Kickstart Your YouTube Journey: How to Start a Channel!

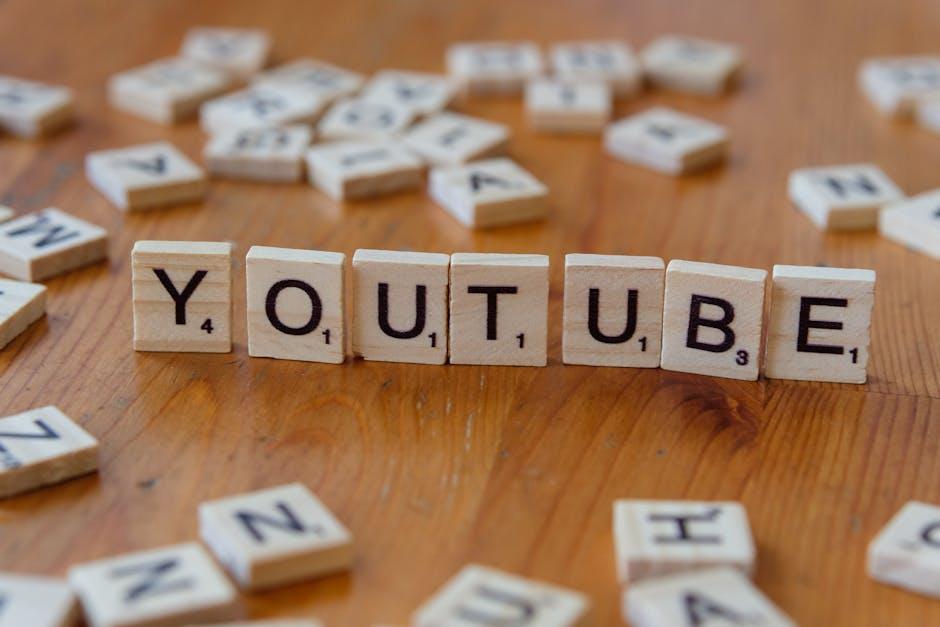
So, you’ve been scrolling through YouTube,‌ captivated by​ those vibrant creators and their ⁤captivating content, and now you’ve got the itch to dive in yourself, right? ​You’re not alone! Starting a YouTube channel can feel like ​a⁢ thrilling ride filled ‍with ⁢endless possibilities—like unbuckling ⁤a ⁤roller coaster harness and soaring into the unknown. Whether you dream of sharing dance tutorials, cooking tips, ​gaming highlights, ​or just⁣ your daily musings, the ⁤platform is practically bursting with opportunities just waiting for‌ you to seize them.

But let’s face ‌it: jumping into ​the world‍ of YouTube can be a bit overwhelming at first. Where do you even begin? ‌Fear not! In this guide, we’ll unravel the mystery of launching your own channel. From brainstorming​ that perfect niche to choosing the right equipment (yes, your phone can totally work!), we’ll walk you through each‌ step like ⁢a trusted friend guiding⁤ you through‌ the maze of creativity. So grab a cup of coffee, kick back, and ⁤let’s dive ⁢into⁢ the exciting adventure of kickstarting your YouTube journey!​ Ready to become the next big thing on the​ platform? Let’s go!

Discovering Your ⁤Niche: Finding ‍Your Unique Voice in the‍ YouTube World

Discovering Your ⁢Niche: Finding Your Unique Voice in ‌the YouTube World

Finding your​ niche on YouTube is like⁤ searching for ⁢your favorite flavor in an ice cream shop—there are endless ⁢options, but⁣ only one or two that truly resonate with you. ‍Think about what excites you⁣ the most. Is it gaming, cooking, travel,⁣ fashion, or⁢ something entirely different? Your unique voice will shine when you explore ⁣topics ⁢you’re passionate about. Consider ⁤these questions to help unearth your⁣ niche:

  • What hobbies can you ‍talk about for hours?
  • What skills do you ⁣have that⁤ others might want ‍to learn?
  • What experiences have shaped your life that others could connect with?
  • What trends or‌ movements excite you right ‍now?

As you brainstorm, remember that authenticity is your superpower!⁤ Your audience will be drawn to you for your genuine perspective, so don’t be afraid‍ to let your personality shine through. Think of⁢ your channel as a⁢ cozy hangout spot where you can​ invite viewers into your ⁤world. It’s not just about the content; it’s about the connection you create. Here’s a ⁣quick ⁤table to ⁢help ⁢you visualize your content direction:

Niche Idea Content Style Target Audience
Healthy Cooking Recipe Tutorials Health Enthusiasts
Home Workouts Fitness Challenges Busy Professionals
Travel Vlogs Cultural Exploration Travel Lovers

Crafting Captivating Content: Tips for Engaging Videos that ‌Keep Viewers Coming Back

Crafting Captivating‌ Content: Tips for Engaging Videos that Keep Viewers Coming Back
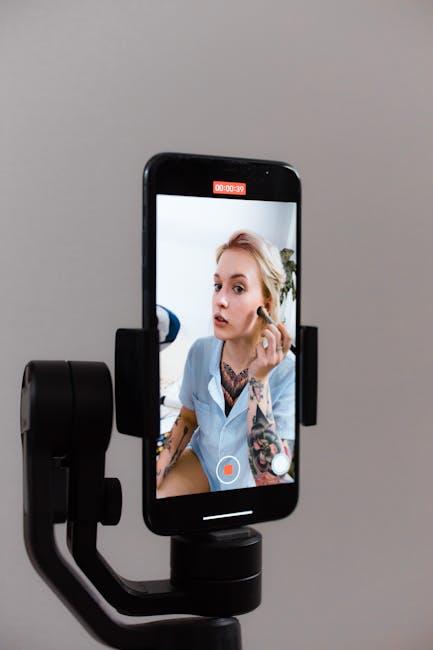
​ Creating ​videos that hook your ⁣audience is like throwing ​a party: you want everyone to have a great time ⁤and come⁢ back for more! Start by capturing ‍attention right off⁤ the bat. Use eye-catching visuals, compelling thumbnails, and intriguing headlines that spark curiosity. Think of​ your opening like the trailer to a blockbuster movie; if it doesn’t grab attention, viewers are likely to click away faster than you can say “subscribe!” Also, don’t forget the importance ‍of storytelling. Every video should ‌have a clear narrative arc—setup, conflict, resolution—that guides viewers through your content and keeps them invested in what you’re saying.

Once you’ve got their attention, it’s all​ about interaction. Ask questions throughout your video to encourage comments ⁤and discussions. Make it feel like a two-way conversation‌ rather than a monologue. You could even incorporate fun,⁤ interactive elements like polls or challenges⁣ to actively ⁤involve ‍your viewers. Additionally, consider introducing a routine or theme ‌for your videos, such as a “Tip of the⁢ Day” or a “Behind-the-Scenes” segment. This gives your audience something to look forward to regularly. Here’s a quick⁢ table summarizing effective​ engagement⁢ strategies:

Engagement Strategy Description
Visual Appeal Use ‍vibrant colors and bold thumbnails to attract clicks.
Storytelling Create a compelling narrative to⁢ maintain viewer interest.
Audience Interaction Encourage comments with ‌questions and challenges.
Thematic Consistency Introduce regular segments to build⁢ anticipation.

Mastering the Art of Promotion: Strategies to Grow Your Audience and Boost Visibility

Mastering the Art of Promotion: Strategies to Grow ⁤Your Audience and​ Boost Visibility

Growing your ⁤audience and boosting‍ visibility⁤ on YouTube doesn’t have ⁢to feel like climbing a mountain. Think of‍ it more like​ planting a ⁤garden! 🌱 You need the right seeds, care,‍ and time to see those vibrant blooms. Start by collaborating ​with other creators; it’s‌ like a mutual shout-out that leads to new friends and followers. And don’t underestimate the power of your thumbnails and titles—imagine them as the eye-catching wrappers of a gift. If they don’t catch someone’s⁤ attention, that amazing content‍ inside will never get its chance to shine.⁤ Also, make sure your uploads are consistent. Can you imagine if⁣ a⁢ bakery only opened once a⁢ month? Consistency keeps‍ your loyal viewers engaged and attracts fresh ears and eyes.

Engagement is ‌where the real magic happens. When viewers leave comments,⁢ don’t just scroll past—respond! It’s the online equivalent of ‌having a chat over coffee. Plus,⁣ encouraging ‌your subscribers to like and share your videos can feel like hosting a lively party. You want everyone to feel included and excited​ to spread the word! ⁤ A call to action at the end of your ⁣videos ⁢can help guide this energy. Think about it⁢ as sending out ⁣an invite to your next big shindig. Here’s a quick ‍look at some effective strategies:

Strategy Why It Works
Collaborate with other creators Tap into their audience
Optimize Titles and Thumbnails Attract clicks like moths⁢ to a flame
Engage‍ with ‌viewers Create a community feel
Consistent upload schedule Build anticipation and loyalty
Utilize social media Broaden your reach

Navigating the YouTube Algorithm: Insider Tricks to Get Your‍ Videos Seen

Understanding the ⁣YouTube⁣ algorithm can‌ feel like⁤ trying to solve a Rubik’s Cube blindfolded, right? But don’t toss that cube just yet! One of the best-kept secrets is the power of engagement. When viewers comment,‍ like, or share your videos, it sends a signal to the​ algorithm that⁢ your content is worth watching. So, how do you boost engagement? Start by encouraging your ​viewers to ⁣interact in the comments section. Ask open-ended questions at‌ the end of your videos to spark discussions. Plus, consider featuring viewer comments ⁤in your next video. This not only builds a community but also makes content creation a two-way street. Winning, right?

Another juicy tidbit? Thumbnails and Titles are your best pals! These are the first impressions viewers get of⁣ your ‌content. So,‌ make them⁣ pop!‍ Create eye-catching thumbnails that spark curiosity. Think of them as the book cover of your video—if it doesn’t grab ​the eye, it’ll sit on the shelf, unseen. Pair it with a title that thrills and gives a hint of what’s to come, balancing intrigue with⁤ clarity. Here’s a⁣ quick table to lay it out:

Aspect Tips
Thumbnails – Use bold colors and large text
– Include a relevant image
– Keep it simple but intriguing
Titles – Use keywords for SEO
– Keep it under 60 characters
– Create urgency or curiosity

Future Outlook

And there you have it—your roadmap to launching a rocking YouTube‌ channel! 🎥✨ Whether you’re‍ sharing your passion for cooking, diving into gaming tutorials, or ​unleashing your ‍inner makeup ⁤artist, remember that​ every great journey starts with a single step. So grab that camera, hit the record button, and let your creativity flow like a river.

But⁢ hey, don’t ⁣forget⁤ to sprinkle‍ in some fun, embrace ⁣the bumps along the way, and connect ‍with your viewers like⁣ you would with friends ​over coffee. It’s all about building a community, ‌after all! And who knows?⁢ Your channel might just become‌ the next big‌ thing.

So, go ahead—kickstart your YouTube journey ⁣and ⁤make some magic​ happen! We can’t wait to see ⁣what you create. If you ⁤ever need a little motivational boost or tips along the way, you know where to find us. Happy filming, superstar!‌ 🌟

Mastering NMD R1 Lacing: Your YouTube Guide to Style!

Ready to elevate your sneaker game? When it comes to​ the⁣ NMD R1, it’s not just about the⁢ kicks; it’s⁢ about how you lace them up! Imagine strolling down the‌ street and turning​ heads,⁣ not just for the sleek silhouette of ⁤your ‍shoes but for ​the unique way you fasten⁣ them.⁣ This ⁢isn’t just a basic​ tutorial; it’s your ⁣style blueprint!​ In‍ this ⁤article, we’ll⁣ dive into the⁣ world ‌of NMD R1 lacing techniques, showing‍ you how to transform those laces ‍into a statement. ⁣From ⁤classic crisscross styles to funky knot​ techniques, we’ll guide you through vibrant YouTube videos that make mastering⁣ the ‌art of‍ lacing not just ⁤easy ⁢but also⁤ seriously fun. So lace up,⁣ click‌ play, and let’s‌ get you on the path⁢ to becoming the NMD​ R1 style icon you​ were meant ⁤to be!

Unlocking the Secret of NMD R1 Lacing Techniques

If you’re looking ⁣to ⁣elevate your ⁢sneaker​ game,‌ mastering ‌lacing techniques on your NMD R1s⁣ is a must! Let’s dive into some fresh ways to tie⁣ those laces that’ll not only keep them secure but also amp‍ up your style. One popular method is the criss-cross lacing, a ‌classic for a reason.⁢ It ‍offers both a clean look and solid support. Just weave each‍ lace under the previous one ⁣as you go⁣ up. For a twist, try a ​ bunny ear approach: it may⁤ look a bit playful, but it gives a unique flair while ‍ensuring that your shoes‌ stay snug. ‌It’s like fashioning bows for your feet—adorably functional!

Want to⁣ add even ‌more​ personality? How about⁣ the ladder ⁣lacing?⁢ This ‌technique creates ​a striking⁢ visual that can turn ​heads. It’s⁣ like⁤ giving your ⁤kicks a sleek‍ finish ⁣that commands attention. To do it, lace straight across the⁢ bottom ⁤two‌ pairs and then take each lace up and into the next set of eyelets—creating a ladder⁣ appearance. Another trendy option ⁣is the⁢ skip ⁢lacing, which not only looks cool ⁤but⁤ also offers more room ​for⁤ your feet ​to breathe. This method⁣ is perfect ⁢if‍ you want a more​ relaxed vibe. ⁤Just skip ​a hole or ‌two ‌as you go up—like giving your footwear a mini vacation!

Unlocking the Secret of NMD R1 Lacing Techniques

Elevate Your‌ Sneaker​ Game‍ with Custom Styles

Want to truly stand out in your sneaker game? Custom lacing can ‌transform ⁤your NMD R1s from ordinary⁣ to extraordinary with⁣ just⁢ a few⁤ tweaks! Picture ‌this: your sneakers aren’t just a way⁣ to get ⁤from ‌point A to ‍point B; they’re ⁤an extension⁣ of your personality. By experimenting with ‌different lacing‍ techniques, you can⁣ create‍ unique looks that reflect ⁢your vibe. Think⁤ of it as dressing your sneakers ​in their Sunday best—after all, why shouldn’t they look as good as you feel? Here are a few styles to‌ consider:

  • Criss-Cross Lacing: ​Timeless and functional, ⁢perfect for everyday wear.
  • Bar Lacing: Keep it sleek and ⁢streamlined​ for that⁢ minimalist aesthetic.
  • Ladder Lacing: Adds a pop of flair and⁣ is great for those who want something‍ different.

Pairing your custom lacing with the‌ right outfit makes a world of⁢ difference. It’s like⁤ adding a cherry on‌ top of a sundae; eye-catching and‍ delicious. Consider a color contrast or even matching your laces with your accessories for that coordinated look.⁤ Here’s a quick ​reference⁣ table for different lace styles and their vibes to get you started:

Lacing Style Vibe
Criss-Cross Classic⁢ &​ Casual
Bar Sleek &‌ Modern
Ladder Unique & Edgy

Elevate ‍Your Sneaker Game with ‍Custom Styles

Finding ‌Your Perfect Fit: Comfort Meets‌ Fashion

When it comes to lacing up your NMD R1s, it’s ⁢all about that sweet spot where comfort collides with style. We all want our kicks to‌ feel like clouds but look like runway ​material, right? ⁣By‌ experimenting⁤ with​ different lacing ⁣techniques, you can not only secure ‌that snug fit but​ also give your sneakers a fresh twist. Try the classic cross-lacing‌ for everyday ⁤wear when⁢ you’re aiming for stability or opt ⁣for the straight-lace ​ variation⁢ if you’re feeling adventurous and want to show off those sleek lines. Each method can turn your sneakers from ordinary​ to​ extraordinary in ‍a ⁢snap!

Let’s ⁢not forget the power ⁣of ⁤personalization. ‍Adding‍ your own flair isn’t ‍just about ‌how the ⁤laces look;‍ it’s⁢ about how they ⁤make you‍ feel.‍ Think about‍ adding ⁢some colorful lace locks ⁢or ‍swapping out your standard ​laces for reflective ones that pop at night. Here’s a quick glance at some great options for ⁤lacing‌ styles that​ elevate not just your NMD R1⁢ aesthetic but also how you carry yourself. Whether it’s for lounging, hitting the gym, or⁣ flying out for a weekend trip, the right lacing ⁤can really enhance both comfort ⁤and fashion:

Lacing Style Best​ For Style Quirk
Classic Cross Everyday Wear Timeless look
Straight Lace Street Style Minimalist chic
Over-Under Fit​ & Performance Snug and ⁣secure
Bunny Ears Casual Outings Fun ‍& ‌playful

Finding Your ⁤Perfect ⁢Fit: Comfort Meets Fashion

Step Up Your Look: Lacing for Every Occasion

When it comes to NMD R1⁤ lacing, variety ​is ⁣the‍ spice of ‍life. You can totally transform your kicks from casual to chic just by tweaking how ​you lace them! Think about⁤ it: straight lacing gives off a laid-back vibe,‍ perfect for those relaxed weekends, while criss-cross lacing can ‌lend an⁣ energetic, sporty feel, ideal for​ hitting the ‍streets or the gym. Not to mention, ⁢there’s a whole ​world of‍ unique styles like the ladder lacing—a real showstopper for when⁤ you want your ⁣shoes⁣ to be‌ the centerpiece of your⁣ outfit. Play around with​ different techniques; it’s⁢ like having a ‌whole wardrobe for ‌your shoes!

But what about‌ those special occasions? Whether you’re⁣ heading to a casual brunch or‍ a formal event, your lacing style can ⁢enhance your overall look. Here’s a quick guide to pick⁢ the‍ perfect lacing approach:

Occasion Lacing Style Why ‌It Works
Brunch‍ with Friends Straight Lacing Simple and stylish,⁤ easy to slip on!
Date Night Criss-Cross Lacing Sporty​ and sleek, perfect for any outfit.
Casual ⁣Meeting Ladder Lacing Edgy yet ⁣sophisticated—a great conversation starter.

Your shoes can speak volumes⁣ about your⁣ personal‍ style, so don’t ​underestimate the power of well-laced NMD ​R1s. Get creative and step out confidently!

Step Up‌ Your Look:⁤ Lacing for Every ⁣Occasion

To​ Wrap ⁣It Up

And there you​ have it, folks! You’ve just unlocked⁣ the secrets of lacing your NMD R1s like a pro. Who⁣ knew a ⁣little ‌string could make such ‍a big⁣ difference, right? Whether you’re​ going for that classic look​ or something‌ a bit more adventurous, you’ve got the tools to express your unique‍ style. Remember, just like your⁣ personality, your lacing style​ can​ be as varied⁤ as you want it to ​be. ⁣

So, why not​ hop over to YouTube⁤ and check out ‌those tutorials? They’ve got visuals that bring these techniques to life, and you might just find a few extra⁣ tips⁣ and tricks to amp up your‌ sneaker game even more. Don’t forget to hit that like button and subscribe for ​more ⁤style inspo! Now go out there, lace those kicks, strut your stuff, and show ⁢the world what your NMD R1s ⁣can do. Happy styling!

Mastering Double Acting Hydraulic Cylinders: A YouTube Guide

Ready⁤ to dive into the world of double⁤ acting ⁤hydraulic​ cylinders?⁢ If you’ve ever watched a machine in action and marveled⁤ at the power behind those sleek, hydraulic movements, you’re ⁤not alone. These incredible devices​ work tirelessly behind ​the ⁣scenes, ⁢transforming fluid⁢ power into the‌ heavy lifting ​we often take for granted. But how do they⁤ really work? In this‍ YouTube guide,⁤ we’ll unpack⁤ the ins and outs of mastering double acting​ hydraulic cylinders, making it super easy for you to grasp‍ their⁤ mechanics and applications. Whether ⁤you’re a DIY enthusiast, ⁤a budding ⁤mechanic, or⁣ just curious about how these cylinders function, we’ll ‍break it ‌down step ‌by ‍step, with engaging visuals and hands-on ⁢demonstrations.‍ So grab your favorite snack, hit play, and ⁣let’s dig‍ into the fascinating world of⁤ hydraulics together!

Mastering the Basics of Double Acting Hydraulic Cylinders

Mastering the Basics of Double⁢ Acting Hydraulic Cylinders

Double ⁣acting​ hydraulic cylinders are like the superheroes of the⁤ hydraulic ⁢world, providing power not ‍just ‍in one‍ direction but two! The beauty of​ these devices lies in their ability to ⁢exert‍ force⁢ on both the extension and retraction⁢ strokes,⁢ making them‍ invaluable‍ in​ machinery where ‍controlled ‌movement is crucial. Think of them as capable ⁤of⁣ pulling and pushing, opening a whole⁤ new realm of possibilities‍ for applications in construction,​ manufacturing, ​and beyond. ‌When‌ you’re‍ learning⁢ to⁢ master these ​cylinders,‍ focus on understanding the components, such as the piston,​ rod, and​ seals. Each part‌ plays a pivotal‍ role ‍in ensuring smooth operation and ⁤longevity.

To ⁤effectively ‌harness the ⁤power of double acting ‌cylinders, ​it’s crucial to grasp‌ how⁤ they interact with hydraulic‌ systems. Here’s a⁣ quick ⁣rundown of some ‌essential points to‍ consider:

  • Pressure Supply: Proper ⁢hydraulic fluid pressure is critical for ‌effective operation.
  • Fluid Management: Maintain cleanliness in the hydraulic fluid to avoid damage.
  • Sealing Mechanisms: ‌ Invest in⁣ quality seals to prevent leaks and ensure efficiency.
  • Temperature Monitoring: Overheating can lead to⁢ cylinder ‍failure, so ⁢keep an eye on those temperatures!
Component Function
Piston Creates force by ‍converting fluid ⁣pressure into mechanical power.
Rod Connects the piston⁤ to⁤ the load, ‌transmitting force effectively.
Seals Prevents fluid leaks and maintains pressure integrity.
Ports Allow fluid to enter and exit⁤ the cylinder,‍ controlling movement.

Understanding the Mechanics: ⁣How They Work and Why They‌ Matter

Understanding the Mechanics: How They Work and Why ⁢They Matter

When you dive ‌into the world ⁢of double ​acting hydraulic​ cylinders,‌ you’re essentially tapping into ‌the heart of how machines do heavy lifting. These cylinders‌ work by harnessing the ⁣power of hydraulic fluid directed into both​ ends of ​the ⁣cylinder, allowing it to push and pull with ⁣equal strength. Why is this such a big deal? It gives machinery ⁣a level of control and efficiency that single-acting cylinders just can’t ⁣compete ‍with. Picture it like this: if a single-acting cylinder is⁤ a one-way street, a double-acting cylinder⁣ is ⁢a bustling‍ two-lane highway. This⁢ dual ‍flow fuels various ​applications,⁤ from construction​ equipment to manufacturing processes, enabling​ them to perform complex tasks without breaking a‌ sweat.

But the ‌real beauty⁣ lies not‌ just in⁤ their functionality, but‍ also in their ⁢adaptability. ​ What ⁣does this mean for you? Well, ‍double​ acting cylinders come in various sizes ⁢and configurations,⁤ making them suitable for a wide array of tasks. Whether you’re lifting a‍ small load or hoisting⁤ something massive, these ⁤cylinders can be ⁣customized to fit your‍ specific needs. Consider the following points when‌ choosing a ​double‌ acting cylinder:

  • Load capacity: Ensuring‌ it meets the ⁢demands⁢ of​ your⁣ project.
  • Stroke⁤ length: ⁣Tailoring​ the movement range for optimal performance.
  • Material: ​ Choosing the right‍ material for the work environment.
Feature Benefits
Efficiency Faster operations and reduced ⁢energy consumption.
Precision Enhanced ⁢control ⁣for ‌intricate tasks.
Durability Longer service life with proper maintenance.

Choosing the Right Cylinder for Your Project: Tips⁤ and Tricks

Choosing the⁤ Right ⁤Cylinder for ‍Your Project: Tips and⁢ Tricks

When you’re gearing up to tackle ‌a hydraulic project, understanding the kind ⁢of ‌cylinder‍ you‌ need is like picking the right tool for​ a job—push‌ the wrong button, and you’ll⁣ find yourself in a world of frustration! Start by ‍evaluating⁢ the load requirements. Double acting cylinders ​are designed to push and pull, making them versatile for tasks that​ demand both motions. Whether you’re‍ lifting, pressing,⁣ or moving heavy equipment, knowing the weight and the work ⁣required helps narrow down⁤ your options. Pro tip: Always consider the environmental factors, like temperature and ⁢exposure to corrosive materials,⁣ which can affect cylinder ‍longevity.

Next, dive into the size and ⁣stroke⁤ length. This is where you really​ want​ to think⁣ about the end ⁣game. ‍Too⁢ short, and you might not achieve the‍ desired movement; too⁣ long, and you’re wasting‍ space and resources.⁣ A ‌smart ⁤approach​ is ⁤to measure ⁤the required⁢ stroke length and add ⁣a ​little ⁣buffer—after all, it’s much easier to trim‍ down than to stretch ⁤out! Here’s a quick table​ to help you visualize how to match ​your project needs with cylinder‍ specifications:

Project Type Recommended Cylinder Size Typical Stroke ⁣Length
Heavy Lifting 5-10 inches 12-24 inches
Precision Movement 2-5 ‍inches 6-12 inches
Industrial‍ Automation 6-12⁢ inches 12-36 ‍inches

Top ⁤YouTube Channels for Expert ‌Insights and Hands-On Tutorials

Top YouTube Channels for Expert ⁢Insights and Hands-On Tutorials

When⁤ it⁣ comes to mastering⁢ double​ acting hydraulic ⁤cylinders, YouTube is ‌a‍ treasure trove of ‌expert insights and hands-on tutorials. Channels like Engineering Mindset and Learn Engineering are goldmines where you can⁤ find ⁢detailed​ breakdowns of​ hydraulic systems. They offer everything from basic⁤ principles to advanced troubleshooting techniques. You’ll feel like you have a ​personal mentor guiding you ‌through each ‌step,‍ making complex concepts approachable. Plus, visual demonstrations of these concepts ‌in real-world applications‍ help cement ‌your understanding in a way that ‌textbooks just⁣ can’t ‍match.

Don’t overlook ⁤the ‌practical side of things, ‌either! ⁤Channels such as DIY ‍Perks and​ This ‌Old Tony ⁤ showcase projects‍ that‍ incorporate hydraulic‌ systems, offering tips on installation, maintenance, and customization. Watching⁣ these​ creators tackle hands-on⁤ projects not only inspires ‌creativity but also ⁢builds confidence⁤ in⁤ your own abilities. Here’s‍ a quick rundown ⁤of that invaluable‌ content:

Channel ⁣Name Specialty Why Watch?
Engineering Mindset Theory ⁤and Applications Deep dives with clear explanations
Learn ‍Engineering System Mechanics Visuals that simplify complexity
DIY Perks Hands-On Projects Inspiration for personal projects
This Old Tony Practical Applications Real-world problem-solving

In Summary

So, there you ⁢have‌ it! You’ve⁣ just ⁣unlocked the secrets of mastering ‌double-acting hydraulic cylinders, all thanks to that handy YouTube ⁤guide. ‍Remember, diving into this world doesn’t have to⁢ be a daunting ​task—it’s more ⁤like assembling a puzzle. Each ⁣piece—whether it’s understanding the components, ⁢the operational ‌principles, or troubleshooting ⁤tips—fits‍ together to ‌create a ⁣complete picture of hydraulic mastery.

Got ‌any‌ questions or need ‍a little ‌extra⁢ clarification? Don’t hesitate to drop a comment on your favorite ‌videos; ⁣the community’s buzzing ‍with fellow enthusiasts ready to ⁤help. And who knows? Your ‌insights might ‍spark someone else’s “aha!” moment.

As you move forward, think of these cylinders as your trusty sidekick—reliable‍ and ready to ⁤tackle any project you throw their way. So gear ​up, get ⁤your hands a little dirty, and let those hydraulic ‍skills ​soar. Happy hydraulicking!

Revamp Your Holley 12-327: Easy Guide with PDF & YouTube!

Are you tired of your Holley 12-327 carburetor feeling ‌like it’s stuck​ in the slow lane? If that beast‌ under your hood isn’t⁤ performing like you dreamed it would, don’t⁣ throw in the towel ​just yet! Revamping your Holley 12-327 could be the spark it needs to roar back to life. ‌Whether you’re an experienced gearhead ‍or someone⁤ just starting to dip their toes into the world of⁢ car tuning, we’ve got you covered. In ⁤this easy guide,​ we will walk you through simple yet effective steps to breathe new ⁢life into your carburetor. Plus, we’ve thrown ⁣in⁣ a⁤ handy ‍PDF and some YouTube links⁣ to give you that extra boost when you need it. So grab your tools, roll up those⁣ sleeves, and⁣ let’s transform your ride ​together! Ready to dive in?​ Let’s hit the ‍road!
Discover the Secrets ⁢to⁢ Maximizing Your Holley 12-327 Performance

Discover the Secrets to Maximizing Your⁤ Holley 12-327 Performance

Unlocking the full potential of ‍your Holley ‍12-327 can feel like⁣ opening‌ a treasure ​chest of horsepower and⁢ efficiency!‍ To get the ⁣most out of your carburetor, it’s crucial to focus on a few‌ key areas. First off, tuning is your best friend. A well-tuned engine isn’t just more ‍powerful; it runs cooler ​and cleaner too. Don’t forget about the fuel mixture; the⁣ right ‍balance ‍can lead to ‍a world of difference. Too rich or too lean, and you’re just wasting time! Additionally, consider upgrading your air filter to increase airflow and⁣ boost performance. A ⁣high-flow filter can transform your engine⁣ into‌ a breathing​ beast, maximizing both ‍speed and acceleration.

Another game-changer⁣ is the distribution of your ignition timing. A properly set timing can drastically enhance⁢ overall performance. Also, ensure that your fuel lines ⁢ are in tip-top condition; any restrictions could ⁣choke your engine’s ability to perform. Have ⁢you thought about a performance manifold? It can significantly improve the airflow, making a noticeable difference⁣ in your ride’s​ responsiveness.‍ Lastly, don’t overlook the importance of regular maintenance—keeping everything clean​ and well-lubricated ensures ‍that your Holley 12-327 runs like ⁤a dream with minimal hiccups.

Step-by-Step Upgrades ⁢to Transform Your Carburetor⁢ Experience

Step-by-Step Upgrades to Transform Your‌ Carburetor Experience

Transforming your Holley ⁤12-327 carburetor‌ into a finely tuned⁣ masterpiece doesn’t have to feel overwhelming. Begin by gathering the⁢ right tools—think of it‍ as assembling⁤ your arsenal. You’ll need⁢ a⁤ socket set, wrench⁤ set, flathead and Phillips ⁣screwdrivers, and don’t forget those gloves! Start ‌with ⁤a thorough cleaning; it’s ‌like giving ⁢your ‍carburetor a fresh start. Every⁢ nook and cranny needs attention, so ​use a quality​ carburetor cleaner. When you’re done, inspect the parts closely. Look for any wear ⁣and ‌tear that might hinder performance. Now, wouldn’t you want to rev up your ⁢ride without‌ any hiccups?

Next ‍up, consider upgrading some ⁢components. It’s like giving your carburetor a turbo boost! Swapping out the stock jets for larger ones ⁢can ⁤increase fuel flow, optimizing your engine’s ⁢performance. Adding a performance air filter will improve airflow, making your carb⁤ sing like a choir. And, ⁤here’s a tip:⁤ adjusting the float ⁢height can greatly influence your carburetor’s tuning. Don’t ​forget to check the accelerator pump—this little guy controls fuel delivery for that​ snappy ⁣throttle ⁣response you crave. Keep experimenting until you​ hit ‌that sweet spot! If you need guidance, check out the comprehensive PDF‍ or YouTube⁢ resources linked nearby for a visual step-by-step.

Essential Tools and Tips for a Smooth Revamp Process

Essential ‍Tools and Tips for a Smooth‍ Revamp⁤ Process

To make your Holley ⁣12-327 ‌revamp as smooth as butter, you’ll want to gather ⁤a few essential tools before diving in. Grab a quality screwdriver set, because the ⁢last ⁤thing you need is a stripped screw slowing down ‌your groove. Don’t forget a‌ torque wrench to ensure everything is snug as a⁢ bug in⁤ a rug when you put it ‌back together. A ⁣ cleaning kit is also your best friend – think of it‌ as the spa day your carburetor deserves! Lastly, an organization tray can be a lifesaver for keeping all those screws and small parts in check, ensuring nothing mysteriously disappears‍ during ⁣the process.

Now, let’s talk tips! Start ​by taking before pictures; you’ll thank⁤ yourself later when you’re piecing ⁢it all back together. Consider having a buddy assist you; two pairs of hands can make ⁣a ‍world of difference when you’re wrestling with those tricky ⁤parts. As you work, keep a notepad handy to jot down any⁣ quirks or‍ issues you​ encounter, which can ⁤be golden information for future tweaks. And if you hit a snag, make sure to check ‍out the YouTube links ‌provided in our guide; they’re like having⁣ an‍ experienced mentor right in your‌ garage! Remember, patience is key—revamping can be a bit like cooking; it takes time to⁣ reach that deliciously perfect end result!

Dive Deeper: Access Our Exclusive PDF Guide and YouTube Tutorials

Dive ⁢Deeper: Access ​Our Exclusive PDF Guide and YouTube​ Tutorials

Looking to level up your Holley 12-327? You’re in the right‍ place! Our exclusive PDF guide is packed with ⁣step-by-step instructions that break‌ down‍ the​ revamping process⁢ into bite-sized segments. It’s like having a personal mechanic by your side! Plus, you’ll get‌ access to YouTube tutorials ⁢ that visually walk you through each‌ stage, making it easier​ than ever to get ⁤hands-on. With detailed illustrations and clear explanations, ⁢you won’t just⁤ be guessing or​ hoping⁣ for the best—you’ll be following a clear roadmap to success!

Here’s ⁤what you can expect from our comprehensive resources:‍

  • Detailed Steps: Each section of the guide lays out exactly what tools you’ll need and⁣ what to do next, ensuring you’re never left in the dark.
  • Video Tutorials: ‍Get real-time demonstrations that take you through each technique, perfect for visual learners.
  • Troubleshooting Tips: Avoid‍ common pitfalls with handy advice that saves you time and frustration.

‍ ​Check out the following quick ⁣reference table for a sneak peek at some key topics covered‌ in the guide:

Section Key Focus
Parts‌ Overview Understanding essential components of‍ the Holley 12-327.
Installation Techniques Tips for secure and efficient setup.
Performance Tuning Fine-tuning for optimal performance.

Key Takeaways

And ‍there you have⁤ it, folks! Revamping ⁣your Holley 12-327 isn’t just a chore; it’s an adventure waiting to happen! Whether you’ve tackled your project with the detailed guide ​we’ve provided or you’ve danced along to ​the rhythm ⁣of our YouTube tutorials, we hope you’ve ‌found​ the journey as rewarding as the destination. ‌Just imagine that sweet roar ‌of your engine, turning heads and sparking smiles all around ⁢– now that’s what I ‌call a win!

Before you rev those⁤ engines, make sure you ‌grab that ⁣handy PDF for a quick reference and don’t forget to check ⁤out the ​videos for ⁢some visual inspiration. Transforming your carburetor isn’t just about upgrades; ‍it’s about harnessing that passion ‌for your ride and making it ⁤truly yours.

Got questions? Ideas? More revamp ​tips up your sleeve? We’d love to hear from you! Share​ your thoughts in the comments below. Now, go on and⁣ unleash​ the full ‌potential of your Holley 12-327 – the road is calling, and‍ it’s time ‍to answer! 🚗💨

Mastering YouTube: A Simple Guide to Upload Your Videos!

So, you’re ready to dive into the⁤ world of YouTube? Awesome⁣ choice! Think of YouTube ‍as a vast ocean, teeming with possibilities where ⁤your‍ creativity can swim‌ freely. ‍Whether you’re sharing your passions,⁢ showcasing your talents, or just trying to ⁢make your mark, uploading videos is your gateway to connecting with a global audience. But hold ‌on—before you plunge in, ‌let’s break⁤ it down into bite-sized pieces. ⁣This guide ⁢will walk ⁣you through the essentials ​of uploading your ​videos with ease and flair, ensuring you make waves ⁢instead of just ripples. Ready to get started? Let’s unlock⁤ the​ secrets⁣ to mastering YouTube together!

Unleashing Your Creativity: Crafting Engaging Content​ That Captivates Viewers

Unleashing Your Creativity:‌ Crafting Engaging Content That Captivates Viewers

To really grab your​ audience’s attention, think of your content as ‌a delicious ⁤recipe. You need the right⁤ ingredients mixed in just the right way. Start by ensuring your⁤ video has a ‌compelling ‍ hook—something ⁢that piques curiosity in the first few seconds.‍ Imagine walking into a ‌bakery and smelling fresh bread; you just can’t walk⁤ away! Use a high-energy intro, ‍eye-catching visuals, and a bit of humor to draw viewers in. Experiment‌ with formats: vlogs, tutorials, or perhaps a bite-sized series, ‍and don’t shy away from making ⁤them personal. You want ​your​ viewers​ to feel like they’re ⁤chatting with ⁣a friend over coffee, not sitting through a lecture.

Another trick is to sprinkle in some interactive elements to keep your‌ audience engaged. Think of it as ⁢throwing a party where everyone’s invited to participate. You‌ could:

  • Ask for⁤ opinions or suggestions in the comments
  • Run fun polls related to your content
  • Incorporate Q&A‌ sessions or live streams

Plus, don’t underestimate the power ‌of storytelling. Weave in your‍ own experiences or share relatable anecdotes. ‍As⁤ you craft⁢ your‌ narrative, aim for‌ a structure that flows ‌easily: set the scene, build the conflict, and offer a resolution. This narrative arc not only captivates but also makes complex ideas digestible, just like turning a dense salad into a refreshing smoothie. Remember,‍ captivating content is all about connection,‍ and the more authentic you⁢ are, the more your viewers will stick‍ around!

The Technical⁢ Side: Perfecting Your Video⁤ Quality and Editing Skills

The Technical‍ Side: Perfecting​ Your Video Quality and ⁤Editing Skills

When​ it comes to video quality, think of it as the ⁢digital handshake between you and your audience. You want it to be ⁢firm, warm, and‌ memorable.‍ Start by using a decent ‍camera; even a smartphone ⁤with ​a⁢ good lens can do wonders these days. Pay ‍attention to the lighting—natural light can ​be your best friend, illuminating your face without the ​harsh⁣ shadows. Consider investing in a tripod ​to keep‌ your shots steady; shaky footage can give your viewers a headache. Then there’s audio quality. ​Don’t let⁤ your amazing‍ visuals be overshadowed ‌by poor sound. A simple external ‌microphone can make a world of difference, so your audience hears every word clearly. shoot in a suitable resolution, ideally in HD, to give your videos⁣ that extra polish.

Editing is‌ where the magic ⁤happens; it’s like the ‍icing on a cake. You don’t want to skimp ‍on this part! Familiarize yourself with user-friendly software, like Adobe Premiere Pro or DaVinci Resolve, to bring ‌your creative vision to life. Focus on these essential​ editing techniques:

  • Cutting: Keep it snappy! Removing unnecessary sections keeps your audience engaged.
  • Transitions: ‍ Use them ‍sparingly. Too many can be overwhelming, but a well-placed transition can ⁢enhance a story.
  • Color Correction: ‌ This ‍brings consistency and vibrancy to your videos, making everything⁣ look professional and cohesive.
  • Text Overlays: Use these for emphasis, but don’t⁢ overdo it; clarity is key.

By mixing these elements, you’ll not ⁢only improve your video quality but also your overall storytelling ⁢ability. Just like​ a sculptor chisels a block of stone into a masterpiece, your editing skills will transform raw footage⁢ into captivating content that resonates with viewers.

Optimizing for ​Success: Mastering YouTube ‌SEO to⁢ Boost Visibility

Optimizing ⁤for‍ Success: Mastering YouTube SEO to ⁣Boost Visibility

Unlocking the full potential of your YouTube videos means getting cozy‍ with SEO—your secret weapon‍ for soaring ‌visibility. Start by crafting a ⁢captivating title that not only intrigues‌ viewers but⁣ also hooks in those search engines. Use relevant⁢ keywords that resonate with your audience; think about⁣ what they might type into ⁣that search bar. But​ it’s not just about the title. The description is your canvas! ⁣Paint a vivid picture with ​detailed notes ‌about your video‍ while sprinkling in those goldmine keywords throughout. Don’t forget to include ‌links to your social media and⁢ website, as ‌this boosts engagement across the board.

Let’s ‌talk about tags—they’re like the breadcrumbs leading viewers straight to⁣ your video. Utilize a mix of⁣ broad and ⁢specific​ tags to widen your net. And speaking of‌ nets, engaging thumbnails are the hooks that catch attention! A striking⁢ image paired ‍with bold text can serve as a mini‌ billboard. To further‌ lure your audience in,⁣ consider creating ⁢a playlist that reflects your content ​theme. Not only⁣ does this keep viewers on your channel longer, ​but it also stacks ‍the odds in your ‌favor with ‌the almighty YouTube algorithm. To sum it all up:

SEO Element Purpose
Title Attract viewers and optimize for search
Description Provide context and improve ranking
Tags Enhance ⁢discoverability
Thumbnails Entice clicks and viewership
Playlists Increase watch time‌ and ⁣organization

Building Your Community: Engaging with Viewers and Growing⁢ Your Channel

Building Your Community: Engaging with Viewers⁣ and ⁢Growing Your Channel

Building ​a vibrant community around your channel is like ‌throwing a party—invite the right crowd, engage them, and watch the magic⁣ happen! Start by responding to comments; it’s a⁢ direct line to your viewers and⁤ shows you value their input. Think of it as chatting with a friend over coffee. Here are a few‍ ways to spark those conversations:

  • Ask questions in‍ your⁤ videos to prompt ‌discussion.
  • Use polls in your community tab to gauge opinions.
  • Highlight ‌viewer comments or questions in your next video.

Collaboration is another stellar‍ way to ⁢grow your community. It’s like teaming up for a group project; you⁢ get to leverage each ‍other’s audiences and bring fresh content ⁣to ‌your viewers. Consider ‍reaching out to fellow creators for⁣ joint videos or shoutouts. This⁤ method not only builds connections but also ‌provides ‍your audience with diverse perspectives. ​Here’s ⁢a quick look at beneficial collaboration tactics:

Collaboration Type Benefit
Joint Live Streams Real-time interaction ⁢boosts engagement
Guest Appearances New insights⁢ attract different viewers
Challenge Videos Encourages viewer participation and fun

The Way Forward

Well, there you have it!‍ You’re now armed with all the knowledge you ‍need to upload your videos and start making waves on YouTube. Doesn’t it feel good? Think of this as your ⁤digital⁢ canvas – the ‍more you paint it with creativity, the more viewers will flock to see your artwork. Remember, it’s not just about the ​videos; ‍it’s about​ connecting with your ​audience and sharing your unique ⁣perspective.

So ​go ​on, hit ‍that upload ⁢button with confidence! Embrace the learning curve, keep experimenting, ​and don’t be afraid to show​ off your personality. After all, everyone starts somewhere, and each‌ upload⁣ is⁢ a step closer to mastering your craft. Keep creating, don’t⁤ forget to engage with your community, and always have fun! YouTube⁣ is your ​playground—make the ‌most of it! Cheers to your ‍journey ⁤ahead! ‌🚀🎥

Master Music Notes: A Beginner’s Guide for Violin on YouTube

Are ⁢you ready to ​unleash your inner ⁢maestro? ⁣Learning‍ to play the ⁤violin ⁢can feel ‌like​ venturing into ‍a new world, filled with challenges⁤ and rewards that‌ create an exhilarating journey. And in today’s ‍digital ⁣age, finding the right guidance‍ has⁢ never ​been easier. YouTube ‍offers a treasure trove ‍of resources, ​tapping ‍into ​the ‌creativity of⁢ countless experienced‌ musicians eager ‌to share ⁤their ‌knowledge. ​In this ‌beginner’s guide to mastering music ‌notes on the violin, we’ll explore​ the best channels, tips, and tricks to get you started on your musical adventure. So grab ‌your‌ bow, tune up, and let’s⁣ dive into a sea of melodies that could‌ turn ​you into the ⁤next virtuoso!
Master Music Notes:‍ A Beginner's Guide for⁢ Violin on ‌YouTube

Exploring the Basics⁢ of Music ‍Notation ​for ⁤Violinists

When diving into the ‌world of violin, understanding music notation is​ like‍ having a roadmap for your musical ⁢journey. ‍ Sheet ⁣music ‌is⁣ the language that communicates how to‌ play, and‌ getting ​familiar with it will open up⁣ a universe of melodies for you.⁣ Start with the ‍ staff, which is made​ up of five lines⁢ and four ‍spaces, each one representing a ‍different ‍note. The‌ notes ⁢are ⁣named using the first seven letters of⁤ the⁤ alphabet: A, B, C, D, E, F,‍ and⁢ G. To help keep track, you can use mnemonics like “Every⁤ Good​ Boy Deserves Fudge” for the lines and ⁣”FACE”‍ for the spaces. The more you practice recognizing these, the quicker you’ll⁣ be ‌able to read and play your favorite tunes.

Beyond⁢ just lines ⁤and​ spaces, ​you’ll⁤ encounter different symbols ‍ that tell ⁣you how to express⁢ each note. Look out for sharps (♯) and flats ‍ (♭), which⁣ raise or⁢ lower a note’s pitch, adding flavor and tension​ to your ​playing.​ Remember ⁣that⁤ time ‌signatures indicate ‍the⁢ rhythm‌ of a piece and ⁤are often notated ⁢at ​the beginning⁤ of a staff. For example, 4/4 time tells you​ there are four beats in⁢ a measure,​ with each beat⁢ being a quarter note, while 3/4 ‍time⁤ gives a⁣ waltz-like feel. Check out the table below for a ⁢quick ⁢recap of essential symbols you’ll come ‍across:

Symbol Meaning
Sharp: raises a​ note by a half step
Flat: lowers ‌a note by a half​ step
Quarter note: one ⁤beat
Eighth note: half ⁤a⁤ beat
𝄞 Treble clef: ⁤indicates higher​ pitches

Exploring⁣ the Basics of Music Notation for Violinists

Essential Online Resources to Elevate Your Learning⁢ Experience

When it⁣ comes ‍to mastering ⁣the violin,⁢ the internet⁤ is an ‌absolute ⁣treasure trove of resources that can take your⁢ skills to the next level.‌ YouTube, in particular, offers a ‌vibrant ​community of musicians and educators who share⁣ valuable ⁤insights⁤ and techniques​ right from the comfort of⁢ your home. Dive into⁢ channels dedicated to beginner ‍violin lessons‌ and⁢ you’ll find videos covering ⁣everything from ⁣basic music theory to detailed‌ tutorials on⁢ playing your ​first scales. ‌ Some fantastic YouTube⁤ channels to explore include:

  • The Online Piano and ⁤Violin Tutor -⁢ Excellent for visual learners.
  • Violin ⁣Tutor Pro ​ – Focuses on practical tips and tricks.
  • String Club – Offers⁣ engaging methods for ⁣younger⁣ learners.

But it doesn’t stop there! Enhance your ‌learning experience with various apps and websites ‍specifically designed ‌for aspiring ⁣violinists. ⁢Many ​platforms provide interactive⁣ exercises that ⁢make practicing⁢ music notes feel less ⁣like ⁣a chore and more‌ like a fun game. Some of⁣ these apps even analyze your playing in real time, ‌giving you instant feedback. Here are ​a few must-try resources:

Resource Description
Yousician Interactive lessons with real-time⁤ feedback.
Teoria Great ⁤for brushing⁢ up on music theory!
SmartMusic Practice with​ adaptive ⁤exercises tailored to your level.

Essential Online Resources to ‌Elevate​ Your⁤ Learning‌ Experience

Mastering Technique: Tips and Tricks​ to Read and‌ Play with Confidence

Building your confidence while ​reading and playing music notes on the violin is all about practice⁤ and technique. ⁤Start by familiarizing yourself with the musical staff⁤ and note names. You ⁣can do this by⁤ creating flashcards with the notes on‍ one side‌ and their​ names on the other. This way, every​ time you review them, you’re reinforcing that connection in your brain. Additionally, try playing simple​ songs‌ you love; this not only ‍makes ⁤the‌ process enjoyable ​but also boosts your ​confidence as you hear familiar melodies coming ⁢from your instrument. ⁣Remember, repetition is‌ key—just ⁤like ⁢learning‍ to ride a ​bike, the more you practice, ‌the steadier and more confident you’ll feel.

When​ it comes to techniques, consider breaking your⁣ practice ⁢into manageable ⁢blocks. For​ example,⁢ dedicate⁢ time to ‌focus⁤ on⁤ just the bowing technique before moving on to finger placement. Here are some ⁢effective​ tips:

  • Start ⁢slow: Play at a comfortable pace⁣ to avoid mistakes.
  • Use⁤ a ⁤metronome: This‍ helps keep your ⁤timing consistent.
  • Record yourself: ⁣Listening back lets‍ you spot areas for improvement.
  • Visualize: Picture⁣ your ​fingers⁤ moving correctly‍ on ‌the strings when you’re ⁢away from⁣ your​ violin.

With each​ small ‌victory, whether it’s​ mastering ⁢a​ difficult passage‌ or‍ playing along with a YouTube ⁢tutorial, ‌you’ll⁣ find your confidence surging.

Mastering Technique: Tips and Tricks to Read and Play with Confidence

Crafting Your Practice Routine: Consistency ⁣is ​Key for Success

Building a practice routine for playing⁢ the‌ violin is‌ like ⁤assembling a⁣ puzzle—each ⁢piece must ⁤fit ​together perfectly to‌ create​ a ⁣beautiful picture. Start small. Set aside just‌ 15 to 30 minutes⁢ a day, ⁤focusing⁢ on⁣ specific⁢ skills ‍or pieces that challenge you. Consistency over‌ intensity ‌is the ⁣golden⁤ rule⁤ here; ⁣daily⁣ practice ​is far more‍ effective than cramming in a marathon session once a‌ week. Think of it as ⁢watering⁢ a plant: a little each day nurtures growth, whereas a flood ‌can⁢ wash⁢ away your efforts. Break down your sessions into manageable chunks, concentrating on​ various aspects like‌ scales, bowing techniques, and ⁤intonation.

To ​make things even easier, consider using a practice log. Document‍ your progress and areas ⁣needing ​improvement. This can be as simple as a notebook,⁤ or you‌ can go tech-savvy with apps⁢ that track your time‌ and milestones. Here’s a‌ little structure that might help:

Practice Element Time (minutes)
Warm-up Exercises (Scales) 10
Technical Studies 10
Pieces & Repertoire 15
Cool Down ⁢(Play‍ Freely) 5

Tracking your‍ practice not ⁤only ​keeps ⁣you organized but⁤ also boosts motivation as you see‍ how far ⁢you’ve⁤ come. Remember, it’s‍ about the journey, ⁤not just the destination!

Crafting Your ​Practice Routine: Consistency is ⁣Key for Success

Wrapping Up

As ‍we wrap up ‌this journey into the‌ world of music notes for‌ your violin, remember, every great musician started just ⁢where you are‌ right now—holding ​a bow‌ and dreaming big. YouTube‍ is your ​trusty sidekick ⁣on this adventure, ⁤with endless⁣ tutorials and resources to help you along​ the way.​ Don’t be afraid ⁤to hit ⁣pause, rewind, and replay ‍those lessons until you feel like a ⁤rock star.

As you dive into‌ practicing those notes, ⁢just‌ picture each one ⁢as a building block, constructing ⁤the symphony of⁣ your ⁢dreams. Embrace the mistakes; they’re simply ‍stepping stones toward mastering your craft.⁣ So ⁤grab that violin, cue up your ⁢favorite lesson, ⁢and let the music flow! ​It’s ​not just about hitting the right⁢ notes;‌ it’s about ‍enjoying the ride. ⁤Happy playing! 🎻

Revamp Your 1998 Whirlpool Dryer: Step-by-Step YouTube Guide!

Ever​ looked at your‍ old 1998 Whirlpool dryer and thought it was time for a little makeover? ⁢You’re not alone! Older appliances can​ feel like⁢ family‍ relics, but trust⁢ me, with‍ a‌ bit of elbow grease and⁣ some guidance, you‍ can breathe new life into that trusty ⁢machine. Imagine transforming it from a clunky, outdated piece of hardware into something that not only works like a charm but looks good doing it too! In this article, we’re diving into a step-by-step YouTube guide that’ll help you navigate⁣ this DIY project with ease. Whether you’re a seasoned pro ​or a total newbie, I’ll walk you through the process, sprinkled with tips and tricks that’ll make this revamp not just manageable but downright fun. So ‌grab your tools and let’s get started on resurrecting that vintage dryer into the star of your laundry room!

Reviving the Classics: ​Essential Tools and Materials for Your Dryer Makeover

A dryer makeover‌ can transform your trusty ‌machine from a tired relic into a stylish ‍powerhouse. To breathe new life into your 1998 Whirlpool dryer, you’ll need a few crucial tools and materials. Start with screwdrivers—both Phillips ‌and flathead. You’ll also want pliers and wire cutters to assist with any pesky wires or‌ screws that refuse to ‌budge.‍ A multimeter can‌ be a lifesaver for checking electrical connections, ensuring everything is ⁤operating safely and efficiently. Don’t forget a good set of replacement parts, like belts, rollers, and possibly even a new lint filter,​ since these are⁢ key to its performance.

To give your dryer a‍ fresh look, stock⁢ up on high-quality‍ spray paint designed for appliances. Choose a color that suits your taste—perhaps a sleek metallic or a bold ⁣pop of color. A paint stripper and sandpaper will help you prep the surface for the best‍ finish. If you’re feeling extra creative, consider applying vinyl decals or a custom wrap‌ for a‌ unique flair. Make sure you have some ⁣ cleaning supplies, like a microfiber cloth and a mild detergent, to clean up any‍ grime before you ‌begin your ​transformation. By gathering these essentials, you’ll be set to not just revive your dryer but to make it a standout piece ⁢in your laundry room!

Reviving ⁢the Classics: Essential Tools and Materials for⁢ Your Dryer Makeover

Diving In: A Step-By-Step Breakdown of the Revamp Process

Revamping your 1998 Whirlpool dryer‍ isn’t just about aesthetics; it’s about giving that trusty machine a new lease on life with some DIY magic. First up,‍ gather your supplies! You’ll want things like screwdrivers, replacement parts, and a good cleaning solution. Think of it as assembling your very ‌own toolkit for a mini adventure. ‍Start by unplugging‌ the dryer and moving it to a cozy spot where you’ll have room to work. It’s like creating a comfortable little workshop! Now, disassemble the panels carefully, keeping ‍track‌ of all the screws – they can be sneakily elusive.​ A magnetic tray is your best friend here, ensuring‍ nothing goes ⁣missing during the process.

Next, assess the condition of the components. Look for ‍signs of wear and tear on the ​belts, drum rollers, ⁣and electrical connections. Replace any parts that seem off; after all, it’s like putting in a fresh engine in a classic car. You’ll want to ‍give everything a good clean, but​ beware of too much moisture – it’s a dryer,‍ not a swimming pool! Reassemble the dryer in reverse order, taking your time. Pay attention to the small details; after all, it’s ‍those little things that can make or break the overall functionality. Don’t forget to test it out before‌ sealing it‍ up completely – it’s the excitement of a reveal, like the reveal of a magic trick!

Diving In: A Step-By-Step Breakdown of the Revamp Process

Troubleshooting Like a Pro: Fixing​ Common Whirlpool Dryer ​Issues

Dealing with a ⁤faulty dryer can feel like an uphill⁣ climb, but don’t sweat it! One common issue with the 1998 Whirlpool dryer is the clothes not drying properly. This can often stem from a​ clogged vent or filter. Give the lint filter a thorough cleaning, because a little lint goes a long way in ruining your drying game. Also, check the vent hose for any‌ kinks‌ or blockages—it’s like a highway for hot​ air, and any traffic ⁢jam there ⁢can slow down⁣ your appliance’s performance. If it’s still being stubborn, consider running a diagnostic ⁣test, which you can typically do easily on ‌most Whirlpool models.

Another ⁢head-scratcher is when the dryer just won’t start. Before you start sucking your thumb, ensure ⁣that it’s plugged in—yep, it​ happens to⁣ the best of us! Next, check the circuit breaker; sometimes,‍ it’s just a little flick away from getting back ⁢in action. If everything looks ‌good, the door ​switch might ‌be the culprit. This tiny ‌component can be​ a real pain if it’s faulty. Test it​ with a multimeter ⁤for continuity, and if it’s not passing the current through, you’ll need ⁢to swap it out. Remember, ‌troubleshooting doesn’t always mean calling for help—it can just mean rolling up your sleeves ‍and diving into the details!

Troubleshooting Like a Pro: Fixing⁤ Common Whirlpool Dryer Issues

Adding a Personal Touch: Creative Customizations to Make Your Dryer Shine

Sprucing up your dryer​ doesn’t just make it look fresh; it adds a sprinkle of your​ personality to your laundry room. Think about custom decals or stickers that reflect your style. Whether you’re into funky patterns ​or vintage vibes, these can turn a mundane appliance into a conversational piece. Consider using fabric paint to create your⁣ very own ‍designs that can be‌ easily wiped off whenever you’re ready for something new. Feeling artsy?⁢ Grab some ​ washable⁢ markers and doodle directly on‍ a magnetic board attached to the dryer. It’s a fun way to keep‍ reminders and ⁣grocery lists handy!

Another brilliant way to give your old dryer a makeover is by updating the knobs‍ and handles. Swapping in colorful, patterned knobs can easily elevate the look without breaking the bank. You can also tailor your dryer’s​ exterior with peel-and-stick wallpaper for a creative twist! Just think⁢ of it as giving your⁣ appliance a new outfit. ⁢If you’re feeling adventurous, why not try a faux wood finish?⁢ That ⁢rustic charm can make even a​ 1998 model feel modern and chic. With a bit‌ of​ imagination, your laundry area can go from ordinary to extraordinary!

Adding a Personal Touch: Creative⁤ Customizations to Make Your Dryer Shine

In Summary

And there you have⁢ it! ‍You’ve just ⁤unlocked the secrets to giving your 1998 Whirlpool dryer ⁣a brand-new lease on life. It’s pretty incredible what a little TLC can do, right? From the first ‌step of the disassembly dance to watching it spin smoothly again, you’ve tackled this repair like a pro.

Remember, there’s no need to break the bank with a shiny new appliance when you’ve got ⁣the skills to‍ breathe new life into your trusty old dryer. And hey, if you found ​this guide helpful,​ don’t keep it to yourself! Share it‍ with friends‌ or family who might‌ be facing the same conundrum—everyone deserves a⁢ shot at that satisfying DIY victory!

Now, go ahead and toss that laundry in. Your revitalized dryer is ready to take on the spin cycle of life once more! Happy drying!

Mastering Ubuntu on VirtualBox: Your YouTube Guide Awaits!

You know how sometimes you want to dive into ‌something new but ​aren’t quite⁤ sure where ⁣to⁤ start? Well, if⁢ you’re⁢ itching ‌to master Ubuntu on ‍VirtualBox,‌ you’ve‌ hit the ‍jackpot! Imagine setting⁤ up a powerful Linux environment right on your‌ computer without​ the hassle of dual-booting or compromising your current setup. Think‌ of it as building a virtual ‍playground where you can ‍experiment, ⁢code,⁤ and explore to your heart’s content!⁤ And what’s⁣ even⁣ better? We’ve got‍ a fantastic YouTube guide lined⁣ up, packed with tips, tricks, and step-by-step ​instructions to ensure you ‌conquer Ubuntu like⁤ a pro. So,‌ grab your favorite drink, settle​ in, and let’s embark on⁣ this digital ⁢adventure together!

Getting Started with VirtualBox:‍ Setting ⁣the‌ Stage for Your ‍Ubuntu Adventure

Ready ⁣to ⁢dive into ​the world⁢ of⁣ Ubuntu? First up, you’ll need⁢ to set up⁤ VirtualBox, and it’s easier than pie! Download and‍ install VirtualBox, just like any other ​software. But hold on! Make‍ sure to check for ⁢ extensions that⁢ can enhance⁣ your experience. Why‌ not ‍grab the VirtualBox Extension Pack, ⁣too? It ‌adds ⁣nifty features like USB support ‍and a better ⁢virtual screen resolution.‍ You don’t want ‍to miss out on these perks!

Now,​ let’s chat about creating your Ubuntu​ virtual machine. Launch VirtualBox,‌ click on⁢ New, and a​ pop-up will appear,‌ ready for your wizardry! Choose a name⁤ for your machine (how about “Ubuntu Adventure”?), select⁣ the ⁢type ​as “Linux,” and the version as “Ubuntu (64-bit).” ⁢Next, you’ll allocate some‌ memory—at⁣ least 2048 MB is a good start, ‍but ‌if you’re feeling generous, crank‍ it​ up ⁣a bit! When you⁢ create the ​virtual hard‌ disk, opt for VDI⁤ (VirtualBox Disk Image) to streamline things. Here’s a quick⁤ table ⁤to guide you:

Setting Value
Machine Name Ubuntu Adventure
Memory Size 2048‍ MB (or more)
Hard Disk Type VDI

Getting Started ⁣with VirtualBox: ⁤Setting‍ the‌ Stage ​for Your ⁣Ubuntu Adventure

Getting ⁤comfy with⁣ Ubuntu’s‌ interface on VirtualBox is like ⁤mastering a new recipe; it just takes ⁤a little practice. Start by tweaking your settings for a smoother ride. Adjust ⁢your ⁤screen⁢ resolution to ⁤make everything fit perfectly ⁣on ⁤your ​monitor. You don’t want to ⁣be‍ squinting at tiny icons!⁣ That can be done by installing‍ the VirtualBox Guest Additions, which not only enhances⁣ graphics but⁤ also‌ enables seamless mouse integration. Ever found your ‍cursor lost ⁢in ⁤cyberspace? ⁤Trust me, that’s ⁤a ⁢game-changer!

Don’t overlook the hotkeys; they’re like shortcuts to unlocking the magic of Ubuntu! For instance, ⁤pressing⁤ Super (Windows) + D minimizes all windows, letting⁢ you easily‍ access⁢ your desktop. Want​ to open ⁤a terminal? Just⁢ hit​ Ctrl ‌+ Alt +​ T. It’s like having superhero powers at‍ your fingertips. Beyond ⁢that, personalizing your desktop with custom themes and extensions ​can make your experience uniquely yours. Why settle‍ for bland when you‍ can add a ​splash ‌of color? ‍Dive into the settings and give your interface ‌a‌ vibe that speaks to you!

Navigating Ubuntus‍ Interface:⁢ Tips⁢ and Tricks for a ‌Seamless ⁣Experience

Essential ‌Software ​and Customization: Tailoring Your Ubuntu Setup to ⁤Your ‌Needs

When ‍you’re diving ⁤into Ubuntu on ‌VirtualBox, customization is where the magic⁣ happens. Think of‍ your setup ​like a ⁣blank canvas – it’s all ⁣about adding the right software to⁢ turn it ⁣into your masterpiece. Depending⁤ on⁣ what you’ll be using​ your Ubuntu ​for, consider downloading essential apps⁢ like:

  • LibreOffice: A ​solid alternative⁤ to⁤ Microsoft Office for all your⁤ document‌ needs.
  • GIMP: For ⁤those who⁤ want to unleash their ‍inner artist with graphic design.
  • VLC‍ Media Player: A ⁤must-have⁣ for ⁢playing‍ just about any media​ file you throw ⁢at it.
  • Firefox or Chrome: Perfect for web surfing ⁤with your preferred ‌browsing experience.

But⁤ it’s ‌not‍ just about the initial apps;⁢ it’s about⁤ making Ubuntu feel⁤ like ⁤home. Personalization can drastically ⁢improve⁢ your⁣ workflow.‍ Tweak your desktop environment⁤ by ‍selecting GNOME, XFCE, or⁢ KDE‌ based on your vibe. You can also explore various‍ themes and icon packs to ‌breathe‍ new‌ life into ‍your desktop. Check⁤ out ‌these​ popular customization options:

  • Terminal Customization: Spruce up your terminal with‌ Zsh and oh-my-zsh ⁣for a ‌snazzy command line experience.
  • Dash to Panel: ‍ An intuitive⁤ way to combine the top bar and ‌dock.
  • Plank Dock: A simple yet⁣ effective ⁤dock for your ‌favorite applications.
Software Use‌ Case
GIMP Graphic Design
LibreOffice Document‍ Editing
VLC Media Playback

Essential Software and Customization: Tailoring Your Ubuntu Setup to​ Your Needs

Troubleshooting Common⁤ Issues: ​Navigating Bumps⁢ in the Road with⁤ Confidence

Getting Ubuntu up ⁤and ​running on VirtualBox can feel like ‌navigating⁢ a maze sometimes,‍ right? You might hit ​a few⁢ bumps⁤ along the way—like the dreaded “Guest Additions” ⁣issue or maybe your display ⁣resolution isn’t quite what you⁣ hoped ‌for.‍ Don’t sweat it! Here are some‌ classic ⁤problems and how you can tackle them. ⁤ Make sure your VirtualBox is ⁣updated; outdated software can often lead to incompatibilities. ⁢Also, try adjusting your ‍VM ‌settings under Display to allocate more ⁤video memory. This could‌ give you⁤ that clearer, crisper screen ​you’re dreaming about.

Another common hiccup people‌ face is network connectivity—ever tried⁣ getting online and found yourself feeling ⁢like you’re stuck in a desert with​ no⁢ Wi-Fi oasis in​ sight? First, check ⁢your⁤ network settings! If you’ve got it‍ set to “NAT,” switch it to “Bridged Adapter” for more ​reliable⁤ access. Here’s⁣ a handy table to keep you⁤ focused on your troubleshooting:

Issue Solution
Guest Additions ‍not ⁤working Reinstall Guest‌ Additions‌ with the latest version
Poor ‍display resolution Increase video memory​ in Display settings
No internet connectivity Change​ to ⁣Bridged‍ Adapter in ⁢network settings

By troubleshooting these⁤ common issues, ⁢you’ll find ‌your groove and be well on your ⁤way to ⁣mastering⁣ your ⁢Ubuntu ⁣experience. ​And with a​ bit of ⁢patience and persistence, ⁣those bumps​ in ⁤the road become just stepping stones ⁣to ‍success!

Troubleshooting​ Common Issues:​ Navigating ‍Bumps in the Road ⁤with Confidence

The Way Forward

So, there you ⁢have it! By diving into‍ the ​world of ⁢Ubuntu on VirtualBox, you’re not just⁢ following a guide; you’re embarking on ⁢a thrilling journey of discovery and⁣ learning. ⁢Just think of VirtualBox as your very own digital playground—it’s ⁤a safe space where you can experiment, ‌break things, and rebuild them​ without ‍any​ consequences. ‍And who‌ doesn’t love‍ that kind of ‍freedom?

With⁢ the treasure trove‌ of‌ YouTube tutorials at your ⁣fingertips, mastering Ubuntu has never been⁤ more⁢ accessible or ‌exciting. ⁢Each video​ is like a friendly guide, ready‌ to walk​ you through⁤ the ins ⁤and outs, offering tips​ and tricks that transform you ‌from ‍a novice into‍ a savvy‍ user. The ‌community is welcoming and‌ filled ⁣with fellow explorers ⁣sharing their experiences.

So don’t‌ just sit ‌there—grab your virtual shovels and dig⁤ in! Whether you want ⁢to boost​ your tech‌ skills, develop​ software,⁢ or simply explore the ​capabilities of Linux, Ubuntu on VirtualBox is⁤ your key.​ Remember, every expert⁣ was once a ‍beginner, ⁤so embrace the journey and enjoy⁤ every⁢ moment.​ Your adventure is ⁣just beginning, and you’ve got this!​ Happy⁤ learning!