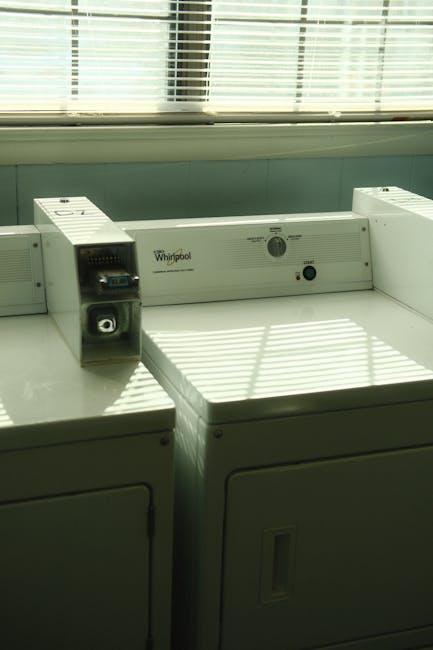
Hey there, fellow DIY enthusiasts! If you’re anything like me, you’ve probably got a soft spot for vintage appliances. There’s something about that old-school charm, right? Today, we’re diving into a treasure from the past—your trusty 1998 Whirlpool dryer. Yes, you heard that right! It might be a bit dusty and in need of some TLC, but with a little love and a sprinkle of elbow grease, you can breathe new life into this household hero.
In this YouTube How-To guide, we’ll walk you through simple steps to revive your dryer, turning it from a silent relic into the dependable workhorse it once was. Whether it’s a strange noise that’s got you scratching your head or a cycle that just won’t finish, we’ll tackle it all together. So grab your tools, put on some comfy clothes, and let’s get ready to unleash the full potential of this nostalgic appliance! Who knows, by the end of this guide, you just might feel like a modern-day appliance wizard! Ready? Let’s jump in!
Revitalizing the Old-School Classic: Why Your 1998 Whirlpool Dryer Deserves a Second Chance
Is your 1998 Whirlpool dryer taking its sweet time to get your clothes dry? It might seem like it’s on the verge of retirement, but give it a second look! These old-school machines were built to last, often outlasting their newer counterparts. What if I told you that with just a little bit of love and some handy YouTube tutorials, you could not only revive its glory but save a ton of cash in the process? Think of it like adopting a vintage car—you might need to do some tinkering, but the end result can be road-ready and even more reliable than before!
When diving into the world of dryer repairs, there’s a treasure trove of resources at your fingertips. YouTube is like a gold mine for DIY aficionados. Here’s a quick rundown of what you can tackle:
- Cleaning the Lint Trap: A quick process that greatly improves drying efficiency.
- Replacing the Heating Element: Essential if your dryer is blowing cold air instead of hot.
- Fixing the Door Switch: Can’t get the dryer to start? This might be your culprit.
- Lubricating the Drum Rollers: Squeaky and stubborn? A little grease goes a long way!
Clearly, your old trusty dryer isn’t ready to end up in the scrap heap just yet. It just needs a little TLC to keep it chugging along for years to come. So, roll up those sleeves, put on your favorite playlist, and let’s dive into the repair adventures together!
Essential Tools and Supplies for Your DIY Dryer Revival Project

Before diving into your DIY dryer revival extravaganza, you’ll need to gather a few essential tools and supplies that will make your life a whole lot easier. Think of these items as your treasure map; without them, you might just end up lost in the laundry room jungle! Here’s what you should have on hand:
- Screwdrivers: A set of Phillips and flathead screwdrivers will help you tackle the screws hiding your dryer’s secrets.
- Multimeter: This nifty tool will help you troubleshoot any electrical issues that might be lurking in those circuits.
- Replacement Parts: Depending on your dryer’s condition, grab a heating element, thermal fuse, or drum belt so you can easily swap out any worn-out pieces.
- Cleaning Supplies: A vacuum cleaner or brush is crucial for removing lint build-up, ensuring your dryer works efficiently and safely.
Moreover, it’s wise to equip yourself with some safety gear to keep things safe and sound while you’re on your repair journey. A little prevention goes a long way! Here’s what to consider adding to your toolkit:
- Safety Goggles: Protect those peepers while you’re on the hunt for lint and grime.
- Gloves: Grab a pair to keep your hands clean and shielded from sharp edges.
- Towels: A stack of towels is handy for any spills or messes that might occur along the way.
Step-by-Step Video Breakdown: Troubleshooting Common Issues with Style
Alright, let’s dive right into the nitty-gritty of troubleshooting your trusty 1998 Whirlpool dryer! No one wants to deal with a dryer that won’t spin or, worse yet, won’t heat up when you’ve got that pile of laundry waiting. So, here’s a handy breakdown of the classic issues you may face and how to tackle them with style. While watching our step-by-step video, you’ll get to see how checking simple components can make a huge difference. Remember to keep a few tools handy: multimeter, screwdriver, and a flashlight. They’re your best pals in this journey!
As you follow along, you’ll uncover the most common hiccups, like malfunctioning start switches or worn-out belts, and see them in action. Here’s a quick list to jog your memory while you’re working on your appliance:
- No Power? Check the door switch and circuit breaker.
- Dryer Won’t Heat? Inspect the thermal fuse and heating element.
- Drum Not Spinning? Look out for a broken belt or faulty motor.
| Issue | Quick Fix |
|---|---|
| No Heat | Replace thermal fuse |
| Drum Not Turning | Change the drive belt |
| Too Noisy | Lubricate or replace roller wheels |
By following these tips, you’ll be well on your way to reviving your dryer like a pro! Plus, troubleshooting with your loved ones can turn into a fun DIY project. So grab those tools, watch the video, and remember: solving problems is all about trial and error. You’ve got this!
Pro Tips for Maintaining Your Vintage Appliance Like a Boss

Keeping your vintage Whirlpool dryer humming like a dream doesn’t have to be a hassle. Start by giving it some TLC with regular cleanings. Dust and lint can build up quicker than you’d think, so make it a habit to wipe down the exterior and vacuum the lint trap each time you do laundry. Don’t forget to check the exhaust vent too; a clear vent ensures your dryer isn’t working harder than it needs to. After all, nobody wants a dryer that runs like it’s stuck in mud. Consider investing in a lint brush for those hard-to-reach spots. It’s like giving your appliance a nice little spa day!
Next up, let’s talk about routine maintenance—this is where you really show your dryer some love. Every few months, give it a deeper inspection. Tighten any loose screws, check the belt for wear and tear, and don’t be shy about pulling it out from the wall to clean behind it. Using a multi-surface cleaner on the drum can also keep those stains at bay—think of it like a mini makeover! If you’re feeling adventurous, look up some how-to videos that show you how to replace small parts. It’s not as scary as it sounds—a little DIY magic can go a long way in reviving your retro beauty!
The Way Forward
And there you have it—the ultimate guide to breathing new life into your 1998 Whirlpool dryer! Isn’t it amazing what a bit of knowledge and a dash of DIY spirit can do? Just think of your dryer as that sturdy old friend who’s been by your side through thick and thin, and now all they need is a little TLC to keep going strong. With the right tools and a few clicks on YouTube, you can turn that laundry room relic into the dependable workhorse it once was.
So, roll up your sleeves and dive into those troubleshooting tips! You might just surprise yourself with your handy skills. Whether it’s replacing a worn belt or unclogging a vent, remember: every small victory in the repair process means more clean, fresh laundry down the line. And hey, if you hit a stumbling block, don’t sweat it—there’s an entire community of fellow DIYers out there ready to lend a helping hand.
Thanks for joining me on this journey of reinvigorating your trusty dryer. Now, go ahead and get your spin cycle game back on point! Happy drying, everyone!