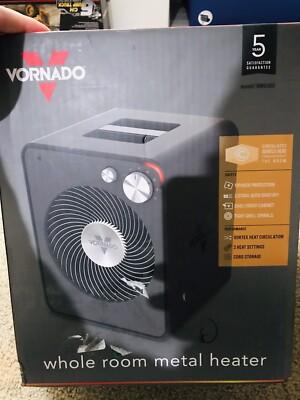
Ever found yourself staring at your Vornado EH1 00115 and realizing it’s time for a little TLC? Maybe it’s not heating quite right, or perhaps it’s just showing signs of wear and tear. Don’t sweat it! Dismantling your trusty Vornado heater could be a breeze with the right guidance. Think of it as a mini adventure: just you, your tools, and a heater waiting to be revived. In this step-by-step guide, we’ll walk you through each phase of the dismantling process, making it as easy as pie. So grab your toolbox and let’s get to work on giving your Vornado the care it deserves!
Unplugging the Mystery: Safety Precautions Before You Begin
Before you dive into taking apart your Vornado EH1 00115, let’s chat about some essential safety precautions to keep in mind. First off, unplug your device. This might sound like a no-brainer, but you’d be surprised how many people forget this crucial step. Imagine reaching in to unscrew a part while the fan’s still plugged in—that’s an unnecessary recipe for disaster. Also, grab some protective gear like gloves and goggles; they’re not just for show. Think of them as your superhero outfit against any unexpected debris flying your way.
Next on the list, ensure you have a clean and well-lit workspace. A clutter-free zone can make a world of difference, turning what could be a chaotic project into a smooth operation. Keep your tools handy but organized. A simple tool checklist can help you avoid any frantic searches in the middle of your task. Here’s a quick table to help you gather everything you need:
| Tool | Purpose |
|---|---|
| Phillips screwdriver | Removing screws |
| Flat-head screwdriver | Prying parts apart |
| Utility knife | Cutting through tape |
| Cleaning cloth | Wiping dust and debris |

Breaking Down the Pieces: A Detailed Walkthrough of Dismantling
Dismantling your Vornado EH1 00115 is like peeling an onion; you have to work carefully to avoid shedding any tears. First, make sure to power down the heater and unplug it from the wall. Safety first, right? Once that’s out of the way, gather your tools—think screwdriver, flashlight, and maybe even a small dish for loose screws. Start by removing the front grille, which often involves a bit of gentle prying. A plastic spudger can be a lifesaver here if you’re worried about scratching the surface. After you’ve got the grille off, take a moment to admire the intricate fan assembly inside. It’s a mini work of art that shows just how much engineering goes into keeping you warm during those chilly nights.
Next up, it’s time to tackle removing the heating element. Take your time here. Look for the connections and carefully unscrew them so you don’t damage any wiring. Once the heating element is out, inspect it for any signs of wear or buildup—this is a great opportunity to clean it if needed! You can lay out the screws and parts on a table, organizing them for easy reassembly later; trust me, future-you will thank present-you! As you dismantle, feel free to document each step with your phone. That way, when you’re piecing everything back together, you’ll have a handy reference to jog your memory. you’ll feel like a true DIY master!

Tools of the Trade: Essential Gear for a Smooth Disassembly
When it comes time to tackle the disassembly of your Vornado EH1 00115, having the right tools is key to a smooth experience. Think of it like preparing for a camping trip; if you don’t have your gear ready, you’ll be left fumbling in the dark. For this project, make sure you gather the following essentials to ensure the process goes off without a hitch:
- Screwdriver Set: A mix of Phillips and flathead screwdrivers is a must-have; they’re the unsung heroes when it comes to unscrewing those stubborn bolts.
- Pliers: Needle-nose pliers can help you grip and pull out any tough parts that might be stuck.
- Flashlight: Nothing’s worse than squinting in the shadows—shine a light on the task and keep your workspace clear.
- Magnetic Tray: Keep those screws and tiny parts organized; you don’t want to lose anything vital in the chaos.
- Soft Cloth: Protect your surfaces and your device; a soft place to rest parts can prevent scratches and damage.
Now that you’ve got your toolkit ready, it’s time to prepare your workspace. Just like cooking in a tidy kitchen, a clear area helps you focus solely on disassembly. Lay out a clean blanket or mat to catch any bits that may fall and keep your tools within arm’s reach. Check out this simple table for a quick reference on setting up your workspace:
| Workspace Item | Purpose |
|---|---|
| Blanket or Mat | Protects your surfaces and catches any loose parts |
| Small Containers | Sorts screws and tiny parts for easy access |
| Work Lamp | Illuminates dark spots for better visibility |

Putting It Back Together: Tips for Reassembly and Maintenance
Once you’ve successfully dismantled your Vornado EH1 00115, it’s time to reassemble everything like a pro. To make the process smoother, organize your parts on a clean, flat surface. This way, you can easily locate screws and components as you go. Remember the old saying, “measure twice, cut once”? Well, it holds true here too. Double-check that each piece matches its corresponding spot before securing anything. Take your time, and don’t rush. No one wants to be that person who ends up with leftover screws!
When you’re piecing it back together, consider systematic steps that might help keep your assembly process orderly:
- Start from the base and work your way up to the fan unit.
- Ensure any wiring is neatly tucked away to prevent snagging.
- Use a magnet to catch any dropped screws; they’re slippery little critters!
Regular maintenance is just as vital as reassembly. A quick dusting and wipedown every so often will keep your Vornado at peak performance. Think of it as a spa day for your fan! By following these tips, your device will run smoothly and last longer. It’s all about giving your trusty appliance the love it deserves!

Insights and Conclusions
And there you have it! You’ve successfully navigated the ins and outs of dismantling your Vornado EH1 00115. Just like taking apart a puzzle, it might seem daunting at first, but with a little patience and these handy steps, you’ve turned what could be a headache into a satisfying afternoon project. Now, you’re equipped to clean, repair, or simply understand your heater a bit better.
Feel empowered? You should be! Just remember, every tool you used and every part you removed is a step toward keeping your space cozy and warm. If you run into any hiccups or have lingering questions, don’t hesitate to reach out and share your experiences. Happy heating, and may your Vornado serve you well for many seasons to come!