Snagging Frames: A Simple Guide to Copying YouTube Images

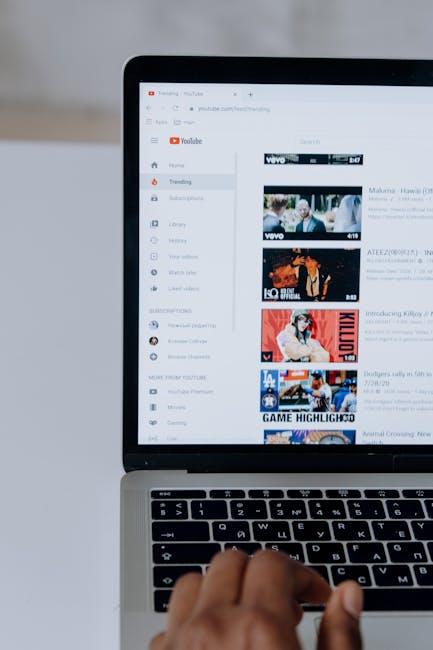
Ever sat down to watch a YouTube video and found that one frame just pops? You know, the one that​ perfectly captures​ the essence of what you want to ⁤share but trying to grab it feels like trying to catch smoke with your bare hands? Well, grab a cup of your favorite⁢ brew because we’re about to make that ​process as easy as ⁢pie! ‍Whether you’re looking to snag a screenshot⁣ for a project, a meme, or just ⁤to reminisce about that epic moment, this guide is your go-to companion. Let’s dive into the ‌nitty-gritty of snagging those images in the ⁣simplest way ⁤possible, so you⁣ can have​ those stunning visuals​ at your fingertips without breaking a sweat!

Ways to Capture Stunning YouTube Thumbnails Without ⁢a Hitch

Ways to Capture Stunning YouTube Thumbnails Without a​ Hitch

Creating ⁤eye-catching YouTube‍ thumbnails need not feel like​ climbing Everest.⁢ With a​ few ⁢clever techniques,⁢ you can produce visuals that not only attract‌ clicks but also convey your video’s essence. ⁤Start⁤ with high-quality images; this sets⁣ a solid foundation.⁣ Think of your thumbnail as the front​ cover of a book—if it doesn’t captivate, people won’t even bother turning the pages. Use bright colors and bold fonts ⁤that reflect‍ both your channel’s vibe and the⁣ video content.⁤ Incorporating text overlays can help highlight key themes, but keep it concise;⁤ nobody wants to read an ‌essay‍ on a thumbnail!

Don’t underestimate the ⁣power of your‍ own ‌creativity. Use ‍simple tools like Canva or Adobe Spark, where you can ⁤easily drag​ and drop elements ⁣to‍ craft something visually stunning. Consider these must-haves ‌for a⁤ great​ thumbnail:

  • A clear focal point: Make sure there’s something that instantly draws the viewer’s attention.
  • : Utilize contrasting colors to make elements pop.
  • : If you’re featuring faces, choose ⁤expressions that evoke‍ curiosity or emotion.

think directionally—where are the ​viewer’s eyes likely to ⁢go? Think of it like a first date; you want to make a great ‍first‌ impression that keeps them wanting to ⁢know more. Test ⁤out different designs, gather feedback from fellow creators, and don’t hesitate to adjust until it clicks into place!

Understanding YouTubes Fair Use Policy for Image Snatching

Understanding YouTubes Fair Use Policy for Image Snatching

When you’re diving⁤ into the world of snagging images from⁤ YouTube, you’ve got to tread carefully around the concept of fair use. Fair use is kind‌ of like the polite ​neighbor who lets ‍you borrow​ sugar, ‍but only if you promise to return ‍the favor someday. The key here is understanding that not every frame you lift is free for the taking. You’re looking at factors like the image’s purpose, the nature of the content, how much you’re ⁢using, and what impact it ⁢might have on the original work. Essentially, ‌if you’re snagging‌ for commentary, criticism, or education,‌ you’re leaning toward fair use, but if you’re doing it for profit, you ⁤might want to think twice.

So, here are some things ​to‍ keep in mind when considering whether you’re sailing into fair use waters or ‍risking a copyright storm:

  • Purpose and Character: Are you using it for non-commercial purposes? Good sign!
  • Nature of the Work: Using images from a creative piece might not play in ‌your favor compared to factual works.
  • Amount Used: Snagging a​ small, transformative part? ​You’re⁢ golden! But a whole scene? Not so much.
  • Market Impact: Ask yourself—will your use of⁢ that image‍ hurt the original creator? If yes, beware!

Top Tools and Apps for Effortless Frame Snagging

Top Tools and Apps for⁢ Effortless Frame⁢ Snagging

When it comes to snagging those perfect frames ‌from YouTube videos, there⁤ are some killer tools ⁤and apps that make the process a breeze. First off,⁤ you can’t go wrong with YouTube⁤ Screenshot, a straightforward online tool that allows you to capture images directly from‌ any video. Just paste the URL, hit your desired‌ play​ point, and voilà! ⁢You’ve got ⁢a snapshot ready to download. Another ⁢solid choice is Snagit. This versatile screenshot tool not only lets you grab your ⁣favorite moments but also offers some nifty editing features, like annotations and ⁢highlights.⁣

If you’re​ looking for something on mobile, FrameGrabber is an awesome app for ‌both Android ‍and‌ iOS users. You can easily navigate‌ through videos and capture high-quality images without ​the fuss. For those who want a more involved process,‌ VLC Media ⁣Player can do ‌the trick. With its built-in snapshot⁢ feature, you can play any video and pause ​at just the right⁤ moment, then snatch a ⁢frame⁣ in⁣ seconds. Just⁤ remember, no matter which tool you choose, always check the video’s ​copyright guidelines before sharing your snags! Here’s a quick table summarizing these tools for easy reference:

‌ ⁤

Tool/App Platform Key Features
YouTube Screenshot Web Direct URL capture,⁣ easy download
Snagit Windows/Mac Advanced editing,‍ annotations
FrameGrabber Android/iOS User-friendly, high-quality captures
VLC Media Player Windows/Mac/Linux Snapshot‌ feature, customizable

Tips for Crafting Eye-Catching Thumbnails That Draw‍ Clicks

Tips for Crafting Eye-Catching Thumbnails That Draw Clicks

Creating thumbnails that pop​ is all about grabbing ⁣attention in⁣ a fraction of a second. Consider using bold colors ‌ and minimal ​text; you’ll want your thumbnail to be legible even at a tiny‌ size. Think of your thumbnail as ‍a movie poster – it should convey⁤ the essence of your video while sparking curiosity. A bit of contrast goes a long way, too! ‍Pair light ⁣text with a dark ​background or vice versa to ‌create a visual ⁣punch that just can’t ‌be ignored. Don’t shy away ⁤from using⁢ faces; studies​ show that human expressions can⁣ significantly increase engagement.

Now, let’s talk about composition.⁣ Use the rule of thirds ⁢to keep your layout ⁢interesting—placing focal points on intersections rather than smack dab in the middle can guide the viewer’s eye. ‌Play around with different‍ fonts and iconography to find a style that⁤ resonates⁢ with your‌ brand. ‍Lastly, consistency is key. By sticking to a specific color scheme and font choice across your thumbnails,⁢ you create⁤ a cohesive look that builds brand recognition. Here’s a quick⁣ cheat sheet:

Element Tip
Color Use contrasting ⁣colors to grab attention.
Text Keep it short; a‍ few⁢ key words are best.
Images Include‍ expressive faces or illustrations.
Style Match‍ fonts and colors ⁣to ⁢your brand.

Final Thoughts

And ​there you have it! Snagging those eye-catching ‌YouTube images is no longer a mystery. With these simple steps, you can effortlessly capture frames⁣ that pop and draw attention. Just‍ think of it like‍ fishing ⁣– you want to cast your line in the right ‌spot and reel in the goodies. Whether you’re ⁢upgrading your thumbnails or adding ‍visuals to your⁤ projects, these tips make it as easy as pie. So, go ⁢ahead ​and ‌get creative! ​Explore, experiment, and don’t hesitate ‌to add your personal⁤ touch to⁣ those frames. Remember,⁤ each image can be a gateway to something ‍amazing. Happy snagging, and ‌may⁤ your thumbnails be ever vibrant ⁤and compelling!

Elevate Your YouTube Descriptions with Emojis & Pics!

Let’s ‌be​ real: in the vast ocean​ of ⁤YouTube content, standing out is tougher than finding a needle‍ in a⁣ haystack! With millions of⁢ videos vying for attention, your description is your secret weapon. Why not sprinkle in some emojis and eye-catching pictures to elevate your ⁣game? Think of emojis as the ⁤glitter on your already fabulous cake—they catch the eye and add personality! In this article, we’re diving into ⁤how you can transform your YouTube descriptions ⁢from plain Jane to wow-worthy. Whether you’re a seasoned content creator or just⁤ starting out, mastering the art of visual storytelling with emojis and pics can help ​engage your audience and drive more clicks. Ready to amp up your descriptions and make them pop? Let’s get ⁤started!
Elevate Your ‍YouTube Descriptions with Emojis⁢ & Pics!

Spark Joy with Emojis: The Art of Visual Storytelling

Let’s face it:​ scrolling through a sea of text can be as engaging as watching paint dry. Emojis are like the⁢ sprinkles on a cupcake—they not only make things look ​more appetizing but also add ‍flavor to your content. So, why not sprinkle some joy into​ your YouTube descriptions? Imagine a concise, yet vibrant description that immediately catches your ⁣viewer’s eye. With⁤ the strategic use of emojis, you ⁣can convey ‌emotions, highlight key points, and even inject a little personality into your content. An explosion of little icons can transform bland​ details into a visual feast! 🎉✨

When crafting your descriptions, think of emojis as‌ miniature storytellers. They break down complex concepts​ and can convey a staggering amount of information in just a symbol or two. Here are some things you can do to jazz up your next YouTube description:

  • Use Emojis to Emphasize Keywords: Make your key points‍ pop with corresponding⁤ emojis. For instance, add a 🎥 next to “video” or a 🎉 next to “giveaway”.
  • Create⁢ a Visual Flow: Pair emojis with bullet points to direct viewers through the content smoothly.
  • Express Emotion: Use ‍expressive emojis for humor, excitement, or ⁤urgency—whatever matches the vibe of your‌ video.

Here’s a quick reference ​chart ‍to think about:

Content Type Suggested Emojis
Product Review 🛍️⭐️💬
Travel Vlog ✈️🌍🏖️
Cooking Show 🍳🍽️🍅

Spark Joy with Emojis: The Art of Visual Storytelling

Picture This: Pairing Images with Words for Maximum Impact

Imagine scrolling through YouTube and hitting a⁤ video that immediately grabs your attention—not just because of the title, but because⁤ of the vibrant images and fun emojis scattered in the description. Using visuals doesn’t just add a splash of color; they add ⁤layers ⁣to your message. Ever noticed how the right emoji can trigger⁣ a vibe? A simple smiley face can shift the whole tone of a description ‍from serious to approachable. ‌Pairing your words with images​ creates a conversation in the viewer’s mind. They see the image and instantly think, “Wow, that looks fun! ‌I ‌want to know more!” It’s kind of like ​putting a cherry on top‌ of a sundae—it ⁣makes ​everything a little sweeter.

Let’s break it down with a few pointers for your YouTube descriptions:

  • Complementary Images: Use images that align with your content. A picture of⁤ a cute puppy can make a⁢ mundane tutorial feel heartwarming.
  • Emojis for Emphasis: Sprinkling emojis⁣ throughout can highlight your key points, making⁢ them pop! ⭐
  • Consistent Aesthetics: ‌ Keep a similar style across your images and emojis to create a cohesive brand identity.

A quick visual summary can also drive the point home. Check out this simple comparison:

Without Images/Emojis With Images/Emojis
Just plain text drags attention. Colorful and engaging—a feast ‍for the⁤ eyes!
Feels like reading a textbook. Like chatting with a friend over coffee. ⁤☕

Picture This: Pairing Images with Words for Maximum Impact

Engagement Boosters: How Emojis Enhance⁤ Viewer Connection

Want to take your YouTube descriptions from drab to fab? Emojis are an excellent way to break the monotony and inject ⁤some personality into your content. They act like little icebreakers, effortlessly drawing viewers⁤ in ‍and‌ helping them connect with your message. Imagine​ portraying excitement with a‌ 🎉 or conveying curiosity with a 🤔—these tiny icons pack a punch! Here’s why they matter:

  • Vibrant Visuals: Emojis add visual flair, making your ​descriptions ⁤pop‌ in a sea of text.
  • Emotional Resonance: They evoke feelings and help convey the tone of your content. ​Like seasoning, they enhance the overall flavor.
  • Creativity Unleashed: Use emojis to tell ⁣a story or highlight key points; it’s like adding a dash of color to a black-and-white sketch.

But there’s more to it! Emojis also make your content approachable, breaking​ down barriers between you‍ and your audience. Picture this: a description so full of energy that viewers can’t help but feel they’re already⁤ part of the action. Depending ⁤on your message, different emojis resonate differently.⁤ For example, if⁤ you’re sharing thrilling news, using ​🔥 can amplify the excitement. Not convinced yet? Check this out:

Emoji Emotion Use Case
🎉 Celebration Announcing ⁣milestones or achievements
💡 Inspiration Sharing tips or creative ideas
🔍 Curiosity Encouraging viewers to explore deeper

Engagement Boosters: How Emojis Enhance Viewer Connection

Crafting a Compelling Narrative: Structure Your⁣ Descriptions Like a Pro

When it comes to crafting descriptions that pop, think of your narrative like a captivating⁢ book you ‌just can’t put‍ down. You want to create a hook that grabs attention right away. Start with an engaging​ opening line that sets the stage, perhaps a question or a surprising fact that makes viewers nod in agreement. Next, break down‍ the⁤ main points you want to cover using clear, ⁤concise language. Create a seamless flow by using bullet points⁤ or emojis to‍ highlight key moments, ensuring every⁢ word counts. ⁢Here’s a little cheat sheet for structuring your ⁣description:

  • Opening Hook: ‍Start with a question or bold statement.
  • Main Content: Use bullet points, with emojis to ⁣add visual flair.
  • Call to Action: Prompt viewers to like, share, or comment.

Imagine your ​description as a delicious recipe—you want to mix the right ingredients to get people hungry for more. Visual elements like emojis not only make your text more digestible, but they can also evoke emotions and convey tone. A simple​ smiley can lighten your message, while a thumbs-up emoji ‍can emphasize excitement. Pair this with well-placed‌ images⁤ that resonate⁤ with your content; they’ll break up your text and provide instant context. For example, if you’re sharing tips on cooking, include a photo of the dish or some fresh ingredients. Here’s a sample structure⁢ you could follow:

Section Content Idea
Intro Hook “Ever struggled with a perfect lasagna? 🍝 You’re not alone!”
Main Tips “1. Use fresh ingredients! ⁢🌿 2. Layer it right! 🔪 3. Bake to perfection! 🔥”
Conclusion “What’s your go-to pasta dish? ‍Let me know below! 👇”

Crafting a ‌Compelling​ Narrative: Structure Your Descriptions⁤ Like a Pro

The Conclusion

So, there ⁤you have it! Elevating your YouTube descriptions with emojis⁢ and images isn’t just about making things look pretty—it’s about grabbing attention and connecting with your audience on a whole new level. Imagine your viewers scrolling through a sea of text and suddenly stopping at your vibrant, eye-catching description. Pretty neat, right? ​

By infusing your descriptions with these playful‍ elements, you’re adding‌ personality and making your content more inviting. Plus,​ who doesn’t love a good emoji or a fun pic? It’s like giving your viewers a warm⁢ virtual hug before they dive into your video.

So go ahead,​ unleash your creativity and sprinkle in those emojis and images. Your future self will thank you for the engagement, and your subscribers will appreciate the effort! Happy creating, and‍ may your descriptions shine like the sun on a ⁤summer day! 🌞