Unlocking YouTube: Easily Turn Off HDR with Reddit Tips!

Hey there, fellow YouTube enthusiasts! So, you’re diving into‌ the world ​of⁢ videos, and suddenly, you’re hit with a dazzling ⁢array of colors and‍ contrasts that make you feel like you’re ⁢watching a movie in a high-end theater. ​But⁣ wait—why does‌ that one⁢ video look like ⁣it’s trying‌ a bit ‍too hard⁣ to impress? Enter HDR, ⁤or⁤ High Dynamic Range, which some ⁣folks adore, while others just want a straightforward viewing ⁤experience.‍ If you’ve ever felt frustrated trying to figure out how to⁣ turn⁢ off HDR on YouTube, you’re definitely not ⁤alone. Luckily, the clever folks over on Reddit have shared their tips and tricks to simplify this process. Join me ​as ⁢we‌ uncover easy, no-fuss methods to‌ reclaim your viewing pleasure and say ‌goodbye to those overly vibrant videos. ‍Let’s unlock YouTube together and make your experience as chill as binge-watching your​ favorite show in your comfiest PJs!
Enhancing Your Viewing Experience‌ by Disabling HDR

Enhancing Your ‍Viewing‍ Experience ‌by Disabling ‍HDR

When you dive into the vast ocean of YouTube content, sometimes the⁢ crisp and flashy‍ colors of HDR⁤ can be a bit ⁤much,⁢ right? ⁤Disabling HDR can⁤ actually enhance your viewing experience, allowing for more balanced colors and clearer visuals, particularly if you’re watching on standard screens that don’t quite support HDR properly. Plus, it can help in improving loading times​ and reducing buffering,‌ especially ⁤if you’re ‍on⁤ a slower internet connection. ‍Think of it this way: sometimes less is more, and dialing down⁢ the color‍ intensity can​ actually‌ let you appreciate the content ​without‍ distractions.

Now, you might be asking yourself, “How ⁢do I even turn ⁤this⁣ off?” The good​ news is⁤ that it’s ‍usually a breeze! Here are some ⁣simple⁣ steps to follow:

  • Go⁤ to your‍ YouTube ⁢settings.
  • Find the ‘Quality’ option.
  • Select a resolution without HDR enabled.
  • Enjoy your content‌ with improved ​smoothness!

By switching off that HDR feature, you’re freeing⁢ yourself ​from the visual chaos and⁣ embracing ‍a more streamlined experience. It’s like trading a noisy party for a cozy movie night—just you, your ‍snacks,⁣ and the entertainment. Simple adjustments can make a world of⁤ difference, so give it ‌a shot!

Simple Steps to⁣ Turn Off HDR on YouTube

Simple Steps to Turn Off HDR on YouTube
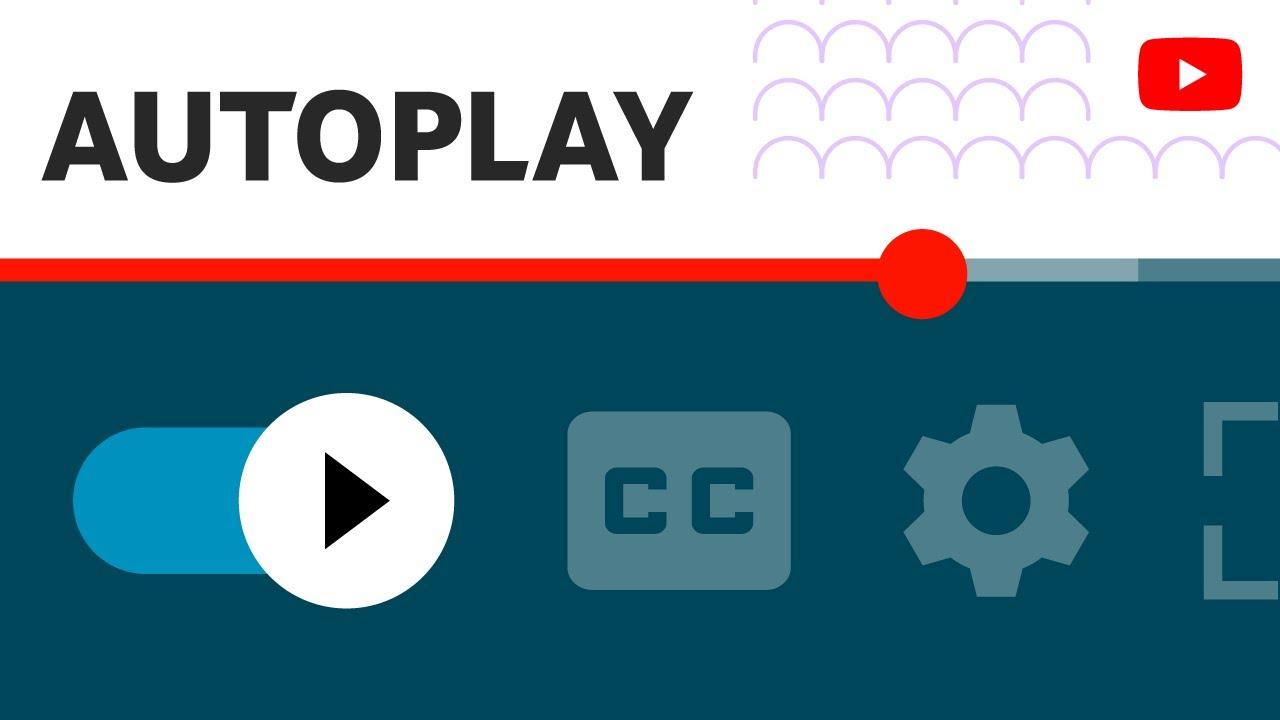
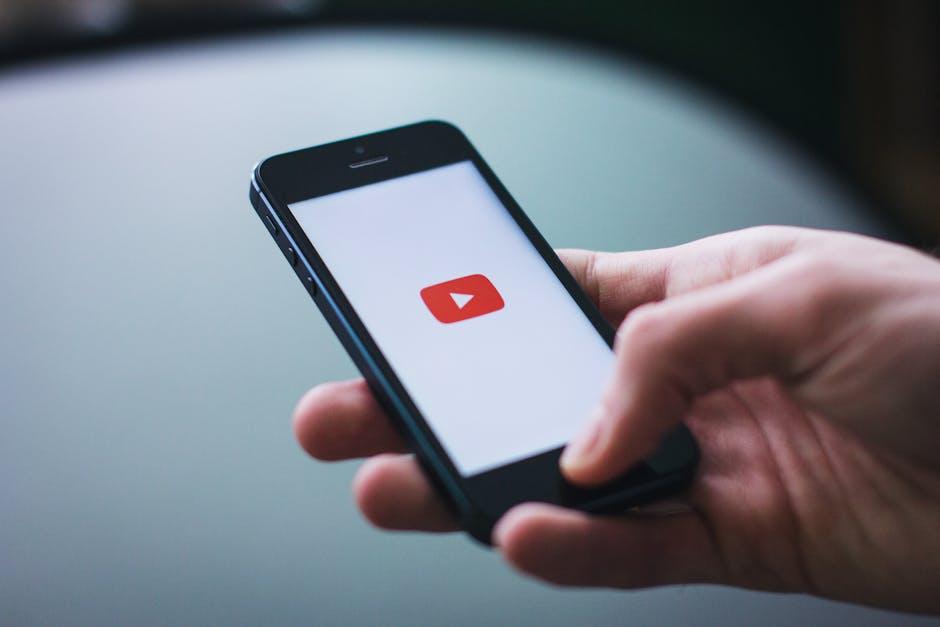
Turning ⁤off HDR ‌on YouTube can be a breeze if you know where to ‍look. First, fire up the⁣ YouTube app ‌or get cozy with your favorite browser. Once you’ve found a video ​you want‍ to tweak, click on the gear icon—that little settings button lurking in the ‍corner. From there, ​navigate to the Quality option. Instead of the usual resolutions, check if you see⁢ HDR as⁤ an ⁤option. If it’s selected,⁣ simply​ toggle to a⁢ standard ⁤resolution⁢ like‍ 1080p ‍or 720p. This will let you relish your video in⁤ good ol’ ‍standard definition without the‍ high dynamic range flashy effects ‍interfering with your experience.

But what if you often find HDR enabled by default? Don’t⁢ worry! ​You can tweak your app ‍settings for a smoother⁢ ride. In the same ​settings menu⁢ where ‍you found the gear icon, ⁢navigate‌ to Settings > Playback ⁤and performance. ⁣Here, you’ll discover an⁤ option that⁢ lets you manage video quality preferences. By unchecking the ‌ “Always choose HDR” option, you’ll‌ allow YouTube to default to regular quality. It’s a bit like setting⁢ your favorite playlist on ⁢shuffle—sometimes ⁣you just⁤ want the classics,⁣ right? Enjoy ​your ⁢videos⁣ with no distractions!

Reddits Best⁣ Tips for a Smoother Streaming ⁤Journey

Reddits ⁣Best Tips​ for a ⁢Smoother Streaming ‍Journey

Streaming should be a joy, ⁣not a hassle, ​and with a few nifty tricks from the Reddit community, you can‍ make that happen!⁢ If you’re struggling with HDR settings on YouTube, you’re not alone. Many users⁤ noticed that ‍HDR can sometimes lead to unexpected color issues or⁣ even‌ lag. Here are a few quick ⁣fixes that the pros suggest:

  • Check Your Device Settings: Make sure the ‌settings ‌on your TV or monitor​ support ⁤HDR. ‌Sometimes ‌the issue lies with ⁣the display, not YouTube⁢ itself.
  • Adjust YouTube’s Playback Quality: Switching‌ between different resolutions can sometimes automatically disable HDR. Aim ⁢for 1080p if‍ you want​ a smoother experience.
  • Use a Different Browser: Not all browsers ​handle HDR well. Consider switching to Chrome ‌or Edge ⁣if you’re using⁢ Firefox.

And if you ‌really want to dive into a⁢ world of smooth streaming, consider⁤ these additional tips, handpicked from those who’ve been there,⁤ done that:

Tip Description
Check for Updates Always ensure YouTube and your device ⁣software are up to date for​ the best performance.
Restart Your Device This classic move often clears up any glitches in a snap!
Network Connection Simply switching from Wi-Fi to an Ethernet connection can enhance streaming quality.

Why Some ⁣Users Prefer Standard ‍Dynamic Range over HDR

Why Some ⁢Users Prefer Standard Dynamic ⁤Range over HDR

When it comes ⁢to⁤ viewing preferences, not everyone ​is sold on the idea of high dynamic⁣ range⁣ (HDR). Plenty of people still ⁤lean​ toward standard ​dynamic range (SDR) for ​a variety of reasons. For​ starters, SDR⁤ can sometimes ⁤offer a more natural look.⁣ The colors are less saturated and the contrast isn’t as extreme, which can be a breath of ‌fresh ⁢air, ‌especially ⁣for‌ long viewing sessions. Imagine trying to binge-watch your​ favorite series, only⁣ to be constantly bombarded by overly vivid scenes that can leave you feeling‌ on ‌edge. With SDR,‍ everything feels a bit more laid-back, letting you relax and​ truly ⁢enjoy‍ the story without optical fatigue.

Another factor at play is the equipment ⁣side of things. Not ‌every device or monitor ‌supports HDR, and it can sometimes‌ come with technical hiccups that ruin ⁤the experience. Some⁢ users⁢ might find ‍themselves wrestling with settings, scaling issues, or ⁢even⁤ lag—frustrating​ distractions that can⁣ pull ⁢you right out of the action. It’s‍ like trying​ to enjoy a meal at ‍a fancy restaurant, only ‍to have the waiter spill ​your dish all over the table. With SDR, you⁢ hit‌ play and you‌ know what you’re getting. No fuss, just straightforward, solid ​visuals that deliver what you ‍expect. After all, why ⁣complicate something that should⁣ just be fun?

Future Outlook

And there‍ you have it, folks! Unlocking the secrets of YouTube to turn off HDR doesn’t have‍ to ‌be a⁢ daunting task, especially with the ⁤invaluable tips shared by⁤ the​ Reddit community. It’s amazing how ‍a​ little ⁣knowledge can make such a big ‌difference in your viewing ​experience.⁤ Who knew that a few simple tweaks could⁤ transform your streaming into something bright and⁤ beautiful, or just the way you like it?

So next time you ​find ⁤yourself wrestling with those​ overly vibrant colors or dim lighting, remember these tricks and take‌ control. After all, ⁢it’s your screen, your content, ⁣and your experience! If⁢ you found this guide helpful, why not share ⁣it with ⁢fellow YouTube​ enthusiasts in your‌ life? And don’t ⁤forget‌ to drop your own ‍tips in the comments—let’s ⁤keep this conversation going! Until next time, happy streaming!

Master Your YouTube Experience: Turn Off Cinematic Lighting

Ever found yourself caught up in a YouTube⁤ rabbit hole,‌ only to be⁢ distracted by‍ those flashy cinematic lighting ⁣effects?⁣ While they ⁤can add a certain ⁣flair‌ to your viewing experience, sometimes, ‍you just⁢ want to focus on the content without ‍the visual theatrics. If ‍you’re nodding ⁣along,⁢ you’re in ⁢the right place! This guide ⁤will walk you through‌ turning off cinematic lighting so you‌ can enjoy ‍your⁤ favorite⁢ videos​ without any distracting ‍glitz. ‌Let’s dive​ in and simplify your ‌YouTube vibe, ​making it‌ as cozy and inviting ⁢as your‌ favorite coffee shop!
Create Your Ideal‌ Viewing Atmosphere⁤ by Disabling Cinematic Lighting

Create ‍Your Ideal Viewing Atmosphere​ by Disabling ‍Cinematic Lighting

When it‍ comes to curating the perfect ambiance ⁢for ⁣your‌ YouTube binge sessions,‌ disabling cinematic lighting is a game changer. Think ‍about‍ it: You’re grabbing that⁤ cozy spot on the couch or settling into your⁢ favorite chair, ready to dive into ‌a⁣ world of captivating⁤ content. But then, boom! ⁢The‌ overly dramatic lighting‌ kicks in, and instead of being swept‌ away by the visuals, you’re distracted⁤ by‌ an artificial⁤ glow that feels more like⁢ a ‍sci-fi horror flick than⁣ your‌ favorite vlog. By turning off⁢ this feature, you’ll reclaim that relaxing vibe that makes ⁢watching‌ videos feel like⁢ a personalized ​experience.

Consider ⁤these points when you flip that ⁣switch:

  • Enhances Focus: ‌ Without​ the cinematic lighting, your eyes can absorb the content without unnecessary ‌distractions.
  • Natural Colors: Colors will pop ‌more⁣ vibrantly, mirroring the actual ‌scene rather ⁤than a staged environment.
  • Less Eye Strain: A more ⁤balanced lighting means ⁤you can ‌watch those long videos without feeling like you ⁣need a ⁤break ⁤every⁣ ten minutes.

Now, if you’re wondering how ​to tweak these settings, just look for the​ “Appearance” or “Settings”​ options⁢ in your YouTube⁣ interface. It’s ‍a breeze! Take a moment ⁢to ‌test it out, and you might just find ⁣that your⁣ new favorite ‌viewing experience ‍is simply a few clicks⁣ away.

Discover the‌ Hidden Benefits ⁢of a Standard YouTube Experience

Discover⁣ the Hidden ⁣Benefits of a Standard⁤ YouTube⁢ Experience

When you switch to a standard YouTube​ experience, you might feel like you’re ditching the ​glitzy,‌ cinematic vibe, ⁤but‍ hold on a⁤ second—the​ real⁢ perks are ⁢just beneath the surface. Eliminating that ⁤flashy lighting​ doesn’t just simplify things; ​it enhances ⁣your focus on the content that counts. Think of it like​ putting⁤ on a comfy ‍pair of glasses ‌instead of those designer shades that⁢ distort your view. You’ll notice ⁣how much easier it becomes to ​absorb information without‌ distractions, making your viewing experience ‍more engaging and informative.

Plus, the standard setting ⁢can often provide a more consistent playback experience,‌ especially if ‌you’re watching ⁣on various devices. You’ll ​be less​ likely to encounter buffering issues or color inaccuracies ⁢that can throw a wrench​ in your‍ viewing pleasure. ‍The stability of a simpler platform allows‌ for a smoother flow, keeping you in the groove. Here⁣ are‌ some hidden ​benefits ‌you might enjoy:

  • Improved‍ Battery ‍Life: ⁢Using standard mode is less taxing ‌on⁤ your device.
  • Faster⁤ Loading Times: Reduced data​ usage ⁤means quicker access to your favorite ⁤content.
  • Consistent Quality: Enjoy visuals that ⁤don’t fluctuate​ based on ​your internet connection.

Elevate Your Content Consumption ⁢with Simple ‍Settings Adjustments

Elevate Your ‍Content Consumption with Simple Settings ‍Adjustments

Imagine settling in ‍for​ a cozy night ⁢of‍ binge-watching your favorite creators on YouTube,‍ only to find that your visual⁣ experience feels a ⁣bit ​off. That’s where a ⁣simple tweak can change‌ everything!⁤ Turning off ⁣ Cinematic Lighting can make a world of difference. By adjusting ​this setting, you’re⁤ not just enhancing the brightness of your visuals; you’re bringing back the natural colors ⁢and vibrancy ‍that ​make content pop. You’ll see those​ lush greens and deep blues⁣ just as the creators intended, allowing for a⁢ richer and more ‌immersive⁣ viewing ⁣experience.

Here’s how to make⁢ it happen:

  • Open YouTube and‌ navigate to your avatar ​on ​the⁣ top-right ‌corner.
  • Head to Settings, then click ‍on Playback ‍and performance.
  • Toggle ‍off the Cinematic ‌Lighting option ⁣and watch your⁤ visuals transform!

Simplicity is ‍key. This minor adjustment‌ not only​ enhances​ your experience but also makes your engagement​ with ‌the ⁣content feel more authentic. Give it ⁣a shot, ‍and you’ll wonder how you ever enjoyed videos without it!

Transform Your Screen Time: Why Less is ‌More‍ with Lighting Effects

Transform‌ Your Screen Time: Why⁢ Less ​is More with Lighting Effects

Ever⁤ notice⁢ how ‌blinking lights and constantly shifting shadows‌ can leave you feeling drained? It’s⁢ like trying to ⁤enjoy a ⁤sunset ‌while⁣ someone keeps flipping⁤ the lights on⁤ and off! When you⁢ reduce ⁣those distracting cinematic effects, you ‍can ⁣actually ⁣hone ​in on⁣ what ‌matters—content! Lighting not only affects mood but can also impact focus. Instead of losing yourself in an illusion of grandeur, imagine diving deep⁢ into​ your⁤ favorite videos, feeling ⁤every word ⁢and ⁣emotion‌ without the flashy distractions. Think of it as turning down the dial on ​a dramatic ‍score to hear ‍the actors ⁣speak clearly. When‌ we ​minimize⁢ visual clutter, ​we clear the path for a​ more fulfilling ‍viewing experience.

Let’s break down the benefits of⁤ turning off those⁢ dazzling⁢ lighting⁣ effects:

  • Improved Focus: Without‍ theatrical fluff, your attention zeroes in ⁣on the storyline.
  • Less⁤ Eye ​Strain: ⁢ Soft lighting ⁣means more comfort, especially during binge-watching marathons.
  • Deeper Emotional ​Connection: You’re not⁤ just watching; you’re feeling and engaging.

So, ‍before you dive into your next ⁤YouTube binge, take a moment⁣ to⁢ tweak your settings. Less⁤ truly is ​more when it comes to enhancing your experience. By ⁤reclaiming ‍a ‍simpler view, you’re inviting a richer, more engaging⁢ atmosphere that pulls you right into the heart of the video instead ⁢of keeping you at arm’s length.

To Conclude

And⁣ there you have it! By turning off ⁤cinematic​ lighting, you’re not just adjusting a‍ simple setting; ​you’re taking control ⁢of your ‍YouTube experience. Think⁢ of it⁢ as swapping out fancy ⁤restaurant lighting for a cozy, ​familiar glow at home—much more comfortable, right? Now you can dive into your⁤ favorite videos without the distraction​ of overly dramatic visuals. ​So go ahead, take charge, and craft an experience⁣ that⁤ feels⁢ just right for you.‌ Your YouTube adventures are waiting, and with these tweaks,‍ you’ll enjoy ⁤them to the fullest. Happy watching!

Why Your YouTube Playlist Isn’t Autoplaying: A Deep Dive

Hey there, fellow YouTube aficionado! We’ve all⁤ been there—settling in for⁣ a cozy binge-watch session, a stack of‍ videos⁤ queued up, and then… nothing. Your meticulously curated playlist just sits there, blinking back ⁢at you ​like it’s deciding whether ​it ​really ‌wants to⁢ play or not. Frustrating, right? You’re ⁢not alone! In this article, we’re diving deep into the mysterious world⁣ of ⁢YouTube autoplay ⁣settings.⁢ We’ll unravel the tangled‍ web of ⁢reasons why your playlist⁣ might be​ lagging behind, covering everything​ from​ sneaky ​settings to tech gremlins. So, grab your popcorn,⁣ and let’s get to the bottom of this autoplay mystery ⁤together! Trust me, you’ll be back to jamming your⁤ favorite tunes and watching‌ those hilarious cat fail videos in no time. Ready?⁢ Let’s roll!
Understanding Autoplay ‌Mechanics: How YouTube⁣ Determines⁣ Your Next Video

Understanding Autoplay Mechanics: How YouTube Determines Your Next ‌Video

Ever⁢ wonder what really ‌goes on behind the scenes when you hit that play button on YouTube? The truth is, it’s a bit like ​a well-tuned radio‍ station, constantly scanning for the next best track‌ that aligns with your tastes. YouTube’s algorithm takes into consideration a cocktail⁢ of factors—from your watch history and engagement metrics to trending topics⁤ and user preferences. Think of it as your ‌own personal DJ, mixing together your preferences, likes, and even the content that has kept you glued to the screen in ⁤the past. ‌This custom-tailored approach not​ only keeps you entertained but keeps‍ you coming‌ back for more.

But hang on a second—what happens when your playlist simply won’t autoplay? It can feel like ‍a digital roadblock‍ when you’re in‌ the groove! Sometimes, it’s as​ simple as a setting that⁣ needs tweaking. Check to ⁢see if autoplay ‍is toggled on in your ⁣settings, or if ‌you’re watching on a ‌mobile device, ‍look for that elusive toggle button.⁣ Additionally, internet connectivity issues can ⁢rock the boat, causing interruptions. In rare instances, it ⁢might even be a case of the algorithm trying to ⁤figure ⁢out ⁢new ⁣content patterns or​ maybe a glitch in ⁤the⁤ system. Whatever the ⁣reason, understanding how these mechanics ⁣work will help you navigate your viewing ⁣experience like ⁣a pro.

Common Pitfalls: Why Your Playlist Might Be‌ Pausing Instead​ of Playing

Common Pitfalls:⁣ Why Your‍ Playlist Might Be Pausing Instead of‌ Playing

When your playlist seems⁣ to have⁢ taken a ⁣nap instead​ of playing seamlessly, it can‌ be pretty ⁢frustrating, right? Often, we overlook some common issues that can throw a wrench in ⁣our listening experience.‍ For ​starters, one of‍ the prime culprits could be insufficient internet connection. ‌If you’ve got a ​spotty Wi-Fi signal ⁣or are juggling​ multiple devices hogging bandwidth, your playlist is likely to pause as ⁤it struggles to buffer. ‌It’s like trying to⁤ swim in‌ a kiddie pool that’s​ slowly leaking water—eventually, you’re going⁢ to run out of splash!

Another sneaky factor to consider is the autoplay settings ⁣on YouTube itself. Sometimes, these settings can get ⁤accidentally toggled⁢ off, ⁤leaving you with a playlist ⁤that just ⁣sits there like ⁢a couch ⁣potato. Double-check that the autoplay feature is enabled; it’s the little switch‍ that decides whether the ⁣party⁢ keeps going. Also, take a moment to review​ your Browser⁣ Extensions. Certain add-ons can interfere with ⁣the way videos are played, and in some cases, they might make your playlists behave ‍like a⁣ shy kid at ‌a dance party—just too hesitant ​to join in! Remember, a⁣ little troubleshooting can ​go a long way in returning your playlist to its vibrant ⁣self.

Tuning Your Settings: Adjusting YouTube for Seamless Playlist Enjoyment

Tuning Your ‍Settings: Adjusting YouTube for Seamless Playlist Enjoyment

⁢ Having a seamless playlist experience on YouTube​ is ⁣like having⁤ a great road trip ​without⁤ the need for pit stops. But what if your playlist isn’t ‌autoplaying? Usually, it boils down to a few tweakable ⁤settings. ​First, check⁤ that your ​autoplay‍ feature is​ toggled on! It’s as ‌simple as⁢ flipping a light ⁣switch—find the small slider ​near your video player and ⁢make⁣ sure it’s activated. If it’s greyed out,⁣ that​ might mean your⁢ account settings have something ‌amiss. Give⁢ your ​browser a refresh or, better ⁢yet, switch it up and try another browser to ⁢see if⁤ it’s a compatibility issue.

⁤ Another hot spot to ​look at is your account preferences. Dive into the account settings like you’re⁢ exploring a ⁣treasure chest. Here, you’ll find options⁤ that dictate‍ how your playlists behave. Spend a moment to double-check things ‌like *“Restrict Playback”* or *“Playback​ Controls.”* Adjust these settings ⁤to allow for a free-flowing experience where songs transition ⁤smoothly from one ​track to the next.‌ If you’re on mobile, it’s also worth exploring the app’s settings since the mobile environment can sometimes have its ⁣quirks—like a⁢ cat chasing its tail. Remember, a little ⁤fine-tuning ‍can turn that playlist into ⁣a⁢ non-stop party! ⁣

Troubleshooting Tips: Quick⁢ Fixes to Get Your Autoplay Back on Track

Troubleshooting Tips: ‌Quick Fixes‍ to Get Your Autoplay ⁣Back on ⁣Track

If your YouTube playlist has decided​ to take a little vacation from autoplay, don’t ⁣panic just yet—there are⁤ some easy fixes you can try. First off, make ‌sure you’ve checked your autoplay setting. Sometimes, it’s as simple as ‍flipping‍ a switch. You can find this option right under‌ the⁤ video when it’s ‍playing. Is the toggle on? No? Just click it, and ⁤voilà! You ⁢should be back in business. If you’re still experiencing issues, it might ⁣help to clear⁤ your cache and⁤ cookies. Think ‍of your ⁢browser like a messy room; if it’s cluttered and disorganized, things just don’t work as⁤ smoothly. So, a little digital spring cleaning⁤ can really enhance your⁤ YouTube experience!

Another culprit could be the browser extensions you’ve installed. While ‌some of them are super useful, ​others can interfere with how websites function. Try disabling them ⁤one by one,‌ or if you’re game, you can check if the ‍autoplay works in an ‌ incognito ‍window or ⁢a different browser entirely. This​ way, you’ll get to⁣ the bottom of‍ whether it’s your browser or an extension causing the ⁤hiccup. And hey, if you’re using​ the YouTube ⁤app, ensure it’s updated. ​Updates often come ⁢packed with ⁣bug fixes ⁣that can solve your autoplay woes. Sometimes ⁤it feels ⁣like‍ technology has a personality of its own, right? A little tweaking and you’ll​ be back to binge-watching like a pro!

Final‌ Thoughts

As we wrap up our deep dive into⁣ the mysterious⁢ world of YouTube playlists, let’s take a moment to reflect on our journey. We’ve explored all those sneaky​ little settings and ⁢quirks that can throw a wrench in your autoplay dreams. Whether ‍it⁣ was ⁣a‌ hiccup in your internet connection or ‌a simple toggle that needed flicking, we’ve uncovered the tricks to get ⁣your playlist humming along ‌smoothly.

So, next⁣ time you ⁤find yourself in the middle of a binge-watch⁣ and your ⁢playlist ⁢decides to‌ take​ a coffee break, don’t panic! Remember our guide and you’ll be back to enjoying‌ that sweet, sweet‌ autoplay before you⁤ know it.​ After all, what’s the point of ⁤curating that perfect list of jams or educational gems if you have to⁢ manually hit ‘play’ every time?​

Thanks for sticking with me on this⁤ exploration. If you⁣ have any lingering questions or maybe even a DIY hack of your own, feel free⁢ to drop a comment below. ​Happy streaming, and⁣ may your ⁤playlists flow endlessly!​ 🌟

Simple Steps to Disable HDR on YouTube via Reddit Tips

Ever ⁣found⁤ yourself squinting at‌ your ‌screen, ⁣wondering why that vibrant YouTube video looks more like a washed-out painting than a masterpiece? If you’ve ​ever wrestled⁣ with ⁢the‍ glowing world​ of HDR (High Dynamic ​Range) and its⁢ sometimes ‌over-the-top antics,‌ you’re ⁣not ⁢alone! Many folks ⁣are​ turning to Reddit for tips⁣ and tricks⁤ to tame this vibrant beast. If​ you’re looking to dial down⁢ the ‌intensity ⁤of your ‍viewing experience‍ and get back to enjoying videos as they were meant to ⁤be seen,⁤ then⁣ you’re in the ⁤right place. Here’s a down-to-earth guide ‌to help ‍you ‍disable HDR⁢ on⁤ YouTube with insights⁣ straight from Reddit’s ⁣treasure trove of knowledge. ‌Let’s smooth out those ⁤overblown colors and ‍get things back to basics!

To kick⁤ things off, you’ll want to dive ⁢into the​ YouTube app or ‌website and get comfy. Look ⁤for ​your profile icon tucked away in the corner—like‍ a ⁣little treasure⁣ waiting to be found. From there, just click ⁤on “Settings.” It’s like⁤ your control panel for all things⁤ YouTube. In the ‌settings menu, head to “Quality” and then peek into “Playback.”⁤ This ​is where the magic happens!‌ If your⁢ device⁣ has⁤ HDR enabled and you find that⁤ the‌ colors⁣ seem a little too​ vivid or your playback isn’t as smooth as you’d like, it’s time to turn off that setting.⁣ Look for the⁤ HDR toggle and flip it⁢ off like you’re switching off a light that’s a‌ little too bright ⁣for your tastes.

Next up, ⁣you might want ‍to ‍check ⁢if⁣ you⁤ have specific restrictions​ on the quality settings‍ of⁤ your videos. Some smart tricks from Reddit folks suggest limiting ‌the resolution manually. After navigating ⁤to settings, you can set a maximum ‌quality level ⁣that ‍feels best for ​your viewing pleasure. Just remember, sharper ​doesn’t always ⁣mean better,⁣ especially if it’s leaving you ⁤buffering like a kid in‍ a candy ‍store ⁤waiting to choose their​ favorite ‌treat. Here’s a‍ quick table to ‌help you‍ remember the settings:

Action Steps
Open YouTube Settings Click your‍ profile icon
Go to Playback Select “Quality”
Disable HDR Toggle off the HDR ​option
Set Maximum Quality Choose ⁣a⁢ preferred resolution

Navigating ‌YouTube’s Settings ‌for a‌ Smoother ‍Viewing Experience

Reddit’s Hidden‌ Gems: Community Tips ⁢on Disabling ‍HDR

If you’ve ⁤ever ⁢found yourself ⁢watching YouTube videos⁤ only to ​be distracted by⁢ the ​glaring brightness of HDR, ⁢you’re not ⁤alone. Many users on Reddit have shared their ‍frustration, leading to clever ways of ⁢turning it off. Here’s what you can do:

  • Check Your ⁢Settings: Head to your⁤ YouTube app and tap on your‍ profile ‌picture. Look for​ Settings and ⁣navigate to Playback and performance. You’ll find an option ‌for Enable HDR—toggle ​it​ off!
  • Video⁣ Quality Control: Another ⁢slick ​tip ​is ‌to actually ⁢control the video​ quality during playback. While watching, click on ‌the‍ three dots (or ⁢the gear ⁣icon) and ‌select Quality. Choose a lower ​resolution ⁢like 1080p to bypass HDR settings that may automatically adjust.

A little creativity goes a‌ long ⁣way‌ when tweaking your viewing experience! If ⁣you’re watching on a⁣ smart⁤ TV ⁢or console, check if HDR is enabled‍ in the⁣ device’s system ​settings. Here’s a quick⁢ breakdown:

Device Settings‍ Location
Smart TV Menu ⁣> Picture > Advanced Settings
Game ​Console Settings > General > TV and display options

This proactive approach ‍can save you ⁣from squinting at those overly bright⁤ videos ⁤while⁤ ensuring you enjoy your favorite‌ content just the way you like it. Whether you’re ‍gaming or binge-watching, these ​little tweaks can ‌make all ​the ⁢difference!

Reddit’s ⁤Hidden Gems: Community ‍Tips​ on Disabling HDR

Why You Might Want to Turn Off HDR and What It⁤ Means for You

Turning off⁤ HDR can actually​ enhance your⁢ viewing​ experience on YouTube, especially if you find that the colors ​in your‌ videos​ appear too exaggerated or​ unnatural. When HDR (High Dynamic Range)‌ is enabled, it​ boosts ⁤the contrast and ‌vibrancy to ⁤make images pop,​ but ⁢this can ⁢sometimes‍ lead to over-saturation. ‍If you’re‍ scrolling ⁤through videos and ⁤everything looks⁤ like it’s bathed in neon light, ⁤you ⁣might prefer a more ‌balanced ‌color palette that⁢ standard⁤ dynamic range offers. The⁤ reality is, not​ all content benefits from ⁤HDR; ⁢sometimes, ⁢simpler is better.

Additionally, disabling HDR⁤ can‍ improve playback performance on devices that struggle with higher ​resolution settings. If you’ve ever experienced buffering or lagging while watching a video,​ switching off HDR could help smooth things⁣ out.⁤ Here’s why it might be‌ worth ⁢considering:

  • Better⁢ performance: It reduces the strain⁣ on your device, ⁤which ‍can lead to a smoother streaming experience.
  • Less ⁤eye ⁣strain: For some, the intense​ contrast can ‌be harsh⁤ on the eyes during ⁣long⁤ viewing sessions.
  • Wider compatibility: Not ​all devices ​handle HDR well, so ‌turning it off⁢ can lead to a⁤ more consistent quality across various screens.

Why You Might Want to Turn Off⁤ HDR⁣ and What It‍ Means for You

Step-by-Step ⁢Guide: A User-Friendly Walkthrough to Disable HDR

Disabling HDR on YouTube ‍isn’t rocket science; it’s more ⁣like turning off a pesky⁢ light when you’re trying to create the perfect mood. First off, hop ​onto YouTube and ⁣play any video of your choice. Once the video is ​rolling, look​ for ‌the gear icon (settings) ​ in the bottom ⁢right corner⁤ of ⁤the player. Clicking‌ that will reveal a menu ⁤where you should see the “Quality” option. Select ‌this, and if‌ HDR is enabled,⁤ it’ll usually show up here as a ⁤part of the⁢ resolution options. Lowering the quality⁢ might ⁤just‍ disable that‍ fancy ⁣HDR effect and give you a smoother viewing ​experience on less-capable screens.

If you’re still seeing those bright highlights‌ and dramatic contrasts that HDR​ brings,‌ it might ‌be‍ time to check your overall‌ YouTube‌ settings. Go to your account settings by clicking on your profile⁤ icon⁢ at the top right.⁣ From there, navigate‌ to​ “Playback‌ and‍ performance,” ‍ and you’ll‍ find an⁢ option to​ disable HDR playback entirely. This ⁤way, YouTube won’t‌ even think about ‌serving you HDR content, keeping it simple and uncluttered for your viewing ‌pleasure. It’s⁤ like decluttering your mind after ​a long day—just ⁣a few clicks ‍can⁤ clear things up!

Step-by-Step Guide: A User-Friendly ‍Walkthrough ​to Disable HDR

Wrapping Up

And there you have it—disabling HDR ​on YouTube using​ those nifty ⁤Reddit ​tips is as easy ‌as⁤ pie! ⁢Whether⁢ you’re​ looking to reduce buffering or just want ⁤a more comfortable ⁢viewing experience, ⁤these simple steps⁣ can make a world of difference. ⁣It’s ‌like tuning ‌a radio: ‍all‍ it takes ‌is a​ little adjustment,⁢ and suddenly everything⁤ sounds⁣ so much clearer.

So, the next ‌time you’re diving into your favorite videos, you’re ​equipped to ensure⁣ that playback‌ runs⁤ exactly how you like it.‍ Don’t forget, you⁤ can always revisit​ those handy⁢ Reddit threads for more tips‌ and ⁤tricks, or share⁤ your​ own​ insights with⁣ fellow​ users! After all, ⁢we’re ‍all in this ⁢together, trying to‍ make our viewing ⁢experience the best‍ it can⁤ be.

Happy⁣ streaming!

Easy Steps to Disable HDR on YouTube: A Reddit Guide

Are you tired ⁤of the High Dynamic Range (HDR) videos on YouTube‌ looking a bit too flashy for your taste? You’re not alone! Many‍ users have found themselves wrestling ⁣with the ‌bright colors and vibrant contrasts that HDR brings to the screen. While‌ it sounds ⁣fancy, sometimes you just want a good⁣ old-fashioned viewing ‌experience without the bells and whistles. If you’ve been browsing Reddit for tips ⁢and tricks, you’ve ⁤landed in the right spot!⁣ In this guide, we’ll walk you through some ​easy, straightforward steps to disable HDR ​on YouTube and regain control of your screen. So grab your ⁤favorite ⁢snack, settle in, and let’s⁣ dive into⁢ this friendly how-to that’ll have your⁢ videos looking just the way you prefer them!

Understanding HDR: The‌ Basics⁤ Before You Dive⁣ In

Understanding HDR: ⁢The Basics ⁤Before You Dive⁢ In

High Dynamic Range ⁢(HDR) isn’t just ⁤a‍ fancy tech term; it’s a game changer for ‌how we⁣ perceive visuals. Imagine being able to see the brightest highlights and the darkest‍ shadows in a single frame without those jarring contrasts that can ‍ruin ​your viewing​ experience. HDR⁣ aims to replicate what our eyes naturally see—where bright areas​ pop ⁣and dark ones retain ‌detail. However, not every screen or setup supports ‍HDR equally, which can lead to those frustrating images that look washed out or overly bright. So, before you jump into tweaking settings or switching gears⁣ on YouTube, it’s helpful to know⁢ if HDR is enhancing your ​experience or⁣ just adding unnecessary complexity. ​

When considering whether to keep HDR on or off ⁤in your ⁢YouTube viewing sessions, think ⁤about the following factors:⁤

  • Device Compatibility: Do your ⁢devices support​ HDR?
  • Content Availability: Is ⁢the content you’re watching actually available in HDR?
  • Viewing Environment: Is your room’s lighting conducive to ​HDR viewing?
  • Personal Preference: Do you prefer‍ vibrant visuals or a ‌more⁤ subdued palette?

Understanding these‌ basic concepts will set the stage for a happier ‌viewing​ experience and help you make informed decisions when it comes⁤ to your ‍settings on platforms like ⁢YouTube.

Navigating‌ YouTube Settings with Ease

Alright, ​so you’ve decided to take the plunge and tweak those‍ YouTube settings,⁣ huh? Disabling HDR (High Dynamic‌ Range) can sometimes⁤ make your viewing⁤ experience smoother, especially‌ if⁣ you’re ‍not rocking a fancy 4K setup. First things first, ⁤fire up YouTube and navigate to the Settings ⁤by clicking on your profile icon in‌ the upper right corner. From there, glide on over to Playback and performance. This is where the ⁣magic happens! Here, you’ll find a toggler⁣ for HDR playback. Just click that, and voilà! You’re on your ⁣way to viewing ⁢without the ⁢flashy HDR effects. It’s as easy as pie!

Now, you might wonder what’s the deal with HDR anyway, right? Well, it enhances the​ colors and‌ contrast in ⁢videos, ⁢making them look super‌ vibrant. But let’s be real—sometimes, it ⁤can make things feel a ‍tad too intense, especially on devices that aren’t super ​high-end. If you’re in a low-light environment, HDR might just wash out those cozy hues. So, think of it like ​choosing between a neon-lit carnival and a warm, ⁤candle-lit dinner—it’s all about the vibe you’re chasing while binge-watching. If the butter-smooth experience ​is ⁣what you’re after, going for non-HDR mode⁤ can be your best bet!

Simple Steps to Toggle Off HDR for a Smoother Experience

Simple Steps to Toggle Off HDR for a Smoother⁤ Experience

Disabling HDR on ​YouTube can elevate your viewing experience, especially if you’re⁢ dealing with lag or stuttering visuals. Luckily,⁢ toggling it ‌off is a breeze.⁤ Start by heading over to the YouTube video you’re watching. Click on the Settings gear icon usually found at the bottom right corner‍ of the video player. Once​ you’re in settings, look ‍for the Quality option. This is where the magic happens! Toggle off HDR, and you should see a more⁢ fluid playback that’s easy on the eyes. Isn’t⁣ it nice when tech just works?

If you’re still experiencing hiccups, consider adjusting a few more settings. Flipping HDR off is a fantastic first ​step, but you can also check​ your⁤ internet connection. A weak signal can exacerbate issues with video playback. Make sure to close any unnecessary tabs ⁣or apps that might be ⁣hogging bandwidth. Also, switching to a lower ⁢resolution in the Quality menu can help ⁢lighten ⁤the‌ load. Need⁢ a table to see the options? Here are some handy suggestions:

Resolution Recommended Use
1080p Good for most ⁢high-speed connections
720p Ideal if you experience ‍buffering
480p Best for⁢ slow ‌connections

The Benefits of​ Disabling HDR on Your Viewing Pleasure

The Benefits of‌ Disabling ‍HDR on Your Viewing Pleasure

⁤ Disabling HDR might seem like a weird ‍move, especially when⁣ everyone raves about‌ high dynamic range lighting. But ‍let’s break it down: sometimes, less really is more. ⁣Imagine‍ watching a movie where the colors⁢ are⁣ so over-the-top that they overshadow the actual⁢ story. Disabling HDR⁤ can help restore ⁤some balance to​ your viewing experience, bringing the focus back to stunning visuals rather than overly ​bright highlights that ⁤might wash ‌out ⁤important details. Those deep shadows? They’ll become ​clearer, while‍ skin tones look‍ a⁣ whole lot more natural.⁢ It’s⁣ kind of like turning down a loud music track; you can appreciate the melody ⁣without ​straining⁤ your ⁣ears.

Moreover, if you’re using a budget-friendly ‌device, keeping HDR on might not serve you well. It ⁣can push your hardware to its limits,⁣ which could ⁢lead to buffering or lag.‍ And no one wants that during their binge-watching ‍session!⁤ By disabling HDR, ⁢you can‌ create a smoother experience, ⁣letting you⁤ enjoy those beloved videos⁢ without ‍interruptions.‍ So, if ⁤you’re‍ tired​ of those glaring whites and want to bring⁤ some cohesion back to your screen, consider⁤ giving HDR the⁣ boot.⁢ After​ all, your comfort is what ⁤really matters when it comes to enjoying your ‌favorite content.

The Way Forward

And there‍ you have it! Disabling⁤ HDR on YouTube doesn’t have to feel⁤ like rocket science, especially with the easy-peasy steps we went through. It’s refreshing to ‍see how a little tweak can ‌make your⁢ viewing experience⁣ just the way‌ you like it—more like cozying up with a ⁣good book than bothering with blinding lights!

If you’ve found these ‌tips helpful, why not share your own⁣ experiences ​on Reddit or with friends?⁤ Every bit of advice⁤ helps passed ​along keeps us all in the loop. And remember, YouTube’s⁢ not one-size-fits-all; it’s about tailoring your viewing to fit your vibe. Whether you’re binging your favorite shows, diving into DIY tutorials, ​or catching up on​ the latest viral videos, you deserve to watch in a way that suits you.

So, go ahead—take control ​of that HDR setting and happy watching! If⁣ you have any‌ questions or want to dive deeper into the YouTube universe, just drop a comment below. Until next time, keep those screens​ flickering, and don’t forget to⁣ adjust your settings as ⁤needed; after all, you’re the captain of⁣ this viewing‌ ship! 🌟📺

Mastering YouTube: Quick Tips to Turn Off HDR on Reddit!

As we dive into the colorful world of YouTube, you‍ might find yourself ⁣stumbling upon a feature that⁣ adds a⁤ bit too much ‌flair ​— High Dynamic ⁢Range,‍ or⁢ HDR. While it⁢ can make your ​favorite videos⁢ pop with vibrant colors⁤ and stunning contrasts, sometimes⁢ it‌ just⁢ doesn’t vibe with your viewing experience. Maybe⁤ you’re watching ‍on a device that doesn’t quite handle it well, ‍or perhaps​ you prefer the classic look of standard dynamic‌ range. ⁤Whatever⁣ your reason, turning off HDR can be a game-changer. So, grab your favorite⁣ snack, settle in, and let’s ​explore ⁢some⁢ quick and ​easy tips ⁤to‌ navigate through‍ Reddit and‌ master ⁢the​ art​ of YouTube, ensuring‍ you get that perfect viewing experience ⁤without the flashy distractions. Ready to get started? Let’s‍ jump right in!
Tips for Navigating YouTube ‍Settings Like a Pro

Tips for ​Navigating YouTube ⁤Settings Like a⁤ Pro

Getting the most out of your YouTube experience means knowing⁣ your way around⁣ those pesky settings. If‌ you’re looking ⁤to turn off HDR, you’ve ​got a couple of paths to take. First,​ open YouTube ⁤and click on your profile picture in the top right corner. Go to Settings and from ​there, navigate to Playback ⁢and Performance.​ Here, you will ‍have the ​option‍ to toggle “HDR Video” off. Not ‌sure what’s ‌what? Think ​of it like⁣ adjusting ​the ⁣dimmer⁢ switch on‍ a light—it’s all about​ making‌ the video⁢ fit your ‍viewing style.

But that’s just scratching the⁤ surface! ⁤While you’re in the‌ settings, ‍take the time to⁣ explore other‌ features. You ‌can adjust ​your playback quality, and ⁢toggle options like “Restrict Playback”, and even‌ manage ‌ notifications. Here’s a ​fun‌ fact: Did you know‍ that tweaking ⁣video quality can save you data? If⁣ you’re in⁣ a tight spot ⁤with‌ your data⁤ plan,‌ lowering the ⁣quality⁣ might‍ just ‌be your best friend! Take ⁣a moment to⁤ customize these settings, and you’ll navigate YouTube‌ like ⁣a ⁣seasoned pro.

Understanding‌ HDR:​ Why‍ You Might Want to⁢ Turn⁢ It Off

Understanding HDR: Why You Might Want to Turn It Off

When diving into the world of ‍HDR (High Dynamic Range), it’s easy to get caught up in the hype ⁢of ⁣those⁣ eye-popping ​visuals. Sure, HDR⁣ can‌ make​ your videos look​ stunning with⁤ vibrant colors and ‍deeper contrasts, but ⁤it⁢ can also⁣ be ⁣a ⁢double-edged sword. Sometimes,‌ turning it off can actually enhance your viewing experience. You might notice that HDR can​ exaggerate ‍brightness, causing some details ‌to get washed ⁢out or making ‍dark scenes appear⁤ overly murky. Plus,‌ not all content is mastered ⁤for HDR, ⁢which​ means switching it off can lead ⁢to a more balanced ⁣image.

If you’re wondering why you’d want to give⁢ HDR the boot, consider these‍ points:

  • Inconsistent Quality: Not every video is optimized ‍for‌ HDR, ⁣and you​ might end up with mixed bag visuals.
  • Eye Strain: HDR’s intense brightness ⁢levels can​ lead to fatigue during long viewing​ sessions.
  • Device‍ Compatibility: Some⁣ older TVs​ and​ monitors just don’t⁢ play nice with HDR, ruining your experience.
Pros of HDR Cons of HDR
Vibrant colors Exaggerated brightness
Depth in shadows Possible ​eye strain
More realistic ‍visuals Inconsistent quality‍ across videos

Step-by-Step Guide to Disable HDR on Your Device

Step-by-Step Guide to ⁢Disable HDR​ on Your Device

If you’re looking‌ to tackle the ​vibrant⁢ world of HDR video‌ on your device, you’re in ‍the right place! Disabling HDR can ‍be a game ‌changer, especially ⁤if you prefer a more⁣ classic viewing ‌experience. Here’s‍ how you can do ‌it in just a few ‌easy steps:

  • Device Menu: ‌Start by diving ​into​ the settings of‌ your device.⁣ Look for the display or‌ video settings‍ section.
  • Video Settings: ​Within this section, locate the⁤ option related‌ to HDR⁤ or High‌ Dynamic Range settings.
  • Toggle‌ Off: Once you ⁤find it, simply ‍toggle ‌the HDR ‍setting ⁤off. ⁢Easy peasy!

In‍ certain cases,⁤ like on ⁤smart ⁢TVs ‍or streaming devices,⁤ you might ‌need to access the app ‌settings directly. Don’t sweat it if it seems ​overwhelming – here’s ‍a ⁣condensed‍ version to⁣ guide you:

Device Steps to Disable HDR
Smart TVs Menu > Settings ‌> Picture > HDR Settings
Streaming Devices Settings > ⁣Display⁤ >‍ HDR
Mobile Devices Settings > Display >⁤ Advanced > HDR

Now​ you’re⁣ all‌ set! ‌Enjoy ​your videos without ⁤the extra ‌pop⁢ of HDR, and don’t⁢ forget to experiment with​ other display settings for the best experience!

Troubleshooting‍ Common Issues⁣ with HDR on YouTube

Troubleshooting Common‌ Issues ‌with HDR on YouTube

Trouble ‌with ‍HDR‌ messing up your‍ YouTube experience? ⁣You’re not‌ alone!⁣ Users ⁢often notice that HDR videos can appear washed out or⁢ lack the ⁢vibrant colors originally intended. ⁤First, check your device settings; sometimes ⁤it’s ⁣as simple as toggling HDR on or​ off. Make ⁣sure your display supports⁢ HDR and⁣ that​ it’s enabled correctly. Here are a few⁤ things to look‍ into:

  • Check Display Compatibility: ⁤ Not all screens ⁤handle HDR⁣ well. Verify‍ yours can support ‌it properly.
  • Adjust Playback Settings: Dive into the‌ video quality settings and see if HDR is causing issues.
  • Update ⁤Your App: Ensure you’re on the latest version of YouTube, as updates‍ often fix bugs⁢ related to HDR.

If you’ve tried⁢ all that and still experience issues, it ⁣may be time​ to disable⁣ HDR altogether. Doing this can help‌ restore your ‍viewing experience,⁤ giving you the ‍colors‌ and contrast back that HDR sometimes ‍messes with. Here’s how:

  • Open YouTube ​Settings: Navigate to the app⁣ settings on your device or ⁢website.
  • Find Playback Options: Look​ for video ‍quality⁣ settings.
  • Toggle HDR: Turn it off, ​and see​ if that ⁢resolves the problem.
Issue Solution
Colors appear washed ⁢out Switch off ⁤HDR in settings
Buffering‍ issues Lower⁣ video ⁤quality​ settings
Screen ⁤flickering Check HDMI cables and connections

Final Thoughts

you’re ⁣the ‍one in control!⁣ As the digital ​world ⁣continues to ⁣evolve, mastering⁤ these little‍ nuances can make⁤ all ​the difference for your viewing pleasure.⁣ Keep⁣ experimenting, share your newfound‌ knowledge with your ⁣fellow Redditors, and enjoy ​the content ‍in your ‍preferred style. Until next time, happy watching,‍ and may your streams‍ always be exactly how you like them—just⁤ the right amount ​of color​ and⁣ clarity. Keep it chill!

Mastering YouTube: How to Disable Autoplay Like a Pro!

You’re settling in for a cozy binge-watch session on⁤ YouTube when suddenly, the ​dreaded autoplay feature kicks in, hijacking your viewing ⁤experience. We’ve all been‌ there, right? Just when you’re ready to hit pause on that cute cat⁣ video, ‌your screen is flooded‍ with unrelated content that you never asked for. It‌ can feel like being pulled into a rabbit hole you never intended to explore. But fear not! Disabling autoplay isn’t ⁣just for tech wizards; it’s as easy as pie! In this⁣ article, we’ll walk‍ you through the steps to take control of your ⁣YouTube experience, ensuring you’re the ⁤one calling the⁤ shots.⁤ So grab your favorite snack, and let’s dive into mastering the art of YouTube, starting with disabling that sneaky autoplay ​feature like a pro!
Understanding the Autoplay Functionality and Its Hidden Impacts

Understanding the Autoplay Functionality and Its Hidden Impacts

Autoplay​ on YouTube can sometimes feel like that overly enthusiastic friend who just won’t let a conversation⁣ end. One minute you’re diving into a new ⁢music video, and ⁣the next, you’re two hours deep into a rabbit hole of cat videos or conspiracy theories you​ never intended to watch. This can be great for binge-watching—who doesn’t love ‌a seamless stream of content? But let’s ​face it, it can also lead ​to some serious time-wasting and unpredictable viewing ​sessions. Understanding how this functionality works not only helps you regain control but also gives you a clearer insight into your viewing habits.

When autoplay kicks in, it nudges you toward content similar to what you just watched, which can boost your engagement but sometimes takes you far off course. Here’s a nifty way⁢ to think about it: it’s⁤ like being⁤ at an all-you-can-eat⁤ buffet where⁤ the desserts are‌ always in your line ⁢of ​sight. You might ⁣go for just one meal but end up sampling everything—even ‌the⁢ items you‌ didn’t want. To counter this, you‌ can disable autoplay and put yourself back in the driver’s seat. Here are a​ few hidden​ impacts ⁤ to consider:

  • Improved focus on specific content
  • Less​ time spent endlessly⁣ scrolling
  • More deliberate content choices

Navigating Your YouTube Settings Like a Seasoned Pro

Getting a grip on your YouTube settings ⁢is like​ having a ‍secret⁢ map to a treasure chest—you just⁤ need to know where to look!⁢ To disable‌ that ‌autoplay feature, ⁢head on over to the settings icon, often nestling⁢ in ‍the top-right corner of your ​screen. Click on ⁤it, and a ⁤menu will pop up like a⁢ well-rehearsed ‍magic trick. ⁢From there, tap on “Playback and performance.”‍ Here comes ‌the⁤ fun⁢ part: you’ll see ​the option for autoplay, usually toggled on by default. Just flick that switch off, and voilà! You’ve taken⁢ control of what plays next without the hiccups of those random, ‍“Are you serious?”​ video choices.

But wait, there’s more! If you want to sharpen ⁣your YouTube prowess even ‌further, consider ⁢exploring the following settings that‌ can enhance your viewing experience:

  • Quality Preferences: Adjust the video⁣ quality to save data or improve streaming.
  • Caption Settings: Customize subtitles ⁤for a better comprehension or language​ practice.
  • Notification Preferences: ‍ Decide which alerts ‍are ⁤actually useful to you.

These tweaks can make your YouTube journey not​ just⁢ smoother but also more personalized, matching that⁤ vibe you’re aiming for.​ So go ahead, explore and make YouTube a true reflection of ‌your viewing habits!

Mastering Manual Control for⁢ a Tailored Viewing Experience

Mastering ‌Manual ⁣Control for a Tailored Viewing ⁤Experience

When⁤ it comes‌ to YouTube, having the ability to steer your own viewing experience is huge. Autoplay ‌can feel like ​that friend ⁣who just won’t stop talking, dragging you into a spiral ⁣of endless videos ⁢when all you wanted was a quick watch. Here’s‍ the ​kicker: ‍you can‍ regain control with ‌just ⁤a few clicks. By disabling ‌the Autoplay ​feature, you’re not just pausing the relentless video flow; you’re curating your own personal playlist. Consider it⁣ like choosing your own adventure in a ‌book—only without the risk of a cliffhanger!

To make it happen, follow these simple steps:

  • Log in to your YouTube account.
  • Click on any video to ‌start ​watching.
  • Look ‍for the Autoplay switch right next to⁢ the video player.
  • Toggle it off!

With Autoplay off, you can savor each video, take a breather, and decide what to watch next with intention. It’s like turning down the background noise of‌ a bustling café so you can‍ focus on your favorite playlist. Your viewing‌ experience​ becomes rich and tailored to⁤ your preferences, instead of getting lost in a never-ending video loop.

Tips and Tricks ⁤to Enhance Your YouTube Journey⁤ Beyond Autoplay

Tips and Tricks to Enhance Your YouTube Journey Beyond Autoplay

To elevate your YouTube experience, ‌consider ⁣embracing a more hands-on approach with content curation. Start by creating playlists ⁣that align with your interests. This isn’t just ‌about categorizing videos;⁢ it’s a way to ‍curate your own viewing‌ journey! By grouping videos based on themes or topics, you ​can easily navigate your favorite content without the nuisance of unwanted ⁣autoplay. Also,⁤ don’t forget to explore the “Watch ⁣Later” feature. It’s like a digital bookmark, allowing you ​to save‍ intriguing videos for ​a more⁢ suitable time. Think of ‌it as your ⁣personal To-Do list for entertainment—it ensures you never⁣ lose track of what piqued your interest.

Another fantastic‌ way to ​enrich your viewing experience is to actively engage with your favorite creators and communities. Leave comments, like videos, and subscribe to ⁢channels that truly resonate with you. Not only does this support creators,‍ but⁢ it⁢ also helps YouTube’s algorithm understand your preferences better. The more you‌ interact, the⁣ more tailored your recommendations will become! You might even want ⁤to set aside time weekly to explore content outside your normal genres; ⁤it’s⁣ like⁤ giving your content palette a refresh! Consider diving into live streams or collaborations ‍amongst creators you love—these dynamic ⁤formats‌ can bring a whole new dimension to your viewing​ experience.

Insights and Conclusions

And​ there you have it! Disabling autoplay on YouTube isn’t just ‍a small tweak; it’s like giving yourself a remote control over your viewing experience. You can finally decide what you want ⁤to watch without getting swept away in an endless ‍stream of videos. Think of it as setting​ the boundaries of your binge-watching world—just because one video leads⁣ to another doesn’t mean you have to follow down that rabbit hole.

So, next⁤ time you’re diving into your favorite content, remember ⁣you have the control! Pause, reflect, and pick your next video like⁤ a gourmet choosing their⁤ meal. Ready to take ⁣charge? Go ⁤forth ⁢and watch smarter, my friend! You’re now equipped with‌ the power of knowledge, and that’s what makes you a pro. Happy watching!

Kick Autoplay to the Curb: Your Guide to YouTube Peace

Tired ⁢of YouTube taking control of your viewing experience? You’re not alone! That little ⁤autoplay feature, which promises seamless binge-watching adventure, often morphs​ into​ an endless cycle of “just one more video” ​that‌ leaves ⁢us ⁢dazed, confused, and wondering where ​the last few​ hours went. It’s like a rabbit hole you didn’t even want to ⁤tumble down! But fear not; we’re here to⁣ help you kick autoplay ​to the⁤ curb and reclaim ⁢your precious time. Buckle up for our easy,⁤ step-by-step ‍guide to finding your‌ YouTube ​peace.​ Say ‍goodbye​ to autoplay ⁤chaos and ⁣hello to curated content ⁣that⁣ aligns with your moods and interests!

Understanding Autoplay and Its ​Impact‌ on Your Viewing Experience

Autoplay is like that friend who ‌can’t ⁢take a hint—once you’ve seen one video, they’re ready to⁤ serve up another without waiting for your cue.⁢ While ⁤it might seem convenient to jump from one⁤ clip‌ to the next, this little ​feature can ⁣quickly​ turn your browsing ​experience⁢ into a chaotic marathon. ⁢You’re trying to enjoy that funny cat video, and suddenly you’re knee-deep in a rabbit‍ hole of random conspiracy ⁢theories or makeup tutorials ‍that ‍don’t even pique your⁢ interest. It ‌can become overwhelming,‍ leaving ‍you with ⁣less control over what ⁤you​ actually want to⁢ watch.

Think of it this ⁣way: without autoplay, your viewing​ experience is like savoring a ‌fine wine, ⁣where ‌you can⁣ fully appreciate ‍each sip. You‌ choose⁣ what you want to enjoy, ‍pause if necessary, and ⁤come back ‌for⁣ more⁤ when the mood strikes. Consider these impacts:

  • Loss of⁤ Focus: Easily distracted by the next video.
  • Wasted Time: ⁣Hours lost to unintended viewing.
  • Overstimulation: ‌Too much ⁣content ‍leads to ⁢decision fatigue.

With⁣ autoplay switched ‌off, you reclaim that⁤ control—your YouTube experience is tailored ⁣to your preferences,‌ making it more enjoyable and less like being ⁤on a virtual treadmill!

Understanding Autoplay and Its Impact on Your Viewing Experience

Mastering the Settings: Turning Off Autoplay‌ Like a Pro

Are‍ you tired of being‍ bombarded​ with videos automatically playing one after another? It can feel⁣ like you’re ‍in a never-ending ⁤loop of content that⁢ you ​didn’t⁢ even ask for! Luckily, it’s easy to take control⁢ of your YouTube experience⁣ by turning ⁣off autoplay. Just imagine you’re walking‍ through⁣ a⁢ library, and ‍every book ​you glance‍ at suddenly shouts its ⁤story—overwhelming, right? Autoplay does just that ⁤in‍ the digital world. Here’s how you can click “pause” and reclaim your browsing peace:

  • Open YouTube: ⁤Launch the‌ app or website and navigate to‌ your homepage.
  • Find the ⁣Autoplay Switch: ​Look on the right panel of your screen. The autoplay toggle is ⁣usually by ⁣the⁣ suggested videos.
  • Flip the Switch: Click the‌ toggle to the “off” position.⁣ Voila! No ​more surprises.

Need a little more help? ‍Here’s a quick table summarizing the steps:

Step Action
1 Open ​YouTube homepage
2 Locate ⁤the autoplay toggle
3 Switch ‌it to off

Now you⁢ can ⁢enjoy YouTube at your own​ pace, picking and choosing when to dive into the next video like selecting ​a delicious dessert from a menu⁢ instead ‍of being served one you never wanted.⁢ It’s all about curating⁢ your experience and saying goodbye to that pesky ⁢autoplay ‍feature!

Mastering the Settings: Turning Off Autoplay Like a Pro

Curate Your Playlist: ‌The Art of ​Intentional Watching

⁤ ⁣ Curating your playlist on ‌YouTube isn’t just about ⁣slapping together a‍ bunch of⁣ videos you like;‍ it’s about crafting ⁣a unique experience that resonates with⁢ your mood ⁤and interests. Think of it as assembling a mixtape for⁣ your brain—the⁣ right videos can​ set ⁣the tone⁣ for⁢ your entire day.⁢ Start by diving ‌deep ⁢into what truly engages you.‍ Are you into​ cooking? Maybe documentaries?⁤ Or‍ how about those quirky DIY projects? Instead of letting the algorithm decide, take matters into your own hands. Start⁤ by creating thematic ⁣playlists that reflect⁢ different aspects ⁤of ⁣your ⁤life or interests:⁢

  • Chill ​Vibes – for those lazy Sunday afternoons
  • Learning Zone – to help you pick up ⁢new ⁤skills
  • Workout Boost – ‍to get ⁤your heart​ pumping

⁤ ​ The beauty of this intentional​ approach ⁢is that you get to reignite ⁤your passion for discovering⁢ content,‌ rather than ⁣just‌ being a passive viewer. Think of it as curating your⁤ own ⁤art gallery;‌ you want your‌ visitors—your ⁤viewers—to feel something. So, take the time to dive into your‌ favorite⁣ creators and‌ really dig deep into⁤ their channels. Watch⁣ their older content ⁢to understand ⁤their evolution. You might‌ stumble upon hidden gem videos that resonate with you​ like your favorite song.‍ And remember, you’re the‌ DJ of your⁣ viewing experience! Don’t⁤ hesitate‌ to ‍swap out videos ‌that no longer spark ⁢joy.‌ Keep​ it fresh, keep it exciting; ⁢after ‍all, content should feel like a⁣ journey, not a never-ending ​loop.

Curate Your Playlist: The Art of​ Intentional⁢ Watching

Embrace ‍Mindful Consumption: Enjoying YouTube ⁢on Your Own Terms

When you dive into the sea ​of YouTube ⁢content, it’s easy⁣ to find yourself drifting aimlessly from one video to another,⁤ especially with⁣ autoplay ⁤doing‍ its thing. But⁣ what if you⁢ took the⁢ helm of your viewing experience? Embracing ‍mindful consumption isn’t⁢ about ​cutting yourself off from your favorite creators; it’s​ about savoring‌ what⁤ you watch ⁢and making​ sure that​ every click⁣ counts. We’re ⁤talking‍ about curating your very own ‌mini film festival‌ in the comfort⁣ of your living room.​ By switching off that⁤ *autoplay* ⁤feature, you can take a moment to ⁤reflect ‍between videos and ask yourself, “Is this really ‌what I want⁢ to watch next?”

To get started, consider adopting ⁢a few⁤ simple practices that make your viewing experience ​more intentional:

  • Plan Your⁣ Watchlist: ‍ Create a playlist ‍of ‌videos ⁤that genuinely interest you ‌rather than depending⁣ on what YouTube suggests.
  • Set a Time Limit: Just like binge-watching a series, set a timer to ensure you’re ⁤not‌ sucked into ​endless scrolling.
  • Unplug⁣ Occasionally: Take breaks to⁣ engage ‍in other⁣ activities, ⁤giving your brain a chance to ‍reset and recharge.

Embrace Mindful⁣ Consumption: Enjoying YouTube on Your Own Terms

Key ​Takeaways

So, there‍ you have it—your‌ ultimate game plan ⁢for‍ reclaiming peace ⁣on YouTube! No more frantically reaching for the remote or diving for⁤ the‌ pause button while a barrage of auto-played ⁤videos hijack ‍your ⁤chill time. ⁢With a few tweaks to ‍your settings, you⁢ can truly enjoy your ⁣viewing experience on your own terms. Think of it like taking back control‌ of your own‌ TV show—now you can select the next ⁣episode instead of letting ‍the algorithm‌ decide for ⁤you.

As you ​navigate‍ your way ⁢back to a more ⁣mindful, ‍personalized ​viewing experience, ‍remember that every click counts. You’re not just ​watching; you’re⁤ curating your⁢ own endless playlist, one ​that‌ resonates with you. So kick that autoplay​ function ‍to ⁣the curb, savor every second, and make space⁢ for the content that genuinely speaks⁤ to you. ​You’re not just a viewer; you’re⁢ the director in this theater of ⁣endless possibilities! Happy watching! ⁤🎥✨

Wave Goodbye to YouTube Autopause: Here’s How!

Hey there, YouTube enthusiasts! Have you ever ‌found yourself knee-deep in a binge-watch session, only to be jolted back to reality by that pesky autopause feature? You know the drill: ‌you’re all cozy, popcorn in hand, and just as you’re about to uncover ⁤the next big plot ‍twist, the screen freezes, and you’re left staring ⁢at the “Are you still⁢ watching?” message. It’s like being at a thrilling movie and the projector shuts off just before the‌ climax—talk about a buzzkill!⁢ But fear not, because today we’re ⁢diving⁣ into some⁣ nifty tricks to help you wave goodbye to that unwanted interruption. Whether you’re a​ casual viewer ⁢or a hardcore content junkie, we’ll make sure you can enjoy your favorite videos without those annoying pauses. So grab your remote and let’s get into how you can reclaim⁤ your uninterrupted YouTube ⁤experience!

Unlocking the Mystery: ‍Why YouTube Autopause‌ Occurs and How It Affects Your Viewing Experience

Unlocking the Mystery: Why YouTube Autopause ‌Occurs‌ and How It Affects Your Viewing Experience

YouTube autopause ⁣can be‍ one of the most frustrating features for viewers, like getting a surprise cold splash of water in the middle of a cozy ‌bath. But why does it happen? Essentially, ‍the platform detects inactivity, which means if you step away,‍ whether for a ⁣snack run or ‌a quick bathroom break,‌ it’ll⁤ just⁣ hit⁢ pause. It’s ​like your personal reminder to stay engaged! If you think about it, YouTube wants to keep ⁢those view counts up and make sure you’re not lost in endless scrolling. Ever tried ‌to catch up on a series only to find it’s paused mid-plot twist? Yeah, it can ruin the​ flow⁤ of the viewing experience.

Now, let’s talk about how ‍this ⁢pesky feature impacts your binge-watching sessions. Each pause disrupts ‍your rhythm, right? You might find yourself scrambling to remember ‍where you left off, and let’s be honest, who wants to rewind constantly? This can break your immersion and takes the fun out of getting lost in video worlds. To tackle it effectively, ⁢consider adjusting your‍ playback settings or even using playlists ‌to maintain some ⁢flow. Here’s a nifty table showing some possible solutions:

Solution Description
Playback Settings Adjust⁣ the autoplay feature to keep it going.
Mobile App ⁤Usage Keep the app active by tapping periodically.
Browser Extensions Use extensions to control auto-pause settings.
Monitor Activity Stay engaged, even during breaks.

Your Viewing Preferences Matter: Customizing Settings⁢ to Defeat Autopause

Your Viewing Preferences Matter: Customizing Settings to Defeat Autopause

Ever found yourself in the middle of‌ a thrilling YouTube video, only to be jolted⁢ back to reality when the autoplay feature stops because of inactivity? It’s the digital equivalent of someone hitting the pause‍ button on a movie marathon just when things get juicy.⁢ Fortunately, you have the power ⁢to customize ⁢your viewing⁣ experience to ensure that this pesky autopause feature doesn’t disrupt your flow. ‍By adjusting your settings, you can create a viewing experience tailored specifically to your habits and preferences.

To get started, head to your YouTube settings and ‍dive into the playback section. There, ⁤you’ll discover a treasure trove of options to enhance your viewing. Consider the following tips:

  • Enable Autoplay: This ⁣setting​ keeps videos rolling,⁤ so⁢ you ‍don’t have to lift a finger.
  • Adjust Quality Settings: Lowering video quality can reduce buffering times, keeping⁢ the ⁣action going.
  • Turn Off Data Saver: If you’re on Wi-Fi, turn off this​ setting to improve performance.

Making these simple changes means one thing: uninterrupted viewing pleasure! Getting‌ familiar with these options isn’t ⁣just about convenience; it’s about reclaiming your ⁤time and enjoying ‌your favorite content without the nagging intermissions.

Tech-Savvy Solutions: The Best Tools and Extensions⁤ to Banish Autopause

Tech-Savvy Solutions: The Best Tools and Extensions to⁣ Banish Autopause

If you’ve ever found ‌yourself in the ⁤middle of ⁤an intense‌ YouTube binge,​ only​ to have your videos pause just ​when the action gets good, ‍you’re not alone! Thankfully, there are several tech-savvy solutions out there that can turn that frustration into seamless viewing. Let’s dive into some of the best tools and extensions ⁢that make this annoyance ⁣a thing of the past. One of the top picks is the “YouTube ​NonStop” extension for Chrome. It automatically‌ prevents YouTube from pausing your videos by skipping the ‘Are you still watching?’ prompt. ⁢It’s a⁢ hassle-free fix that enhances your viewing experience without ‌you having to lift a finger!

Another brilliant option is the “Enhancer for YouTube” tool. This extension isn’t‌ just a one-trick pony; it adds a variety‌ of features that can revamp⁣ your YouTube experience. From customizing ⁤video playback speeds to blocking ads, it covers all⁤ bases. What’s more? You can easily toggle the autoplay setting, so‍ your videos keep rolling without interruption. ​Here’s a quick ⁣look at some more handy tools:

Tool/Extension Features
YouTube NonStop Automatically ⁣bypasses the ‘Are you still watching?’ prompt
Enhancer for YouTube Custom playback speeds, ad blocking, and more
Magic Actions for YouTube One-click HD, volume controller, and auto-repeat options

Keep the Good ​Times Rolling: Tips​ for Enjoying Uninterrupted Video Sessions on YouTube

Keep the Good Times Rolling: Tips for Enjoying Uninterrupted Video Sessions on YouTube

Let’s be real: there’s nothing⁤ worse than getting into⁢ your favorite YouTube binge and suddenly, the⁢ video just pauses because you haven’t⁤ moved in⁣ a while. It’s like your comfy couch is⁢ conspiring against you, right? To make sure you’re never rudely interrupted again, ‌try these⁢ simple tricks:

  • Keep Your Cursor Moving: Whether it’s wiggling your‌ mouse or tapping the spacebar occasionally, staying active on the screen can prevent those​ pesky pauses.
  • Auto-Play Settings: Make sure your autoplay is switched on! It’s like setting the mood for a non-stop movie night.
  • Use Background⁤ Play: If you’ve got a Premium membership, take advantage of this feature to listen to videos ​while browsing other apps.

For those who love to customize their experience, check out some browser‍ extensions.⁣ They can help you bypass autoplay restrictions,⁤ and who doesn’t love a good cheat code? Not to mention, you can use the following nifty table to find extensions that suit your style:

Extension Name Features
Youtube Nonstop Prevents autoplay pause for a seamless​ experience.
Enhancer for YouTube Adds custom controls and removes ads.​ Bonus!
YouTube Repeat Loop your favorite videos without ​interruption.

In Summary

And there you‌ have⁣ it, folks! With these tips, you can finally wave goodbye ⁤to that⁣ pesky YouTube autopause feature that’s been interrupting your binge-watching sessions. No more jarring moments ⁤where you’re suddenly thrown out of the zone just because you took a​ bathroom break or your snack run took a tad longer than expected.

So, go ahead and ⁤implement these tricks, and reclaim your viewing experience!​ Whether you’re diving into the ⁢latest series, soaking​ in some insightful tutorials, or enjoying your favorite music playlists, enjoy them​ without interruptions. And hey, if you’ve got any brilliant⁤ hacks or experiences to share, drop them ⁣in the comments! ‍Let’s keep the conversation going — after ​all, we’re in this together on⁣ our journey through the wonderful⁣ world of YouTube. Happy watching, and may your playlists‌ flow uninterrupted! ​🎥✨

Switching Off HDR on YouTube: A Simple Reddit Guide

Ever found ​yourself staring⁢ at a video on YouTube, captivated by the stunning visuals, only to get a ‌bit overwhelmed by the overblown colors and brightness?⁤ You’re not alone. ⁣High Dynamic Range (HDR) can be a game-changer​ in video quality, but it doesn’t always ⁤hit the mark for every display or personal preference. If you’ve⁢ been wishing‌ to dial it‌ back a notch and ‍experience ⁤your ⁣favorite ‌videos in a more traditional color palette, you’re in luck! We stumbled upon a handy ⁢guide on Reddit that walks you through switching off HDR on YouTube. Whether you’re a tech enthusiast or just⁤ someone looking ⁢to enhance your viewing experience, this simple guide will make it easy‍ for you to customize‍ your settings and enjoy your videos the way you like them. Let’s dive in and ​take control of your YouTube experience!

Understanding HDR on‌ YouTube and Why You Might Want to Turn It Off

Understanding HDR on YouTube and Why You Might Want to Turn⁤ It Off

High ‌Dynamic Range (HDR) is like the fancy dessert topping of video⁤ content—great in ‍theory, ⁣but it might not ⁢always be​ to your ⁣taste. When ⁣you enable HDR on YouTube, you’re diving into​ a realm where colors pop, contrast is enhanced, and shadows have depth. This could sound like a visual ⁤feast for your eyes,⁣ but not everyone has the best equipment to handle those vibrant colors. Ever noticed‍ how⁢ some⁣ videos look​ washed out or‌ have weird color casts when viewed⁣ in HDR? That’s because not⁢ all ‌screens are HDR-compatible, and your device might be struggling to ​process that extra pizzazz.⁣ If your monitor or TV⁢ isn’t up to snuff, watching an⁣ HDR ‍video could feel more like a headache than a treat.

So, why might‌ you want to turn it off? Think about your viewing⁣ experience. If you’re trying to binge your favorite show or catch⁣ up ⁢on the latest music video, a smoother, more consistent picture might ⁤be more enjoyable than one that occasionally goes haywire.⁣ The benefits of ‌HDR are diminished on devices⁣ that can’t appropriately ⁣showcase those​ enhancements. Plus, there’s ⁢the issue of buffering and loading times during⁤ streaming, ⁢which ‍can be a‍ real buzzkill when you’re itching to ​dive into ‍some great content. The reality​ is that⁢ sometimes, keeping things simple ‌means more enjoyment. Who needs the extra visual flair when the ⁣fundamental joy of video watching remains blissfully unaffected?

Step-by-Step Guide to Disabling HDR on Different Devices

Step-by-Step Guide‌ to Disabling HDR on Different Devices

Disabling HDR to get⁣ a more⁣ classic viewing experience on‌ YouTube is easier than​ pie, no ​matter⁣ what device you’re using. For ⁣ smartphones, head⁢ over to your Settings. Look for the Display option, and you might see a⁢ toggle ‌for HDR. Just turn it​ off, and ​you’re set! On tablets,​ the process is typically similar, but you’ll ⁤want to check any specific ⁢settings in the⁣ YouTube app⁤ itself, as sometimes‌ those in-app options give you direct control—just head to Settings and look under‌ Quality.

For those ⁤using⁤ a computer, it’s​ a bit different. Open‌ YouTube in your browser, ‌click ⁤on your ​profile⁤ icon, and navigate ‍to Settings. From ⁣there, look for the Playback and Performance section‍ and find the ⁤option for​ HDR. Make sure to disable it! If you’re using a⁢ smart TV, grab your remote, go into Settings, and ⁣check⁤ under the picture settings. ⁤The steps⁣ might vary slightly depending ​on your TV brand, ⁢but once you find that HDR toggle, switch it ‌off, and ‍you’ll ‍be back⁢ to regular viewing in no time!

Device Steps to Disable HDR
Smartphone Settings → Display → Turn Off HDR
Tablet YouTube ‌App → Settings ​→ ⁢Quality‌ → Disable ‌HDR
Computer YouTube → Profile Icon →​ Settings​ → Playback &⁤ Performance → ‍Disable HDR
Smart TV Settings ⁤→⁤ Picture Settings → Turn⁣ Off HDR

Common ⁤Issues with ‌HDR Playback and How to⁢ Troubleshoot Them

Common Issues with HDR‍ Playback and How⁣ to Troubleshoot Them

When⁤ diving into HDR content ‌on YouTube, you might encounter a few⁣ hiccups that could leave you scratching your head. For starters, if your television​ or monitor isn’t properly calibrated, you may notice strange color ‌artifacts or​ that ‍the image looks washed out. This⁣ is usually a result of compatibility issues between your ​display ​and the‍ HDR format. Make sure your‍ device​ supports HDR by checking the specifications—sometimes ‍it’s not ⁤as straightforward as it seems. Adjusting settings in your TV or streaming device can ‌often resolve these problems. Ensure that HDR is enabled in both the YouTube app and your device⁤ settings. If ⁢everything ‍seems fine but ‍issues persist, ⁣try rebooting your devices or updating ‌the firmware; you’d be surprised how many problems this simple step can fix.

Audio can also be a sneaky culprit in HDR playback. You might find that⁤ your audio is⁢ out of sync or, worse, nonexistent.​ This often occurs ⁢due to mismatched formats between your audio ⁢system and video. To⁤ troubleshoot, first, check‌ your audio settings‍ in YouTube—select the correct audio output if you’re ⁢using external⁤ speakers or a soundbar. If you’re experiencing lag, use the audio delay settings available on many smart TVs. Sometimes, resetting the audio settings can‌ make all the difference. Here’s a quick look​ at common settings ‌to check:

Issue Potential Fix Notes
Colors looks off Check HDR‍ settings Calibrate ⁢your display
No audio Verify ‌audio output Reset settings if required
Image lag Configure video settings Use “Game⁣ Mode” if available

Enhancing Your Viewing Experience: Alternatives to HDR on YouTube

Enhancing Your Viewing Experience: ⁤Alternatives to HDR on YouTube

When you ⁣dive into ⁣the ⁣world of YouTube, sometimes the glimmering brightness of HDR (High Dynamic Range) ⁢can ⁢overshadow your viewing pleasure. It’s like sitting⁣ in a fancy restaurant but realizing you’d rather eat at your favorite‍ burger ⁤joint. ​Adjusting the settings can significantly change your experience without compromising the content you’re playing. If HDR isn’t your ‍thing, consider ⁣alternatives ⁢that can still make your⁤ videos pop! ⁤Here are⁤ some options to enhance your experience:

  • Smooth Playback: Switching to 30fps ​can make⁣ fast-paced videos more⁣ digestible, keeping everything fluid without ‍the eye-watering brightness.
  • Brightness & Contrast Adjustments: Tinkering with your screen’s brightness ​or contrast settings ‍can help dial down⁤ that intense⁤ HDR glow.
  • Color Filters: Use color ⁣filters to give your videos that unique flair without the intense ​brightness HDR throws ‍at ​you.
  • Quality Settings: Opting for lower resolutions ⁤like 720p ⁤or 1080p can​ reduce strain on your device’s capabilities‍ and provide a more consistent picture.

Let’s talk about your screen⁢ settings. If your display has options like “Movie” or “Game” mode,⁣ don’t hesitate to ⁢explore! Switching‌ modes ‌can enhance‍ color representation, making your content feel more ​alive without being overly intense.‍ You can even create a⁢ customized profile tailored to your watching habits. Here’s a mini⁣ breakdown:

Mode Type Effect
Movie Soft⁤ color gradation, less brightness
Vivid Bright colors, more⁤ HDR-like
Game Enhanced response, richer visuals
Standard Balanced settings ‍for everyday use

Experimenting with these settings can lead to the perfect ‌viewing experience without the overwhelming brightness⁣ of HDR. It’s all about finding what feels ⁣right for you! So, don’t be afraid to mix​ things up—your movie nights will thank you!

Closing Remarks

And there ‌you have it—your⁤ no-nonsense ⁤guide to switching off ⁢HDR on YouTube, ⁤straight from the folks on Reddit who know⁢ their stuff!⁣ No ‍more squinting at overly bright ⁤scenes ‌or colors that‍ look like they’re auditioning for a⁢ technicolor ⁤dream. Whether you’re binge-watching your favorite series‍ or diving into the latest gaming content, enjoying that perfect visual experience is⁤ just⁢ a few clicks away.

So, next time you’re‌ diving ⁤into the YouTube rabbit hole, remember you’ve​ got ⁢the power to tailor your viewing ⁢experience to⁤ your ‍liking. If you‍ have more tips or tricks, don’t‌ hesitate to share them! Let’s‍ keep this conversation ‍going, because there’s‌ always something new to ⁣learn‌ and share. Happy watching!⁣ 🍿✨

Mastering YouTube: Tips to Disable Autoplay for Good!

You ever sit down to watch just one video on YouTube and suddenly find ⁤yourself three hours⁣ deep in an algorithmic rabbit hole? Yeah, been⁤ there. It’s​ like that moment when you say, “I’ll just have one cookie,” and ⁢somehow end up ⁤with a ⁤whole plate ⁤gone. Autoplay can be a double-edged sword—super convenient but ‍also ​a sneaky time thief. ⁢Whether you’re ​trying to focus on a task ​or just​ want ⁣to avoid the endless spiral ⁢of ‍dog videos, disabling ⁤autoplay can be your ‍best bet. So, ​let’s dive into some straightforward tips and tricks that’ll ‍help⁢ you take back control of your viewing experience and keep those distractions at bay for‍ good!

Understanding YouTube Autoplay and Its Impact‍ on Your Viewing Experience

Ever found yourself diving deep into⁤ YouTube, only to be sucked into⁤ an endless loop of videos that you never meant to​ watch? That’s the magic—and sometimes the menace—of autoplay. It’s like‌ that ‍irresistible snack you can’t stop⁣ munching⁢ on⁣ while binge-watching your favorite series. ‍While autoplay can create a seamless viewing experience by suggesting videos you’re​ likely to ​enjoy, it can quickly turn into⁢ a rabbit hole of distractions. You start with one cat video, and before you⁤ know it, you’re knee-deep in conspiracy theories about why ‌cats are actually aliens! The problem is that it can disrupt your viewing⁤ intentions and lead ‌to less control over what you really want to watch. So, why not⁣ take the reins back?

Turning off autoplay isn’t just about personal preference; it’s⁢ about reclaiming your ⁣time and attention⁢ when ​navigating⁢ through the vast ocean of content. Here‍ are a few tips to help you out:

  • Visit Settings: Check your settings by tapping on your profile icon.
  • Autoplay Toggle: Flip ‍that switch⁢ off for both your web and mobile app.
  • Thoughtful Viewing: Choose videos mindfully, instead of letting algorithms⁢ dictate ⁤your next‌ click.

It’s ⁤almost ​like ‍a buffet; it’s easy to⁢ pile everything on ⁤your plate, but focusing‍ on what you truly want can make for a more‌ satisfying meal! With ‍a‌ little effort, you’ll create a more tailored viewing experience that doesn’t just leave you mindlessly watching, but instead makes ​every click count.

Understanding YouTube Autoplay and Its Impact on⁢ Your Viewing Experience

Simple Steps to Turn Off Autoplay on Your Devices

Ever find yourself entrenched in ⁤a YouTube rabbit hole ⁣thanks to that⁢ pesky autoplay ⁤feature? You’re not alone! ⁣Turning off autoplay is a breeze and can save you from sleepless nights spent watching cat videos. Here’s how to do it on your devices: for ⁣ desktop, simply ⁣go ‍to the YouTube homepage, play any video, and look for the Autoplay switch on the right⁤ sidebar. Just⁣ a flick of that toggle, and you’re set! On mobile, play a video, tap the Autoplay icon right below the⁣ video, and watch it change from blue to ‍gray. Boom, you’ve taken control!

If you’re using smart TVs ‌or streaming devices, the process⁣ is similarly straightforward. Grab your ⁣remote and head to the settings within the‍ YouTube app. Look for the general settings ⁢and just like touch screen devices, find the Autoplay‌ option to toggle it off.⁢ And don’t forget—if you⁢ make changes on one device, they don’t always ⁤sync across ⁢others, so double-check in case you need ⁣to switch off autoplay elsewhere! ⁣It’s like gathering all‍ your ‍ducks in⁣ a‍ row; ‌once they’re aligned, you can‍ sit back and truly enjoy your​ content without interruptions!

Simple Steps to Turn‍ Off Autoplay on Your Devices

Customizing Your Settings for a Seamless‌ YouTube Journey

Getting your YouTube experience​ just right starts with diving into those settings. Think of it like customizing your car’s interior—you want to make sure everything fits your⁣ style. To disable autoplay, ⁣head on‌ over ​to ​the Settings icon in your YouTube profile. Once inside, navigate⁤ to the Playback and performance section. Here, you’ll find the nifty little toggle for Autoplay. Just flip ‌that switch off, and before you know it,⁣ YouTube will stop‍ automatically rolling into the‍ next ⁣video. You’re in control now, and it’s‌ pretty‍ liberating, isn’t it?

But wait, there’s more​ you can do ‌to streamline your watchlist! Checking⁢ out your Watch later list is like having a ​snack ​jar filled with ⁣all your favorite treats.‍ Just visit your library and click on Watch later to see​ what you’ve saved. If you find videos ‍you no longer want, it’s a ⁤breeze—just click the ‘X’ to remove them. Plus, consider customizing your subscriptions! By hitting ⁤the bell icon next to your favorite channels, you’ll get notifications that matter most to ⁣you, ensuring you never miss a beat without ​the chaos of unwanted content. Tailoring‌ your ⁤experience makes a world ​of difference!

Customizing ⁣Your Settings for a Seamless YouTube Journey

Exploring ‍Alternative Methods to Control Your ⁣Watching Habits

Ever found yourself deep in⁣ a YouTube binge, wondering how you got from watching cute cat videos to a full-on documentary about cave ⁢paintings?⁣ Yeah, we’ve all​ been there. To tackle those unintended marathons, consider trying ‌a few alternative methods to ‌take control of your viewing habits. First up,⁤ it’s time to embrace manual navigation! Instead ⁢of letting the ‌platform serve you the next video on a ⁤silver platter, create your own watchlist. Having a set playlist is like having a GPS‌ guiding⁢ you through‌ your digital ⁤journey—no detours into the land of endless scrolling.

Another strategy revolves ​around‍ setting ⁣boundaries for yourself. This could be as simple as designating specific times for YouTube or using timers to limit your sessions. Here’s an idea: why not create a fun, visual chart to track⁣ your ‌watching habits? Take a‌ look at this simple table showcasing different time ‍slots and the types of content you want⁢ to ‍explore ⁤in each.

Time Slot Content‍ Type
7 AM – 8 AM Educational ‍Videos
3 PM – 4‌ PM Short Documentaries
8 PM – 9 PM Entertainment

This​ way, you can maintain ​focus while also indulging in what you love ⁢without veering off the ⁢path. Remember, conquering YouTube ⁣is all‍ about creating opportunities ‌for intentional ‍viewing. ⁣So ⁣grab that remote and take the reins!

Exploring Alternative Methods to Control Your ⁢Watching Habits

Closing ⁢Remarks

And⁤ there⁤ you have it! With ‍these handy tips, ⁣you’re​ all set to take control of your YouTube experience. Disabling autoplay isn’t just about ⁣giving you more ⁤control over ⁣what ⁤you watch; ⁢it’s your way of reclaiming those ⁢precious moments that could easily ‍be swallowed‌ by an endless stream of videos. Remember, you’re not just⁣ a viewer; you’re the ‌captain of your own​ viewing ship! So why let YouTube decide your​ destination? Take the reins and ‌dive into content on your own terms.

Give yourself the ‌gift of intentional viewing—whether it’s fine-tuning your playlists, revisiting old ⁣favorites, or discovering ‌new gems, ‍the choice is‌ yours! If you found these ⁤tips helpful, don’t⁣ keep‌ them to yourself; share them ⁣with friends ‌or drop a comment below about‍ your favorite YouTube moments. Here’s to‍ a more purposeful⁣ and enjoyable YouTube journey—happy watching, ⁣and may⁢ your recommendations always be ⁤a reflection of your interests!