Ever thought about diving into the exciting world of YouTube livestreams but felt a bit overwhelmed? You’re not alone! Navigating the ins and outs of live broadcasting can seem as daunting as trying to assemble IKEA furniture without the instructions. But fear not! With Hudl as your trusty sidekick, mastering YouTube livestreams can be as easy as pie. In this friendly guide, we’ll stroll through the essentials, sprinkle in some tips, and help you set up a stream that not only captivates your audience but also feels like a natural extension of your personality. So, grab your favorite snack, get comfy, and let’s jump into the vibrant universe of livestreaming together!
Crafting Your Livestream Blueprint for Success
Starting your YouTube livestream journey isn’t just about hitting the “Go Live” button; it’s about creating a structured approach that keeps your viewers engaged and coming back for more. Think of your livestream as a dinner party: you want to lay out your dishes beautifully, have great conversations, and guide the night along smoothly. To achieve this, outline your key objectives. Are you aiming to educate, entertain, or promote a product? Pinning down your goal is like knowing your menu—it sets the tone for everything else. Plus, consider the flow of your stream. You might want to break it into segments, like an appetizer, main course, and dessert, to keep things digestible and lively.
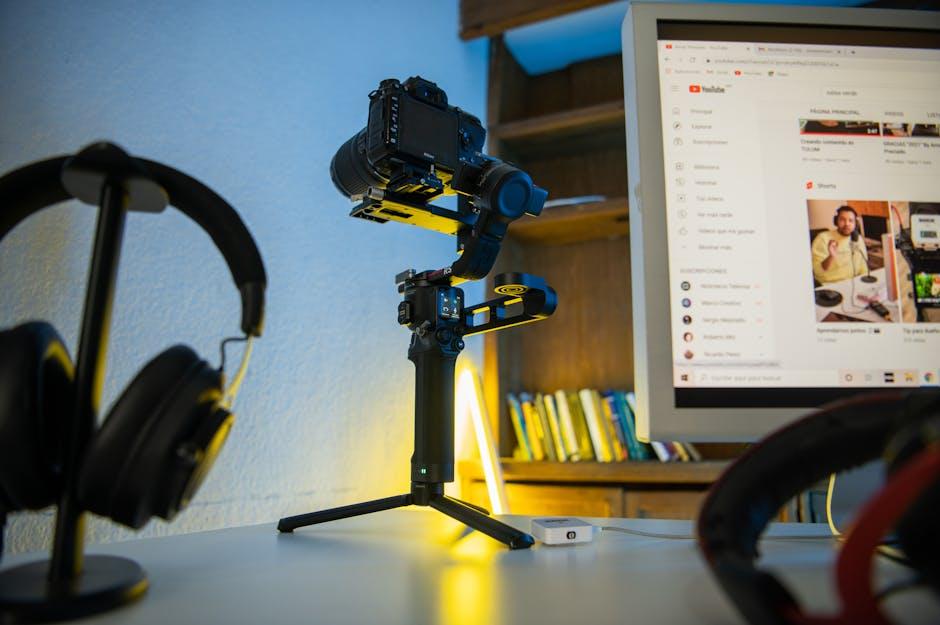
Don’t skip the tech setup, either! It’s like ensuring your kitchen is stocked and your utensils are ready before you start cooking. Test your equipment—camera, microphone, and streaming software—because nothing’s worse than technical hiccups during showtime. Make a checklist to keep you on track. You’ll want to include key elements like:
- Choosing the right platform for your audience.
- Creating visually appealing graphics or overlays.
- Engaging with your chat in real-time.
- Having a backup plan in case of tech failures.
When you think ahead and have a solid plan, you’re not just preparing for a livestream; you’re crafting an experience that feels seamless. Trust me, your viewers will appreciate the extra effort, and those repeat attendees will feel right at home, just like loyal dinner guests!

Navigating the Hudl Interface Like a Pro
Learning to navigate the Hudl interface can feel like stepping into a new world, but once you get the hang of it, you’ll find it quite intuitive. First off, take a moment to familiarize yourself with the dashboard; this is your command center. Here, you’ll see options like Live, Games, and Highlights right at your fingertips. Just think of it as your remote control for an epic game night—you’ll want to know where everything is so you can switch seamlessly between plays. Dive into the video library where you can sort through past games using filters like date, opponent, or even player—it’s like organizing your favorite playlists!
Next, let’s dig deeper into the live streaming features that Hudl offers. Setting up a livestream is a breeze, and you’ll definitely appreciate the customization options. You can add overlays, adjust the camera angle, and even include the scoreboard—it’s like dressing up your favorite outfit for a big night out, making sure you look sharp! Don’t forget the chat feature; it keeps everyone connected during the stream, creating that electric atmosphere that makes live sports so enjoyable. Just glide through the interface, and you’ll soon feel like a pro, capturing every thrilling moment and engaging with your audience like a true champion.

Engaging Your Audience: Tips and Tricks for Real-Time Interaction
Interacting with your audience during YouTube livestreams can bring your content to life in ways that pre-recorded videos just can’t match. Ready to get that chat buzzing? Ask open-ended questions! Instead of simple yes or no queries, throw out some thought-provoking prompts that invite viewers to share their opinions or experiences. For example, if you’re discussing a game, ask your audience, “What’s your favorite play of all time and why?” People love to share their stories, and this not only keeps the chat lively but also creates a feeling of community. Add some polls and live quizzes during the stream to keep the excitement flowing. Who doesn’t enjoy a little friendly competition? It’s like running a game show right from your living room!
Another great way to engage is by making your viewers feel noticed and appreciated. Shout-outs are a fantastic way to achieve this; acknowledge users by name when they comment. It’s the digital equivalent of giving a warm wave across the room. You could create a simple table to showcase your loyal fans, highlighting their contributions or questions. Here’s an example:
| Username | Comment |
|---|---|
| SportsFan123 | “I loved that last play!” |
| GamerGal | “What’s your prediction for the next match?” |
These interactions can create a vibe that encourages viewers to stick around and engage with one another—essentially turning your stream into a mini-event that feels special. So, roll up your sleeves and embrace the energy of real-time interaction; it makes the experience unforgettable for both you and your audience!
Analyzing Your Performance: Leveling Up Your Streams with Insights
When it comes to leveling up your livestreams, insights are your new best friend. Dive into your analytics dashboard and start exploring those numbers. What’s your average viewer count? Which streams had your most engaged audience? By focusing on metrics like watch time, chat interactions, and even view durations, you can get a clearer picture of what resonates with your viewers. Think of it like peeking behind the curtain—suddenly, you’re not just another creator; you’re a detective solving the mystery of audience engagement.
Don’t overlook the power of feedback! Encourage your viewers to drop comments or participate in polls during the stream. It’s like having a focus group right in your chat. Here are a few key areas where insights can make a huge impact:
- Content Type: Are tutorials pulling in more viewers than gaming streams?
- Timing: Do your fans prefer tuning in on weekends or weekdays?
- Viewer Geography: Is your audience primarily local, or do you have an international fanbase?
Once you’ve dug deep into your analytics and gathered feedback, you can start crafting your future streams like a seasoned chef perfecting a recipe. Adjust ingredients, mix in new styles, and before you know it, you’ll be serving up content that keeps fans coming back for seconds!
Wrapping Up
So there you have it! You’re now armed with all the tricks and tips to conquer your YouTube livestreams using Hudl. Think of it like a friendly gathering where you’re the star of the show—keeping your audience engaged and entertained while showcasing your unique flair. Just remember, every livestream is a chance to connect with your viewers, so bring that energy and creativity!
Don’t forget, practice makes perfect. The more you go live, the more comfortable you’ll become in front of the camera, and the better your streams will get. Remember to keep your setup tidy, engage with your audience, and sprinkle in those Hudl features that keep everything running smoothly.
So, hit that “Go Live” button! Your viewers are waiting, and it’s time for you to shine. Happy streaming, and may your audience grow as fast as your excitement!