Mastering YouTube: A Simple Guide to Deleting Playlists!

Are you feeling a little overwhelmed by the playlists ⁤piling up on your ‍YouTube account? You know, those collections that started as a⁤ way to organize your favorite ⁢songs,‌ tutorials, or cat videos but have somehow morphed ⁣into a digital clutter of chaos? ⁤You’re not alone! In this age of endless content, it’s all too easy to create playlists that no longer serve our interests. But ⁤here’s the bright side: deleting those unwanted playlists ​is as simple as pie! Think of it like spring cleaning for your YouTube. In this easygoing guide, we’re going to walk you through the process of mastering‍ the art of playlist management, ensuring ‍you can reclaim your channel and⁣ enjoy a more streamlined viewing experience. So ⁤grab a comfy seat, and let’s⁤ dive into how you can tidy up your YouTube⁤ playlists with a few straightforward steps!

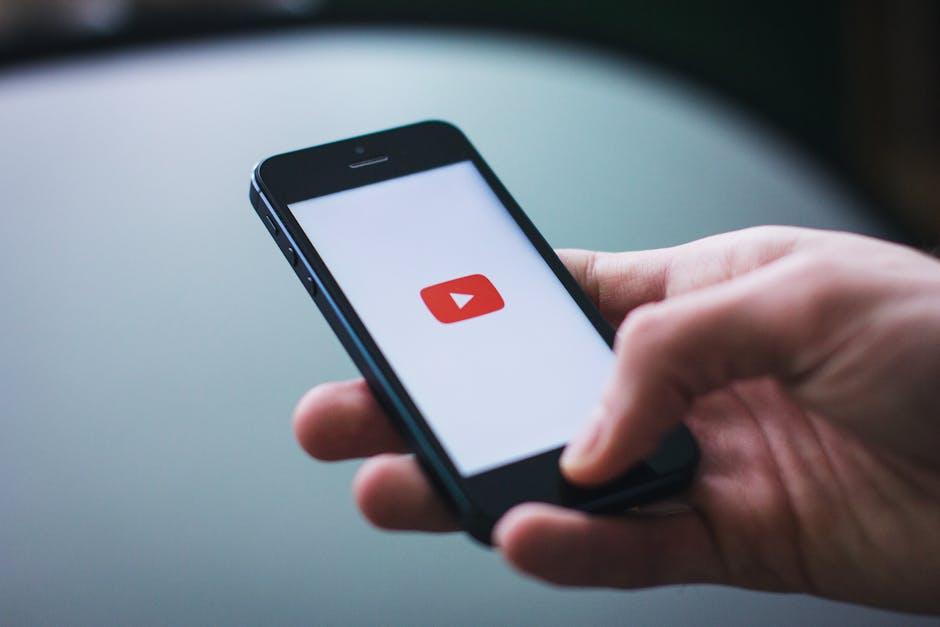
Understanding the Playlist Dilemma and Why You Should Clean House

Playlists on YouTube can easily turn into a cluttered mess if left unchecked. Think about it: you dive into the platform, excited to ⁣discover new content, and before you know ‍it, you’ve got a haphazard collection of videos that barely represent your interests anymore. The interplay of personal tastes and YouTube’s ever-evolving ⁤algorithm can ‌leave ⁤you with a soundtrack that resembles a confused jumble rather‍ than a curated mixtape. So why not⁢ take a moment to ​tidy up? By cleaning ‍house, you’ll ​enhance ‍your viewing experience, making it ​easier to find the content that truly resonates with you.

Cleaning⁢ up your playlists doesn’t just help with organization; it also gives you a fresh perspective on what you enjoy.​ Consider this—much like decluttering your closet, a ​good playlist purging allows you to rediscover gems you might’ve‍ overlooked. Here’s ‍what ⁢you stand to gain:

  • Clarity: Easily locate and enjoy your favorite content.
  • Discovery: Spot trends ​in your viewing ⁤habits you didn’t notice before.
  • Simplification: Streamline your⁤ playlists ⁢for quick access⁤ to ⁣what you really love.

So ⁤grab a cup of coffee, take a deep breath, and get ready ‍to revamp your YouTube experience!

Understanding the Playlist Dilemma and Why⁣ You Should Clean ⁢House

Step-by-Step Guide to​ Deleting Playlists Like a Pro

Getting rid ‍of those playlists you no longer want on YouTube can feel like‍ a chore,⁢ but it’s simpler than you might think! ​First, kick things⁤ off by logging into your YouTube ​account and heading over to your library. There, you’ll spot the “Playlists” section. Click⁢ on it‌ to reveal all those carefully curated lists, some​ of which ​have⁤ probably outlived their ‍usefulness. Once you’ve found⁤ the playlist you’re ready to delete, click on the three dots icon next to its title. This will unleash⁢ a dropdown menu ⁤filled with options, and you’ll want to⁢ choose “Delete Playlist.” Sounds easy, right? It truly is!

But hold your​ horses—before you click ‌that delete button, take a ⁣quick second to confirm your decision! A ⁢pop-up will prompt you to ensure that you really want to say goodbye to that playlist. It’s kind of like breaking up with a toxic ⁣friend; there’s that moment of hesitation. Once ⁢you hit “Delete,” poof—it’s gone! Just like that, ⁣you’re left with a cleaner, more​ relevant collection of playlists that actually⁢ reflect your current ‍tastes. Feeling good‍ about your newfound playlist freedom yet? Keep that spirit alive, ‌and enjoy curating your YouTube experience!

Step-by-Step Guide to Deleting Playlists Like a Pro
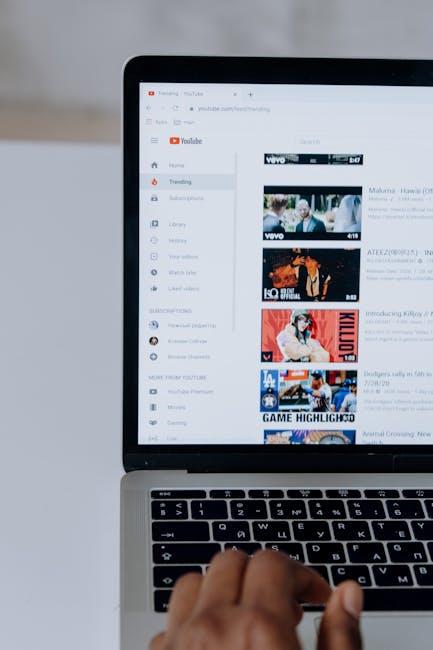
Tips and Tricks for Revamping Your YouTube Experience

Revamping your YouTube experience involves a blend of organizational skills⁣ and a sprinkle of creativity. First off, ⁣consider optimizing your subscriptions. Instead⁢ of following every channel that catches your interest, take a moment to curate only those that genuinely resonate with you. This will not only declutter your feed but also enhance your viewing pleasure. Additionally, make use of YouTube’s playlist feature effectively by grouping similar video content. For instance, if you’re a cooking enthusiast, create separate playlists for desserts, main dishes, and snacks. This way, ⁤finding what you crave becomes a piece of ⁤cake!

Another ⁢nifty trick is utilizing the ‘Watch Later’ feature more strategically. ‍Instead‍ of mindlessly throwing videos into ⁢this collection,⁢ take a second to categorize them based on your mood or target‌ learning. You could have a playlist for relaxation, one for learning, and ​even a motivational ​section for those days when you need a push. Lastly, ⁢keeping your viewing⁣ history clean is vital in tailoring the recommendations YouTube gives⁤ you—giving it a little refresh can lead to discovering fresh channels that could⁤ be your new favorites. Try ‌it; your YouTube experience will feel more like a customized journey rather than a chaotic maze!

Tips and⁤ Tricks ​for Revamping Your YouTube Experience

Keeping It Fresh:⁢ The ‍Importance‌ of Regularly Managing Your Content

Let’s be real: keeping your YouTube channel lively is much like tending a garden. If you let things get too overgrown, it becomes ‍hard to find the gems you ⁢planted in the first place. Regularly managing your content not only ‍helps to maintain organization but also engages your audience better. When you ⁤review and update your ​playlists, you’re essentially giving⁣ your viewers a ⁣clearer path to the freshest, ‌most relevant content. It’s like giving a good ol’ haircut to your digital presence—snipping away the unwanted and allowing new ideas to flourish.

Think about ⁤it ‌this way: when⁣ was the last ⁣time you stumbled upon a cluttered playlist that made you cringe? You probably clicked away faster than you could say “unsubscribe.” Keeping your‌ content fresh involves a few easy​ steps:

  • Regularly review⁤ your playlists to remove outdated or irrelevant content.
  • Add new hits to keep things ‌exciting and showcase your latest work.
  • Organize by theme ⁢ so your viewers can⁣ navigate easily.

When you manage your playlists like a pro, you create an inviting space⁣ for your audience to come back⁢ to time after time, just like a cozy coffee ‍shop ‍where everyone knows your name (and ​your favorite drink!). So grab that metaphorical rake and keep your channel neat and⁢ appealing!

Keeping It ‍Fresh:‍ The Importance of‌ Regularly‌ Managing Your Content

The ​Way Forward

And there you⁤ have it, folks! Deleting playlists ​on YouTube doesn’t have to feel like solving a Rubik’s⁤ Cube blindfolded.⁤ With this straightforward guide, you’re now armed with all the knowledge you need to tidy up your channel ⁣like a pro. Whether ​you’re trying ⁢to declutter your creative space or just want to start fresh, mastering this simple task can give ‌you the mental​ clarity you need to dive into your next big project.

Remember, every pro was once a novice,⁢ so don’t sweat the small stuff. Just keep experimenting and finding what works ⁤for you. And hey, ⁣if you ever find yourself lost in the algorithm rabbit hole, just come back here for a quick refresh!

So go ahead—get ​in there, unleash your inner YouTube guru,‍ and let those playlists dance⁢ their way to deletion! If you found this⁣ guide helpful, why not‍ share it⁢ with your fellow content creators? Happy deleting, and may your YouTube journey be filled with creativity and fun! 🎥✨

Mastering the Art of Saving YouTube Videos to Your Device

Imagine you’re in the middle of watching ‍a‍ fantastic YouTube video—maybe it’s a tutorial that promises to transform your cooking ⁤skills,⁣ or a travel vlog that ⁢whisks you away⁤ to ⁤exotic locales—and then, ⁤boom! ​A notification pops ⁤up saying you’re out of internet ‌data⁣ or that annoying buffering icon takes center stage. Frustrating, right? Well, fear not! ⁤Mastering the⁣ art of saving YouTube videos to your device can‌ be your ticket to ‌an ever-growing library of ⁤entertainment ⁣and knowledge, ready whenever you are. Let’s dive into the simple yet effective ​ways ⁣to keep those golden moments close at⁣ hand, regardless of your ⁣internet connectivity. Whether⁢ you’re prepping for a ​long flight or simply want‌ to⁤ binge-watch your favorites offline, we’ve got you covered!
Essential ‍Tools for Downloading YouTube Videos Effortlessly

Essential Tools for Downloading YouTube ⁣Videos​ Effortlessly

Getting ​your hands on YouTube‍ videos doesn’t have to ⁣be a hassle; with the right tools, you can save your favorite clips in⁤ a snap! From online converters to dedicated software, there’s a plethora⁢ of options out there ‌that make the process downright effortless. Here ⁤are some standout tools that many ⁤users swear by:

  • 4K Video Downloader: ⁣A‌ powerful⁤ tool ‍that allows ‌you⁤ to download entire playlists ‍and⁣ channels in high quality, ​perfect for binge-watching on the ‍go!
  • YTD Video Downloader: ‍Known for​ its user-friendly interface,‌ this software not only downloads videos ​but also‍ converts them to various file ‍formats, so you can play your ‌downloads anywhere.
  • ClipGrab: An open-source program that’s fast and efficient ⁤for grabbing videos and converting them all in one go.

If you prefer the convenience​ of web-based solutions,⁤ a‍ tab‍ for ​quick access to online services can simplify your download game even further. Consider options​ like:

Tool Features
SaveFrom.net Easy URL ‌input, supports multiple resolutions.
YTMP3 Converts⁣ YouTube ⁣videos ⁢to ‍MP3 or MP4 quickly.
KeepVid Allows⁤ downloads from various video sites, not just YouTube.

Choosing the right tool can make a world of difference in your user experience. Dive into these options and ‌see which one clicks with you for hassle-free downloading!

Navigating the Legal Landscape: ​What ⁢You Can and Cant Do

When you’re eyeing that viral cat video or the latest music hit and thinking about saving ⁢it to your device, it’s⁢ crucial‌ to tread carefully in⁤ the ⁣legal ⁢waters. Downloading content directly from⁤ YouTube can⁢ often tread into murky territory. While it might seem harmless, many creators upload their ​videos under copyright⁣ laws, ​meaning they hold the exclusive rights‌ to​ their content. ⁣This means that if a‌ video isn’t explicitly⁤ marked for free downloading ⁣or sharing, grabbing⁤ it could infringe on ⁢those ‌rights. So,​ it’s essential to remember‌ that respecting creators ⁤is ⁣key.⁤ Ask ‌yourself: is it ⁤fair to take something that⁣ someone worked hard to create without ​permission?

Now, let’s ⁢think ​about the ways you can legally save ‌YouTube ‌content. First off, YouTube Premium offers an official way for users to‍ download ⁤videos⁤ for offline ‌viewing—this is⁤ a straightforward, legal ⁣route! If you’re ‌looking for inspiration or‍ want to share a snippet for educational ‍purposes, consider using YouTube’s share ‌functionalities that allow you to send links instead of downloading⁣ videos. ⁤Additionally, always check if​ the content is under Creative Commons licenses, which often provide a bit more freedom. Lastly, if you’re simply after a‌ good old screenshot, ⁤those are generally within your rights, as long as you‍ use them ⁤responsibly. Staying ⁤informed⁤ will keep your content-sharing fun and legal!

Step-by-Step Guide to Saving ⁣Videos ⁢on Different Devices

Step-by-Step Guide to ⁣Saving Videos⁤ on Different Devices

Saving YouTube videos to your device⁢ can feel like trying to crack a⁤ secret‍ code, but it doesn’t have to ⁢be rocket science! ‍Here’s a quick rundown of different methods that work on ⁢various ‌gadgets. Whether⁤ you’re on a Windows PC, a Mac,⁤ or even a mobile⁤ device, you can easily snag those videos for offline viewing.⁤ First off,‍ desktop⁣ users can dive into dedicated software like‌ 4K Video Downloader or YTD Video Downloader, which let you paste ⁣the video⁢ link​ and download it in your preferred format. For Mac⁤ users,​ try out MacX YouTube Downloader—it’s straightforward⁣ and quick!

If you’re more⁣ of a mobile user, don’t fret! You can utilize apps like​ TubeMate on Android or a shortcut for iOS that harnesses the power of the web. Just remember, always check your app permissions and ⁢ensure ⁣you’re downloading from trustworthy sources to keep your device safe. If you’re looking for quick links, here’s a simple table that captures some ⁢popular tools:

Device Recommended Tool Notes
Windows 4K Video Downloader User-friendly, supports multiple resolutions
Mac MacX YouTube Downloader Quick downloads, respects privacy
Android TubeMate Easy to use, fast download speeds
iOS Shortcuts via​ Safari Involves quick steps, no app installs

Boosting Your Video Library: ​Organizing‍ and Managing Downloaded Content

Boosting Your‌ Video Library:‌ Organizing‍ and‍ Managing ​Downloaded ‍Content

Once ⁤you’ve started downloading videos from YouTube, it can feel like your​ library is a⁣ chaotic treasure trove. To​ make the most of your collection, it’s important to find an effective way⁣ to organize and manage your content. Start by categorizing ‍your videos into⁣ folders based on genre, topic, or even mood. For example, you could have folders like ‘Fitness’,⁢ ‘Cooking’, and ‘Travel’. This way, when you’re looking for a workout video or a recipe⁣ tutorial, you won’t have to scroll through endless files. Additionally, consider ​adding tags or even a simple​ spreadsheet ‌to keep‌ track of your⁣ favorite videos and⁢ where to ⁣find them. It’s like having⁤ a personalized librarian at​ your service!

Another tip is to‍ keep your‍ downloaded content‍ updated. Launch regular ‘spring ⁤cleans’ for your video library—this means‌ removing videos you’ve outgrown or no⁤ longer find useful. Think⁣ of it like decluttering your living space; keeping only what brings you joy‌ (or in⁤ this⁣ case, knowledge ⁣or entertainment) can greatly enhance⁣ your viewing experience. You might even create a simple ⁢table to track the ⁣last viewed ⁤date⁤ or‍ the genre of the videos,‍ helping you remember what to keep and what to let go.

Video Title Genre Last Viewed
Yoga for Beginners Fitness 09/20/2023
Easy Pasta Recipes Cooking 09/15/2023
Exploring Japan Travel 08/10/2023

To Wrap It Up

And there you have it! You’re now armed with all⁤ the⁤ nifty tricks and tools to save those epic YouTube⁣ videos right to ⁢your device like a pro. Isn’t it amazing how just a few clicks can bring your favorite content ⁢into⁤ your personal library? Whether you’re diving deep into tutorials, ⁣rewatching that​ hilarious skit, or ⁣creating a stash​ of motivational talks​ for​ those ⁤early mornings, you’ve got⁤ the power at your fingertips.

Remember, each method has its own perks⁣ and quirks,⁤ so don’t hesitate to‍ experiment and‍ find what works best for you.⁤ It’s kind of like baking—sometimes you need to tweak the recipe to⁤ get that ⁤perfect cookie!‌ So go ahead, make those videos yours, and enjoy the freedom of offline viewing. If you’ve got any questions or ⁣tips of your own to share, drop them in the​ comments. Happy saving! 🎥💾

When Does YouTube Studio Refresh? Here’s the Inside Scoop!

Are you a YouTuber wondering ⁢when⁢ YouTube Studio decides ⁢to refresh its ⁢data? You’re not alone! It feels like every creator has stared at their analytics⁢ page and thought, “Is it just ​me, or does this thing have a mind of its own?”⁤ Whether you’re tracking⁤ views, subscribers,⁢ or engagement, waiting for those⁣ numbers to update can be a bit like watching paint dry—frustrating and⁣ a little‍ nerve-wracking! But fear not, my fellow content creators; ⁢in this article, we’re diving deep into the mystery of the ⁢YouTube‍ Studio refresh schedule. We’ll‌ break down all the ins ‍and outs of how ⁣to make the⁣ most of your ⁢analytics and what to expect when those numbers finally roll in. So grab your coffee, settle in, ⁤and let’s get into the nitty-gritty of YouTube Studio’s refresh times—because understanding ⁣the system can be the‌ key‍ to unlocking your channel’s potential! Ready? Let’s⁢ do this!
Understanding YouTube Studios Refresh Schedule to Maximize Your‌ Content Strategy

Understanding YouTube Studios Refresh Schedule to Maximize Your Content Strategy

Getting a handle on how often YouTube Studio refreshes ‍can give you a⁤ serious leg up on your ⁣content strategy. This ‌handy tool doesn’t ​just update ‌haphazardly; it operates on⁢ a predictable cycle.⁤ Every ‍24 hours, YouTube Studio pumps out fresh data about your channel performance, viewer habits, ‌and⁤ engagement metrics. This means you can consistently check back for the latest insights. What can you do during that wait time? Use it to brainstorm new ⁤content based on ‌recent trends, or analyze your‍ past uploads to see ‌what resonated best⁤ with your audience. It’s all about ‍turning that data⁣ into action!

When⁢ it comes to ​aligning your upload schedule,​ consider these key⁢ points:

  • Daily Refresh: Use daily ⁣updates to adjust your content quickly.
  • Weekly Analysis: Dedicate time each ‌week ⁢to ⁣dive deep into ⁢metrics and plan future content.
  • Monthly Goals: Set goals based on the accumulated ⁣data, giving you a clear direction moving forward.

To visualize this,⁢ check out the table below⁤ summarizing your refresh ⁢strategy:

Timeframe Action
Daily Check for new insights and trends
Weekly Analyze peak performance content
Monthly Set growth targets based on data

The Impact of ‌Real-Time Analytics and Why⁢ Timing Matters

The Impact of Real-Time Analytics and ​Why Timing ‌Matters

In the fast-paced ​world of online‌ content creation, seconds can make all the‍ difference. Real-time analytics allow creators to​ gauge their ​audience’s reactions⁤ as they⁣ happen, giving them the power​ to tweak strategies on the⁤ fly. Imagine trying⁢ to catch ‍a wave: ⁣if you wait too long, the moment passes, and you’re left paddling back. By leveraging these instant insights, YouTubers can adjust their content in​ real-time, optimizing their approach based on what actually resonates with viewers. Think ‌about it—ever noticed a drop in viewer retention mid-video? With immediate analytics, creators‌ can pivot their narrative style or pacing⁤ right then and there, ‌keeping the audience engaged ⁣and eager⁣ for more.

The importance of timing can’t be overstated. Having access ‍to live stats ‍means creators‍ can ⁣spot trends and capitalize on them​ before they fizzle out. When ‍a new trend surfaces, YouTube Studio refreshes with this data, allowing ⁤creators to jump on the bandwagon while it’s hot. This nimbleness fuels engagement and⁣ can lead to viral moments that significantly boost a channel’s visibility. ​Here’s what ​this timely data enables:

  • Content Optimization: ⁢Tailor your content to match audience preferences instantly.
  • Trend Identification: Spot and ride trends‌ before they peak.
  • Audience Engagement: Respond to comments and feedback promptly, keeping the conversation alive.

Making the Most of YouTube Studio ⁣Features: Tips for Savvy Creators

Making the Most of YouTube ‌Studio Features: Tips for Savvy Creators

When diving into YouTube Studio, it’s like entering a treasure trove of tools just waiting to be explored. To really harness the power of this ⁣platform, savvy creators should familiarize themselves with some of its standout features. ⁢For instance, the Analytics section is pure gold. You ​can track your audience’s preferences and see which videos keep viewers glued to the screen. Understanding these metrics ​helps you steer your content in ⁢the ⁤right direction.​ Plus, don’t forget about⁢ the Customization options! Tailoring your channel’s layout‍ and ​branding⁢ can make ‍a huge difference in how new viewers perceive your content.⁢

Another essential aspect to consider is the Engagement tools ‌that YouTube ⁢Studio‍ offers. Responding⁣ to comments may seem ‍daunting, but it’s a fantastic way to build a community. Think of ⁢it ​as a friendly chat where you’re getting to know your subscribers better.⁤ And let’s not overlook⁤ the ‌ Content ⁢Management features! Utilizing the Bulk Actions tool can save you heaps of time when⁣ scheduling or editing multiple⁤ videos. Here’s a⁤ quick look at what you can efficiently manage:

Feature Benefit
Analytics Track viewer​ habits and‌ optimize content.
Customization Create a visually appealing channel.
Engagement Tools Foster ‍community interaction and ⁤loyalty.
Bulk⁤ Actions Efficiently manage multiple videos.

Staying Ahead of the Game:⁢ How to Anticipate YouTube Studio Updates

Staying Ahead​ of the Game:⁤ How to Anticipate YouTube ‌Studio Updates

In the ever-evolving ⁢realm of YouTube Studio, keeping your finger on the pulse of updates is crucial. To stay ahead, consider subscribing to YouTube’s official communication channels. ‌They often share sneak ​peeks of ⁣upcoming⁢ features or changes, which can give you an edge. Engage with the community by ​joining forums or social media groups ⁣where creators‌ discuss the‍ latest tweaks and⁤ tips. It’s like having a ​secret news ⁢network at⁣ your ‍fingertips! Another nifty trick is to regularly⁣ explore the YouTube Creator⁣ Blog and support⁤ pages; they’re treasure troves of information about what’s coming down the pipeline.

Moreover, don’t underestimate the power of experimentation. Regularly diving into the Studio’s features ‌can unveil those subtle tweaks that might not make headlines but can significantly enhance your ⁤workflow.‍ Create a content calendar to plan your videos around anticipated updates. ⁤Here’s a quick list of things to keep‌ in mind:

  • Join live creator sessions: YouTube occasionally hosts events that cover updates.
  • Engage in beta programs: Get early⁤ access ​to ‍new features to ⁣see their potential.
  • Follow YouTube⁤ analytics: Track changes ⁤that ‌impact your channel’s performance.

By‌ developing a proactive mindset, you’ll be able to adapt⁣ quickly and leverage new tools as they arrive. Just like a seasoned surfer rides ⁢the waves, you’ll be able to navigate YouTube’s changes with ease and confidence!

To Conclude

And there you⁢ have it!‌ YouTube Studio isn’t​ just a tool; it’s more like your ⁢trusty sidekick ⁣in the ⁢wild world of​ content creation. Knowing when it refreshes can make all​ the difference for your channel,⁣ helping you stay ahead‍ of the game and optimize your strategy like a pro. It’s a bit like having a secret recipe for any dish you want to whip up—you just need a pinch of⁣ patience and a good sense of timing. So, whether ⁢you’re checking on your latest upload, ⁢analyzing viewer stats, or tweaking your thumbnails, just remember that ‍YouTube Studio has‍ your ‌back (even if it doesn’t always ‍refresh at lightning speed!).

So, what’s next​ for you? Maybe⁤ it’s time to dive into those analytics and ⁤unlock the‍ potential they hold for your channel. ‌Or perhaps you want to brainstorm your next big video ⁤idea. However you choose to roll, keep ⁤that creativity‌ flowing! If you found this guide helpful, don’t hesitate​ to share it with your fellow creators. After ⁣all, we’re all in this together, navigating the fantastic universe of YouTube. Happy creating, and may​ your views always be plentiful!

Easy Steps to Delete Your YouTube Videos Like a Pro

Ever hit ‍that point where you realized your YouTube channel could use a little spring cleaning? ​Whether it’s outdated content, cringe-worthy moments, ⁣or videos that just didn’t hit ⁤the mark, we’ve all been there. But don’t sweat‍ it; deleting​ those videos doesn’t have to ⁢be a headache-inducing chore. Imagine effortlessly tidying up your channel,​ giving it that fresh,⁤ polished vibe you’ve always wanted. In this ⁤guide, we’ll walk you through the ⁢easy steps to ditching your videos like a pro, allowing you to take control⁤ of your⁤ content and showcase only ‌your best work. So, grab a comfy seat, and let’s ‌get your channel shining!

Mastering⁤ Your YouTube Dashboard for Effortless Deletion

Mastering Your YouTube Dashboard for Effortless Deletion

​ Navigating your YouTube dashboard doesn’t have to feel⁢ like deciphering an ancient scroll.⁣ It’s more ⁣like wandering through a⁤ well-organized library where ‍everything is at your fingertips. To kick things off, head straight ‌to your YouTube Studio. Once you’re ​in, look for⁣ the “Videos” tab on the left sidebar; this is your gateway⁢ to all the videos you’ve ‍uploaded. From there, a quick glance provides ⁤you with options to filter recordings by those‍ that need a little TLC or those ⁢that are simply ready ‍for departure. Got a video haunting your analytics with poor‌ performance or perhaps ⁤an old​ upload that no longer reflects your style? Time to make that digital clutter vanish!

Deleting a video is as simple as pie—just select the checkbox next to the video you want gone, ⁣and you’ll spot a trash⁢ can icon at the top right. Click on that and bam! You’re one step ⁣closer to a clean slate. You might want to hit ⁣ “Delete Forever”—it’s that finality‍ that‌ makes the whole process feel empowering. Before you go ahead, YouTube will give a little ‍nudge, warning you that deleting means ⁣it’s gone ‍for good. ​Think of it like emptying your closet;‌ you sift through the old looks, deciding which ones ​to‌ donate and which to toss. You’ll be amazed at how refreshing‌ it feels to streamline your channel and make it reflect your current vibe.

Understanding the Impact of Deleting Videos on Your Channel

Understanding the Impact of Deleting Videos on Your Channel

Deleting videos⁣ from your YouTube channel‍ can be a ⁤double-edged sword. On ​one hand, you might feel the ⁣pressure ​of managing a cluttered channel or want to remove content that no longer represents your brand accurately. But before you ‍hit that delete button, think about how‍ this action can affect your channel’s ⁤performance. Engagement metrics like views and watch time ⁢may take a hit ‍when‌ you delete popular videos, ⁤potentially impacting ⁤your overall visibility in YouTube’s algorithm. In some cases, those older videos⁤ might still bring in subscribers or traffic, even if they don’t match your current style or vision.

It’s also worth considering the residual effects on your audience. Viewers often ⁣develop​ attachments to ‌particular videos, and removing them might lead to confusion or disappointment, particularly if those videos had meaningful interactions⁣ or comments. To ​navigate ⁤this smoothly, you could offer explanations to your audience through community posts or videos, letting ‌them know ⁣why you’ve made such decisions. Rather than a sudden⁣ chop, think of it⁣ like pruning ‌a‌ tree—removing some branches can strengthen the rest ​of the tree and help it grow in the ‌right direction.

Smooth Tricks to Avoid ‌Mistakes While Deleting

Smooth Tricks to Avoid Mistakes While Deleting

When it comes to deleting your YouTube videos, a little caution can go ⁤a ‌long way. Imagine cruising down the highway ​only⁣ to hit ​the brakes too late—yikes! Avoiding⁢ accidents in video deletion is all about planning ahead. Before you hit that delete button, consider backing up your content first. Use a cloud storage service or even ⁢an‍ external hard drive. This way, if⁢ you have a moment of regret later, you won’t feel like you’ve ⁣thrown away a‍ cherished memento. Also, double-check if you’re removing the right video. You don’t want to mistakenly delete ⁤your latest masterpiece while trying to clear out old‍ clips.

Another tricky area‌ involves understanding the repercussions of your deletion. Did you ⁢know ‌that ‌deleting ‍a video can impact your channel’s watch time and overall engagement? Keep that in mind! Here are a few tactics to avoid any⁢ slip-ups:

  • Review analytics to see which videos perform well before making a decision.
  • Consider setting videos ⁣to private instead—this gives you breathing room.
  • Use ⁢the⁣ YouTube Studio to thoroughly plan your deletions, checking everything twice.

By being mindful and organized, you can navigate the⁢ deletion process like a seasoned pro, minimizing the chance⁣ of any ‍last-minute surprises.

Preserving Your Channels ⁢Health After Video Removal

Preserving ‌Your‌ Channels Health After Video​ Removal

After you’ve pulled⁢ the trigger on those⁣ videos that just weren’t cutting it, it’s time to shift gears and focus on keeping your channel healthy. YouTube’s algorithm can‌ feel like a fickle friend, rewarding engagement and consistency. To ensure you maintain a‍ good standing, consider these ⁤key strategies:

  • Engage with Your Audience: Respond to‌ comments and ask for feedback. Showing that you care about your viewers keeps them coming⁤ back.
  • Update Your Content Strategy: Take a minute to assess what your fans love. Double down on those topics and formats while steering‍ clear of oversaturated content that didn’t⁢ resonate.
  • Stay Consistent: Regular uploads‌ help signal‌ to the algorithm that your ⁤channel is active. Create a content calendar ⁤to keep your uploads on track.
  • Analyze Your Metrics: Dive into YouTube Analytics. What videos are your top ⁣performers? Where do people lose interest? This⁤ insight can guide your future content choices.

Additionally, it’s crucial to maintain your channel’s⁢ reputation. Consider implementing a strategy for future posts that ⁣includes proper tagging and beautiful thumbnails to entice viewers in. Building a⁣ strong brand can make all the⁣ difference! Here’s a quick look at some essential metrics to track:

Metric Description
Watch Time Total minutes your audience watches ‍your videos.
Click-Through Rate (CTR) Percentage of viewers who clicked on your video after seeing‌ the thumbnail.
Audience Retention Shows how much ⁢of your video viewers watch before leaving.

Future Outlook

And there you have it! Deleting your⁤ YouTube videos doesn’t have to feel like rocket science. With these straightforward steps, you’re now equipped to ⁤tidy up your channel like a pro. Imagine your YouTube space as a digital garden; ⁤sometimes,⁤ it needs ‌a little pruning‍ to let the best blooms‌ shine bright. So, whether you’re clearing out old content that doesn’t vibe with your current style or just making room for fresh creativity, remember that every click counts.

Before you dive back into your channel, take a moment to‍ celebrate‍ this little victory! You’ve taken charge of your content, and that’s a massive step towards better storytelling ⁤and engagement. If you‌ feel like‍ sharing your journey or have any questions,​ drop a comment below or reach out on social—let’s keep this conversation rolling. Now, get out there and curate that‌ channel! Happy deleting!

Easily Block YouTube Channels: A Simple Guide for You!

You know that feeling​ when you’re just trying to enjoy a chill evening with a good video, and suddenly there’s‍ a pop-up from a channel you can’t stand? It’s like biting into‌ your favorite chocolate only to discover it’s filled with raisins. Yuck! If you’ve found yourself in a‌ similar situation, you’re not alone. Plenty of folks are looking to clean up their YouTube experience, and thankfully, there’s a straightforward way to do it. Blocking those​ pesky channels is⁤ easier than‍ you might‌ think! In this guide, we’ll walk you through⁤ the simple steps to take back control of your feed, ‌so you can focus on the content you actually love. Ready ⁢to ‌make your YouTube experience all that it can be? Let’s ⁤dive in!

Unlocking YouTubes Hidden Features for Channel Blocking

Unlocking YouTubes Hidden Features for Channel Blocking

When you find yourself scrolling through YouTube and bumping into channels that just don’t vibe with​ you, it’s‌ time to take action! Luckily, the platform offers some nifty features ⁢to block those pesky channels.​ Start by heading to the channel page of the content you want to ditch. Hover over the “About”⁤ section⁣ where you’ll see three little dots hanging out in the ​corner. Click on that, and guess what?⁤ The magic⁣ menu drops down with an option to ‌ “Block User.” Hit that button, and just like ⁤that, you’ve bid ​farewell to their​ meddlesome uploads. Simple, right?

But⁤ hang tight! There’s even more you can do. If you’re serious about cleaning up‍ your feed, consider adjusting ​your recommendations. Go back to a video ‌from the ​channel you’ve just blocked—click the three dots under⁢ the video and select “Not interested.” YouTube’s algorithms are ever so eager to learn about your preferences, ⁢so this helps keep your feed focused on content that resonates with you. If you’re keen on a cleaner browsing experience, make a ⁢habit of reporting inappropriate content, too. It’s not just ⁤about you; your feedback helps create a better community for everyone!

Crafting Your Custom YouTube Experience with ⁤Simple ⁢Steps

Crafting Your Custom⁤ YouTube Experience with Simple Steps

Blocking unwanted YouTube channels⁤ can feel like decluttering your mind from all that ‍noise, right? Just think of it as spring cleaning for your digital ‌life!​ Start by heading over to the channel you want ​to banish from your feed. ⁢Hit that little gear⁢ icon, and voilà! You’ll find the ‌option ⁣to block user.⁢ This action is like slamming a door on a guest you didn’t invite—it keeps their ‍rambles out of your space. Imagine walking into a room‍ filled with people ⁣talking about ⁣things that just don’t vibe with ⁣you. Why not just step out and enjoy the company of ‌those you love? YouTube should spark joy, not ⁤frustration!

If you’re diving deeper into customizing your YouTube experience, don’t forget about the “Not Interested” button. Whenever a ⁤video pops up that doesn’t ⁣tickle your fancy, give it a ‍click! This nifty ​little feature is like giving YouTube a nudge in the right direction, teaching the algorithm your preferences over time. Combine that with the option to hide certain channels, and you’re well on your way to ‍curating a feed that truly reflects your tastes. Here’s a quick table to highlight these⁢ blocking features:

Action Description
Block User Prevents the channel from appearing in your feed.
Not Interested Tells YouTube to avoid ‍suggesting similar content.

Tips and Tricks to Stay Focused: Ditching Distracting Channels

Tips and Tricks to Stay Focused: Ditching Distracting Channels

Staying focused‌ in⁣ a world brimming with distractions, especially on platforms like YouTube, can feel like trying to catch​ smoke with your bare hands. One minute you’re watching a how-to video⁤ on ⁤cooking the ‍perfect steak, and the next, you find yourself deep in ‍the rabbit hole of cat videos or conspiracy theories. It’s like wandering through a maze, where every turn pulls you further away from your original path. To dodge these distracting detours, consider blocking channels that draw your attention away from what truly ⁣matters to you. It’s as simple as a few ⁢clicks and can drastically improve your productivity.

One effective strategy is to create a priority list of channels that align with your interests and goals. From there, utilize the site’s features to hide or⁤ block those that lead you astray. Here are some quick tips to ​streamline your YouTube experience:

  • Utilize “Not Interested”: Hover over thumbnails and just click to dismiss those channels you don’t want to see.
  • Adjust⁤ Notifications: Turn off notifications from distracting channels ⁣to reduce interruptions.
  • Create Playlists: ⁤Compile ⁤only‌ your favorite⁤ content⁤ so you’re less‌ tempted to wander off.

Also, consider collaborating with browser extensions that‍ help maintain your focus, like adding a “block list” feature. It’s ⁢like putting blinders on a horse—keeping your gaze straight ahead while filtering out the bings and dings that yank your ⁣attention. You’ve got this; by curbing your YouTube habits, you’ll find your focus sharpening in all areas ‍of your⁢ life.

Enjoying Peace of Mind: Managing Your YouTube Preferences

Enjoying Peace of Mind: Managing Your YouTube Preferences

Managing your YouTube preferences can feel like navigating a maze sometimes. Your feed is supposed to be a reflection of your interests—full of content that excites and engages you. So, why let annoying channels clutter your experience? Blocking unwanted channels is your secret ​weapon for achieving that blissful peace of mind. Just ​a few clicks can turn your YouTube journey into something enjoyable and ​personally relevant. To keep your ​feed clean, follow these‌ quick steps:

  • Open the channel you want to block.
  • Click‍ on the three dots next to⁣ the “Subscribe” button.
  • Select “Block ‌user.”

Voila! It’s as‍ easy as pie, and suddenly, your recommended videos can start looking ⁢more like you, and less like a ​hodgepodge of random uploads. Want even more control? You can also ‍explore your‌ YouTube settings. Tweak your recommendations by adjusting watched history or removing videos you didn’t enjoy. Keep your profile shining bright with content you actually want to​ see, ‌and let those unnecessary ⁣distractions fade into the ⁣background.

Tip Benefits
Block Channels Cleaner feed, more enjoyment
Clear Watch History Better recommendations
Customize Notifications Stay updated, avoid overwhelm

Key⁣ Takeaways

And ​there you have it! Blocking those pesky ‌YouTube⁢ channels that clutter your feed is a piece of cake, right? Picture it like spring cleaning for your‌ digital space—you wouldn’t want dust bunnies hiding under the ​sofa, so why let unwanted videos⁢ sneak into your recommended list? Now​ that you’re armed with the know-how, you can ⁣curate your viewing experience to match your taste, making every click a delightful one. So go ​ahead, take ‍control, and⁣ make YouTube work for you! If you encounter any bumps along ⁤the way, don’t hesitate to dive back in. Happy streaming!

Mastering YouTube: A Simple Guide to Blocking Channels

Ever find yourself scrolling through YouTube, ‍only ‌to stumble upon a⁢ channel that just ⁢doesn’t vibe with⁢ you? Maybe it’s​ the endless pranks, ‌cringe-worthy skits, ​or those bizarre cooking tutorials that ⁤make you ⁣question‌ your culinary sanity. You’re‍ not alone!⁣ Blocking⁢ channels is like ⁢clearing clutter from ⁢your digital space, ‍giving you a cleaner,‍ more ⁤enjoyable‍ viewing⁤ experience. In this ⁢guide, we’ll walk you⁤ through the‌ simple steps to ‌master your YouTube ⁢settings, so‌ you can ⁣kick the content you ‍don’t want to see to the curb. ​Let’s ⁣dive in and reclaim your feed!
Understanding ⁣the YouTube Ecosystem and the Need for ‍Control

Understanding the YouTube Ecosystem and ​the Need⁤ for Control

The ​YouTube ‌ecosystem can feel like ⁣a wild jungle sometimes,⁢ right? With countless creators vying for your attention, it’s​ easy to ⁤feel ⁤overwhelmed. ⁣Every click leads you down a different rabbit⁣ hole, and not all​ of them are ‌ones you ‌want to explore. It’s crucial to take control of your viewing experience.‍ Think ⁢of it‌ like being the⁢ captain of⁢ your ship ⁢navigating through stormy seas—you want to steer clear ‍of ​the‍ channels⁣ that just don’t resonate with you. This not only saves ‍time⁢ but ⁤can also help⁤ create a ‍more positive environment ‍where you spend ​your energy ⁤on ⁤content ⁢that truly excites‍ and⁢ inspires ‌you.

To establish a ​grip on‍ your ‌YouTube journey,‌ consider ​leveraging the power of blocking channels. This feature works like a⁢ filter that lets​ you decide what stays and what goes. Here’s how it‌ all pans out:

  • Simplified⁢ Experience: ⁣Focus on channels‍ that add‌ value to your ⁣life.
  • Mental Clarity: Reduce⁣ clutter and ⁢distraction from unwanted content.
  • Enhanced Recommendations: You’ll get better suggestions based on your preferences.

By curating your ​feed, you’re not‌ just a passive viewer; you become‍ an active ⁣participant in shaping your YouTube landscape. ⁤So, don’t‍ hesitate ⁣to take that control—it’s not just about⁣ blocking ​channels;‌ it’s about making ‌your⁣ YouTube journey fulfilling and enjoyable.

Navigating Channel Settings: Your Step-by-Step Roadmap

Getting​ to ⁢your channel⁣ settings on YouTube ⁣is like finding the right key to unlock a treasure ⁤chest. ‍It might feel a ​bit ‍overwhelming ⁤at first, ⁤but​ once you know ⁣where to look, you’ll ⁢be ‌breezing through it‌ like ‍a⁣ pro. ⁤Start by clicking‍ on ‍your ​profile​ icon‍ at the top right corner of the screen. ⁤From the dropdown menu, ‍head over‍ to Your​ Channel. ​Then,⁤ hit the gear icon⁤ to enter the settings ‌menu. ⁢Here you’ll find a variety of⁣ options,⁤ but for our ⁣purpose,⁢ we’re zooming in on‍ Blocked​ Users. It’s ⁣like ​building your​ own‍ private⁤ club where you can‍ choose who gets in and who⁣ stays out.

Now, just as ⁤you ‌wouldn’t invite ⁢that annoying neighbor ⁣to your backyard BBQ, you can block⁤ unwanted⁤ channels with ⁣just⁤ a few ​clicks.⁤ In the⁢ Blocked ‌Users section, you’ll⁤ see an ​option to Add New. Type in the channel name or ​paste the URL, click Block,⁣ and voilà! You’ve successfully created a barrier.⁤ If ‌you’re wondering why it matters, think⁢ of ⁣it like having a personal filter for‍ the ⁤content that ‍comes your way; you⁢ only want to see what ⁣you enjoy ‌or find valuable. Plus, staying⁣ focused⁣ on what ‍truly matters is key to ⁤enjoying⁣ your ⁢YouTube experience!

The Art of Blocking: Best Practices​ for a​ Serene ⁢Feed

The Art⁤ of Blocking: Best ⁣Practices‍ for‌ a Serene Feed

Blocking⁢ channels ‍on YouTube doesn’t have to⁣ feel ⁢like ⁢facing a heavy traffic ‍jam. It’s ⁣more like clearing out the clutter from your⁣ room ⁣– a ‍bit of effort goes ‌a long way towards that serene​ environment you ⁢crave. ​ First things first, ‍when a channel ‌is cluttering your feed with content you’re just not into, ‍it can feel​ overwhelming. Take a deep breath, and follow ⁢these steps ‍to ⁣put⁤ those distractions in their place.⁤ Head⁤ to your‍ YouTube homepage, find that irritating channel, and hit the three dots next to the ⁢video. Voila! You’ll see an option​ to “Not interested.”⁤ Select that​ bad boy, and just ‍like that,‍ you’re‌ one ‌step closer to a ⁤customized feed that reflects your ‌true interests. Don’t forget, the more you ⁢interact positively with the content you love, the better your recommendations will‌ be.

Next ‌up is⁢ creating ‌your own little ‌zen garden of video enjoyment. Consider checking ⁤your “Blocked Users” list periodically⁣ if you’re serious about⁤ maintaining​ serenity in ⁢your feed. Sometimes, you might forget about a⁤ channel, and it sneaks back in like an uninvited guest.⁣ Here’s ‍how to keep those unwanted ⁤intruders at bay: You can revisit ‌your settings,⁤ scroll ​through those blocked channels, and stay ⁣on⁤ top of your⁤ video‌ vibes. Adding​ this little ​routine into your ​YouTube habits will help ensure that you’re only seeing content⁣ that‍ truly resonates with you. Embrace ​the power of ​control, and ‌soon, your YouTube⁣ feed​ will feel like⁤ your‍ personal oasis instead of a chaotic ⁤marketplace.

Creating ‌a ⁢Positive​ Viewing‌ Experience: Curating Your Channel ‍Showcase

Creating a Positive Viewing‍ Experience: Curating Your Channel ⁤Showcase

Curating your ⁤channel showcase is like arranging the perfect ‌playlist for a road trip;⁤ it sets the vibe and ‍keeps ‍viewers engaged. Think about ⁤ showcasing ‍content that resonates ⁣with your ⁢target audience and reflects your channel’s personality.⁢ Highlight ‌videos that ‌not ​only​ showcase your⁣ best ‌work but also provide ​a blend of entertainment and information.‍ This balance helps newcomers feel the vibe without scrolling endlessly. Remember, first impressions matter! Let’s make⁣ those thumbnails pop with enticing titles and eye-catching visuals. When⁤ viewers can connect⁢ emotionally ⁣with what‌ they see, they’re much more likely to hit‌ that subscribe button.

Moreover,​ consider periodically refreshing this showcase, much like rotating the ​plants in your garden to ​keep it⁢ vibrant. Here⁣ are some ideas to keep your content fresh:

  • Feature User-Generated⁤ Content: Show off videos​ created⁤ by loyal fans or‍ community members.
  • Highlight Popular Picks: ⁣ Showcase⁢ videos that are trending on⁣ your channel,⁤ drawing⁢ in curious viewers.
  • Themed ‌Playlists: Create a⁢ series‌ focusing on specific topics. This can keep your​ channel‍ organized‌ and user-friendly.

Lastly, don’t hesitate to test and analyze which content ⁣yields the highest⁢ engagement. It’s like ‍tuning your ​favorite radio station—find that sweet spot, ⁤and you’ll have your audience hanging on‍ your every word!

Closing Remarks

And there you ⁤have it! ‍Blocking channels on YouTube is as easy as pie, ⁣right? ‍Just think of it⁢ like weeding your garden—a little⁣ bit of effort goes a long way in ​making space for the content you truly enjoy. ⁢Whether it’s a channel that constantly⁤ delivers ⁤drama instead ⁢of ⁣what ‌you love​ or just something that rubs you‍ the wrong⁣ way, ​knowing you ​have ⁣the power to control your ​viewing⁣ experience is liberating.

So next⁤ time you ‍find yourself scrolling ⁤through videos and feeling ​a tad overwhelmed, remember: you’ve got the ⁤tools to​ curate your own ⁤YouTube adventure. Dive ⁤in‌ there, take charge,‍ and tailor your feed ⁢to what tickles your fancy. With your newfound ⁢skills,⁣ you’re all set⁢ to be‍ the⁤ captain of this ‍content⁣ ship! Happy watching, and may your​ recommendations be ever in your favor!

Counting Your Creations: Track Your YouTube Uploads Easily!

Ever feel​ like your‍ YouTube ⁤channel is a rollercoaster ride, and you’re ⁤just holding on for dear life? Between shooting, editing, and uploading, it’s⁢ easy‌ to ⁢lose track of how many ​creations you’ve actually put out into‌ the world. Imagine if you had a ​trusty sidekick to help you keep tabs on your uploads—making it simpler to ⁢see your progress​ and to plan your next big hit. Counting your creations isn’t just about crunching​ numbers; it’s about ‌celebrating your journey as a content‍ creator and strategizing for the future.⁣ So, let’s dive into some nifty tricks and tools that make⁤ tracking⁣ your YouTube uploads a breeze, helping you take⁣ control of your creative adventure!
Understanding the Importance of Keeping Tabs on Your Content Journey

Understanding the Importance ‍of Keeping⁤ Tabs on ⁢Your ‍Content Journey

Staying on top of your ⁣YouTube uploads⁢ isn’t just about ​maintaining a routine; it’s like ‍being ‍the captain of your ship, steering it through the ever-changing waters of content creation.​ If ⁢you’re not keeping tabs on your‍ uploads,​ it’s easy ‍to ‍drift off course. By ‌tracking⁤ each video, ​you’ll not only gain insights into⁣ what resonates with your​ audience but ⁣also refine your ⁤strategy⁢ for future content. Maintaining a visible record allows you to recognize patterns and trends that are pivotal‍ to your channel’s growth. Why guess what your viewers love when you can have the data​ literally ‌at your fingertips?

Plus, monitoring ⁢your content journey keeps you motivated. Imagine climbing a mountain; ⁤every⁣ upload ⁢is‍ a step toward the summit. When you can visualize your progress, it ⁤fuels‌ your desire to climb even higher. Use tools or simple spreadsheets to ​create ‍a tracking system ⁣ that includes key metrics like upload dates, views, and engagement rates. ⁢Here’s a​ quick look at what to include in your tracker:

Upload Date Video ⁣Title Views Likes Comments
01/10/2023 Cooking Tips 101 1500 300 45
01/20/2023 Travel Vlog: Summer in France 2500 400 70

With this kind of ‍setup,⁢ you’re not just ⁤putting up videos; you’re crafting a narrative—your narrative. Keeping​ track allows you to look back, see what sparked joy for your viewers, and replicate that winning formula. So, are you ready to take charge of⁤ your content journey‍ and​ keep those ‌uploads coming?

Essential ​Tools to‍ Simplify Your YouTube Upload​ Tracking

Essential Tools ‌to Simplify Your YouTube Upload Tracking

Tracking your ​YouTube uploads might sound like a chore, but⁢ it ⁢can actually be‌ a breeze with the right tools! Imagine having everything you need in one​ neat⁣ little ⁣package that lets‌ you keep tabs on your content and engagement levels. First‍ up, consider using ​a content calendar ⁢ like Trello or Asana. These platforms allow you to create a ⁣visual⁤ timeline of your uploads, making it easy to plan and coordinate your posting⁢ schedule. You can add labels for⁢ your video topics, ‍include links to drafts, and even set reminders for when to film or edit—talk about‌ organization!

Another fantastic option is YouTube Analytics. It’s like ​having‌ a backstage pass to the ⁤inner workings of your channel! You can track views, watch‍ time, and even demographics, all‌ in one place. Want to​ know what your audience loves? Dive into the data and adjust your content accordingly. Additionally, using⁢ a simple spreadsheet can offer flexibility;‌ just jot down your upload dates, titles, and performance metrics to visualize your growth over time. Check the following example:

Upload Date Video ⁢Title Views
01/15/2023 Ultimate Guide to Cooking 1,500
02/20/2023 Travel Vlog: Paris Edition 2,200
03/10/2023 DIY Home Decor Ideas 800

With these tools in your arsenal, ‍not only will you simplify your tracking process, but ‌you’ll⁣ also gain insights that can elevate your channel’s success. By keeping everything organized, you’ll feel more⁣ in control of ⁤your content creation journey!

Crafting a Streamlined​ Upload Schedule That Works for ⁤You

Crafting a Streamlined Upload Schedule That Works for You

Finding the right upload schedule for your YouTube channel can feel like trying ​to solve a Rubik’s Cube blindfolded. You want ‍to keep your ‌audience ‍engaged without burning yourself out. Here’s where a little planning can ​work wonders! Start by identifying the best times your viewers are online—check out ⁣the YouTube Analytics to spot those ​sweet⁤ spots. From there, craft a schedule ‌that feels natural. Whether‌ it’s Tuesdays at 3 PM or Fridays after work, consistency is ⁢key! Imagine your upload days as a weekly⁢ coffee date with your subscribers; they’ll come to look forward to ⁢it!

A great strategy is⁢ to batch your content creation. Instead of scrambling to create​ a video the ​day before ⁤your scheduled upload, set aside specific⁣ days for shooting, editing, and promoting. Break it down like this:

Task Recommended Day Time Block
Filming Monday 10 AM – 1 PM
Editing Wednesday 2 PM – ⁣5⁤ PM
Promotion Friday 3 PM – 4 PM

With this ‍streamlined approach,​ you’ll not only⁢ stay organized‍ but‍ also keep your creativity flowing. So, ​why not⁣ give it a shot? Your audience—and your sanity—will ​thank you!

Turning Data into Insights: Analyzing ​Trends‌ for ‍Future Success

In the ever-evolving world ‍of content creation, especially ‍on⁤ platforms‍ like YouTube, understanding your data ⁢can feel like trying to decipher⁢ a foreign language. However, transforming that vast sea of numbers into valuable ⁣insights is crucial for future success.⁢ By tracking your uploads, you can ⁣pinpoint trends that resonate with your audience, allowing you⁣ to tailor your content strategy ‌effectively. Consider the following to streamline your analysis:

  • Upload Frequency: How often are you posting? Too little, and‌ your audience might⁣ forget you; too much, and they might⁣ feel overwhelmed. Find that sweet ⁢spot!
  • Engagement Rates: Examine which⁣ videos garnered‍ the ‌most likes, comments, or shares. This way, you⁤ can identify‌ what⁤ excites your viewers.
  • Audience Retention: Look at where viewers drop off. ‌Understanding this can ⁤guide you in ⁤maintaining viewer interest ‍and ‍improving your ⁤content.

Once you’ve gathered this data, the real magic happens when you start analyzing trends over time. ‍Here’s ⁣where creating a simple table can ‍help visualize your findings:

Month Total Uploads Average Views Engagement⁣ Rate ‌(%)
January 8 1,200 15
February 6 1,500 18
March 10 2,000 20

By analyzing ⁤this data, accountability increases, and so does your ​content ⁢quality. It helps you identify what’s working and what⁢ isn’t, enabling you to adapt quickly. So, are you ready to dive into your analytics and take your channel to ‌the next level?

In Conclusion

So, there you have it! Keeping tabs on your YouTube uploads ⁤doesn’t have to feel like solving a Rubik’s cube blindfolded. With the​ right tools and a little organizational flair, ⁤you can effortlessly keep track of your creative journey on the platform.⁢ Imagine being able ‌to glance at ‍your upload schedule and​ see your‌ efforts laid⁢ out⁣ like pieces‍ of art in a gallery—each video a ‍brushstroke in your masterpiece.

Now that you’re equipped with some handy tips,​ it’s time to dive in and start counting those‌ creations. Whether you’re a vlogging ‍newbie or a seasoned content creator,⁢ remember that every video counts and ​contributes to your unique story.⁢ So, why wait? Get out there, upload, and revel in the joy of tracking your progress.⁣ Happy creating!

Mastering YouTube: How to Block Shorts with HTML Code

Want to take control of your YouTube⁢ experience? If the endless stream of Shorts ⁤has you feeling overwhelmed, ⁢you’re not alone. Imagine trying to sip⁢ a fine wine while a blender’s running‍ in the background—tough to focus,‌ right? Well, there’s a way ‌to mute that noise and enjoy the content you‍ love, free from those distracting snippets. In this article,⁤ we’re‍ diving ‍deep⁣ into the world of ​HTML code to‌ help you block those​ pesky ‌Shorts. Whether you’re ⁤a coding novice or a seasoned pro, we’ll guide you step-by-step so ‌you can craft​ your ideal YouTube experience. Ready to reclaim⁣ your viewing joy? Let’s get to it!
Unlocking the Power of⁤ HTML to Control Your YouTube Experience

Unlocking the ⁣Power of HTML to‍ Control Your YouTube Experience

Using a bit‍ of HTML magic, ‍you can ⁤tailor your‌ YouTube experience to your liking. Not ⁤everyone ‍is a fan of ⁣Shorts—those quick bursts of content that pop up and throb ⁤for attention. If ‍you want to put ⁤the brakes on them,⁣ you can use a ‍simple HTML‍ snippet‌ to hide those⁤ pesky videos⁣ from your feed. Just imagine your ⁢homepage ⁢morphing into a calm sea of long-form content without ⁢those flashy interruptions! Here’s ​a little HTML ‍trick ‌to get you started:

Pop that snippet into your user stylesheet or browser extension that⁢ allows custom CSS, and ‌like magic, those Shorts will disappear. ⁤Your feed will be more​ peaceful, allowing you to focus on the content you really enjoy.​ Want to double-check your progress? A ‍quick HTML table can‍ help you​ visualize the victories ⁢you’ve ‌scored against Shorts:

Action Status
Installed‌ Custom CSS ⁣Extension ✔️⁣ Done
Added HTML for ⁤Blocking ​Shorts ✔️ Complete
Checked YouTube Feed ✔️⁤ No ⁢Shorts!

Now ‍you’re not just ‍a ‍viewer; you’re the master ‍of your YouTube domain! It’s like having a⁢ remote control for ⁢your entertainment; you choose​ what you want to see. Plus, once you⁢ get this down,⁣ you might​ even start experimenting ⁣with other⁢ types⁢ of content to hide. Why not? This is your space, and with a little HTML, you’re calling the shots!
Diving into the Code: Step-by-Step Guide to Blocking ⁤Shorts

Diving into the⁢ Code:‌ Step-by-Step Guide to Blocking Shorts

Ready to dive deep into‍ the⁤ world of HTML and ⁢take control⁤ of your​ YouTube experience? Blocking Shorts might ‍sound‌ complicated, but once you dive ​into the code, you’ll find it’s much‌ simpler⁢ than you think! Start by accessing your​ website or application settings where you⁢ can⁤ insert ⁤custom HTML. Once​ there, you’ll want to create a simple script to filter out those‍ pesky ⁢Shorts.‌ Think of ​it ⁤like‌ putting⁢ up ⁤a fence in your yard—you’re ‍just creating a boundary for the content you‍ want to keep out. Here’s a snippet of what ⁢your code could look like:

  • Identify the ⁢container: Most Shorts appear⁤ in designated sections; find their HTML structure.
  • Add a CSS rule: Use display: none; to hide them from view.
  • Test it out: Refresh your ⁣page to ⁤ensure the Shorts have disappeared!

For‌ those who prefer a ⁣visual guide, ​consider creating a table to summarize your actions. It gives you a ​quick reference and helps visualize your ​progress as ⁣you adapt your site:

Action Description
Step 1 Access your ‌HTML​ settings
Step 2 Locate the Shorts⁢ container
Step ⁢3 Add your custom ‍CSS​ rule
Step 4 Refresh‍ and ⁢enjoy ‌your Shorts-free‍ experience!

Customizing Your ⁤YouTube: Enhancing⁤ Your Viewing Pleasure

Customizing​ Your YouTube: Enhancing Your Viewing Pleasure

Customizing your ⁢YouTube experience can feel like sprucing⁤ up your living ​room—you‍ want it to ‍reflect your tastes and be ‍enjoyable for ​you. ‍Ever felt overwhelmed by the influx of YouTube ​Shorts ⁢that pop up? Well, fear not! You can ‍tidy up​ your feed by using a ⁣simple bit ‌of HTML code to block​ those⁤ pesky shorts. Here’s how⁢ you ⁢can enrich your viewing pleasure without the chaos of ⁤Shorts cluttering ‌your space.

To⁢ get ⁣started, you’ll want to ⁤dive into your browser’s⁣ console. ​Sounds technical, but it’s simpler than it ‌sounds. Just‌ follow these steps:

  • Right-click anywhere on the YouTube page and‍ select “Inspect” or “Inspect Element.”
  • Go to the “Console” tab.
  • Copy and⁢ paste this snippet of​ code:
HTML Code Effect
document.querySelectorAll(“ytd-rich-item-renderer”).forEach(e =>⁣ e.remove()); Blocks ⁤all Shorts⁣ effectively!

Once you hit​ enter, watch those shorts disappear as if they were‍ never‍ there! Just like that,‍ your feed ‍will feel refreshing and more aligned with the⁣ content you love. The best ⁤part?⁣ You⁢ can repeat this ⁣every time you​ log⁢ in, ‍ensuring your YouTube⁢ experience remains exactly‌ what you want⁣ it to be!

Troubleshooting Headaches: Common Issues and Quick Fixes

Troubleshooting Headaches: Common Issues⁣ and Quick ‍Fixes

⁢ Let’s‌ face it, we all love⁢ YouTube, but those pesky Shorts can sometimes feel like they’re⁣ trying to sneak into our viewing experience like an unwanted guest at a party. If you⁣ find yourself scrolling⁤ through your favorite videos only to be interrupted by ⁤60-second ‍clips that just aren’t your vibe,⁣ fear not! You‌ can tackle‍ this issue with some clever HTML code. You just ⁤need to dig⁢ into‍ the​ customization options, ⁤and soon you’ll be waving ‍goodbye to those abrupt Shorts! Simply⁢ add ‍a few lines of code to your site’s HTML​ to filter out those ‌flashy clips. Here’s how⁢ you can get started:
​ ​⁢

  • Access your HTML editor: Navigate ⁣to your​ theme options or wherever ⁣you can touch the ⁤source​ code.
  • Insert a content blocker: Add a line that ⁤tells YouTube to skip Shorts in ‌the embed.
  • Save ‌and refresh: Make​ sure to ​save your changes ⁤and ⁣refresh to ​see ‍the magic happen!

​ ⁣ ⁤ ⁢ ‌ Sometimes, even after you’ve blocked those Shorts, you might ⁤find that other distractions pop up.⁤ Maybe it’s those annoying recommendations or auto-play loops⁤ that keep dragging you back in. To tackle these, consider creating‌ a ‍distraction-free zone by using additional CSS tweaks. For instance, you ⁣can hide sections of the page you don’t want ‌to see by customizing your styles. Think of it like setting up a cozy reading nook in ⁢your living ⁤room—eliminating the clutter to focus‍ on what you truly⁢ love. Here’s a little table with ⁢some CSS ‍snippets⁢ you might want to try out:

Issue CSS​ Solution
Blocking ​Shorts display: none; ​for Shorts section
Hiding Recommendations visibility: hidden; on recommendation panel

The ​Way Forward

So there you have it—your go-to ‌guide for blocking those pesky YouTube Shorts with a sprinkle of HTML⁢ magic! ⁣With just a few ​lines of code, you can reclaim ‍your viewing‍ experience and dive back​ into the longer‍ content you love.⁤ Think of‍ it⁤ like building⁤ a cozy blanket fort around your favorite binge-watch area; sometimes you‍ just⁢ need to create ‍boundaries to enjoy your space fully.⁤

Next time you log onto YouTube, you won’t have to dodge ‍those quick-fire clips ⁢that can‍ sometimes feel more ​like interruptions ⁤than entertainment. Take control,‌ and make your ⁤viewing time truly yours. Whether ⁢you’re a casual viewer or a​ content creator ⁤looking ⁣to focus, mastering these simple code tweaks can⁤ really amp ⁣up your experience. So ‌go ahead, implement the changes, and let the regular videos flow ​without‌ those Shorts trying⁤ to⁣ sneak in.

And hey, if ⁤you have any ⁤troubleshooting questions or want‍ to share how these changes worked out for ​you, don’t hesitate to⁣ reach out. Happy watching, and ⁢may your YouTube journey be filled with just the content ‍you crave!

When Does YouTube Studio Refresh? Your Questions Answered!

You’ve just uploaded⁣ your latest masterpiece to YouTube, and you’re eagerly checking back to see how it’s performing. But wait—where are those analytics and updates you were ​expecting? If you’ve found yourself scratching your head over ⁤when ⁤YouTube Studio decides to refresh⁣ its data, ⁣you’re not‍ alone. It’s a bit⁢ like waiting for your favorite coffee to brew; it feels like forever sometimes! But fret not! We’re diving into your burning questions about YouTube ​Studio’s refresh schedule, so‍ you can ⁢be in the know⁤ and make the most of your content. Let’s uncover the secrets behind the numbers and help you understand how to keep your channel ‌thriving.

Understanding YouTube Studio Refresh Timings for Optimal Management

Understanding YouTube Studio Refresh Timings for Optimal Management

Understanding ⁣the ​refresh timings of YouTube Studio can feel like‌ trying to⁤ catch smoke with your bare hands. ⁢The⁤ platform refreshes various metrics in cycles,⁤ meaning what you‍ see isn’t always ‌the latest data. YouTube generally ​updates key statistics like views, watch time, and subscriber count every 24-48 hours, although real-time data can be found‍ for peak activity metrics if you’re really eager to get insights. This lag can indeed be frustrating if you’re eager to track the performance‌ of your latest content, but keep in mind that ⁤this gives you a more ‍stable reflection of growth, allowing some breathing room to avoid knee-jerk reactions to fleeting numbers.

So how⁤ do you make the most of this information?‌ First up, plan ‌your analytics checks during peak refresh‌ times. Consider these timing ‍tips:

  • Post Upload: Check your stats a day after posting ‍to see initial engagement.
  • Monthly Reviews: Assess overall channel health at the end⁣ of each⁢ month for a complete picture.
  • Consistency: ⁢ Stick⁣ to a​ routine; regular analysis helps you spot long-term trends.

Utilizing these strategies can help you stay ‌ahead of the⁢ curve, turning those delayed ⁣refresh ⁢timings into a structured approach for better content⁢ management. Embrace the waiting game; after all, good things come to those who are patient!

Key Metrics That ‍Influence When Your Data Gets Updated

Key Metrics That Influence When Your Data Gets Updated

Several key metrics play a crucial ⁣role in ‌determining when your⁢ data reflects updates in YouTube Studio. Understanding these factors can help you navigate the ins and⁣ outs of content performance. Here are some essentials to ‌keep in mind:

  • Engagement Rates: Higher engagement can signal to YouTube’s algorithm that ⁤your video is worthy of being featured more prominently, leading to quicker updates.
  • View Counts: Significant spikes in views often result‍ in faster data refresh rates, as the platform works ​to provide real-time analytics.
  • Audience Retention: If ‍viewers stick around to watch your video from start to finish, that’s ⁣a positive indicator that might prompt a swift update.

Furthermore, the timing of your uploads significantly influences how quickly metrics are⁢ updated. Here’s a ⁣simple breakdown:

Upload Time Impact on Refresh Rate
Weekdays (AM) Generally faster updates, as ⁣more users are active.
Weekends (PM) Can⁢ lead to slower‌ refreshes due to ⁢increased ​traffic.
Late​ Night Often results in delayed updates,⁣ as viewership‍ drops.

Maximizing⁣ Your Strategy: ⁣Tips ⁣for Navigating⁢ the Refresh Cycle

Maximizing Your Strategy:​ Tips for Navigating the Refresh Cycle

When⁣ diving into the YouTube Studio refresh cycle,⁤ it’s crucial to stay ahead of the game—after all,⁢ your content prowess deserves the‌ spotlight! ⁣Keep ​your finger on the pulse by monitoring the updates and​ utilizing the ‍studio’s features ‍effectively. Regularly check your dashboard for new announcements, as⁣ YouTube often rolls out tweaks ⁤and major updates that can impact your strategy. Think of it like a gardener tending to a garden: the more you nurture and adapt to the ⁣changing seasons, the more likely your content will bloom! Make‍ sure to ⁣engage‍ with your analytics consistently; identifying trends​ can help ⁤you anticipate when a refresh might be due, allowing you to pivot your approach before the wave hits.

Don’t forget to leverage any‌ feedback generated from the refresh cycle. It’s nearly like having a‌ GPS while on a road trip—you want guidance to navigate efficiently! As you gather insights, create a strategy that embraces flexibility⁢ and responsiveness. Here are some quick tips to keep in mind:

  • Stay informed: Follow YouTube’s official blog and social ⁢channels for news.
  • Engage with the community: Networking with other creators can be a goldmine for strategies.
  • Test new features: Experiment with the tools provided during refresh periods for maximum engagement.
Feature Potential Impact
New Analytics Metrics Provides insight on audience behavior changes.
Updated UI Enhances user experience ​and ease​ of⁤ navigation.
Enhanced Shorts Capabilities Boosts reach and engagement for quick content.

Common Misconceptions About YouTube​ Studio ‌Refresh ⁤Frequency

Common Misconceptions About YouTube‍ Studio Refresh‍ Frequency

There’s ⁢a lot of chatter out there about how often YouTube ‌Studio refreshes data, and some of it is​ downright misleading. Many ⁢folks believe that real-time metrics are updated⁢ constantly. In reality, while it might feel instantaneous, the truth is that⁤ data refreshes occur in batches throughout the day. Depending on the type ​of insight you’re after—like views, subscribers, or estimated revenue—you could be looking at data that’s anywhere from a few ‌hours old to a day or even two⁣ on rare occasions. So, if you’re checking every‍ few minutes and feeling⁢ frustrated by ‌stale data, it’s ‌not just you; it’s the system!

​ Another common myth is that once you upload ‍a video, you can instantly see its ⁤performance metrics. ⁣This leads many creators to panic when their ​initial views don’t reflect what they expect. The reality is that after hitting publish, those numbers take time to climb as the algorithm begins its work. The first ⁣few hours might feel like a game of⁤ waiting, but it’s crucial to understand that your video is being processed and promoted gradually. Think of it like planting‌ a ⁣seed; ​you won’t see ‌a tree sprouting right away, but with a little patience and care, you’ll eventually witness ‍growth. Here’s a ⁣simple breakdown of refresh timelines ‌for various metrics:

Metric Refresh Frequency
Views Every ⁤48-72 hours
Subscribers Every ‍24 hours
Estimated Revenue Every 24-48 hours
Engagement Stats (like Watch Time) Every 24 hours

The Way Forward

And⁣ there you have it—your ​go-to guide on when ⁤YouTube Studio refreshes and why it can feel like⁢ watching paint ⁢dry sometimes! Whether ⁤you’re a seasoned creator or just dipping​ your toes ⁢into the vast ocean of content‍ creation, knowing when‍ to check those analytics can⁤ make all the difference in fine-tuning your channel. Remember, patience is key—just like waiting ⁣for that perfect moment⁤ when the ​light⁤ hits your shot just right.

So, the next⁤ time you find yourself staring at that screen, waiting for updates or wondering when those stats will finally kick in, just take a deep breath​ and remind yourself that good things ‍come to those who ‌hustle! Keep creating, ⁣keep engaging, and don’t hesitate to come back here whenever‌ you have questions. ⁣We’re all in this YouTube journey together, and we’ve got your back. Happy creating, and ⁢may your refresh rates always be swift!

Easy Steps to Delete Your YouTube Video in No Time!

Ever found yourself staring at a YouTube video you wish you could just wipe off the face of the internet? Maybe it’s⁢ an⁤ old vlog ⁤that makes you cringe or a ⁢tutorial that turned ‌into ​an epic​ fail. ​Don’t sweat it! Deleting your YouTube video is as easy as pie, and I’m here to walk you through the process step-by-step. No tech jargon ⁣or​ confusing ⁢terms—just simple, straightforward instructions‌ that ‍you can follow in ⁤a jiffy. Let’s ⁣dive in and get that digital baggage off your back!

Understanding ‌the YouTube Interface for Effortless ‌Navigation

Understanding the YouTube Interface for ‌Effortless Navigation

Getting cozy with ⁣the YouTube interface can make deleting your​ video a walk in the park. When you log ​in, you’ve‌ got a dashboard that’s like your personal command ‌center. In ‌the left‌ sidebar, you’ll find⁤ shortcuts to ‌your videos, playlists, and ​library. This is where you can keep everything organized, just ‌like sorting through your‍ favorite books. Imagine ⁢having a bookshelf ⁤where you ⁢can easily ‌spot what you need.⁢ That’s the magic of YouTube’s layout—it’s designed‌ to help you navigate smoothly.

Now, once​ you find “Your Videos,” you’ll see a list of everything you’ve uploaded, giving you an overview that feels ​like flipping through your own photo album. Each ⁤video has ​its nifty little settings button (three dots), which is your gateway to making changes. Need to ⁣delete? Just hit that button and choose “Delete‌ Forever.” It’s pretty straightforward. ⁣If‍ you’ve‍ got‍ multiple videos lined up, it’s as easy as checking a box⁢ next to each ​one you want to ​remove. Want a ⁢visual? Check the table ‍below for a quick recap of the ​steps!

Step Action
1 Log into YouTube
2 Go to‍ Your⁤ Videos
3 Click settings ⁣(three dots)
4 Select “Delete Forever”

A ‍Step-by-Step Guide to Deleting Your Video Like a Pro

A Step-by-Step Guide to Deleting ⁣Your ⁣Video Like a Pro

Ready ⁢to free up​ some space on your YouTube channel? First things ⁣first, you’ll want ⁤to log ​into your account‍ and head ⁢over to the YouTube⁣ Studio. From the left sidebar, click ⁤on Content. This page shows all your videos, like a⁤ digital ‍library of your creative work. Scroll through ​your​ list of uploads until you spot‌ the ‍video that’s no longer serving you (we all‍ have a few!). Hover ​over the video thumbnail, and you’ll see ⁤a few options pop up. Click on the ​ Options button, which⁢ looks⁢ like three vertical dots, and brace⁤ yourself for the next⁣ step!

Now that you’ve⁣ found⁢ your video,​ it’s time to take ‌the plunge. Select Delete ⁢from the menu that appears. You’ll receive a‍ prompt asking you to confirm this move. It’s like standing on the edge ⁤of a cliff, staring ​down at the ‌ocean below—are you ready for this? Don’t forget, once you hit ​that confirmation, it’s goodbye to the video ​forever!​ If you’re ‍still feeling a little hesitant, maybe consider setting ‌it ⁣to Private first. That way, you don’t have to ‍totally let go ⁢right away.‌ Remember, deleting a video might just be ⁣a part ​of your ⁣creative journey!

What to Consider ⁤Before Hitting the Delete ⁢Button

What to ‌Consider⁣ Before Hitting the Delete Button

Before you go ⁢all Hulk and smash⁣ that ⁤delete button, take a moment to think about what you might be erasing. There might be some hidden gems ‌in​ that video you’re ready to toss. Consider the engagement your video has received—like, are people commenting? Sharing? Sometimes a ‌video might not perform well initially but could pick‌ up traction later.​ Plus, think about the context—if it’s a part of a larger story or keeps your channel’s theme consistent, think⁣ twice ⁣before letting ​it go. You know what they ‍say: “One person’s ​trash​ is ‍another ​person’s treasure!”

Also,⁢ weigh your options before ⁣making it permanent. Instead ‍of deleting, could you simply unlist it? That ‍way, it’s not visible to everyone but still remains in your⁢ content ​library if you change your mind later. Moreover, consider if ⁣you’ve still got that ⁢original footage saved; you might⁣ want to⁢ remix it into something ⁢fresh. ‌Or if you’re worried about‍ performance, think⁤ about tweaking the ⁣ thumbnail ‍ or description instead of ‌an outright deletion.‌ Sometimes, all it takes is a ⁤little sprucing to turn something ho-hum into a must-watch!

Recovering Your Content: ⁣What​ Happens ⁢After Deletion?

Recovering ⁢Your Content: What Happens After ⁢Deletion?

Deleting a YouTube video might‍ feel like a​ final farewell, but the good news is that some⁤ options can bring your digital creation back⁢ from the abyss. Once⁢ you hit​ that delete button,⁤ the‍ video enters the grand ⁣void‌ of the YouTube universe, ‌making it seem ⁢like it vanished into thin air. ⁣However, if you act quickly, there’s a​ flicker of hope! YouTube doesn’t keep your deleted videos for‍ long, but they sometimes reside in ⁣the platform’s⁤ servers for a ​brief period, just enough⁤ time for you to realize that you want your masterpiece back. To​ recover, check ‍your YouTube ⁤Studio dashboard where you can find the ​”Trash” section, allowing you⁢ a chance ‌to restore your ‌work within⁤ a limited timeframe.

If your video has totally⁤ slipped through the‌ cracks and isn’t hanging out in the trash, don’t throw​ in‍ the towel⁢ just‌ yet. Think of it like a lost⁢ sock in​ a ⁣washing machine—sometimes, it shows ⁣up when you least expect it. Try browsing through ​your connected accounts or any backups you ‌might have created. ⁤If your video had a significant impact or loyal viewers, ​they might even have ​downloaded it when it‌ was live. Here’s a quick ​checklist to contemplate:

  • Check YouTube Studio: Look ⁣under⁤ “Trash” for a potential restore.
  • Explore Local Backups: See if ‍you saved a copy on your device.
  • Ask Your​ Audience: ⁣ Perhaps⁤ someone downloaded it and can share it with you.

The Conclusion

And there you ⁢have it! Deleting⁣ your YouTube videos can be as easy as pie. ⁢Whether you’re lightening your ⁤digital load or clearing out the clutter⁢ for your next ⁣big masterpiece, following these simple steps will have you ‍unpublishing that content in no ⁤time. Just think of it like spring cleaning‌ for your⁤ channel—make room for fresh ideas and creative expression! So, next time⁤ you feel the need to trim the fat from your channel, you’ll have‍ the know-how tucked away like ⁢a trusty ⁣toolkit. If you ⁤enjoyed this guide or have ⁢any questions, don’t hesitate to reach out. Keep creating and sharing your unique voice—who knows​ what masterpieces await? Happy⁤ uploading!

Wave Goodbye: Easy Steps to Delete Your YouTube Playlist!

So, you’ve decided it’s time to declutter your​ YouTube ‍playlists? Maybe those old jams just aren’t hitting the same, or​ perhaps your watchlist has turned into a⁤ bit of a‌ digital hoarder’s paradise. Whatever the reason, deleting a ⁢YouTube‍ playlist doesn’t have to be a ‌headache. In fact, it can ⁢be as simple⁣ as waving goodbye to an old friend—no hard feelings! Let’s⁣ dive into some easy steps to help you clear out the digital cobwebs and create⁣ a playlist that‍ truly sparks joy. Ready‍ to swipe left‍ on those outdated tunes? ⁣Let’s get started!
Decoding Your YouTube Library for‌ a Fresh Start

Decoding Your YouTube Library for a Fresh Start

​⁣ Ready to give your YouTube library a little TLC? Think of your playlists as the bookshelf of ​your⁢ digital life. Over time, those initial must-watch collections might ⁢collect dust, and let’s be real—some⁤ songs just don’t hit the same anymore. So, how ​do you declutter that cluttered ‍library and make ⁣way⁣ for⁣ fresh content? Start by reviewing ‌your playlists. Ask yourself:
‍ ⁤

  • Which videos still resonate with you?
  • Are there any that you’ve outgrown?
  • Do you really want ⁤to keep that viral cat video from five years ago?

‍ ⁣ Once you’ve identified the guilty culprits, it’s time to take‌ action! Simply go into your⁣ library, click the playlist you want to remove, and hit that delete button like it’s ​a noisy⁤ alarm clock you just‍ can’t stand. It really is that easy! If​ you’re feeling fancy, ‍you might ​even create a new playlist⁣ that reflects‌ your current vibe—something fresh and new, like planting a garden after winter. Switching things up can be just ⁣what you need to reignite ‌your passion for discovering new content.

Letting Go: Tips for Deciding Which Playlists to Delete

Letting Go: Tips for Deciding Which Playlists to Delete

Deciding which​ playlists to part with can⁤ feel like sorting through a treasure chest; some gems shine, while others may have lost their ⁢luster over time. Start by evaluating your playlist purpose. ​Ask yourself: “Does this collection‌ still resonate with‍ me?” If it’s gathering virtual dust ‌with songs ⁤that aren’t hitting home anymore, consider letting it go. A‌ playlist‌ that once matched your vibe might now⁤ feel like an ‍awkward⁢ pair of shoes – great in theory, but not really your style anymore. When ‍in doubt, think ⁤about how often you listen⁤ to it. If it hasn’t made your soundtrack in months, it might be time to say goodbye.

Another effective way to trim the fat is​ to ⁤ review your song choices. ⁣You can run through your playlist and weigh ‍how ⁣each track makes you feel. Jot down a few thoughts ​about each⁢ one: Does it spark joy? Does it remind you of a fun time, or is it just background noise? If any tunes incite‌ a “meh” feeling, they probably don’t deserve a spot in your curated collection. Consider creating a decision table to ‍visualize what stays and what goes. Here’s a simple layout to help you out:

Track Title Vibe​ Check Keep or⁣ Toss
Song A ❤️ Love it! Keep
Song B 😐 Just okay Toss
Song C 🎉 Party anthem! Keep
Song D 🧐 Who‌ even is this? Toss

Step-by-Step Guide to Erasing Your Playlists with Ease

Step-by-Step Guide to Erasing ‍Your Playlists with Ease

Ready to wipe the slate⁤ clean ‍and declutter your YouTube experience? Deleting‌ a playlist is as easy as pie!⁤ Just‌ follow these simple steps to​ send that unwanted playlist packing:

  • Log into your YouTube account: Open your ‍favorite browser and head over to YouTube. ⁣Make sure you’re signed in.
  • Navigate to Your ⁣Library: ⁣Look for the Library icon on ​the left sidebar. Click it to reveal all your playlists.
  • Select ​the Playlist: ‍ Find the playlist you want to delete and click on its title to open it.
  • Access Playlist Settings: Hit​ the three dots ‍(⋮) right next to the playlist ‍title ‌to⁤ unveil more ⁣options.
  • Delete the Playlist: Click on “Delete playlist” ​and confirm your choice. Boom! It’s gone.

But, wait a minute!⁣ Are you sure you want to part⁣ ways with that ‍collection of bangers? Once you hit that delete button, there’s no going back. If ​you’re feeling unsure, you can always take a moment to rethink your decision. And hey, if your playlist ⁤holds too many good‍ memories, ‍why not⁣ just keep ⁢it around for‍ a bit longer? It’s ‌like reminiscing over an old photo album – sometimes the best treasures lie in what ⁣we choose to remember!

Celebrating Your Clean Slate: Making the Most of Your YouTube Experience

Celebrating Your​ Clean Slate: Making the Most of Your YouTube Experience

Embracing that fresh start on YouTube can feel like‌ unboxing a ​shiny new ‍gadget. Think about it! Each playlist is like a collection of memories we created with‌ the click of a button. Yet, sometimes​ we have to part ‍ways with old favorites to make ⁣room for new passions. When you delete a‌ playlist, it’s not just a digital ⁤cleanup; ​it’s an emotional declutter, allowing space for what truly resonates with‌ you now. It’s like clearing out your closet to only showcase ‍those ⁤outfits⁣ that make you feel fabulous.​ So, grab a comfy⁢ chair and let’s dive⁢ into this process a little deeper.

As you navigate through your YouTube settings, consider how‍ refreshing it is ⁤to ‍streamline your viewing experience. Here are a ‌few steps to keep ​in mind ⁢while you’re on this journey:

  • Evaluate Your Favorites: Take a moment to scroll through your playlists and ⁢decide which ones still inspire you.
  • Make a Backup: If there are any sentimental‌ tracks, don’t forget to save them elsewhere first.
  • Hit Delete: Once you’re ready, the delete button is just a click away—like shedding old skin!
  • Celebrate Your‌ Progress: Each playlist you delete is a step toward your ideal‌ YouTube space!

Once you’ve⁢ pressed that delete​ button, ⁤revel in‍ the satisfaction of your clean ​slate. It’s more ⁣than⁤ just a digital clean-up; it’s ⁤an opportunity to explore new‍ trends, discover fresh content, and align your playlists with who‍ you are today. Remember, your YouTube journey​ is yours alone, ⁢so curate it‌ in a way that sparks joy and reflection. As you⁤ hit ‘Play’ on those new ⁤interests, think of it as​ turning the page on a new chapter—one filled with excitement ⁣and endless possibility!

In Conclusion

And there you have it! With ​just a few simple ​steps, you’re all set to wave goodbye to those playlists that no longer tickle your fancy. It’s like spring cleaning for your YouTube account—out with the old, in with the‌ fresh ⁤and ⁤fabulous! Remember, it’s totally okay to curate your collection and ‌keep only the gems that resonate‌ with you. So go ahead, dive into ⁢that YouTube library, and make⁣ it your own. If you have any questions or need a helping hand, don’t hesitate to ask! Happy editing, and may your future playlists be nothing short ⁢of amazing! 🌟

Quick Guide: How to Easily Delete Your YouTube Video

So, you’ve decided it’s time to say goodbye to that old YouTube video that’s been collecting ‍virtual dust, huh? ‍Maybe it’s ‍out ⁤of date, ‍or​ perhaps it just ‌didn’t quite hit the mark.​ Whatever the reason, deleting a YouTube video might seem daunting, ​but fear not! This quick guide is here to walk you through the process step by step, making⁤ it as easy⁣ as pie.‍ Whether​ you’re looking⁣ to tidy up ​your channel or just want to remove a video for ⁣good, I’ve got you covered.⁣ Let’s ⁤dive in and make this hassle-free!

When you’re in the YouTube‌ Studio, think of ‍it as your personal control room. Imagine having all‍ the buttons you need to power up, tweak, or⁢ shut down your video empire right ⁢at your⁣ fingertips. To get started ⁤on deleting ⁤a video,‍ navigate to your ‍ Content tab.​ This⁣ is ‍where all⁤ your videos hang ‍out like ​friends at a party. Here, you can scroll through your library, eyeing ​the clips you want to keep⁢ and those that might⁢ deserve a one-way ticket to the digital realm of ⁢deletion. If‍ a video no longer ​feels like part⁤ of ⁣your ​brand or maybe it’s just⁤ not hitting ⁤the⁢ mark, ​it’s time to​ take⁣ action.

Once you’ve spotted the troublesome video, click on the Options (the ​three⁤ dots)‍ next to it, and you’ll ⁢see a menu pop‍ up like⁢ a genie granting⁢ wishes. Select Delete, and YouTube will confirm your choice. Talk‍ about a moment of ⁤truth! ‌Just be‍ sure you’re really‌ ready ​to let go,⁤ because once‍ that​ video is ⁢gone, it’s like ‍trying to recapture spilled​ milk—nearly impossible! If you’ve‌ got a bunch of videos to manage, you ‍can even ‍bulk-delete by selecting multiple videos at once. ​Just remember,⁢ the power to remove videos ⁤is a responsibility.⁤ Make sure you’re only hitting⁤ that delete button​ on the clips‍ that⁣ have run their course!

Navigating the YouTube Studio: Your Gateway ​to Video Management

Finding Your ‌Video: Simple Steps to⁤ Locate and​ Select

Locating your YouTube ⁢videos can feel like ‍searching for ⁣a needle in a haystack, especially‍ if you’ve got ⁣a ton of ⁤content floating around ⁤your channel. But fear​ not! You can easily find what you’re ​looking for with just‍ a few clicks.⁣ Start by heading‌ to your YouTube ‍Studio dashboard, where all your uploaded ⁢videos⁤ hang out.⁢ Click on the⁢ Content tab on the left‌ side. From there, you can either scroll‍ through ‍to⁤ find your video or use the search bar at ⁢the top​ to type in​ keywords ‍related to your video title. Think ⁢of it like Googling‍ the⁤ best pizza place in town—just ⁤type ⁣in what⁣ you need, and voilà!

Once you’ve found the video you want to get ​rid of, selecting ⁤it ⁢is a breeze. You’ll see⁢ a list with thumbnails, titles, and some crafty little stats next to each video. Just hover over your selected video, and you’ll spot ⁤the options button⁢ (it looks like ​three ‍dots). Click on⁣ that, and there’s⁣ an option to ​ Delete forever. It’s vital to⁣ know, though, that this action ⁤is irreversible—like tossing⁢ out⁢ leftovers ⁣you’ll​ never ‍finish. Make sure you’re ⁢ready to bid ⁤farewell⁤ to your video​ for good. And just like that, you’ve streamlined your channel while ​keeping​ it‌ clutter-free!

Finding Your Video: Simple Steps⁤ to Locate and Select

Deleting with ‍Confidence: What ⁢You‍ Need to Know Before ‌You Hit Delete

Before you dive into deleting that ⁣YouTube video, take a moment to reflect. Hitting the delete‍ button ⁤is as final as a snap of your fingers—poof! ⁢Your‌ content is ‌gone forever.⁣ So, here ⁤are some essential points to consider:

  • Value of the⁤ Video: Does it serve a purpose?⁤ Sometimes, what feels outdated can still⁤ resonate with viewers.
  • Engagement Levels: Check⁣ the ‍comments and likes. If‌ your⁣ video has ‍sparked⁢ conversations or‍ gained traction, ​it may⁢ be worth keeping.
  • Channel Identity: ⁢ Does this video align with the overall vibe of your ⁢channel? A ​mismatched video can⁢ sour your brand.
  • Future Use: Think ahead! ⁢Could you repurpose the ‍content or edit it for ​later use? Deleting it ‍might ⁢be a waste.

If you’re leaning toward deletion, consider the‍ following factors to make⁤ this decision easier:

Factor Consideration
Analytics Check views, watch⁢ time, ‍and audience retention. Are people sticking around⁢ to the end?
Community Feedback What⁤ do ⁤viewers say? Positive comments​ can be a ​reason‍ to keep it.
Content ⁤Relevance Is it still relevant, or has it aged ​like milk?

Deleting with⁤ Confidence: What You Need to Know Before You⁢ Hit Delete

Aftermath and Alternatives: Options Beyond Deletion You Should Consider

Deleting a YouTube video might seem⁣ like the⁤ only answer when you think it’s underperforming or‍ doesn’t⁤ align with your brand‌ anymore. However, there are some solid ‍options you should think about instead of just hitting that delete button. Have you considered unpublishing? This lets⁢ you​ keep ​the​ video on your‍ channel ​while making it invisible‍ to the ‍public. ‌It’s like hiding‌ a⁤ book on the back shelf‍ instead of‌ tossing⁢ it​ in the trash. You ⁢can always revisit​ it later when ⁢you get ⁢a fresh perspective or decide to re-edit it.‌ Think about this as ‌your video’s *personal retreat*,​ taking a break until it’s ready ‌for the spotlight‌ again.

Another great alternative is to ⁣ update your video ⁢ with new graphics, ‌additional information, or even a new voiceover. This can breathe new‌ life into ‌something you ​may have deemed unworthy. Sometimes, a‍ quick refresh can turn ⁣a ‘meh’ video into a crowd favorite!‍ You could‌ also ‍ create⁤ a playlist that ⁢includes it among your​ best⁤ content,‍ giving it a chance to shine alongside more popular videos. the goal is to maximize ‍your content’s‍ potential—ask​ yourself, “What can I do to make ‌this ⁣video work for me?” The possibilities ‍are ⁣endless!

Aftermath and ⁤Alternatives:⁢ Options Beyond Deletion You Should ⁤Consider

Closing Remarks

And there you have it! ‍Deleting‌ your YouTube video is‌ as easy ‍as ​pie ⁢when ‌you know the steps. Whether​ you’re tidying up ‍your⁤ channel ‍or⁣ just​ hitting ​the reset‌ button on⁤ your content,⁣ a few clicks‌ can ​make ‍all the difference. Remember, it’s ‌your channel, and you get to decide what⁢ stays and what​ goes.​ If ⁢you’re feeling a bit hesitant, think of it as decluttering a messy room—sometimes, a fresh start is just what you ‍need to⁣ spark new‌ creativity!

So ‍go ahead, take charge of your content, ​and don’t worry—whatever you choose to ‍delete,⁢ you ‍can always create something new ⁤and even better. ⁢Got any questions or tips‌ of your own? ​Drop them in the⁤ comments! Happy YouTubing!