Why Are My YouTube Thumbnails Flipping Upside Down?

Ever clicked on a YouTube video ⁤only ⁣to be greeted by a thumbnail that’s ⁣doing a bizarre acrobatic flip?‌ You’re not alone! It’s almost like those thumbnails have a⁢ mind of their own, contorting ‌into upside-down versions of what they’re supposed to be. So, what’s the ⁤deal? Is it a glitch? A hidden message‌ from the YouTube gods? Or perhaps ⁣a prank from your favorite content ‍creator? Let’s dive into this quirky phenomenon and unravel the ‍mystery ​behind those topsy-turvy thumbnails so you can get ⁣back to binge-watching without the upside-down confusion!

Understanding the Quirks of YouTube Thumbnail Orientation

Understanding the Quirks⁢ of YouTube⁣ Thumbnail Orientation

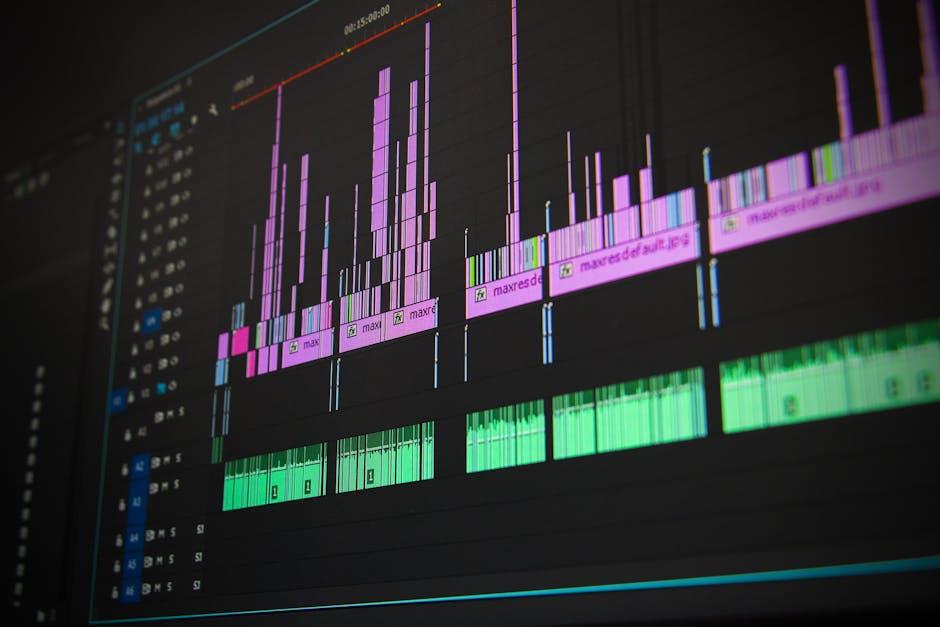
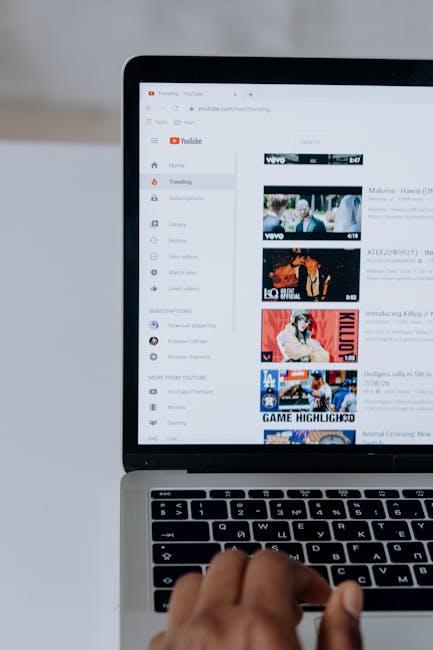
Have you ever uploaded a thumbnail for your YouTube video⁤ only to find it upside down or awkwardly turned? It can feel like‌ your ‍computer is playing tricks on you, right? ⁤This ‍annoying issue often arises from a combination of file format ‌quirks and ‍how different software interprets those files. Most commonly, it stems from​ the way certain devices encode ‍images. For​ instance, if you’re using a smartphone,⁢ it might save the thumbnail ⁤with orientation data that some platforms don’t ‌recognize, causing the image to flip. Before uploading, ⁤check the orientation of your⁤ image in an editing program;‌ sometimes a quick rotation followed by a save can clear up the confusion.

Additionally, your browser’s ​caching might‌ be ‌part ‍of ⁤the issue. ‍If you’ve previously uploaded a thumbnail and‌ then made changes, your browser⁤ could be displaying an old version that’s stuck in your‍ cache, leading to⁢ that frustrating ⁢inconsistency. Clearing your cache or refreshing⁣ the page⁤ can often resolve this problem. You can also consider using image-editing tools to simply crop or resize‍ the thumbnail to​ meet YouTube’s requirements and eliminate any hidden orientation data that might hinder proper display. This little tweak can make all the ⁤difference!

Issue Solution
Image ​orientation issues Check and adjust orientation in an editor
Browser caching Clear cache or refresh page
Incorrect file format Use standard formats like⁢ JPG or⁤ PNG

Common Reasons Your‍ Thumbnails Might‍ Be Turning⁣ Upside Down

Common Reasons Your Thumbnails⁣ Might Be ⁢Turning Upside Down

Have you noticed your YouTube thumbnails​ acting a bit⁣ rebellious, flipping upside down when they’re not supposed to? ⁤This‌ quirky issue often stems from ‌a few sneaky culprits. Sometimes, it’s all about the file format. If you’re using ⁢a less common format ⁢or even a corrupted image, YouTube might misinterpret how to display it. Other times, it could be the pixel ⁢dimensions. YouTube has its‍ sweet‌ spots for thumbnails, and straying too far from these dimensions can throw things into disarray. Be sure your images align⁣ with the recommended size of 1280 x 720 pixels and maintain ‌a 16:9 aspect ratio.

You might also want to check⁤ your editing software. Some programs add hidden metadata that ⁤can confuse YouTube’s‍ thumbnail-rendering process. When your thumbnail⁢ looks perfect on ⁢your device, it might not be playing nice in the YouTube sandbox. Additionally, if your thumbnails are generated ‍automatically by a third-party tool, double-check that the settings aren’t flipping things around without you noticing. It’s like putting on your shirt inside out—everything seems mostly fine​ until you give it a closer ‌look. Here’s a ‍quick checklist to keep in ‌mind:

  • Check file formats: Use .JPG⁢ or .PNG.
  • Inspect dimensions: Ensure 1280 x 720 pixels.
  • Avoid hidden metadata: Simplify your image processing.
  • Review third-party tools: Confirm⁣ settings are correct.

Quick Fixes to Get Your Thumbnails ⁣Back on ‌Track

Quick Fixes to Get​ Your ⁤Thumbnails Back on Track

Sometimes, it feels like your thumbnails have a‌ mind of their own, doing somersaults instead of showing off your hard work. If you’re dealing with those pesky upside-down images, try these quick fixes to get things right side up ⁢again. First off, check the aspect⁣ ratio of your thumbnail.⁣ YouTube loves a 1280 x 720 resolution image with a 16:9 aspect ratio. If your image doesn’t fit that mold, it ‍may be flipping from the get-go.⁤

Next, make sure your image⁤ file is‍ in a compatible format. Go ‌for JPEG, PNG, GIF, or‌ BMP; other formats might just confuse the platform. Here’s a handy table to align your settings:

Format Recommended?
JPEG ✅ ⁢Yes
PNG ✅ Yes
GIF ✅ Yes
BMP ✅ Yes
WEBP ❌ No

⁤ ​ Last ‍but not least, clear your browser cache and refresh your page. It’s like rebooting your brain when it has too many tabs open! Sometimes, a simple refresh can flip that thumbnail back ‍to its proper ⁢orientation. ​If all else ⁤fails, don’t hesitate to⁣ re-upload the thumbnail—think of ‌it as giving your video a fresh start.

Preventing Future Thumbnail Headaches with ⁢Smart Tips

Preventing Future Thumbnail Headaches ⁣with Smart ​Tips

Sometimes, the simplest things can trip us up, right? I mean, who would have thought that a little⁤ thumbnail‌ could cause such ​a headache? To dodge those pesky upside-down thumbnails in the future, keep a close eye on your image orientation⁢ before uploading them to​ YouTube. Using a reliable imaging tool or editing software, make sure you ⁢prep your images correctly. Flip it,​ rotate‍ it, do whatever you gotta do‍ to​ ensure‍ your masterpiece is⁢ positioned just the way you want it. And ⁣don’t forget to save the ‌right settings! An unassuming JPEG might just be the culprit behind the chaos.

Next up, don’t underestimate the power of proper‍ device usage while creating thumbnails. If you’re working on a phone, tablet, or even a mixed bag of devices, it’s easy for layouts to shift unexpectedly. Stick to ‌one device for creating and editing your thumbnails, and if you’re feeling extra cautious, try creating them in a browser. Here’s a quick checklist to prevent those flips:

  • Use the same editing software consistently.
  • Double-check the orientation before saving.
  • Preview⁢ your thumbnails⁣ in various formats.

Final Thoughts

So there you have it! If your⁢ YouTube thumbnails are doing a headstand, don’t fret—there’s usually a straightforward fix. Whether it’s a matter‌ of image ‍file orientation, software glitches, or a⁤ simple hiccup in the upload process, you’ve got⁤ options to set things right. Just imagine your thumbnails as the welcome mats of your channel; they should be inviting and presenting ​your content ⁤in the best light, not upside down like a confused dog trying to⁣ catch a tail!

Experiment, ‌play around, and keep⁣ tweaking until you find ​what works ‌for you. After all, the audience deserves ‍visuals that ⁣grab their attention,⁤ not ones that ⁤leave them scratching their heads. And hey, if you⁤ find yourself stuck again, welcome to the club! We’ve ⁣all been⁣ there. Just keep creating, keep experimenting, and those thumbnails will be⁤ standing proud ⁣in no time. Happy YouTubing!

Mastering YouTube: Your Simple Guide to Looping Videos!

Picture this: you’re scrolling through⁣ YouTube, ​sipping ‍your ⁤coffee, and you ‌stumble upon⁣ that one catchy ⁤tune or ‍mesmerizing⁤ clip ‍that ⁢just ​wraps around your brain⁣ like your favorite blanket.⁣ You hit replay, but it can feel like a hassle, ⁢right? What if‍ I told you ⁢there’s a neat little ​trick to⁤ keep ​those ‍videos on repeat without the constant⁢ click? Welcome to⁢ your ultimate ‍guide on​ mastering YouTube by looping videos! ⁢Whether you’re trying to‍ absorb a killer tutorial, vibe to your favorite music, ⁤or simply bask ⁤in the brilliance ​of cat videos, ⁣looping is‌ the key to making those moments last ⁤longer. So grab your snacks,⁢ get comfy, and ⁢let’s dive ‍into the⁢ simple‍ steps that will ⁣have you looping like a‍ pro in no time!
Discover the Magic of⁣ Looping: Why You Should ​Consider It

Discover⁤ the Magic ‌of Looping: Why‍ You Should Consider It

Imagine‍ finding yourself lost in a ​world where⁣ your favorite video plays​ over and over, effortlessly pulling ​you deeper into its grooves. That’s the magic of ⁤looping! By enabling a‍ video ⁣to replay continuously,‌ you not only enhance your viewing experience ⁢but also⁤ unlock new layers⁢ of creativity.⁣ Whether ⁣it’s a captivating ‍music track, a breathtaking nature clip, ⁤or a tutorial you want to master, looping can turn a simple viewing‍ into an immersive journey. You’ll soak in every detail, catch ‌nuances you might have missed the‌ first time,⁣ and maybe even spark‍ some‍ inspiration for your⁣ own projects.

But ⁣let’s face it, looping⁤ isn’t just for the ⁤hardcore viewers; it’s a ⁤tool for anyone ⁣and​ everyone wanting to‌ experience video content in⁢ a​ whole ‌new light. ⁢Here are a few reasons ‌to consider ⁤it:

  • Focus: Looping helps solidify ⁤concepts, ​especially ⁢in educational videos, making ⁣it‍ easier to ⁢absorb complex ⁢information.
  • Relaxation: ‍ Replaying calming visuals ⁤or ⁢sounds ‍can create a soothing atmosphere, ⁣perfect for winding down ⁤after a long day.
  • Entertainment: ⁣ Who⁤ doesn’t​ love that one scene from a movie or‍ a catchy tune? Looping it keeps the ⁤good vibes rolling!

With just ⁢a few clicks, you can⁣ transform your screen into a portal​ of endless enjoyment. Why settle for a one-time thrill when you⁤ can ​ride the ⁣wave of⁣ repetition? So, ​dive into the enchanting ‌world of looping and let⁣ it elevate your‍ multimedia experience!

Techniques to‌ Perfectly Loop Your​ Favorite Clips

Techniques to Perfectly Loop Your Favorite⁤ Clips

Looping your ‍favorite ⁤YouTube clips can be ⁤a game-changer, especially​ if you’re trying to nail down those dance​ moves or⁢ soak up every bit of information from a tutorial. One of the easiest methods is to use ‍YouTube’s built-in features. Just right-click⁢ on the ‍video itself and ⁣select‍ “Loop”‌ from the context ‌menu. Voila! Your clip ​will‌ keep playing on repeat until you decide‍ to‍ stop ⁢it. How cool ‍is‌ that?⁢ If you’re watching on mobile, simply create ​a playlist with‌ the same⁣ video ‍twice, ⁣and​ that can give you the looping effect you ⁤need.

If ⁢you’re looking to take ‌it a step further, ‍third-party tools can also ‍do the trick. Websites like‌ ListenOnRepeat ‍ or Looper for YouTube let ​you enter ⁤a URL ‌and ‍customize your loop settings. You can choose specific timestamps, set the‌ loop to repeat a certain number of times, or keep it going indefinitely! Here’s a quick ⁣rundown of some options:

Method Ease of ⁢Use Customization
YouTube Right-Click Very Easy None
Mobile Playlist Easy Basic
Third-Party Tools Easy Highly Customizable

The Best Tools and Platforms for​ Effortless Video‍ Looping

The⁣ Best Tools and ​Platforms⁣ for Effortless Video ⁣Looping

Looping videos on platforms ​like YouTube doesn’t have‍ to feel like ⁢solving a⁣ Rubik’s Cube blindfolded. There are several tools⁣ and⁢ platforms that ⁢make it a breeze. For starters, YouTube itself offers a straightforward method: simply⁢ add “&loop=1” to the end of the video ⁣URL and ⁤boom—you’ve got continuous playback. It’s like a ⁣magic​ trick that requires no sleight of ‌hand. But if you’re​ looking for more customizable ‌options, why⁣ not explore software like iMovie or Adobe Premiere Pro? These ‍programs ​let you select⁢ specific clips and⁤ loop them seamlessly, ‌giving‌ you control over how your video flows. ⁣Plus, they come ‍with add-ons‌ that can‌ enhance the​ visual appeal, like transitions and effects, transforming your​ looping ⁢video into a masterpiece.

If you’re more about online tools, consider trying⁤ out Kapwing ⁢ or ‌ Clideo ‍ for an ‌easy⁣ browser-based experience. These platforms offer user-friendly interfaces where ‍you can upload your video, set the desired‌ loop length, and⁤ export it without the need to download ⁣heavy ‍software. Also, these sites are⁢ great for ⁣collaboration. Here’s a​ quick comparison of these tools:

Tool/Platform Features Best For
YouTube Direct loop ⁣via URL Quick⁢ and ‍easy ​looping
iMovie Advanced editing options Mac ⁢users⁢ looking to customize
Adobe Premiere‌ Pro Professional-grade editing Serious videographers
Kapwing Online ‌tool, collaborative ⁢features Team projects
Clideo Straightforward looping Casual users

Unleashing⁣ Your⁢ Creativity: Fun Ways to Use Looping in Your Content

Unleashing Your‍ Creativity: ​Fun Ways to Use Looping​ in Your Content

Looping can be a game ​changer ⁢for your content, adding a ‍fresh ‌spin that keeps your audience‌ coming back for‍ more. ‌Think ‍of it as the secret⁤ sauce that⁢ transforms a bland⁣ dish into a culinary delight. ⁣ Experiment​ with different types of loops ‍to see what resonates‍ most with your viewers. You could⁤ create‌ a catchy intro‍ sequence ⁤that repeats or craft a fun montage of⁣ highlights from your content.‍ This not only boosts⁤ engagement‍ but also gives ⁣your videos a ​polished feel. Who doesn’t love⁤ a​ good ⁤replay?⁤ Here are some fun ideas to play ⁣with:

  • Quick tips: Loop a short clip showcasing valuable advice.
  • Behind-the-scenes: Give a sneak ⁢peek that⁤ viewers can loop while ⁤waiting for more⁤ substantial content.
  • Challenges or contests: Motivate your⁢ audience to loop submission ‌rounds.

Don’t shy ​away from integrating ‌ visual effects and ⁣sound elements that play nicely ‌with​ loops. Music ‍looping can create⁢ an immersive experience;‍ imagine your‌ audience vibing to a ‌catchy ⁤tune ⁣while watching your content. You can also blend⁢ visual loops with transitions that keep the ​energy ⁣high and the‍ storytelling⁢ smooth. Use ⁢this ⁤simple strategy​ to ⁤craft‍ interactive experiences: a‌ looped ⁣animation paired with a relevant ⁣question can prompt viewers⁢ to comment, ⁢share, and ‍engage more deeply. ⁢Consider​ this layout for ⁣your looping ⁤ideas:

Loop Effect Purpose Engagement Tip
Motorized text animation Catch ⁢Attention Ask a question to spark⁤ comments
Visual GIFs Reinforce Ideas Link to related ⁣videos
Sound bites Enhance‌ Mood Encourage sharing a favorite moment

To Conclude

And there you have it! ​You’re now armed with all the secrets‍ to mastering the ins ​and outs ‌of looping videos on ‍YouTube. Whether you want​ to ‍create ⁢a⁤ hypnotic vibe with your ⁤favorite tunes or​ share those killer tutorials that just never get old,​ looping is your golden ticket.

Remember, looping isn’t just⁢ about‍ repetition; it’s about crafting an experience ⁣for your viewers—keeping them hooked and coming back for more. So why not⁢ get out⁤ there and start experimenting? Dive ⁤into your video library,‍ find ⁢your most loop-worthy content, and‍ let your creativity run wild!

If you have any questions ⁢or tips of your own, don’t‌ hesitate ⁢to ⁢drop them in the comments below! Your journey to YouTube mastery‍ doesn’t end here; it’s just ⁣the ​beginning. Happy ‌looping! 🎥✨

Snip, Clip, and Share: Making YouTube Moments on iPhone

Imagine⁤ this: you’re ‌lounging on your couch, ⁢scrolling through YouTube, when you stumble upon that perfect clip—the one that makes you laugh, cry, or just⁣ scratch your head in disbelief. Now, wouldn’t ⁣it be awesome if you could grab that moment and share it with ‌your friends? Well, good news! With your trusty iPhone, you can easily snip, clip, and share ⁣those unforgettable moments. In this article, we’ll dive into the simple steps and⁤ handy tricks you need to elevate your video-sharing game. Whether it’s a hilarious fail or an inspiring quote, let’s unleash your inner content creator and spread those YouTube gems far and ⁤wide!

Unlocking the Magic of YouTube Moments with Your iPhone

Ever find yourself ​watching a YouTube video and thinking, “That’s pure gold!”? Well, with your iPhone, transforming those‍ epic moments​ into shareable snippets is a breeze! Picture this: you’re scrolling through your favorite ​vlog, and suddenly, a hilarious blooper or an inspiring quote pops up. Instead of⁣ just​ texting your friend about it, why not create a quick⁣ montage? A few taps and swipes, and you can‌ snip all the good stuff right from the app! ⁤No ​more⁤ boring playbacks; it’s all⁣ about capturing that perfect second and letting it shine.⁤ Here’s how ​to dive in:

  • Open the YouTube app – Navigate to the video you want to highlight.
  • Select the share option – It’s‍ like sending a love letter to your friends, but with ⁢video highlights!
  • Trim the clip – Use your finger to adjust the start and end, getting right to the juicy bits.
  • Save and share –​ Now, it’s time to send it ⁢off! Whether it’s via social media or a quick text, you’re all ‍set!

Imagine having⁤ a ⁢mini-highlight reel on your phone, ready⁣ to impress⁣ your followers or just make your friends giggle. It’s ⁤not just about⁣ sharing, but connecting. Think of it like collecting little treasures from your favorite videos — each clip is a tiny piece of joy. And don’t forget, you​ can be the curator of what gets shared! Want a cozy cooking tip or that iconic scene from ⁢a vlog? With just a few taps, you’re the maestro of memorable moments! Ready to be the star of⁤ your own YouTube snippit show?

Unlocking the Magic of YouTube Moments⁣ with Your iPhone

Mastering⁣ the Art ⁢of Snipping: Tips for Capturing the Best Clips

When ⁣it comes to snipping clips from your ‌favorite YouTube videos on your iPhone, it’s all‌ about finesse and timing. First off, catch the moment before it slips away; that epic hairstyle tutorial‍ or the perfect cooking hack can be gone in a ⁣flash. Try using apps like Duet Display or Screen ‍Recorder; they’re saviors‌ for making sure you grab the right piece without too much hassle. Don’t forget your finger! Tap precisely to ensure the snip starts and ends just right—imagine you’re a⁤ conductor, and each tap is a note in your symphony of ‌moments!

Next up, let’s talk about ⁢editing those snips. You can use simple ⁢tools right on your iPhone to trim, add text, or even create ‍a little ⁢narrative around those⁣ clips. Think of your clips as puzzle pieces; your job‍ is​ to fit ‌them together to tell a story that resonates. Here’s a quick breakdown:

Tip Details
Choose Wisely Select⁤ clips that pack a punch.
Experiment Mix and match ⁤styles or effects.
Keep It Short 30 seconds is usually ideal!
Share Strategically Post when your audience is active!

Mastering the Art of Snipping: Tips for Capturing⁤ the Best ⁢Clips

Editing Like a Pro: Essential Apps That Transform Your Footage

In the ever-evolving world of video editing on your iPhone, snagging the right⁣ tools ​can be a game-changer for your YouTube channel. ‍Think of these apps as your trusty sidekicks, always ready⁣ to give your footage that polished pop. Some gems ⁢that stand out include iMovie, a classic that ‍combines simplicity with powerful features, and LumaFusion, a favorite among pros for its advanced editing capabilities. ⁢Not⁤ to mention, Adobe Premiere Rush seamlessly bridges your desktop and mobile workflow, ensuring you can edit anytime, anywhere.

To make the ‍most of these apps, consider ⁣incorporating techniques like color correction and audio adjustments, which can⁤ elevate your videos from standard to stunning. A simple‍ checklist can‌ guide your editing process:

  • Trim clips to ⁤keep your audience engaged.
  • Add transitions ​ for smooth scene‍ changes.
  • Adjust audio levels to ensure clarity.
  • Utilize overlays for text‍ captions and graphics.

With ⁤the‍ right tools and a bit of creativity, you’ll be crafting YouTube moments that captivate​ and entertain. Why not take the plunge? Your audience is waiting!

Editing Like a Pro: Essential Apps ⁤That Transform Your Footage

Sharing Your Masterpieces: Strategies for Maximizing Engagement on YouTube

Engaging your audience on ⁢YouTube is all about creating a connection that keeps them coming back for‌ more. To maximize that engagement,​ focus on timing and trends. Posting your videos when your audience is most active can make a world of difference. Use YouTube Analytics to identify peak times, and don’t shy away from hopping onto trends. Whether it’s a challenge, meme, or current‌ event, putting your unique twist on what’s buzzing can boost visibility. Pair your uploads ‌with eye-catching thumbnails and ‍compelling titles—think of them as the‍ biscuit in your tea; they⁣ must be just right to draw viewers in!

Additionally, encourage ⁢interaction by embedding calls to action throughout your videos. Ask questions, invite comments, and create interactive polls that spark conversation. A fun way to keep things fresh is by incorporating a “Top Comments” section where you showcase viewer⁢ reactions in your upcoming videos. This not only​ acknowledges your audience but makes them feel valued, turning casual viewers into devoted fans. Here’s a quick look at some effective ⁤strategies:

Strategy Benefit
Utilize Keywords Improves SEO, helping new ⁣viewers ​discover your⁢ content.
Engage with Comments Builds community and encourages ​viewer loyalty.
Collaborate with ​Others Introduces you to new audiences and‍ enhances content diversity.
Share ⁣on Social Media Drives traffic from multiple platforms and maximizes reach.

Sharing Your Masterpieces: Strategies for Maximizing⁢ Engagement⁤ on YouTube

To‍ Wrap It Up

And there you have it—your ‍go-to guide for capturing those unforgettable moments on YouTube right from your iPhone. Whether you’re snipping, clipping, or sharing, you now have the tools to turn your ⁤favorite memories into engaging snippets that your ⁣friends and followers won’t stop talking⁢ about.

Imagine this: a quick laugh, a hilarious blooper, or that epic fail—now, instead of letting those moments fade into the abyss of⁢ forgotten videos, you’ve got the power to make them shine. ⁣So go ahead, unleash your creativity, and ‍give that “share” button a workout!

Remember, it’s all about having fun and sharing experiences. Don’t hesitate to experiment with edits⁢ and effects, and let your personality shine through ‌every ‌clip you create.‌ Now,​ get ⁤out ‍there and start making ⁢some YouTube magic! Who knows? Your next viral moment might be just a snip away! Happy sharing!

YouTube Launches NEW AI Tools for ALL Creators

Alright, folks, buckle up because YouTube just hit the fast lane with a fresh set of AI ‍tools‍ that are about to revolutionize the game​ for creators everywhere! That’s right—whether you’re a seasoned pro or just dipping your toes into the​ vast‌ ocean of content creation, these updates promise to make life a⁢ whole lot easier‍ and more exciting. Imagine diving ⁣into your YouTube Studio and being greeted by an inspiration tool that doesn’t just ⁢throw spaghetti at the ⁣wall ‍to see what sticks; it actually serves up data-driven topics and outlines ‍tailored for you! It’s ​like having a brainstorming buddy who’s always got your back.

But that’s just‍ the tip⁢ of the iceberg! From ⁢selecting the ⁤perfect ⁣soundtrack without the‌ ominous shadow of copyright claims looming over ⁣your head to groundbreaking AI dubbing tools that can instantly translate your creations into multiple languages, the potential here is mind-blowing. Ever found yourself stuck in the editing trenches? Well, YouTube’s new app is here to pull you out of that quicksand, allowing you⁣ to cut, trim, and rearrange clips on the fly—no more tedious processes keeping you from unleashing your creativity!

So, ⁤whether‍ you’re crafting high-energy vlogs, sentimental ‍documentaries, or eye-catching shorts, these features are⁢ more than ‍just tech upgrades—they’re catalysts for sparking your imagination and pushing the limits of what your content can achieve. Ready ‌to dive deeper into this treasure trove of tools? Let’s do it!

Unlocking Creativity‌ with AI: How ⁢YouTubes New Tools‍ Can Spark ⁢Fresh Ideas

Unlocking Creativity with AI: How YouTubes New Tools Can Spark Fresh ⁤Ideas

YouTube’s latest update brings a breath of ⁣fresh air for creators desperately seeking new ideas and inspiration. With the inspiration tool ‍ located in YouTube Studio, you’ll no ‍longer have to spend endless hours scratching your ⁣head for topics. This nifty tool utilizes real-time data and analytics to suggest relevant themes and outlines tailored to your niche! Imagine cutting down your brainstorming time and diving straight into the creative​ fun. It’s like having a brainstorming buddy who’s⁢ got insights into what your audience really wants to see—they’ve done the homework so you can focus ​on making epic content!

But wait, there’s more! YouTube isn’t just stopping ⁤at ideas; they’re ⁣also stepping up to tackle the audio side of things. Picture this: you’re crafting a​ heartwarming documentary or a high-energy vlog, and you need just the right soundtrack. With access to ‌their​ AI⁣ music recommendations, you can find perfectly curated, copyright-safe tracks from their extensive library, taking the guesswork out ⁣of music selection. Plus, there’s a powerful dubbing tool ‍on the horizon, ready to help you reach ‌global audiences by translating your ​videos into multiple languages. And if you’re ⁤hoping to enhance your videos visually,‍ the new dream screen​ feature lets you create‌ stunning animated backgrounds simply ​by typing a few words! It’s like ⁢having your personal visual artist right at your fingertips!

Streamlining Your Workflow: Enhancements in⁢ Editing and‍ Audio Quality

Streamlining ⁣Your Workflow: Enhancements ⁤in Editing and ⁤Audio Quality

YouTube has ​really stepped up its game with these fresh AI tools, making ​the whole content creation process smoother than ever. Imagine diving into YouTube Studio and pulling ​up the ⁤ inspiration tool. This bad boy not only serves up trending topics​ but also crafts outlines based on real​ data and analytics. Say ⁣goodbye to those dreaded brainstorming‍ sessions that feel more‌ like a wrestling match with your brain. Instead, you can focus on what you do best—creating‌ engaging content that resonates with your audience. With​ just a few ‍clicks, you’re off on your creative ‌journey, armed with ​insights that could save you hours of research.

But it ​doesn’t stop there! Let’s talk about audio—because after ‌all, sound is half of⁢ the‌ viewing experience, right? YouTube is rolling out a feature that handpicks music from its extensive ​library tailored to fit your content’s mood—totally free and copyright-compliant! No more sleepless nights worrying about pesky copyright strikes. Plus, if you’re ⁢aiming to reach a more global audience,‍ the upcoming AI dubbing tool will have your back, enabling translations into various languages right from YouTube Studio. And you can even ⁢indulge your visual creativity with ​ Dream Screen, which can transform simple phrases into stunning animated backgrounds. So, whether you’re vlogging about your latest adventure ⁣or crafting an emotional documentary, YouTube’s enhancements ‍are designed to elevate your workflow and audio quality to new heights.

Going Global: Breaking Language Barriers with AI Dubbing

Going Global: Breaking Language Barriers⁣ with AI Dubbing

Imagine having the ability to reach millions ‍of viewers across the globe without being held back by language differences. YouTube’s new AI ⁢dubbing tool is set to make that ‌dream a reality! This‍ innovative feature will seamlessly translate your videos into multiple languages, helping creators connect with diverse ​audiences effortlessly. ‌From the comfort of YouTube ‌Studio, you’ll ‍be able to tap into a⁢ world ‌of opportunity, allowing your content to ​resonate with people‌ from different cultures. The benefits of broader reach and engagement are immense. After all, why ‌limit yourself to a single language when your ideas can‌ inspire and entertain a worldwide ⁤community?

This AI-powered dubbing tool isn’t ⁣just about translating words; it captures ⁤the essence of⁣ your⁤ content, ensuring that the tone and‍ emotional weight of your voice resonate in​ every language. Think about ⁢it‍ like this: it’s as if you have‍ a personal translator who ​not only ​knows the words but understands the vibe of your message. ‍This level⁣ of accessibility means that your audience will feel more connected, comfortable, and included. With these advancements, creators can truly be the storytellers of their ‌generation, breaking barriers⁢ and building bridges‍ across ⁤language divides. So, why not take the plunge and let your‌ voice be heard far and wide?

Making Magic with Visuals: Simplifying ‌Content Creation with Dream Screen

Making Magic with Visuals: Simplifying Content Creation with Dream Screen

YouTube is flipping the script on content creation, and the new AI features are like having ​a personal assistant right at your fingertips. Imagine being able to‌ dive into YouTube Studio and generate fresh video ideas while sipping your coffee. The inspiration tool ⁢does⁣ exactly that, pulling from data and analytics to serve up suggestions and outlines tailored to your channel. It’s like having a brainstorming buddy who ​never gets tired! Think about how much time ‌you’ll save—goodbye to endless hours of mental gymnastics trying to come up ‌with the next big topic. And let’s ‍not​ forget about ‌the people who⁣ say audio is the heart of video; they’re absolutely right! YouTube’s new recommendations for music, complete with a library that’s both free and ‍copyright⁣ compliant, means you can focus on the story you‍ want to tell⁣ without stressing ⁤over potential lawsuits.⁤ How cool is ‌that?

But wait, there’s more! The Dream Screen feature is about to revolutionize the way you ​create visuals. You can conjure up stunning backgrounds just by typing in a handful of​ words. Need a relaxing beach scene? Type it out, and voilà! It’s like having a magic ‍wand but for video ‍creation. And here’s the kicker:⁣ it’s not limited to those epic shorts you’ve been dreaming of.⁤ Also, the newly launched app lets you edit directly on your device, allowing you to trim, split, and‌ rearrange clips without getting bogged down by fancy software. With AI helping to improve ‍audio quality and sync⁣ your music right in the mix,‌ you’ll be producing professional-grade videos in no‌ time. So what are you waiting for? Dive in and start exploring this‌ exciting new world of ​content creation possibilities!

The Conclusion

As we wrap up this deep dive into the exciting new AI tools YouTube⁢ has rolled out for creators, it’s ​clear that the landscape of⁢ content‍ creation is about to get ​a serious upgrade. If you’re a creator, think of these tools as⁤ your trusty sidekicks, ready to lighten the load of brainstorming, editing, and even enhancing‍ the quality of your work. ⁢With ‌everything from topic suggestions in YouTube Studio ​to a rich ⁢library of music ⁢that’s copyright-friendly, ⁤it’s like ‌YouTube is handing you a magic wand to make your creative process smoother and more fun!

Imagine being⁣ able to‌ type in a phrase and let the AI whip up‌ beautiful backgrounds for your ‍videos. Pretty ‍wild,⁤ right? And let’s not forget⁤ the upcoming dubbing feature, which could open doors to audiences you’ve only‍ dreamed of reaching. As ‍exhilarating⁤ as this tech might be, it does​ raise some great⁢ questions about the role of human creativity in an age of AI. Will we still be the heart and soul behind our channels, or will robots start stealing the‌ show?

If you’re curious to see ​just how ⁣far this AI​ can⁢ go, make sure to check out our other‌ video where​ we​ put it to⁢ the ultimate test. Trust me; you won’t want to miss it! So, ⁣whether‍ you’re just starting or a seasoned ⁢creator, these new tools ‌hold a promise of a more⁣ efficient, inspiring, ⁤and ⁤perhaps even more enjoyable creative ​journey. Keep pushing those boundaries, and who knows? The sky’s the limit when it comes​ to​ what you can create.⁣ Until next time, happy creating!

How to Set a Stream Pause Image on YouTube Like a Pro!

Hey there, fellow ​content creators! ‍So, you’ve ‍finally ⁢decided to take your ⁢YouTube game⁢ to‍ the next level, huh? Whether you’re streaming ​the latest gaming adventures, ‍sharing cooking masterpieces, ⁣or ⁤just ‍chatting with your community about life, one little ⁣detail ​can make a world of difference: your ‍stream pause‍ image. Yep, that’s right! It’s like ​the cherry ‍on ⁣top of your creative sundae.⁣

Think of ⁣it as a‍ little ⁣billboard for your ‌channel—an ‍opportunity to communicate not just what you do, but who you are. Setting up a⁢ captivating pause image‌ can keep⁣ your viewers engaged, ⁣spark their ‌curiosity, ‍and make your stream look‍ super ​professional. And⁣ let’s ⁣be honest, who doesn’t want to make a lasting impression? In ‍this article, we’ll dive into the ins and ‌outs⁢ of crafting the perfect stream pause image on YouTube.‍ So grab your favorite drink, kick back, and let’s transform⁣ your‌ streams together! ​Ready? Let’s roll!
Crafting the Perfect Stream ‍Pause ​Image That​ Captivates‌ Your ⁢Audience

Crafting ​the Perfect‍ Stream Pause Image ‌That Captivates‌ Your Audience

Creating an eye-catching ⁤stream pause image is your secret‌ weapon for ⁤keeping your audience engaged, even in your absence. Think of it as your personal billboard; it should communicate ‍the essence of your content ⁣and​ pique viewers’ curiosity. ​Use vibrant colors and striking⁤ visuals that reflect your ‌channel’s theme—whether it’s gaming, tutorials, or vlogs. Incorporate‍ elements​ that speak directly to your community,‌ like inside⁤ jokes or‌ recognizable ​graphics. And hey, don’t forget ⁤to insert ‌your channel’s logo! It’s ⁣like putting a stamp on ‌your masterpiece. Imagine walking⁤ through ‍an art gallery and being immediately ⁤drawn to a ​piece. That’s⁤ what your pause image ‍should do—hook them in!

Now let’s talk about text. Keep it‌ bold and minimal—after ⁤all, less⁢ is more. Use catchy‌ phrases​ like “BRB – Enjoy ⁢the‍ Show!” or‌ “Taking‌ a Quick Break!” to maintain that connection with​ your‍ audience. Consider the placement of the text and visuals; alignment⁢ can ‍significantly affect how people ⁢perceive the image. Here’s a simple way to visualize how to balance elements:

Element Position Purpose
Background Full-Width Creates‌ scene mood
Logo Top Corner Brand identity
Text Centered Engagement

Essential Tools⁤ and⁣ Resources⁤ for Designing Eye-Catching Stream Graphics

Essential Tools‍ and Resources ⁢for Designing Eye-Catching Stream Graphics

Creating stunning stream graphics ​doesn’t have to ⁢feel like ⁤you’re trying to solve a Rubik’s cube ⁤blindfolded. With the right ​toolkit, you’ll be whipping up designs⁤ that ​turn heads in​ no time! Start ‌with design software like Adobe Photoshop or Canva, where⁢ you⁤ can flex your⁤ creative muscles and easily manipulate ⁤images. But that’s just the tip of the⁤ iceberg. Consider using stream‍ overlays, ‍which add⁣ that professional ​touch to your visuals. Sites like Nerd or Die and Streamlabs offer ‍fantastic pre-made options that you can customize to match ‍your brand. ​Combine‌ these elements, and you have a visual feast that⁣ keeps viewers​ glued to their screens.

Don’t underestimate ⁤the power of template resources; they’re your ⁢best⁣ friends when time is of ‌the essence.‌ Websites such as Envato Elements ⁢and Creative Market ‍provide ‌tons of downloadable templates, allowing you to hit the⁢ ground running. ⁢Additionally, ‌leverage‍ font libraries like ​Google Fonts to find something that⁣ screams ​‘you!’ and ‌stays readable⁣ even⁤ in the chaos ⁢of a busy​ gaming ‍scene. Lastly, keep some color palette ‌generators in‌ your pocket,‌ like⁤ Coolors⁤ or Adobe Color, to help you‍ nail that perfect vibe. ⁢The right​ tools​ not only simplify the process but also spark joy in your design ⁣journey, making ‌each stream look as ‌fresh as a​ daisy!

Tips to Optimize Your Stream​ Pause Image for ⁣Different Devices

Tips⁣ to‌ Optimize Your Stream Pause Image ⁣for‍ Different Devices

Optimizing your stream pause​ image is crucial for making ⁤a strong impression across various⁤ devices. Remember, what looks⁣ amazing ⁢on a ‍desktop may ⁢not ⁤translate well to mobile screens. To keep ‍your audience engaged,⁤ consider the following:

  • Image‌ Size: Aim for ⁤a ‌resolution ‍that automatically adjusts for different⁢ screen sizes, around 1280×720⁣ pixels is a safe bet.
  • File Format: ​ Use⁤ JPEG for ⁣photos and⁤ PNG for images⁣ with ⁢text or graphics;⁤ they ​maintain quality‌ while keeping file sizes small.
  • Minimal Text: ⁣Keep‍ text brief—your pause image should convey a ‌message without overwhelming the viewer.‌ Think of it‍ as a teaser for what’s ⁢to come!

Testing is key ⁣to ⁣ensuring consistency. Preview your⁢ image on⁤ various devices ‍to ​see ‌how it appears.⁢ You⁢ want to avoid a scenario where crucial elements are cut off​ or pixelated! Also, consider the background—an ⁣eye-catching ⁢design can create brand ⁣recognition while being ⁣visually pleasing across all platforms. Here’s ‍a quick table summarizing‍ essential image specs for‌ different devices:

Device Recommended Dimensions Best ​Format
Desktop 1280 x 720⁤ px JPEG/PNG
Tablet 960 x 540 ⁣px JPEG/PNG
Mobile 640 ‍x 360 px JPEG/PNG

Using Your Brand to Create a Stream Pause⁤ Image That⁢ Stands Out

Using Your Brand to Create ⁢a ⁢Stream Pause Image That ‍Stands⁣ Out

Creating a ‍stream ⁤pause image that truly reflects your brand is like⁢ dressing your virtual self for the‍ occasion. It’s not just about throwing up a random image; it’s about showcasing⁣ your identity​ and grabbing viewers’ attention even when you’re⁣ offline. Think ⁣of‍ your image‌ as ⁢a ⁣billboard ⁣for your personality. Although it may ⁣seem⁤ simple, the right design can​ turn heads.​ Remember to incorporate your ⁣logo, colors,⁤ and ​overall ⁢aesthetic to reinforce ⁤brand recognition. It’s⁤ all about making a lasting impression! Some great ⁢tips ‍include:

  • Choose a captivating background: Bright, engaging colors or‍ a ⁢subtle ‍gradient can ⁣work ‌wonders.
  • Include your URL or social media handles: ​ This keeps your‌ audience connected, even when​ you’re not ⁤live!
  • Add a fun message or tagline: ‌ Give ‍your viewers something to remember ‍you by.

But don’t just stop with the visuals; the ‌layout also plays ‌a crucial ⁣role in making your ​image pop. Experiment with ​fonts that reflect your style—clean, bold, and ⁤easily readable‌ will keep your‍ image‍ professional yet approachable. Additionally, think ⁤about the balance and⁣ spacing of your elements. A‍ cluttered image​ can⁢ distract more than ‍it informs. You might‌ want​ to ‌consider using this​ simple​ table ​as a guide‌ for ⁤your⁤ design elements:

Element Purpose
Logo Brand recognition
Background Initial⁤ attraction
Message Viewer engagement
Social Links Encouraging‍ connection

The Way⁤ Forward

And there you have it, ‍folks! ⁤Setting a stream pause image on YouTube doesn’t have‍ to be⁤ intimidating. With a little practice, a sprinkle of​ creativity, and the tips​ we’ve covered, ‍you’ll be well​ on your way to transforming those moments of downtime into​ visually stunning opportunities ‌for‍ engagement. Just⁤ think of your ⁣pause image⁤ as ‍your stage curtain—when⁤ it’s⁣ closed,‍ you still⁢ want it ⁤to draw‍ the audience’s ⁤gaze until the show‍ resumes!

So, whether you’re a seasoned streamer or ‌just dipping your toes ⁢into the world of live⁢ broadcasting, ‍don’t underestimate the​ power of ‍a well-crafted pause image. Get ‍out ⁢there, flex ⁣those creative muscles, and let your⁣ personality shine⁤ through! If ‌you have any questions ‍or want⁢ to share your own tips, drop a comment below. ‍I’d love to hear how you keep‌ your viewers hooked, even when the action ⁣takes⁢ a breather. Happy streaming, and remember—the best is yet ‍to come!

Mastering YouTube: Your Friendly Guide to Video Editing

Ever found‌ yourself scrolling through YouTube, mesmerized by some stunning video or clever edit, and thought, “I wish I could do that”? Well, you’re not alone.⁤ Video editing can seem like⁣ a daunting task, but what if I told⁣ you it’s more like piecing together a ‌puzzle than rocket science? In this ​friendly guide, we’ll break down the art of video editing into manageable⁣ steps, so you can transform your footage from ‘meh’⁣ to magnificent. Whether you’re a complete beginner or someone looking to polish your skills, ⁤you’ll find tips, ⁣tricks, and insider secrets that will make⁤ you the editing wizard you‌ always dreamed of being. Grab your snacks, settle in, and let’s turn ​your YouTube dreams into reality!

Crafting​ Captivating Stories: The Art of Editing Your Footage

Editing your footage is like sculpting a block of marble; it’s not just ⁣about​ cutting⁣ things⁢ up but about crafting a masterpiece. ⁢After filming, the real magic⁣ happens as ⁤you sift through hours of footage, ⁤looking for those golden nuggets that will bring your story to ⁤life. Start by organizing your clips into folders that highlight their⁣ content or theme. This way, when you dive into editing, you won’t be stuck ⁢in a chaotic maze. Think of it as laying out your ingredients before you hit the kitchen—everything you ​need is right at ‌your fingertips. As you piece ⁢together your ‍narrative, don’t be afraid to let go of scenes that, while beautifully shot, just don’t serve your story. Keep only what adds value. Consider pacing: a​ well-timed cut can evoke suspense, laughter, or drama, ​and using transitions wisely ‍can smooth those jumps like adding ‌a pinch of⁤ salt enhances a dish!

Engage your audience by layering in b-roll, music, and sound effects that enhance the viewing experience without overwhelming it. B-roll serves as the garnish on your main dish, providing texture and context without ⁣stealing⁢ the show. Ask yourself, does‍ this ⁤clip boost the story? Does the sound make it more immersive? Just as an artist blends colors, you’ll blend visual elements to ​create a cohesive story.‍ Utilize color grading to give your footage a consistent mood—warm ⁤hues ⁢for a cozy vibe, cool tones‌ for something⁤ edgier. And remember, feedback is ⁤golden; share‌ rough cuts with trusted friends and be open to ⁢their insights. After all, it’s like having an extra set of eyes for the masterpiece you’re polishing!

Crafting ‍Captivating ‍Stories: The Art of Editing Your Footage

Polishing Your Video Gems: Essential Tools for Every YouTuber

When it comes to polishing your ⁢video content, you want​ to equip yourself with the right tools that can make your edits smoother than a fresh ⁢jar‍ of Skippy. ⁤Here’s a rundown of essential tools that can elevate your YouTube game:

  • Editing Software: Programs like Adobe Premiere Pro or Final Cut Pro are the gold standards, offering robust features for both beginners and pros. If you’re looking for something free, DaVinci Resolve packs a punch!
  • Audio Tools: Don’t underestimate good sound! Adobe Audition or Audacity can help remove those pesky⁢ background noises that might distract your audience.
  • Graphic Design Tools: Canva and​ Adobe Spark are⁣ excellent for creating eye-catching thumbnails that entice viewers to click on your videos.

While software is crucial, don’t sleep on hardware!⁣ Here‌ are a few gadgets that can greatly enhance your video production value:

Device Purpose
Tripod Stability for those smooth shots—no one likes ⁢shaky footage!
Microphone Crystal clear audio to keep your viewers⁣ engaged. Consider a shotgun or a lavalier mic!
Lighting Kit Good lighting‌ can ⁢change​ the entire mood of your video—think of it as makeup ​for your footage.

Polishing Your Video Gems: Essential Tools for Every YouTuber

Setting the Scene: Mastering Sound and Visuals for Maximum Impact

When it comes to grabbing your audience’s attention, ⁢the right blend of sound and visuals can set the mood like nothing else. Think of‍ it as​ creating a ‌killer playlist for a road trip—each song strategically picked to pull your viewers along on an emotional journey. Start by choosing music that complements the vibe of your ​video; whether it’s upbeat and fun or serene and reflective, the right track can elevate your content from good to unforgettable. Utilize sound effects to punctuate important moments;​ imagine a well-timed ding during a reveal,⁢ or soft background music⁤ that swells during an emotional peak. It’s these auditory cues​ that keep viewers glued to the screen, eagerly⁤ anticipating ‌what’s next.

But let’s not forget visuals—the glue that holds⁢ your story together! Color grading can ‌create an atmosphere that ties everything back to your brand or message. A vibrant ​palette may evoke energy and excitement, while muted tones can evoke nostalgia or calm. Don’t shy away from ⁢incorporating⁤ overlays and animations, either. They’re like⁢ sprinkles on a ‍cupcake—they add ‍that extra touch! Consider organizing your‌ clips in a way that efficiently guides⁤ the viewer’s eye. Keep it clean:

  • Use a visible​ hierarchy ⁤to highlight key moments.
  • Integrate engaging graphics to illustrate points.
  • Experiment with transitions that suit the pacing.

Each element plays a role,​ contributing to a cohesive and impactful viewing experience. Remember, your goal is not merely to inform but to engage​ and⁢ entertain, transforming ordinary‍ content into something⁤ memorable.

Setting the Scene: Mastering Sound and Visuals​ for Maximum Impact

Mastering Thumbnails and Titles: The Perfect ⁣Click-Through Formula

When⁤ it comes to ⁤grabbing attention on ‍YouTube, the‍ thumbnails and titles are your home run hitters. Imagine scrolling ‍through endless videos—what makes you stop and click? ⁤It’s all about⁣ that eye-catching thumbnail paired with an irresistible title. Think of it as the cover of a book; if it’s bland, who’s going‌ to pick it up? Here’s a tip: use bold colors ⁤and ⁤intriguing images⁤ that spark ‍curiosity. Toss in a title that hints at value or excitement, like “You Won’t Believe What ⁣Happens‍ Next!” or⁤ “5 Secrets to Editing Like a Pro!”‍ Ideas that tease the content lead viewers right to your video. Pro tip: don’t forget ‌to keep your branding ​consistent to create a recognizable​ identity ​that keeps ‌them coming back for more.

Let’s break it down into⁣ bite-sized pieces. Here’s a quick checklist to ensure your thumbnails and‌ titles are top-notch:

  • High-Quality Images: Use sharp, clear graphics that stand out.
  • Text Clarity: ‌ Keep text brief but impactful; you ⁣want it legible even on small screens.
  • Color Contrast: Pick colors that pop against each other to draw the eye.
  • Consistency: Use⁤ a uniform‌ style across videos to establish your ⁣brand.

Consider‍ testing different formats or variations of your thumbnails and titles. Run a few experiments to⁣ see what resonates with your audience the most. Check‌ out this simple⁤ comparison of two types of titles:

Title Type Engagement Level
Descriptive Moderate
Teaser High

Mastering Thumbnails and Titles: ⁣The Perfect Click-Through Formula

Concluding Remarks

And there you have it! You’re now armed and ready to ‍conquer⁢ the world of video editing on YouTube. Remember, every‍ expert was once a beginner, so don’t sweat it if your first few videos don’t go viral overnight. ‍Think of ⁤your journey like nurturing ​a plant: it takes time, patience, and a sprinkle of love​ to watch it grow.

As you dive into this vibrant⁢ universe, keep experimenting with different styles and techniques.⁢ Let your unique voice ‍shine through! It’s not just about the edits; it’s about telling ⁢your story and connecting with your ⁢audience.⁣ So, grab your editing software, unleash your creativity, and enjoy the ride.

Don’t forget—feedback is your‌ friend. Engage with your ⁣viewers, learn from their reactions, and continually refine your craft. The world​ of YouTube is big, and there’s‍ room for everyone, so keep pushing forward. Who ⁤knows? The next viral sensation could be you! Happy editing, and may⁢ your creativity flow​ like an unending river!

Mastering YouTube: A Simple Guide to Looping Videos

Ready‌ to‌ dive into ⁣the world of YouTube like never ‌before? Whether you’re a content creator looking to⁣ keep your ⁢viewers​ hooked or⁣ a casual ⁣user wanting to⁤ enhance​ your binge-watching experience, mastering the art of looping​ videos can be a game changer. Imagine being able to replay that ⁢catchy tune or tutorial without⁢ lifting a finger! In this simple ⁣guide, we’ll unravel the secrets to looping⁢ videos on YouTube, making⁢ your viewing ‌experience smoother and ⁤more enjoyable. So​ grab⁢ your popcorn and get comfy; let’s unlock the power​ of the ⁣repeat button together!

Unraveling ⁤the Art of Looping: Why Your Videos Should Never⁤ End

Imagine you’ve found the perfect YouTube video, one that ⁢resonates⁢ with you on multiple levels. You’re engrossed, maybe even a‍ little obsessed,​ but the moment it ends, you⁣ suddenly feel a void. ⁣This‌ is ⁤where ⁤looping ⁣comes into play—it’s like having your ‌favorite song on repeat, the‌ kind ​that captures the essence of a moment⁣ so well⁢ you just can’t ⁢get enough. By looping a video, you not⁣ only keep your audience engaged, but you also encourage a ⁣deeper emotional ⁢connection with the content. Instead of just watching, they can now experience; it transforms passive viewing into an ‍active journey.⁤ You can create a sense of anticipation as viewers endlessly dive back into the ​delightful rhythms of⁤ your content.

Looping isn’t⁢ just ​a clever‌ trick; it’s an art form that ‌amplifies ‍viewer retention. Think about it: when a video seamlessly transitions back to the beginning, it invites ⁢viewers to experience the ⁢entire ‍narrative without interruption. You can enhance this‍ effect by:

  • Using catchy ⁣music or sound ⁤effects ‍ that make people⁣ want to ⁣replay the video.
  • Incorporating visual hooks that grab⁤ attention every time it‌ loops.
  • Designing ‌a strong‌ narrative that only‌ feels complete ⁤when‌ viewed multiple times.

Ultimately, a looped ⁢video can become ​a compelling experience that invites viewers to linger just⁢ a‍ little longer, creating a community‌ around shared enjoyment and excitement. Why let your⁣ audience ‍leave when you can ⁤keep them coming⁢ back for more?

Unraveling the Art of⁤ Looping: Why Your ​Videos Should Never End

The‌ Tech ⁤Made​ Simple:​ Tools and Tricks for Seamless Looping

Getting ⁤your video ⁢on a seamless loop isn’t rocket science, but it sure can feel like it ‍sometimes! Thankfully,⁣ with ⁢a dash of savvy‌ tech know-how and​ a couple of⁣ handy tricks, you can make your viewing​ experience as smooth as butter. First‍ up, let’s talk about⁣ some essential⁣ tools ⁢ you’ll want to have‍ in your ⁣arsenal:

  • YouTube’s‌ Built-in Loop Feature: If you’re watching a video on your computer, just right-click⁣ on the video ‍and select⁣ “Loop.” Voilà! That video will play again and again.
  • Video Editor Software: For more control, consider using ​tools like Adobe Premiere Pro ⁤or iMovie ⁣to create a looped version of your favorite ⁤clips.
  • Browser Extensions: Extensions such as ​”Looper for YouTube” ⁢can add even ‍more ⁢looping options, letting you loop ​specific sections or ​playlists with ease.

Now,​ it’s ⁤not just about the tools; it’s about how ⁣ you use them. Having a⁤ clear plan ​can save you from the hopeless feeling of ⁤your video getting stuck on that awkward pause.‍ Here’s how to​ make⁣ it work:

Step Description
1. Choose Your Video Select the one that holds your‌ attention—for those⁤ endless watch parties.
2. Utilize the Tools Apply one of the‌ above ⁣methods to ‍create your loop.
3. ⁣Enjoy & Repeat Sit​ back, relax, and let the⁤ video ​do its thing.

The Tech Made Simple: Tools and ‌Tricks ⁣for ⁣Seamless ⁤Looping

Engaging Your Audience: Creative Ways to Use Looping ⁤Effectively

One⁣ playful ⁢way to engage your audience is⁤ by using looping to create a⁣ rhythmic ⁤experience. Think of ⁢it​ like ​a catchy tune that⁢ keeps playing‌ in your head; it makes viewers want to⁢ stick around longer. You could create short looped clips that ⁢highlight quick tips, behind-the-scenes​ moments, or⁤ stunning visuals. These bite-sized clips⁣ draw viewers in, as they can’t help but watch “just one more‍ time.” Grab ‌their attention and keep​ it by adding⁤ fun elements like quirky⁤ sound bites or cool graphic overlays that change with each loop. This⁣ not‌ only⁣ adds excitement but ⁣makes everyday content ⁢feel fresh and ⁢makes them crave more.

Another fantastic avenue ⁣to explore is using looping ⁢as a storytelling device.⁣ Imagine your audience getting⁢ lost in​ a beautiful, looping visual‍ that tells‌ a story or showcases an art piece. By structuring ‍your ⁣video into a ​ beginning, middle, and⁢ end that repeats smoothly,⁢ viewers‌ find themselves fully immersed. It’s like watching a ‍favorite scene from a movie on‌ repeat—you can delve deeper into the⁤ details ​with‌ each cycle. ⁣You​ can also engage your audience by inviting them to‌ share their interpretations or feelings about the loop. Here are some ideas ​to consider:

  • Dynamic transitions: ​ Use seamless transitions⁤ between loops for smooth storytelling.
  • Call-to-action prompts: Encourage ⁤viewers to comment or share their thoughts after ‌each⁢ loop.
  • Interactive elements: Incorporate polls ⁤or⁢ quizzes that⁣ are easy to respond to after looping.

Engaging Your Audience: Creative Ways to Use Looping Effectively

Mastering the⁤ Metrics: How‍ Looping ⁢Can Boost Your Channels Performance

Imagine this: you’ve just uploaded a​ stellar ⁣video, and it’s gaining views, ⁢but⁢ what⁢ if there⁤ was​ a way to keep that momentum rolling? ⁢Looping videos can ‌amplify your watch time, and that’s like the secret sauce to YouTube’s algorithm. ​When you keep a viewer engaged ⁢longer, you’re not just⁢ racking up more views; you’re sending‍ a signal to YouTube that your content is worth it. ​Here’s why you⁢ might want to​ consider ​integrating looping into​ your strategy:

  • Boosted Engagement: When a video ​automatically restarts, ‌it encourages viewers to catch what they might have missed the first time.
  • Increased Watch Time: ‌Longer ⁢watch time ‍means better chances ‌of⁢ being recommended‌ on​ that coveted sidebar.
  • More Views: Every loop ‍counts as another view, helping ‌your video climb ‌the ranks.

To ​visualize ⁢the impact, let’s ‌look at ⁢a⁤ quick comparison of ‌channel performance before‍ and​ after implementing⁣ looping.​ This table highlights the potential growth you could see:

Metric Before Looping After Looping
Average Watch Time 2 minutes 4‌ minutes
Total Views 1,000 2,500
Subscribers Gained 50 120

With these⁢ numbers, it’s clear: ​looping⁣ isn’t just ⁣an expendable feature; ‍it’s ⁤a game changer. So, why not‌ give it a shot? You might be onto something⁣ that​ skyrockets your channel’s⁢ performance!

Mastering the​ Metrics:⁤ How⁤ Looping Can ​Boost Your Channels⁤ Performance

Closing Remarks

And there you ‌have it! Mastering the art⁣ of looping videos on YouTube is like learning a ⁣new dance;⁤ once you get the ⁢rhythm down, it becomes second nature. ⁤You’ve got ⁢the ⁤tools, the tips, and a sprinkle of⁢ creativity to make⁤ your content shine. Whether ​you’re ​looking to⁤ enhance ⁤your music playlist, create engaging ​tutorials, ‍or just want to keep those heartwarming pet videos on repeat, looping can elevate your YouTube game‍ to ⁢a whole new level.

So, dive in, experiment, and don’t be afraid to play⁤ around with your content. ⁤The beauty of YouTube is that ⁣it’s‌ a space to express yourself,⁢ and looping just adds a little something extra to the⁣ mix. Keep your​ audience ​captivated, and who knows? You might just turn casual ‌viewers into loyal fans.⁢

Now​ go on,⁣ hit that ​loop button, ⁢and let ⁢your ⁣creativity flow ⁢like⁢ a never-ending stream. Happy looping!

Stuck in YouTube Studio? Here’s Why You Can’t Edit!

Are you staring at ⁢the YouTube Studio interface, feeling⁣ like you’ve stepped ⁣into a maze of ​buttons and options, but ‌somehow can’t seem to edit your​ video? Trust me, you’re not ⁢alone! Navigating this⁤ bustling hub ⁤of video management‍ can‍ sometimes⁤ feel like ⁣trying to​ solve a Rubik’s ⁣Cube—frustrating and a bit perplexing.​ Whether you’re a seasoned content creator or just dipping your​ toes into the world of YouTube, there are ⁣plenty‍ of reasons why you might find yourself ⁤stuck. In this article, we’ll‍ dive into the common culprits that could be thwarting your editing ambitions. From pesky⁤ settings and unprocessed uploads to technical‌ hiccups, we’ll explore⁣ it all. So, grab⁢ a cup of coffee, ⁣and let’s unravel this‍ digital⁣ mystery together!
Understanding ⁣the YouTube Studio Interface​ and ​Common Pitfalls

Understanding​ the YouTube Studio Interface ​and Common Pitfalls

When‌ you first⁤ dive into​ YouTube Studio, it can feel like stepping into a high-tech spaceship—overwhelming but exciting! The left-hand‌ menu is your‍ command center. From​ your DASHBOARD, where you can see all‍ your channel’s ⁢vital⁢ signs like views ‍and subscriber counts, to the CONTENT ‌ tab that ‍houses all your uploads in an organized fashion. But wait, what happens when you try to ‍edit a video ⁤but the option ‍just ‌isn’t there? It’s like showing up ⁢to a party ​without the invitation! ⁣A few common snags can cause this ⁣irritation:

  • Video Processing: If your video is still processing after upload, editing options will‍ be locked.
  • Copyright Issues: ⁣ Videos flagged for copyright restrictions lose⁤ some editing ⁣capabilities.
  • Using YouTube ⁢Shorts: Editing features for Shorts differ​ from‌ regular videos,⁣ so double-check what you’re working⁢ with.

Exploring the ANALYTICS section is like peeking behind the curtain to understand⁢ what your audience loves or hates. This is⁣ essential before‍ making adjustments or planning future videos. But navigating through tons of data⁤ can feel like ⁤trying to find a needle in a haystack. Here’s a quick⁤ breakdown ‌of ‍common⁤ pitfalls‍ that can trip you ⁤up in ⁣this complex area:

Pitfall Solution
Lack of​ Engagement Metrics Focus on watch time and⁣ likes/dislikes ratio.
Ignoring ⁤Traffic Sources Use⁤ this ⁢data‍ to tailor your‌ promotional strategies.
Neglecting Audience Retention Analyze drop-off points to adjust your content flow.

Exploring‌ Permissions and Access Issues ​that Hold You Back

Exploring Permissions and Access ‌Issues⁤ that Hold You Back

When you’re trying to edit your ⁣videos in YouTube Studio, nothing can be more ⁤frustrating than running into permissions and⁣ access issues. Think of it like trying to get⁢ into a concert but realizing your ticket ⁢is‌ invalid—super annoying, right? One of the most ⁣common culprits is the channel ownership. If ⁤you’ve added⁢ managers to‍ your channel, they might lack‍ editing rights. It’s a⁢ classic case of “too many cooks,” where⁣ everyone has‍ the‍ best intentions but⁣ doesn’t ⁣have the ⁢right templates. ‍To check or modify permissions, dive‌ into the settings and ensure ‍everyone ⁢on your team ⁣has the right access. Here’s a⁢ quick⁤ checklist:

  • Owner vs. Manager: Verify if they need⁣ more access.
  • Google Account Credentials: Confirm‍ they⁣ are using⁣ the right ‌account.
  • Linking⁢ Accounts: Ensure any linked accounts ‍(like AdSense) are also properly set up.

Beyond⁢ ownership confusion, other access issues can arise ⁤from content ‍restrictions. If ⁤your video gets flagged for copyright or community ‍guideline violations, it can prevent you from editing entirely—like throwing a wrench in ⁣your gears just when you were getting started. Another angle you might‍ not have considered is geographical restrictions. YouTube operates ‌differently across countries, and certain​ features⁤ might just be inaccessible based on where you’re ⁤logged ⁤in from. Keep an eye on the following factors:

Factor Impact
Copyright Claims Can restrict editing ⁣capabilities.
Content Policies May limit access to​ specific features.
Region Settings Could lead​ to unavailable​ tools.

So, ‍next time you’re ⁣stuck, take ​a step back and evaluate these details. You might ‌find that the‌ key to seamless editing is just a click ​away!

Troubleshooting⁤ Technical Glitches: Solutions for Editing Woes

Troubleshooting Technical ​Glitches: Solutions for Editing⁤ Woes

We’ve ​all been there—sitting in YouTube Studio, ready to sprinkle your editing magic, and​ bam! You hit ⁢a wall. What‌ gives? Technical glitches can feel ​like a black hole ⁣sucking the joy out ⁣of video‍ creation. First off, check⁣ your internet connection. Sometimes it’s as⁤ simple as a⁤ weak⁢ Wi-Fi ‍signal that ‌keeps your ⁣edits from ⁤saving. Make sure everything’s working on your end; a ⁣quick ⁢reboot of your ​router can work ‍wonders. Next, clear ⁤your browser cache and cookies.‌ Think‌ of ‌it as spring cleaning for your⁤ computer! ​Those⁢ bits​ of stored data can ​sometimes create unwanted chaos in ‍your editing process.

If that doesn’t ⁣do the⁢ trick, it’s time ​to dive deeper.‍ Are you using an outdated ⁣browser? Make sure you’re on‌ the ⁢latest⁢ version. You wouldn’t wear last ‌year’s sneakers​ to a marathon, right? Here’s a couple of ⁣quick checks⁤ to help troubleshoot:

Potential Issues Solutions
Browser ​Compatibility Switch‍ to ‌Chrome or Firefox for better support.
Temporary Glitches Clear cache and restart your browser.
Unsupported Formats Ensure ⁤your video⁤ files are in a ‍compatible format.
Account Issues Log out ⁣and log back in to refresh ⁤your session.

Don’t forget ‍to disable any browser‌ extensions⁢ that could ​interfere; they may seem harmless, but some might be snooping around when they shouldn’t be. And if all​ else fails, reaching out to the ​YouTube support community can provide that extra set of eyes needed for a fresh perspective.‍ Remember, even ‍the pros run into hiccups! So take‌ a breath, get back to troubleshooting, and soon‍ enough you’ll‌ be back in the editing​ seat, ‍ready to create captivating content.

Maximizing Your Editing Potential with Smart​ Tips and Tricks

Maximizing Your Editing Potential with Smart ⁣Tips​ and Tricks

Editing can‍ sometimes feel like trying to solve a Rubik’s Cube ⁣blindfolded, especially when you’re stuck in YouTube Studio and things just ​aren’t ⁤clicking. If you’re scratching ‍your ⁢head‌ over why your‍ edits ​aren’t working,‍ it could be due to a few common⁣ pitfalls ‌that trip‍ up even seasoned ⁢creators. Let’s face‌ it, some days you wish you​ could wave a‌ magic wand and make everything ‍perfect, but instead, you’re just left staring at the screen. Check out these quick⁤ tips to ​streamline your process and get back on‌ track:

  • Clear‍ Your Cache: Sometimes,‍ a cluttered ⁣browser can cause chaos,⁢ leading⁤ to editing errors. Brave the tech jungle ⁢and clear that cache!
  • Check Permissions: ⁢Are you editing someone else’s video? ​Make sure you⁣ have the right permissions, or you’ll‍ just be ‌banging ⁢your head ⁤against the wall.
  • Update Your Browser: Outdated tech is like wearing shoes two sizes too small. ‍It ⁣limits ‌your ‍potential—so keep ⁣your browser fresh!

Moreover, familiarity with⁢ the tool can make ⁣a world of ⁣difference. Think of it ‍like learning ‌the ropes ⁣of a new video game; at first, you might fumble, but soon enough, ⁢you’ll ‍be zipping through levels like‍ a pro. Invest some⁤ time in tutorials, explore⁤ the help sections, and ‍don’t hesitate to experiment with features. Sometimes, all it takes is a⁢ different approach‍ or a little patience to uncover the problem. Remember, practice‌ is key, so here’s a simple breakdown to help you navigate your⁤ editing fears:

Common Issues Quick Fixes
Lagging Interface Close‌ background ​tabs
Feature Not Responding Restart ‍the app
Audio Sync Problems Check audio settings

Insights and Conclusions

And ⁣there you have it, folks! ‍If you’ve ever found yourself trapped in the labyrinth of YouTube​ Studio, scratching‌ your ⁢head over why ⁤you can’t seem to edit that video just ‌the way‌ you want, you’re definitely not ⁢alone. From pesky technical gremlins to the sometimes confusing changes in policy, there’s a lot that can leave us feeling ‍a bit stuck. But hey, remember, even the best of us hit a few bumps on the road to ​creativity!

So, next ⁢time you‍ find yourself‍ wrestling ⁢with ⁤the platform, take a deep breath and​ arm yourself with patience and​ a​ little bit of tech-savvy. Use the tips ​we’ve shared to troubleshoot, seek out community feedback, or even ⁤explore alternative editing tools when necessary. You’ll not only get ⁢through ⁢it but might just ​find your⁢ editing process more streamlined and enjoyable!

And if​ you’ve got your own tips or stories about battling ⁣the ​YouTube ‌Studio beast, ⁣drop them in the comments! Let’s help⁣ each other navigate this wild world of video making together. Until⁢ next time, keep creating, keep exploring, and remember:​ the only limit is your imagination. Happy editing! 🎥✨

Master the Art: Editing YouTube Videos Like a Pro!

Hey there, aspiring YouTube whiz! So, you’ve got a treasure trove of footage‌ just waiting to dazzle the⁢ world, huh? Well, before you hit that upload button, let’s‍ take a moment to chat about a game-changer:​ editing.⁣ Think of editing as the magic wand that transforms‍ a ⁣pile of raw clips ​into a captivating story that hooks your⁣ viewers from‍ the get-go. In‌ this article, “”,‌ we’ll spill⁣ the juicy secrets ⁤and savvy tips to level up⁢ your editing game. ‍Whether you’re crafting vlogs that keep your friends glued to the ‍screen or​ tutorials that unlock the mysteries of the universe, mastering‍ editing can make the difference ‍between a “meh” video and a total must-watch. Ready to dive in? Let’s roll ⁣up our sleeves and​ turn your creative vision into a‌ polished masterpiece that shines brighter than a thousand likes!
Unleashing Your Inner Director: Essential Tools for ​Seamless Editing

Unleashing Your Inner Director: Essential Tools for Seamless Editing

Editing is like molding clay; it’s a chance to take raw footage‍ and transform it into something beautiful and polished. To really unleash your inner director, you need the right⁢ set of tools in your editing arsenal. Think about software‍ that suits your‍ style, such as Adobe Premiere​ Pro ‍ or Final Cut Pro. Both offer intuitive timelines, robust effects, and ⁤are well-equipped for color correction and audio adjustments. Pair that with lightweight applications like iMovie ‍ for ⁣beginners or Filmora for⁣ those⁤ who want an elegant interface without too much fuss. Remember, the tool needs to enhance your creativity, not​ stifle it!

But the magic ⁢doesn’t ⁣stop with software; hardware plays a significant role too.‍ A good quality external​ hard drive is essential for backing up your footage and keeping everything organized. Don’t​ forget about⁣ your monitor; a bigger screen can help you see details you might miss on ‍a laptop.​ And let’s not overlook the importance of⁤ a good pair of headphones. The ⁣right sound can ​make or break a scene! Below is a‍ quick​ table to ‌highlight the essentials:

Tool Purpose
Adobe‌ Premiere Pro Professional editing software
External Hard ‌Drive Backup and storage
Good Monitor Enhanced⁢ viewing experience
Quality Headphones Audio editing and mixing

Crafting a Narrative: How to​ Tell a Story Through Video Cuts

Crafting a Narrative: How to Tell a Story Through Video Cuts

When it comes to video editing, the real magic happens in how‍ you piece together your footage.​ Think of your video‍ like a jigsaw puzzle—each ⁤clip is a⁣ piece, and it’s your ⁤job to find the perfect fit that creates a cohesive ⁤picture. The key to an⁤ engaging narrative lies in selecting the right cuts that enhance the story you want to⁣ tell. ‌For ⁢instance, starting with an attention-grabbing clip can hook ​your audience instantly. Then, ⁤follow it up with a variety of⁢ shots: ⁣close-ups for drama, wide angles for context, and cutaways that ‍enrich your⁤ narrative. ⁢This kind of cutting isn’t just logistical;‌ it’s strategic, as each⁢ transition carries emotional weight and keeps viewers on ‍the edge of⁣ their seats.

Moreover, pacing is everything! A rapid series of cuts can elevate tension, while longer ‍shots ​allow viewers to ⁤absorb⁢ a moment—kind⁣ of like the difference between‌ sprinting and leisurely strolling through a park. To master this, consider these ⁢ important elements in your​ editing process:

  • Rhythm: ⁢Align ‌your cuts with the music or dialogue to⁣ create a ​natural flow.
  • Emotion: Choose clips that resonate emotionally; this connection can make or break your ⁣narrative.
  • Clarity: Ensure each cut adds clarity—don’t confuse your audience with unnecessary information.
Editing Technique Description
Jump Cuts Eliminate unnecessary parts​ to speed ‌up storytelling.
Cross Dissolve Smooth transitions that suggest a passage of time.
Match‍ Cuts Connect similar visual elements for ‍thematic continuity.

The Magic of‍ Transitions: Elevating​ Your ⁣Edits with Creative Techniques

The⁢ Magic of Transitions: Elevating Your Edits with Creative Techniques

When it comes ⁢to creating eye-catching edits, transitions are the secret ​sauce that elevates your content ​from mundane to magical. Think of them as the smooth bridges ​connecting the various scenes of your story. By creatively mixing up your transitions, you not only maintain⁢ the viewer’s interest but also enhance the narrative flow. Here are some techniques ​worth exploring:

  • Jump Cuts: Perfect for maintaining a⁤ brisk pace in ​your video.
  • Fade Ins/Outs: Adds a layer of emotional depth, giving your ⁣audience a ⁤moment⁤ to breathe.
  • Match Cuts: Keeps visual continuity and makes shifts feel intentional.
  • Cross Dissolves: Seamlessly blends two scenes, which can‌ evoke nostalgia‌ or reflection.

To really nail those⁢ transitions, consider how they⁣ relate to the story you’re telling. For instance, using a fast-paced zoom can pump up the adrenaline⁣ during ‍action shots, while a gentle spin transition can underscore​ a whimsical moment. An effective way to see which transition fits best ⁤is to create⁣ a quick table to test your ideas:

Transition Type Best Used For
Zoom In Action Scenes
Wipe Ending a Chapter
Swipe Smooth Scene Changes
Fade Creating Tension

Ultimately, transitions should serve a purpose. ‌They’re like the ‍spices in your favorite dish — too little and it’s bland, too much and‍ you risk overwhelming the flavor. So, ‍play around with different styles and find your unique⁢ voice, because the right transitions will help your edits shine and keep ​those viewers coming back for more!

Polishing Your Masterpiece: Tips for Final Touches That Wow Your Audience

Polishing Your Masterpiece: Tips for Final Touches That Wow Your Audience

Once you’ve poured your heart into​ crafting your video, it’s time to sprinkle on those final nuances that’ll leave your audience hungry for more. Start by ⁣ tightening up your edits: you want to ensure each cut enhances the story rather than ⁣drags it down. Don’t hesitate to trim the fat—remove‍ any unnecessary ⁢segments ⁢that might make viewers lose interest. Think of it⁤ like sculpting a ⁣masterpiece; you want to unveil the‌ beauty hidden beneath the⁣ layers. And remember, a touch of color grading can work wonders. Adjust those colors to​ match the⁤ mood of your content—dynamic hues for exhilarating ​moments, softer tones for more intimate scenes. This isn’t ⁣just ⁢editing; it’s giving your ⁣video the cinematic flair it deserves!

Next up, let’s talk about sound.​ Your ​video might visually ‍captivate, but‍ if ‍the audio isn’t on point, it could ⁢turn ​your masterpiece into a hot mess. Incorporating background music ⁣can set the perfect tone, but be sure it doesn’t ‌overpower‌ your voiceovers. So, what do you do?⁤ Consider layering sound elements—maybe a subtle tune under ​your narration and some⁢ catchy ​sound effects to accentuate key moments. It’s like seasoning a ⁤dish;‌ too much can ruin it, but just the right amount can elevate the whole experience. don’t forget ⁤ captivating thumbnails and catchy titles. These are your first impressions; make them easy to read ⁣and visually appealing​ to make clicks irresistible!

Tip Description
Tighten Edits Remove unnecessary parts to keep the pace brisk⁣ and‍ engaging.
Color Grading Adjust ⁢colors to evoke the right emotions, enhancing ​the⁢ storytelling.
Layer Sound Use background music subtler than narration; include sound effects for emphasis.
Thumbnails Create visually‍ enticing thumbnails that draw ‌in viewers.

To​ Wrap⁢ It Up

And there you have it—your roadmap⁤ to mastering⁢ the art of ​editing YouTube videos like a true pro! Whether you’re slicing up footage like a⁢ chef with a fresh vegetable or spicing things‌ up like a master mixologist crafting the perfect cocktail, remember that the magic happens in the details. Embrace those tools and techniques we talked about, play around with your clips, and dare to ⁤let ⁣your creativity shine.

Editing isn’t just about trimming the fat; it’s about telling a⁣ story, evoking emotions, and keeping your audience ‍hooked from the first frame to the last. ​So, don’t​ be afraid to​ experiment! Take risks—after‍ all, every great editor started somewhere, right? As ‌you dive into this journey, remember that practice⁣ makes perfect. ⁣The ‍more you edit, the more your unique style will‍ emerge.

So grab that footage and​ start cutting!⁢ Your ‌next viral masterpiece is just a click away. If you ⁤have any tips or adventures in editing to ⁣share, I’d love to hear about them in the comments.‌ Happy editing, ⁤and may your videos skyrocket to success! 🎥✨

Easy Fixes for Script Errors in Your YouTube Videos

Ever‍ hit “Upload” on your YouTube video, only to find it’s riddled with script errors that​ make you cringe? ​You’re not alone! Every ​creator has fallen into the trap of typos, awkward phrasing, ⁤or missed cues. It’s like trying to throw a party where ⁣the playlist has a mind of its own—frustrating, right? But don’t sweat it! There are ⁤some super‌ simple fixes that can turn those script blunders into smooth sailing. Whether you’re a seasoned pro or just starting out, these easy tweaks will have ⁤your videos looking polished and professional in​ no time. Ready to level up‍ your⁤ content? Let’s dive in!

Spotting ⁣the Red Flags:‍ Common Script Errors to Look Out For

When ⁤diving into the world of scriptwriting for YouTube videos, it’s crucial to be on the lookout for those pesky errors that might fly under your radar. You ⁣know, the little things that can ‌turn a brilliant idea into a confusing ⁣mess. Here are some common⁤ script ‌errors that can poke holes in your narrative flow:

  • Inconsistent Voice: Mixing formal and informal tones can leave ‍viewers scratching their heads. Keep ⁣it cohesive!
  • Lengthy ⁣Sentences: If your sentences are longer ⁢than a Monday morning, they might lose your audience. Aim for‌ clarity and punch.
  • Lack‌ of Clear Structure: Wandering off-topic is⁢ a killer. An organized script ensures your viewers stay ‍glued to the screen.

Another hot spot for script errors is the dialogue. If characters sound too much ‍like robots rather than real ​people, you’re missing the ⁤mark. ⁢Writing natural-sounding dialogue is key to engaging your audience. Also, remember to:

  • Use Active Voice: It gives more energy to your script. “I filmed the scene” is punchier than “The scene was filmed by me.”
  • Avoid Jargon: Keep your language accessible. You don’t want to alienate⁣ viewers who aren’t in the know.
  • Edit Ruthlessly: Don’t be afraid to cut out the fluff. Each word should serve a purpose!

Spotting the Red Flags: Common Script Errors to ​Look Out For

Polishing Your Script: Simple Tips‍ to Enhance Clarity and⁢ Flow

When ‍you’re trying to capture your audience’s attention, clarity is key. Imagine your script as a shiny car; ‌if⁤ it’s cluttered with dirt and dust, nobody’s going to want⁢ to take it for a spin. Read⁤ through your script aloud to catch any awkward phrasing or run-on sentences. Pauses are your best friends! They help emphasize important points and give your viewers a moment‍ to digest information. You can also swap out jargon for simpler words. Remember, the goal is to communicate, not to confuse. A​ well-polished script draws viewers in like a warm cup of coffee on a cold morning.

In addition to eliminating fluff, consider the flow of your script. Think ‍of it like a well-choreographed dance, where‍ each move transitions smoothly ​into the ⁢next. Use bullet points to break down complex ideas; this makes your information digestible and visually appealing. ​Wouldn’t it be great if your‍ viewers felt like they were seamlessly ⁢gliding through your content instead of tripping over misplaced ⁣thoughts? Here’s a quick ‍table to help ⁤you remember some flow-enhancing tips:

Tip Description
Short Sentences Keep your sentences concise to maintain rhythm.
Transitional Phrases Use words like⁢ “however,” “on the other hand,” to guide your viewers.
Anecdotes Personal stories make content relatable and engaging.

Polishing Your Script: ⁣Simple Tips to Enhance ⁤Clarity and Flow

Testing for Success:⁤ How to Run a Smooth Rehearsal Before Hitting Record

Before hitting that record button, a little ​run-through can make all​ the difference. Think of this as ​your warm-up lap before a big race.‌ You wouldn’t sprint without stretching, right?⁤ So, gather your crew and run through the script a couple of times. This way, you’ll spot⁤ any awkward phrases or tongue twisters that trip ​you up. Don’t forget to check your props and any visuals too—everything from lights to sound‍ levels ‌should be just right. Here’s a quick checklist to help you out:

  • Script Flow: Does it​ feel natural? Are there any lines that sound off?
  • Timing: Are you hitting​ your marks? Practice how you’ll transition between sections.
  • Technology: Is your camera focused? Are your mics positioned properly?

And, in the spirit of teamwork, ask someone else to listen in. Sometimes another set ⁤of ears can catch errors that you might miss. ​Treat this run-through like a dress rehearsal—everyone should know their cues and‌ what to expect. If it’s all feeling smooth, ​you’re‌ golden! Just imagine stepping onto that stage or in front ​of the camera, fully ⁣knowing your ‌lines and having everything in place—pure confidence. Here’s a simple table to⁢ keep track of your rehearsal elements:

Element Status
Script Review ✅ Done
Tech Check ✅ Working
Timing Practice ✅ Perfect

Testing for Success: How to Run a Smooth Rehearsal Before Hitting Record

Revamping ⁤on the Fly: Quick Fixes During Filming to Keep You on Track

When you’re deep into filming, the last thing you want is a script hiccup‍ to throw you off your game. If you find your script doesn’t quite flow or an awkward phrase suddenly eats at you, don’t panic! Think ⁢on ‍your feet and embrace ‍the ⁢opportunity for spontaneity. A ‌quick trick is to not overthink ⁤it; if your words falter, simply⁤ pause and rephrase. Often, the simplest words resonate best with your audience. For example, if you stumble over a complex line, swap it for a straightforward analogy. ⁣Your​ viewers will appreciate your authenticity. You might say, “Learning how to fish can feel ‍overwhelming,” instead of a convoluted metaphor about ⁢ocean currents. Keep it relatable and real!

Another handy ⁢hack is to use visual cues. If you fumble with a line, use hand gestures or facial expressions⁢ to emphasize your point while you recover. This not only keeps your audience engaged but also detracts‌ from your ‌moment of hesitation. You can even create a table summarizing key⁢ points ‌you want to convey during your video, making it easier to glance down and retrieve your‌ thoughts ​without stopping⁢ the flow. Here’s a sample layout you‍ can use:

Main Point Visual Reminder
Script Error Handling ✋ ‌Hand Gesture
Audience‌ Engagement 👁‍🗨 Eye Contact
Keep it Simple 🗣️ Clear Speech

Revamping on the Fly: Quick Fixes During‌ Filming to Keep You on Track

In Summary

So, there you have it! Fixing those pesky script errors in your YouTube videos⁤ doesn’t have ⁢to be a‍ Herculean task. With a mix of careful planning, a dash of patience, and​ a ⁤few handy tools, you can breathe new life into your content⁤ before hitting that upload button. Remember, every mistake is just a stepping stone to improvement, so don’t sweat it too much!

Next time you’re knee-deep in editing, just keep these easy fixes in your back pocket. Whether it’s tightening up your script, checking your ​audio, or simply taking a breather to come back⁣ with fresh eyes, you’ll be ‍well on your way to delivering ‌videos that are ⁤not just polished​ but truly shine.

So, grab your camera, roll up⁣ your sleeves, and get ready to create some amazing content. Happy filming, and may your views soar​ sky-high!

Easy Steps to Add Music to Your YouTube Video Magic!

Hey there, fellow creators! So, you’ve poured ‌your heart ⁢and soul ⁢into making an ‌amazing YouTube ⁤video, but something just‌ feels off. Maybe it’s a bit too quiet? You’re not alone—adding music is like sprinkling fairy dust ⁤on your content. It‍ takes ‍the vibe up a ⁢notch, grabs viewers’ attention, and keeps them engaged from start to finish. ‍But here’s the kicker: ​getting the ⁢right tunes on your video doesn’t have ​to be ‌as ‌tricky as finding a needle in a haystack. In ⁤this ​guide, we’re breaking⁤ it ​down into easy, ‌bite-sized steps ⁤that⁢ even ‍your grandma could follow! So, ‍grab⁤ your ⁣coffee, get comfy, and let’s dive into the ‍magical world of adding music to your YouTube videos. Trust me,⁢ once ​you’ve ​learned the ropes, your ​videos‌ will dance ⁤off the screen! 🎶✨
Crafting​ the Perfect Soundtrack That Captivates Your​ Audience

Crafting the Perfect Soundtrack That Captivates Your Audience

When it⁢ comes ​to enhancing ​your YouTube videos, ⁣selecting the right music is like choosing the⁣ perfect spice ⁣for your favorite​ dish. It sets the mood, drives ‌the story, and ⁣creates an unforgettable experience for your viewers.​ Start by asking ‍yourself, “What feelings do I​ want to ⁢evoke?” Whether you want your audience to feel⁣ energized, nostalgic, or intrigued, there’s a⁤ soundtrack that can​ resonate perfectly with ​your ⁢content. Explore different genres and tempos—an upbeat​ track can energize a tutorial, while a melodic one is ideal for a ​reflective vlog. Consider leveraging platforms that offer royalty-free‍ music for your⁣ projects to avoid any pesky copyright issues down the road.

While you sift through tracks, listen⁢ with intention. Focus on the cues and ⁢transitions in ⁢your ‌video; a⁣ well-timed beat⁢ drop can amplify your punchline, or a soft melody can underscore a heartfelt moment. Here are⁤ a‌ few ‌quick tips for ⁣pairing music ⁤with​ visuals effectively:

  • Match⁤ the Energy: ‌ Align‌ the energy‌ of the music with the energy of your video.
  • Limit Distractions: Keep the ‍music subtle during⁤ dialogue-heavy ​sections.
  • Use Dynamics: Vary the​ volume ⁢to control emphasis on parts of your video.
Music⁣ Type Best ⁢Suited For
Upbeat ‍Pop Tutorials, Challenges
Ambient ⁤Sounds Vlogs, Nature ‍Clips
Orchestral Dramatic Stories, Events

Navigating the YouTube⁤ Audio Library ⁣Like a Pro

So, you’re diving into the treasure trove that ‍is the YouTube Audio Library? Awesome choice! It’s ⁣like ‍having an all-you-can-eat buffet​ of free ‌music and sound effects right at your fingertips. To ‍truly own it, start by browsing categories ⁢that pique​ your interest, be it ⁢ Genres, Artists, or Duration. Need something upbeat for your vlog ⁣or maybe a serene background for your travel montage? Just filter through the⁣ options! And don’t forget about the search bar—it’s your best buddy when you have something specific in mind.⁣

Finding the right track ‌is ‌just ⁤half⁢ the ‌fun. ​Once you’ve zeroed in on⁤ the ⁣perfect tune,⁢ make sure to‌ check out ⁤the licensing details—it’s like ​reading the‍ fine print ⁢before signing a contract. Some tracks might require attribution, while others are free to use without any strings attached. Plus, you can easily download your chosen tracks with a ​simple click, ready to spice up‌ your video. Want a neat way to​ keep⁣ track of what you like? Create a playlist within the library! ⁣It’s like having a personal DJ, ‍making sure you always have the soundtrack ⁤to⁤ match your creativity.

Mixing Your Music and Video‍ Together for ⁢Maximum Impact

Mixing Your Music and Video Together ‌for Maximum ‍Impact

Bringing your music and video ‍together can feel like ⁣adding the final sprinkle of ⁤seasoning⁢ to a delicious dish. It’s all about creating a ‌vibe that not ‍only complements the visuals but enhances ‍them.⁤ Think ⁣of it this way: ​your video is⁤ the cake, and ‌the music is ⁤the icing. Without​ that‌ sweet ‌touch, it might just⁣ fall flat! To get it right, focus on syncing the rhythm of the ‌music with⁣ the ⁤key moments⁤ in⁤ your footage. Pay special attention ⁤to ‌transitions, emotional peaks, and any‍ text overlays; these can really benefit from a carefully⁢ chosen ‌soundtrack. You want your‍ audience‌ to ‍feel the energy ‍in their bones, so don’t hesitate to experiment with different genres ‍until you find the perfect match.

Another crucial step is ensuring that your audio levels are balanced.⁢ It can be a real buzzkill if the ⁢music​ drowns ‌out ‍your narration, right? A simple mix can make a‍ world of difference.​ Here’s a‌ quick checklist⁤ to help you​ achieve that ⁤harmony:

  • Adjust ‍Volume Levels: Make sure the music complements​ rather than overwhelms your spoken content.
  • Use Fades: Start and end ‌the‍ music gently so ​it flows nicely with​ your video.
  • Test Different Tracks: Sometimes, all it takes ⁢is​ swapping out a track to transform the entire feel!

And remember, you can always‍ refer back to ‌a ⁢basic⁤ structure like ‌this to keep​ your‍ mixing on point:

Track Type Best Use
Upbeat Instrumentals Great for travel vlogs or⁢ fun‌ tutorials.
Soft Acoustic Perfect for ‍storytelling ‌or emotional content.
Electronic ⁤Beats Ideal ‌for tech reviews or energetic⁣ demos.

Legal Considerations‌ for Music Use That‌ Every ‍Creator‌ Should Know

When ⁤adding ⁢music to your YouTube videos, it’s crucial to⁤ navigate the legal landscape like a pro. Think of it as a‍ game of chess; a single wrong move can put you in​ check! ‌First⁢ off, always ensure ⁢you have the⁣ right licenses. You can ‍choose between ​royalty-free⁢ music, which gives you a license to⁢ use the⁤ tracks for a fee, ⁣or ⁢Creative Commons music, ⁢where you might have ⁢to ‌credit the artist,⁤ but ​it’s often free to use. Some ⁣platforms also offer music libraries with‌ tracks that​ come with built-in licenses, so you can avoid​ a‍ headache later. Remember to always read the fine ⁤print because even the smallest⁤ detail can lead to a copyright claim.‌ You really don’t want to end up having your⁢ video taken down or, worse, facing legal ‌action!

Another ​smart‍ move?⁤ Keep a list of all the music sources⁣ you use! This simple practice can ⁢save you ⁤from future trouble. Make a ‌ quick reference table ​ to⁤ track ⁣the following:

Track​ Name Artist Source License Type
Chill Vibes DJ Smooth Free Music Archive Creative Commons
Epic Adventure Beat Maker AudioJungle Royalty-Free
Sunny Days Happy Tunes Bensound Attribution License

This way, if any questions about usage pop up, you’ve got all the info at your fingertips! Staying ⁢informed and organized ​is key to ‍letting your creativity flow without the burden of legal hassles. Dive⁣ into your video‍ magic knowing you’ve done your homework!

To Wrap It Up

And there ‌you have it! Adding music to ‍your YouTube videos doesn’t have‌ to feel like climbing Mount Everest. With just a few simple steps, you’re ​well on your‌ way to transforming your visual storytelling into an audio-visual​ feast ⁣that captivates ⁣your audience. Imagine your video as a delicious meal—you wouldn’t serve it ​without seasoning, right? ‍Music is that secret ingredient that elevates your content from⁤ bland to grand!

So,⁢ whether you’re⁤ looking to set⁢ the mood,⁣ create a vibe, or simply spice‍ things up,‌ don’t ⁣shy away from experimenting with⁣ different tunes. Remember, it’s⁤ all​ about finding that perfect soundtrack ⁣that resonates with your message and captivates ⁤your viewers. Trust me, ‌their ears will thank you!

Now, go⁤ ahead and unleash your creativity! Dive into the⁣ world of music selection with confidence and watch your videos come⁢ to​ life like never before.‍ If you found⁣ this guide helpful, spread ‍the word! Share ⁤it with your fellow creators who are on ​the same journey. Until next ‍time, keep creating, keep inspiring, and let your videos sing! 🎶

Master the Art of Splicing and Looping YouTube Videos!

Looking to spice up your‌ YouTube videos? You’re in the⁢ right place! Mastering the art of splicing and looping ‍isn’t‍ just a technical skill; it’s a game-changer ‌for anyone ⁢who wants to keep their‌ audience hooked. Imagine crafting seamless ⁤transitions that make ⁢your content ⁢flow⁣ like ​a ⁢well-composed song. Whether you’re ⁤creating tutorials, vlogs, or just sharing your daily⁣ escapades, learning how to splice and loop effectively⁢ can elevate your storytelling to a whole new level. Ready to ⁤dive into the world of video editing and unlock the secrets that make your clips pop? Let’s get started‍ and turn​ your raw⁤ footage into⁤ captivating masterpieces!
Unlocking the Essentials of Splicing: Techniques That Make Your Edits Shine

Unlocking the ‌Essentials⁤ of Splicing:⁤ Techniques That Make Your Edits Shine

When ⁤it comes to ‍splicing your YouTube videos, the right techniques ⁤can elevate your content from ordinary to extraordinary. Think of⁣ splicing as the frosting on your ⁢cake—it’s what makes everything more appealing! Start by trimming unnecessary clips and keeping only the juiciest bits. Use tools like‌ keyframes to ​achieve smooth transitions; it’s like gliding from one moment to another without any hiccups. ​The goal is to make the viewer feel like they’re on a​ seamless journey‍ rather than jumping through a disjointed timeline.

Now, don’t underestimate the power of layering audio and video.​ Picture a beautiful symphony where every⁤ instrument adds ​depth—your clips can sing in harmony too. Incorporate background music ⁣that⁢ complements the mood ⁢of your⁣ footage, and use sound effects to enhance critical ⁣moments. To‌ get⁤ even more⁢ precise, here’s a quick look at ⁣some essential splicing techniques:

Technique Description
Cutting Removing unwanted parts to create clean edits.
Fading Smoothly transitioning in and​ out ⁤of‍ clips ⁣for a polished effect.
J-Cut Leading with audio from the next scene to hook your audience.
L-Cut Continuing audio from⁤ the current scene into the next for ​fluidity.

By mastering⁤ these splicing⁢ techniques, you’ll not only make your edits shine but also‌ keep your audience engaged and ‌coming back⁣ for more. So go ‌ahead, roll up your sleeves, and let those creative‌ juices ⁤flow!

Looping Like a Pro: Creating Seamless Transitions for Engaging ​Content

Looping Like a Pro:‌ Creating Seamless Transitions for Engaging​ Content

Creating smooth transitions is like adding the finishing touches to a masterpiece.​ You want your viewers⁤ to glide from one moment to the next without even noticing the change. Here are⁤ some tips⁣ to ensure your edits feel natural and engaging:

  • Cut on ‌Action: When your subject is ⁤moving—whether it’s a wave crashing or a person reaching for an object—make your​ cut during that ‍action.‍ It ⁢creates a sense of continuity.
  • Match Your Cuts: Pay ‌attention to ⁣the rhythm and ⁣pacing. If ​you have a fast-paced segment, keep your transitions quick. ‌For slow, reflective moments, give your viewers a little ‍breathing room.
  • Use ‌Crossfades: Sometimes a quick fade can create an ethereal effect, making each scene subtly blend into the next.

Experimenting with audio transitions can elevate your video further. Remember, sound is just as‌ crucial as visuals in creating seamless moments. Consider:

Audio Technique Effect
Sound‌ Bridges Carry over ‌sounds ​from⁣ the previous clip into the next ​for fluidity.
Volume ⁢Adjustments Fade audio in and out to ‌prevent jarring jumps in sound.
Layering Sounds Create a richer experience by overlapping different audio elements.

Tools of‍ the Trade: ‍Must-Have Software and Apps for YouTube Video Mastery

Tools‍ of the Trade: Must-Have Software and Apps for YouTube ⁣Video Mastery

Whether you’re ‌a‌ budding creator or a seasoned⁣ pro, having⁢ the right tools can ‌make all the difference when it comes to crafting engaging YouTube videos. First on⁣ your list should be video editing software. Think of programs like Adobe Premiere Pro or ⁤ Final Cut⁣ Pro. These allow you to splice clips like a chef dicing vegetables—precision is key! ​You’ll want something user-friendly yet powerful, so don’t overlook options like Filmora or DaVinci Resolve. They’ll help you add ⁢those spicy transitions ‌and clean ⁢edits‌ that keep ⁣your ‍audience glued to the screen. Also, don’t forget audio editing tools! Quality sound is half the battle; software ⁤like Audacity or ⁣ GarageBand ⁣can elevate your audio like⁣ a ⁤fine wine paired with a gourmet ‌meal.

Next, let’s talk about thumbnail and graphic design, because you know what they say—first impressions matter!⁤ Tools such as Canva and Adobe Spark ⁣are ​fantastic‍ for designing ​eye-catching‌ thumbnails⁢ that can up your click-through rate significantly. ⁣You might ‌also want to incorporate looping ⁢software like Open Broadcaster Software (OBS) or ScreenFlow that help capture those mesmerizing moments or smooth transitions. An essential ‌aspect of mastering video is staying organized; using tools like Trello or Asana helps keep all your‌ content ideas sorted, ​kind ‌of ⁢like having a chef’s station organized before cooking a big meal. Embrace these tools, and you’ll be on your way to YouTube glory!

Tips‌ for Captivating Your Audience: Splicing and Looping Habits to Boost Views and Engagement

Tips⁣ for Captivating Your Audience: Splicing and ‌Looping ​Habits⁣ to‍ Boost Views and Engagement

When it comes to keeping ⁢your viewers glued to the screen, mastering⁣ the art of splicing and looping can be game-changing.‍ Think of splicing as a way ​to create a⁣ rollercoaster ride for your ‍audience. ‌You ⁢want to build tension, throw in some unexpected twists, and then deliver that satisfying drop. Start by slicing up your ⁤raw footage to highlight‍ the ⁢most exciting or emotional moments. Remember, shorter clips tend to hold ‌attention ⁤better, so ⁤keep those edits snappy! Overlay eye-catching graphics and sound effects at pivotal moments to amplify the impact of your story. It’s all about striking that perfect ‌balance⁣ between pacing and​ visual interest.

Looping, on the other‌ hand, has a special charm that can draw people deeper into your​ content. Picture it like a catchy chorus in​ your favorite song; it sticks in your head and keeps you coming back for more. Utilize ⁤looping in ways that enhance certain elements‌ of your video — perhaps⁣ a breathtaking ​scene or a powerful quote ⁣relevant to your message. You can also experiment with b-roll footage under your narration to add depth without distracting. Don’t forget to pay⁣ attention to ‌the hook; it should be compelling enough to reel‍ viewers in and keep them engaged throughout the loop. By ⁣injecting ⁤this rhythmic repetition ​thoughtfully, you’ll create an immersive experience that not ⁣only boosts your views but also builds ⁣a loyal audience.

To Wrap It ‍Up

So there you have it—your ultimate guide to splicing and looping YouTube videos! Armed with these tips, you’re ready to elevate⁢ your video ‌content ​from basic ⁤to brilliant. Just imagine creating clips that have everyone glued to their screens, hitting replay over and‌ over again. Whether you’re ⁣aiming to create catchy highlight reels or simply ‌want to enjoy your favorite moments on loop, the power is now at your ⁣fingertips.

Remember, practice makes perfect! The more you play around with these techniques,⁣ the more comfortable you’ll ⁣become. ⁤So ​dive in, experiment, ​and let your creativity flow. And hey, don’t forget to share your masterpieces with friends or drop them ​in the comments—everyone loves ⁤a good watch, right?

Now go out there and make some ‌video magic happen! Happy splicing! 🎥✨