Looping Love: Making Your YouTube Videos Repeat Effortlessly

Ever found yourself lost in the depths of a captivating YouTube video, wishing you could hit repeat without lifting a finger? You’re ‍not alone! Whether it’s a catchy tune, a heartwarming vlog, or a ​tutorial that’s got you hooked, there’s something ⁢magical ⁣about​ revisiting those moments without interruption. Welcome to the world of looping⁤ love—where we’ll explore effortless‍ ways to make your favorite YouTube gems repeat automatically. So, grab your‌ favorite snack, get comfy, and let’s dive into mastering the art⁣ of seamless loops that keep‍ your ⁢favorite content ​playing as long as your heart desires!

Mastering the Art of Seamless Loops for Endless Engagement

Creating⁤ a loop⁣ that feels natural and engaging can be a bit like ​crafting⁢ a perfect song—every note must ⁢flow seamlessly into the next.⁢ Start by identifying the focal point of your video; what is it ‍that you ⁣want viewers to keep coming back for? Whether it’s a catchy hook, ‌an emotional ⁢punch, or a stunning visual, ensure this element is⁢ easily repeatable. Consider adding in brief recaps or transitions that guide your audience back to the beginning without jarring them. Here’s ​a checklist to enhance the looping effect:

  • Catchy Intro: Make​ it⁢ memorable yet succinct.
  • Visual⁢ Cues: Use graphics⁤ or animations that⁣ signal a return to the start.
  • Sound ⁤Design: Subtle audio elements can lead viewers back smoothly.

Moreover, pacing is crucial. Think of your loop as a dance; every step needs to be in rhythm. If‌ the pacing is off,⁢ viewers might feel lost or ​disoriented, causing them to click away. Test your video by watching it on mute to notice how well the visuals and patterns connect. And don’t shy away⁤ from using visual tricks or repetitive phrases that reinforce your message. You can even create⁢ a simple table to outline how each element contributes to that magical loop:

Element Purpose Impact
Intro Clip Grab ​attention High​ retention
Visual ⁢Cues Guide viewer Smoother transition
Audio Signals Enhance flow Engagement boost

Mastering the Art of Seamless Loops for Endless Engagement

Crafting Captivating Content That Demands ‌Repeat Views

Creating videos that keep ​viewers coming back for more is all about tapping into their emotions ⁤and captivating their senses. Think ‍of your content ⁢as a favorite song—one that, once‍ heard, you just can’t help but replay. You ‍want to evoke feelings that ⁣tug at⁢ the heartstrings, whether it’s nostalgia, laughter, or sheer joy. To achieve this, consider the following elements:

  • Engaging Thumbnails: Eye-catching visuals that spark curiosity can draw viewers in⁢ like moths to ⁢a flame.
  • Compelling Storytelling: Craft a narrative that resonates. A well-told story can make even the simplest message feel meaningful.
  • Catchy Hooks: Start with an intriguing question ‍or bold statement ⁣to grab attention⁤ right from the get-go.

Once you’ve captured their interest, keep​ them hooked with interactive elements. This could be polls, questions, or even challenges that invite viewers to engage directly with⁢ your content. Think of it as a two-way street where viewers⁢ feel involved—not just passive observers. To illustrate the impact of these elements, here’s a quick⁤ comparison:

Element Impact on Viewers
Thumbnails High click-through rate, ⁢increased curiosity.
Storytelling Emotional ⁢connection, improved retention.
Interactive⁤ Elements Boosted engagement, repeat‍ viewership.

Crafting ⁢Captivating Content That Demands Repeat⁢ Views

Exploring Tools and Techniques to Effortlessly Loop Your Videos
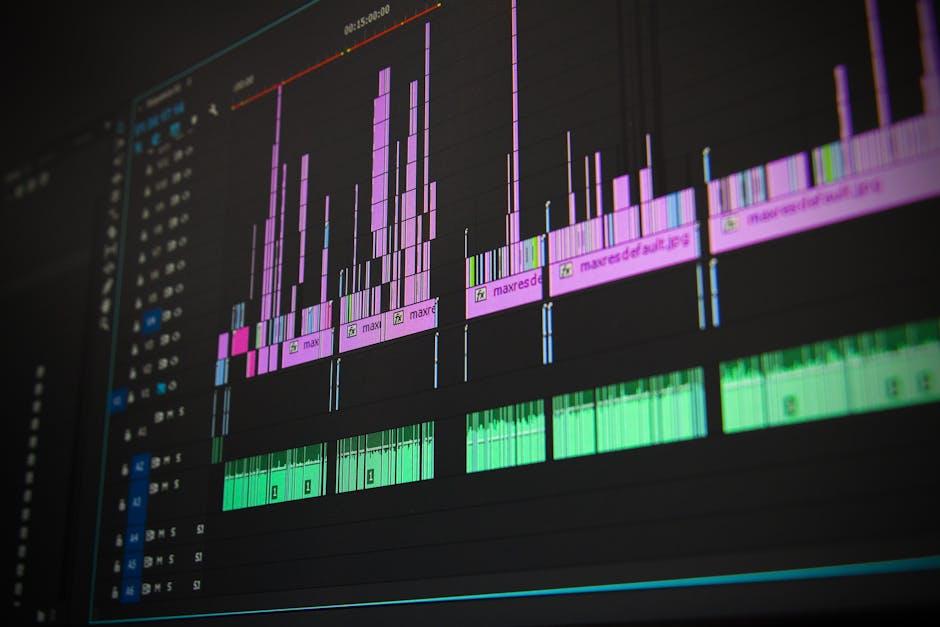
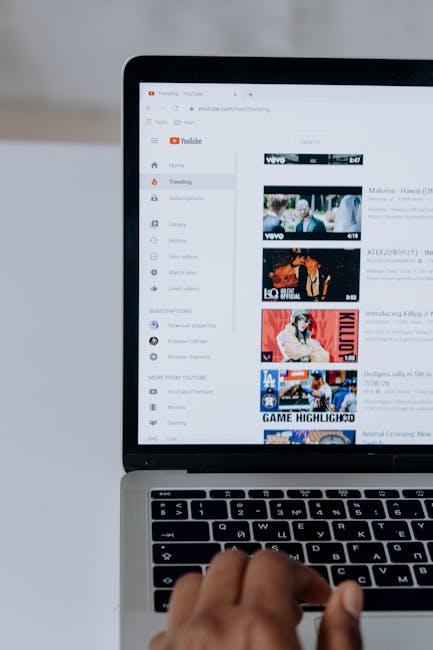
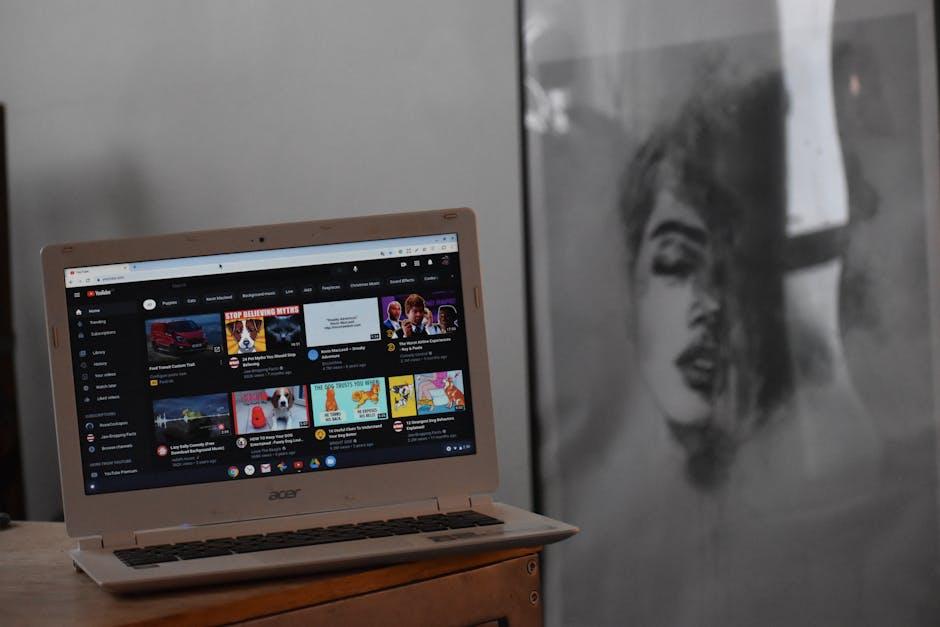
When diving into ⁢the world of video looping, there’s a treasure trove of tools and ‌techniques at your fingertips. Want to keep​ those mesmerizing visuals playing on ‌repeat? You can leverage various online platforms that make the process quick​ and painless. YouTube’s own built-in​ looping feature is a solid start; just right-click‍ on the video and select “Loop,” and ⁤voila! Your video will ​play endlessly. But if you’re looking for more flexibility, consider tools like Veed.io or​ Kapwing, which allow you ​to stitch⁤ clips together and add captivating effects before looping them. It’s like giving your video a magical potion to keep it alive and engaging.

Enhancing ⁢your looping game doesn’t have ‌to be a solo mission, either. ​ Collaborative editing tools like Adobe Premiere Rush enable ⁤multiple users ⁣to chip in on​ creating and ​looping videos, ensuring that none ⁤of that creative energy gets wasted. Besides, don’t underestimate the power ​of simple editing techniques. For instance, using fade transitions at the end of a video can create a ‌seamless loop effect, almost like the video is winking at the viewer. Here’s a quick look at some ‌key ⁢features to keep in mind when choosing a tool:

Tool Key Feature Ideal For
YouTube Built-in loop option Quick repeat
Veed.io Custom video edits Creative loops
Adobe Premiere Rush Collaborative editing Team projects
Kapwing Multiple video formats Flexibility

Exploring Tools and Techniques to ‍Effortlessly Loop Your Videos

Boosting Your Channels‍ Growth with⁤ the Perfect ‍Loop Strategy

Creating a seamless loop ⁤for your YouTube videos is ⁤like giving your audience an all-you-can-eat‌ buffet of entertainment.⁤ When viewers get caught in the loop, they ‌often stick around longer, which is pure gold for your channel’s​ growth. Think about ​it: repeat‌ views can skyrocket your watch time, boost engagement, and increase your chances of landing on the coveted YouTube algorithm’s⁣ good side. A few strategies⁣ to consider include:

  • Engaging Hooks: Start with a captivating moment that ‌grabs attention, making it irresistible to replay.
  • Interactive Elements: Utilize polls or questions to encourage ‍viewers ⁢to rewatch and⁣ engage with your⁤ content.
  • Teasers⁣ for Upcoming Content: End your videos with​ a hint of what’s next, inviting viewers to ⁤loop back to catch every detail.

Now, let’s not forget about the beauty of effective video editing and ‍clever‍ scripting. A well-structured⁤ narrative can compel your audience to hit that replay button willingly. Pairing your visuals with an enticing soundtrack creates a‍ rhythm, almost like a ⁣song that you can’t help but play‍ on repeat. Consider using a loop point—a specific moment where the video can ​start over without losing ⁢its flow. Here’s a quick look at why this strategy matters:

Benefits Impact
Increased Watch Time Higher ranking in search results
Boosted Engagement More comments and likes
Stronger Community Viewers feel more connected

Boosting Your Channels Growth with the Perfect Loop Strategy

Key Takeaways

And there you have it—your ultimate guide to looping love on YouTube! Imagine your viewers getting lost in your content, hitting repeat⁢ without even thinking about it. It’s ⁤like serving them a delicious pizza; who stops at one slice, right? With just ⁣a few tweaks and the right tools, you’ll ‌have those‌ views⁤ stacking ⁤up ‌like a game of Jenga, each video more stable than the last.

So go ahead, take a leap into the looping world. Try out the techniques we discussed, and watch as your audience ⁢stays glued to‌ their screens, hungry for more. Remember, good content deserves a second (or third) viewing, and with these strategies, you’ll ⁢make it happen effortlessly.

Don’t be shy about experimenting—grab those analytics and see⁤ what works best for your audience. After all, the beauty of YouTube is that it’s your ⁢stage. Get ⁢out ⁤there, loop ‌it up, and let your creativity shine. ⁤Happy looping! ‌🎥✨

Unlocking YouTube: A Simple Guide to Adding Music Magic

Looking to spice ⁢up your YouTube ‍videos and make them pop? You’re not ⁣alone! Whether you’re a seasoned vlogger or just starting​ out, adding the‌ right music can turn an ordinary clip into something truly magical. ‌Think of ‌your favorite movies ‍or videos—how often does the soundtrack elevate⁢ the entire experience? It’s like adding the final brushstroke to​ a masterpiece. But let’s be real, navigating ⁣copyright issues and finding the perfect tunes can feel like wandering through a maze. Don’t‌ fret! ‍This guide ⁤is here to ⁣help you ⁤unlock ‍the secrets of adding music to ⁤your YouTube content ‍with ease. Let’s dive in and ⁤discover how to sprinkle a little sonic ‌pixie dust on your videos!

Finding​ the Perfect​ Soundtrack ⁢to Elevate Your Videos

Finding ‍the Perfect Soundtrack to Elevate⁣ Your Videos

Choosing ‌the ‍right soundtrack for your videos is⁣ like picking the perfect seasoning for your favorite dish—it can make all the difference! The right tunes can transform an ordinary ‌clip into an emotional⁣ rollercoaster. Start by considering your video’s vibe. Is​ it upbeat and energetic, or ⁢slow‍ and introspective? Here are ‍a few ‍pointers to‍ help you navigate through the music jungle:

  • Reflect the Mood: Match the energy of‍ your music with the‌ overall mood of your ⁢footage.
  • Audience Connection: Think about what resonates with⁢ your audience. What genre ​gets them tapping their ‌feet?
  • License Matters: Always ‍ensure your chosen music is copyright-free or properly ‌licensed for use.

Once you’ve⁤ identified the ⁤right mood and genre, ‌it’s time to‍ dig into music libraries. Plenty⁣ of platforms offer ⁢high-quality, royalty-free options. ‌You might want to consider resources like Artlist, Epidemic Sound, ⁤or even ​YouTube’s own Audio Library. Here’s ‌a‍ quick comparison to help ⁤you decide:

Platform Features Best⁢ For
Artlist Unlimited downloads, diverse styles High-quality production
Epidemic Sound Monthly subscription, curated playlists Consistent content creators
YouTube Audio Library Free ​to use, user-friendly Beginners &⁣ budget ‌videos

Navigating Copyrights Like a⁣ Pro: Music Selection Made Easy

When diving into the vast ocean​ of YouTube, one of⁢ the​ most vital ‍skills‌ to master is picking the right⁤ music​ without ‍falling ‌into copyright chaos. Think⁣ of music selection like choosing the perfect outfit for a big⁣ event; you ⁢want ​it to complement⁣ your visuals and ‍vibe just right. ‍ Royalty-free tracks are your‌ best friends here—these tunes won’t break the bank and ⁢won’t get your videos⁢ yanked down. ‍Sites like ⁣ Epidemic⁤ Sound, Artlist, and ⁤ YouTube’s Audio Library offer a treasure trove‍ of options. But remember, ⁢always double-check ‍license agreements; some may require⁢ attribution, ​just like thanking⁣ a friend for lending you⁢ that killer jacket.

Another crucial ‍tip is to ‍get familiar with Creative Commons licenses. They let you know exactly ​what’s fair game. Sometimes all ​it takes is​ giving credit where it’s due, making it a win-win for you ‌and the artist. Here’s a quick cheat sheet to help you differentiate:

License Type Description
CC ‍BY Use⁢ freely with attribution.
CC BY-SA Use and modify ‌with attribution; share ⁤alike.
CC BY-ND Use⁤ and share as-is ​with attribution.

With these basics⁣ under your belt, you can breeze‌ through music selection like a pro,⁣ adding that extra⁢ magic to your content without stepping ⁤on any⁢ copyright toes!

Tips ⁢and Tricks‍ for ​Seamless ‌Music Integration in Your Edits

Tips and Tricks‌ for Seamless Music Integration in ⁤Your ⁣Edits

Integrating ⁢music into your videos ​doesn’t have to feel like solving a Rubik’s cube ⁢blindfolded. Start by knowing your target audience; it’s like ​picking the perfect playlist for a road trip. Is ‍your vibe chill and laid-back or energetic ​and upbeat? Choose tracks that not just fit your theme but also amplify the emotions​ you want to⁣ evoke. ⁢Look for ‌royalty-free sites like⁤ Epidemic ‍Sound or Artlist, where ⁣you can discover soundscapes that range from serene piano melodies to heart-pumping ‌beats.⁣ Remember, you don’t want the music to overshadow your​ content, instead, it should serve as an⁤ invisible thread weaving all ⁣your elements together.

Timing is everything,⁣ and that goes for your audio too! Syncing music with visuals can elevate your edit from bland ​to grand​ in⁢ a snap. ⁣Consider ‌using key moments in ⁤your ⁤footage ⁣to highlight musical cues—like a bass drop hitting just as the action peaks or a‍ soft strum accentuating a heartfelt moment. Tools like⁣ Adobe Premiere Pro let you easily​ align audio​ to‌ video tracks, ‌making this a ⁤breeze. Plus, don’t‌ forget⁤ to adjust the volume​ and​ fade in/out;‍ too loud, and you​ risk drowning out your message. Think of it like​ seasoning your food: just the right ‍amount will ‌leave your viewers wanting more!

Exploring Free and Affordable Music Resources to Enrich Your Channel

Exploring Free ⁢and Affordable Music Resources ⁢to Enrich ​Your Channel

Diving into the world of music⁣ resources can be​ a game-changer for your channel, and‌ the⁤ good news ⁣is, you‌ don’t‌ have to break the bank! There are tons of free and affordable platforms ⁤ out there that allow you to find the perfect soundtrack for your videos. Here are some gems you ‌might ⁤want to explore:

  • Jamendo: Perfect for indie ​music lovers.
  • Free‌ Music Archive: A treasure trove ​of⁣ quality tracks that won’t cost you a dime.
  • Incompetech: Known for its ⁢vast collection of royalty-free music by Kevin MacLeod.
  • SoundCloud: Explore hidden jewels ⁢from emerging​ artists—just make sure to check licensing!
  • YouTube Audio Library: Directly from the ⁣source, it’s packed ⁣with tunes and sound effects.

These resources give you a ‍chance to enhance your ⁣video content with​ the right vibe, whether you’re‍ going ​for something chill, upbeat, or even a little dramatic. It’s⁤ like dressing your video in the⁣ perfect outfit! To help streamline your selection process, you might even want to ⁣consider ‍creating a simple⁢ breakdown table of your ​favorite tracks and⁢ the mood they set:

Track Name Mood Resource
Sunny Day Cheerful Jamendo
Epic Journey Inspiring Incompetech
Relaxing Waves Calm YouTube Audio Library

Future Outlook

And there you have it! You’ve⁤ just taken your first steps into the ⁢vibrant world of YouTube music integration. Think of it like adding that secret ingredient to your grandma’s​ famous cookie recipe—suddenly, it’s ‌not just good; it’s ‍extraordinary! ‌By following these simple⁣ tips, ⁤you’re not just⁤ uploading videos; ‍you’re crafting experiences that resonate with your audience.

Remember, the⁢ right ⁣tunes ‍can elevate your content from silent flickers to soulful storytelling. Whether​ you’re creating a travel ‍vlog⁢ that needs a sunshine vibe‍ or a ⁤tutorial that requires a bit of‍ upbeat energy, music is ⁢your trusty sidekick in​ this digital adventure. So, get‌ out‌ there and experiment! Dive into YouTube’s ‌library, ⁣explore‍ your ⁢favorite‍ tracks, and don’t ⁤hesitate to ‌mix genres or⁢ styles to‌ find that perfect fit.

As you add those melodies, ​don’t ⁤forget to engage​ with your viewers. Ask them what they⁤ think of your⁢ music choices, or invite them to suggest tracks—they might surprise you with some gems! So go ahead and​ hit that upload button, and watch as your⁢ videos transform into captivating experiences that leave your audience coming back for more. ⁢Happy creating!

Snagging Still Shots: How to Capture YouTube Frames Easily!

Ever‌ found yourself ⁤watching your favorite ‍YouTube video, and suddenly you‌ spot that perfect frame? You know,‍ the ‌one that captures a hilarious ⁣expression, an epic ⁣moment, or ‍a⁣ stunning visual? It’s like finding​ a hidden gem in a treasure ‌chest! ‌But then, the struggle begins—how do you⁣ snag that ⁤still⁣ shot without the hassle? Don’t worry, you’re‌ not alone! Whether you’re an aspiring​ content creator, ⁣a social media ⁤whiz, or just someone who loves to collect those memorable moments, capturing ⁤YouTube‌ frames doesn’t have to ‍be a daunting ⁢task. In this article, we’ll explore some super simple methods⁤ that will have you snapping those perfect ⁤stills ‌in no time. Ready​ to turn those dynamic videos into share-worthy stills? Let’s‍ dive in!
Snagging Golden ⁣Moments: The Best‌ Tools ‌to Capture⁣ YouTube Frames​ Effortlessly

Snagging Golden⁤ Moments:‌ The ​Best⁢ Tools to Capture YouTube Frames Effortlessly

Capturing those golden moments from YouTube videos doesn’t have to be a⁣ chore! With the ⁤right tools at your fingertips, you can ⁤snag stunning still shots in‌ no‍ time. Screenshot ​tools like Snagit or Greenshot are fantastic⁢ options that⁤ allow‌ you to ‌customize your captures, whether you want to take‍ a⁢ full-screen shot or just grab ⁢a tiny portion of the frame. They⁤ come⁢ loaded with editing features too, letting⁢ you annotate or‍ highlight key ​parts ⁣of your image. Plus,⁢ they’re ‌super⁤ friendly ‌to use. Just point, click, and you’re ⁣off! Can you feel how easy that sounds?

If you’re looking for⁣ a more techy approach, online video frame ⁣extractors like Kapwing or YT Cutter ​can​ do wonders! These web-based marvels⁤ allow you to input the⁢ video URL and select ‌the exact frame you‍ want. It’s​ like having ⁤a magic wand that just points to your desired ​moment. ‌Imagine this: instead⁤ of scrolling through⁤ the video frame by frame, you can just fast-forward ​to the best bits, grab what you need, and save it directly ​to your ‌device. How convenient is that? The possibilities⁣ are ‌endless when you have the right⁣ tools, making your‌ frame-snatching adventures smoother than ever!

Mastering the‌ Art of Frame Selection:⁢ Tips⁣ for Picking the Perfect Still

Mastering the Art ‍of Frame Selection: Tips for Picking the Perfect⁣ Still

Choosing the‌ right frame for your⁢ still shots isn’t just a matter of luck; ⁤it’s ⁤an art form! Think of it ⁢like picking‍ the ‍right ‍outfit for a big date. You want something that stands⁢ out yet feels comfortable.‍ Start ​by assessing the content of your video.‍ Are ⁣you ‍aiming for ⁣something dramatic? ‍Consider​ frames ‍with⁢ dynamic lighting or movement. On the other‍ hand, if your video is more laid back, a soft focus with​ natural tones can work‍ wonders. Pay attention to‌ your composition—the rule of ‌thirds can help you find that perfect⁣ slice of the video ‍that tells a​ story at first glance.

Next up, don’t forget about ⁢the emotional punch. Certain⁢ frames evoke feelings, ‌so make ‍sure the one you choose resonates with the message you want to convey. Here are a⁢ few tips‌ to⁤ help⁤ you pick‍ wisely:

  • Clear⁢ Subject: Your main⁤ focus should shine through, not ‌get lost‌ in the background.
  • Good Lighting: Natural light is your best friend; ⁤it brings out colors beautifully!
  • Action Moments: Look for a frame ​where something exciting or⁤ memorable is ​happening;⁤ it draws ​viewers ‌in.

Plus, consider creating a small‌ table to keep track of your best ⁣finds, like‌ this:

Frame Description Emotional Impact Lighting
Dramatic Pose High⁤ Impact Natural Light
Soft Smiles Warmth Soft Glow
Action Shot Excitement Bright Contrast

With these ​tips ⁤up your⁣ sleeve, you’re⁢ well-equipped to snag those⁤ still shots that ‌perfectly ⁤represent your content! Happy frame hunting!

Editing Like a Pro: Enhancing Your Captured Frames for Maximum ⁣Impact

Editing Like a Pro: Enhancing Your Captured Frames for Maximum Impact

So, ⁣you’ve got your‍ stunning frames ready⁢ from your​ YouTube videos, but now it’s time to‌ sprinkle some editing magic⁢ on them! You don’t need to be ⁢a tech ⁤whiz to enhance⁢ those still shots. Start with‌ some basic adjustments like⁢ brightness, contrast, and sharpness. A little tweak in brightness can make your image pop, ⁢while a⁤ simple increase‍ in contrast can bring out the details ‍that often get lost in the shadows. Use editing apps ⁤like Canva or ​Lightroom – they’re‌ user-friendly and packed with features.⁢ Honestly, it’s like painting ‌a canvas;​ the right brush⁤ strokes can turn ‌a decent shot⁤ into something that grabs attention and tells a story!

Next ⁢up, consider adding some stylish effects and overlays to elevate your frames.​ Think about using⁣ filters or frames that match⁢ the vibe of ​your content. Don’t be ⁤shy ⁢about experimenting! Here’s a ‍quick ​list of editing techniques you ⁣can try:

  • Color Grading: Change the tone to match your brand’s aesthetic.
  • Cropping: Focus on⁣ the most⁤ compelling elements.
  • Text Overlay: Add⁢ a ⁣catchy tagline or label to give context.
  • Blur Effects: Create depth by blurring​ backgrounds ⁢to highlight the main subjects.

As you play with these techniques, remember that subtlety is key ⁢– you want⁢ your frames to shine, ‌not⁤ overshadow the content itself. Keep your edits ‌aligned with your​ message ‌to ensure⁣ maximum impact. Happy editing!

Sharing Your Visual ⁤Treasures:⁣ The Best Ways to Showcase Your Snagged Shots

Sharing Your Visual Treasures:‍ The Best Ways to Showcase ‌Your Snagged Shots

Once⁤ you’ve snagged those ‌perfect​ frames from your favorite YouTube videos, it’s all​ about how you showcase them.​ Think of your screenshots as treasures; you wouldn’t hide gold⁤ in a shoebox, ‍right? Here are some top ways to⁢ flaunt your‍ newfound visual ‍gems:

  • Create ⁤a ⁤Gallery: Use a gallery plugin⁤ or tool to compile⁤ your frames beautifully. It ⁤invites viewers to browse ‌through your collection effortlessly.
  • Interactive Slideshows: Consider turning your images into a slideshow ⁤with engaging ‍transitions. This can keep your audience ⁣captivated and enhance their experience.
  • Social Media Sharing: Don’t forget⁢ to hit up​ Instagram or Pinterest! Use⁣ relevant hashtags and tag creators ‌to‍ increase your reach.​ They’ll love seeing their work ⁢recognized!
  • Blog ‌Feature: Write‌ a post highlighting​ the context of each ‍frame. Add anecdotes, impressions,‌ or behind-the-scenes ⁢info to deepen the engagement.

Don’t ⁣overlook the potential of storytelling. Each image ​can convey emotions and narratives. To organize your showcase, ⁤a well-structured table ‍can be incredibly effective:

Frame Title Video Source Story Behind It
Chasing Adventure YouTube A moment capturing thrill in a travel vlog
Heartfelt Goodbyes YouTube A ⁤scene from an emotional farewell video
Epic Fail! YouTube Hilarious blooper from⁤ a comedy ⁤sketch

Closing Remarks

And there you have it, folks! Snagging those ‌perfect ‍still shots from your favorite ⁢YouTube ‌videos ⁤doesn’t have to feel like ​searching‌ for a needle ‍in a‍ haystack. With a few handy tools and some straightforward tricks, you‌ can freeze​ those memorable moments and share them⁤ in no time. ⁤Whether⁣ you’re crafting a dynamic presentation or simply want to keep a piece of that hilarious⁢ clip for your⁤ collection, you’re ⁤now armed ‍with⁤ the ‌know-how to make it happen.

So the next time you stumble across ‍a⁣ frame that really ⁣strikes ⁣a chord—like that⁤ unforgettable reaction or‍ that jaw-dropping visual—don’t hesitate! Grab‌ it,‌ savor it, and let your creativity run wild. After all, it’s all about those moments that make you ‍chuckle, inspire, or simply ‍leave you ⁣in awe. Happy snapping, and​ may your ‌YouTube journeys‌ be filled with‌ just the⁢ right frames! Until ​next time, keep⁣ capturing the good vibes⁣ and sharing your stories.⁢ You got this! 🌟

Effortless Steps to Clip Your Favorite YouTube Videos!

Ever found ​yourself hooked on a YouTube video, just wishing you could save that perfect‌ moment to share with your friends or revisit later? You’re not alone! We’ve all been there—scrolling through our favorite channels, watching a killer recipe ‍tutorial or an epic gaming highlight, and thinking, “I need this on⁢ my⁢ phone.” Luckily, clipping your favorite YouTube videos isn’t as tricky as it ⁢sounds. With ⁣just a few effortless steps, you’ll have those sought-after snippets ready to go, ⁤like catching fireflies in a jar. Let’s dive right into how you can easily snip⁢ out those golden moments and keep the good ​times rolling!
Master the Art of Video Clipping with Simple ⁢Tools

Master the⁣ Art of⁢ Video Clipping with​ Simple Tools

Clip your favorite moments from YouTube without breaking ‍a sweat! With the right tools, you can ⁤create bite-sized clips that are perfect for sharing or replaying. Start ⁤by⁤ choosing a user-friendly online video editor or app. ⁣Look for options that allow ‍you to upload videos directly from YouTube or paste a link to save some time. Once you have your video loaded, the fun begins! You can trim, cut, ⁣and rearrange footage with just a few clicks. Why​ not add a bit of flair by incorporating text overlays ⁣or fun⁤ filters? It’s as easy as pie!

Remember, the key to mastering video⁤ clipping is finding the right balance between simplicity ‍and creativity. Consider these tips:

  • Plan your clips: Jot down timestamps of the moments you love.
  • Stay focused: Keep it short and sweet—30 seconds to a minute is usually ideal.
  • Preview⁣ before saving: Make sure your edits flow smoothly and⁤ capture the essence of the original video.

Once you’re satisfied, export and share your masterpiece! ⁣You’ll impress friends and followers with⁣ your snappy, engaging content that speaks volumes without needing a long watch. Happy clipping!

Unlocking the Secrets ‍of YouTube’s Hidden Features

Unlocking the ⁣Secrets of YouTube’s Hidden Features

Ready to⁤ dive into the world of YouTube’s⁢ hidden gems? The platform’s not just⁣ a place for ‌endless cat videos and music clips;​ it’s packed with features that can make your viewing experience even better. One of the coolest tricks is the​ ability to create clips ⁢from videos, allowing you to share your favorite moments ⁣effortlessly. To⁣ get started, look‌ for ⁢the Clip button underneath the video player. This nifty tool lets you select a portion of‌ a video—usually between 5 and 60 seconds. Once you’ve caught that epic part, you can highlight it, give⁢ your clip a title, and voilà! You’ve created ⁣something shareable that captures the⁢ essence of the moment. Consider ‌it like creating your own highlight reel but for those internet gold moments you can’t help but love.

But wait, there’s ⁢more! You⁤ can also customize how your clips look when ​you share them. Here’s a quick list of ways to make ‍your clips pop:

  • Catchy Titles: Use engaging titles that tease the content—make viewers want to click!
  • Creative Thumbnails: Pick ​a ⁣thumbnail that stands out—first impressions matter!
  • Engage Your Audience: Ask your viewers a question ​about ‍the clip to spark a‌ conversation.

If you want to take it a step further, consider using a simple table to summarize the‌ main points of your clip or to invite viewers to⁤ your ‍other content. For ‍example:

Clip Title Duration Main Moment
Epic Fail ⁢Compilation 30 seconds Slipping on a banana peel!
Best Dance Moves 45 seconds Grooving at the party!

So get out there, start clipping, and share your ​favorite moments! ⁤YouTube is ​waiting for your unique spin on its endless ​sea of content.

Creating Shareable ​Moments: Tips for Social Media Integration

Creating Shareable Moments:​ Tips for Social Media Integration

Sharing⁣ those epic moments from your favorite YouTube videos can feel like a daunting task, but it doesn’t have to be! With simple strategies, you can seamlessly weave‌ those clips into your social media feeds, captivating your audience along the ⁤way. Start by identifying ⁤the specific moments that truly resonate with you—those snippets that​ are packed with⁤ emotion, humor, or⁣ valuable insights. Think about it: wouldn’t you rather share a powerful quote or a hilarious blunder from a​ video than post an entire hour-long‌ clip? Once you’ve pinpointed those gold nuggets, use easy-to-navigate ‌tools or apps that allow you to‍ clip, edit, and customize your selections before sharing them. This keeps your posts fresh and relatable, and who doesn’t love a good, shareable moment?

As you get ready⁤ to⁤ hit ‘post,’ don’t forget ⁣to sprinkle in some engaging⁣ elements that encourage your followers to interact. Add catchy captions, emojis, or even pose questions to spark conversation. It’s like ⁣casting a fishing line—you’re not just throwing out content; you’re inviting your audience to reel in the fun, share⁤ their thoughts, and maybe even create a dialogue. Consider incorporating these tips to boost your shareability:

  • Visual Appeal: Use⁤ eye-catching thumbnails or​ edited previews.
  • Personal Touch: Share your thoughts or reactions alongside the clips.
  • Use Hashtags: Make it‌ easier for others to find your content.
  • Invite Collaboration: Tag others or challenge friends to share their favorite moments.

Polish ‌Your Clips with Editing Tricks That Wow

Polish ​Your Clips with Editing ‌Tricks That Wow

Video editing doesn’t have to be a daunting task. With a few⁢ clever tricks up your sleeve, you can transform your YouTube clips into⁤ engaging and polished⁤ gems. First off, consider cutting out the​ fluff; nobody wants to sit through monotonous content. Snip out those long pauses, awkward ⁤moments, or repetitive information. This not only tightens your edit but‌ keeps your audience hooked. Don’t forget to add transitions—they’re like the cherry on top that can elevate your videos from basic to brilliant. Think about simple fades, wipes, or even an upbeat music cue to signal a change;​ it’s‍ all about maintaining a flow that feels ⁤natural and ‍engaging.

Another essential trick? Incorporating text overlays to highlight key points or add a splash of personality. Use attention-grabbing fonts, but keep them legible. If you’re feeling adventurous, try pairing‌ specific colors with the mood ⁤of⁢ your content; warm hues for exciting ‌moments,​ cool tones for calm sections. And let’s not overlook the power of sound effects!‌ They can punctuate actions and really elevate the overall experience.‌ Whether⁢ it’s a swoosh when you transition or⁢ a soft beep when you make a ⁣point, these sound bites can lift your production quality. Here’s a quick ⁣overview of editing elements that can transform your clips:

Editing Element Purpose
Cuts Eliminate⁣ unnecessary parts
Transitions Smooth change between scenes
Text Overlays Emphasize key points
Sound Effects Enhance viewer engagement

The Conclusion

And there you have⁢ it! Clipping your ⁤favorite YouTube videos doesn’t have to feel like scaling a mountain. With just a few easy steps, you can unlock a treasure trove of‍ moments that make you laugh, cry, or even inspire a little dance in your living room. Imagine having a personal highlight reel at your fingertips—suddenly, every hilarious quip or jaw-dropping reveal is just a click away. ‍So go on, dive into those video treasures‍ and let your creativity flow!

Don’t forget‍ to share your clipped gems with friends or even sprinkle them across your social media. Who knows? You ⁢might just spark someone else’s day with ⁢a perfectly timed laugh or a ‌mind-blowing tutorial snippet. Happy clipping!

Master Your YouTube: Edit, Remove, and Manage Subscriptions!

Are you tired of sifting through a chaotic sea of YouTube ‍subscriptions, wondering where ⁤the gems are hidden? Don’t worry; you’re far from alone! Every‌ day, millions of ‍content‌ lovers dive ‌into the‌ vast ocean​ of videos, but keeping your viewing experience streamlined ‍can feel like trying to swim upstream. Whether ⁣it’s deleting channels that no longer spark ⁤joy or organizing your subscriptions⁤ so ⁤you can easily find what you love, mastering your YouTube experience ​isn’t just a nice-to-have; it’s ⁣a game-changer! In this‍ article, we’ll unlock the​ secrets to editing,‌ removing, and ⁣effectively managing your YouTube​ subscriptions, transforming your digital landscape into a personalized paradise. So ‍grab your virtual toolbox,‌ and let’s get⁢ to work—your ⁣ideal YouTube experience is just​ a ​click away!

Discovering the Power‍ of YouTube Editing Tools

When it comes to crafting engaging⁣ videos on YouTube, having the right editing‍ tools at ‍your fingertips ‌can be a total game changer. Imagine being able to snip away ‍those awkward‌ pauses, add ‍some ⁢jazzy transitions, or toss in‌ a​ catchy tune. The platform offers ​a plethora of editing features⁣ that allow creators​ of all levels to polish their⁢ videos and make them pop. You ⁤can⁢ use basic⁤ functions like ‍trimming ⁣and merging⁢ clips or dive ​deeper into effects ​and filters that add a professional‌ touch. The intuitive interface makes it a breeze to navigate, so you’ll spend less time fumbling around ⁤and more time⁤ making your content shine.

Moreover, managing your ‌subscriptions has ‍never been easier with YouTube’s streamlined features. Ever felt overwhelmed by the sheer volume of channels you’re subscribed to? You can easily sort through your ‌subscriptions, allowing you⁣ to see what content your favorite creators⁢ are dropping without scrolling through endless lists. ⁢Take advantage of ‍options like notifying yourself about new uploads or categorizing channels based on genres.⁤ YouTube even empowers you to ⁣curate⁣ your​ feed, ensuring you never miss out on what ⁤you want to⁣ see.‍ Here’s a ⁢handy table to⁢ help you⁤ remember some quick tips on managing subscriptions effectively:

Tip Description
Organize Favorites Group ‍your favorite⁣ channels into categories for easy ‌access.
Notification ⁣Settings Customize alerts for uploads from creators you love.
Unsubscribe Wisely Regularly review⁣ subscriptions to keep your ‍feed relevant.

Discovering​ the Power of YouTube Editing Tools

Streamlining Your Subscriptions⁣ for a Tailored Experience

Managing your YouTube subscriptions shouldn’t feel ‍like herding cats—it can actually be a breeze! The first step⁤ is to take a ⁣closer look at what you’re currently subscribed⁢ to. It’s​ easy to collect channels over time, but ⁣the key is to keep those that truly resonate with you. ‌Start‍ by going through⁣ your list; you ⁣might find⁤ some old favorites gathering digital dust or channels that‌ no ⁤longer ⁢appeal ⁤to⁢ your interests. Here are some tips ‌for curating your collection:

  • Prioritize Content: Focus on channels that deliver‌ the most value to your viewing experience.
  • Regular⁣ Cleanup: Set aside time, ‍maybe‌ monthly, to​ review ​and⁣ remove any channels that no longer pique ⁤your⁤ interest.
  • Create Playlists: ‌ Instead of subscribing to every‍ channel,‌ create⁢ playlists for specific themes—this organizes content without ⁣cluttering ⁤your subscriptions.

Another nifty ‌trick ⁤is to leverage‍ YouTube’s notification settings. It’s not just​ about ⁢who ⁤you subscribe to; it’s about staying in the ⁣loop without overwhelming your‍ feed. ​For channels that truly matter, enable‍ notifications to ensure you catch new uploads. Meanwhile, for those you’re less invested in, consider turning off notifications to reduce the noise. Check ​out this simple table to⁣ visualize your ​options:

Channel Type Notification Setting Follow-Up Action
Must-Watch ⁢Channels On Enable Notifications
Occasional Interest Off Check Weekly
Forgotten⁣ Favorites Off Evaluate Monthly

Streamlining Your Subscriptions for a Tailored‍ Experience

Effortlessly ‍Remove‌ Unwanted Channels from Your Feed

We’ve all⁣ been there—scrolling through YouTube and realizing your feed is cluttered with channels⁢ that ‌just don’t speak⁣ to you⁤ anymore. Clearing out unwanted channels is easier ⁣than pie!⁤ Just ‌log‍ into your account,‌ head to your subscriptions, and you’ll⁤ see a world of ⁤possibilities. You can simply hover ​over the⁢ channel name, ⁢look‌ for that little gear icon, and with ⁤a quick click of ‘Remove’, poof! That channel is gone, freeing up‌ space for fresh, engaging​ content that actually tickles your fancy.

But wait, ‌there’s more! Think of your YouTube feed as your personal garden; you‍ want to cultivate what you love and ditch⁤ what’s​ just weeds. Here are some handy tips to keep your feed ⁢tidy and enjoyable:

  • Regular Maintenance: ⁤ Set aside a few minutes each month to‌ reassess your⁣ subscriptions. Are ⁢there any old channels that no longer inspire ⁣you?
  • Explore⁢ New Content: ‌Dive into different genres ‌to ⁣find ‌fresh voices and perspectives; your feed deserves a little ​variety!
  • Utilize⁣ Notifications: ⁣ Customize your settings to get alerts only ​for the channels ⁤you really care about, ‍so you don’t miss⁤ out⁢ on ‍their latest offerings.

Effortlessly Remove Unwanted⁣ Channels from Your Feed

Mastering Your‌ Notifications: Balancing Alerts‍ and ⁤Serenity

‍ ⁤ ​Staying on top of your ‌YouTube game means getting a handle on those⁤ pesky notifications. If you think about it, notifications are a‍ lot like your well-meaning ⁣friends: sometimes, they ‌just won’t stop talking! To keep the⁤ peace while ⁢staying informed, you can customize ‌what you receive and how. Dive into your settings and prioritize those alerts‌ that matter most—like updates from your favorite channels or comments⁣ on your latest video. This ‍way, you can easily filter​ out the⁤ noise and focus ‍more on the ​content you truly love.

Taming ‍the ‌notification beast also involves a ⁤little strategy. Consider the following tips​ to create​ a​ more serene ​YouTube experience:

  • Custom Alerts: Enable notifications for⁢ specific channels to get‌ timely updates without the overwhelm.
  • Daily ⁤Digest: ​Instead of being bombarded throughout the day,‍ switch to a daily ‌summary for non-urgent ‍updates.
  • Focus Time: Use ‌”Do Not Disturb” during your creative hours so you can‍ dive deep without distractions.

‌ With these simple ⁣adjustments, you’ll find‌ that scrolling⁤ through YouTube becomes more ​about relaxation than a constant barrage‌ of alerts!

Mastering Your Notifications: Balancing Alerts and ‍Serenity

Insights and Conclusions

And there‍ you ‍have ⁤it! With these handy tips​ on editing, removing, and ​managing your⁣ YouTube subscriptions, you’re all set to create‌ a personalized viewing experience that truly ‍reflects your interests. It’s like⁢ curating your own ⁤playlist of favorite‍ jams, but instead, you’re tuning in to the content ​that makes you smile, inspires you, or even‌ teaches you something⁤ new!‌

Don’t​ forget, YouTube is a‍ vast ⁣ocean ‍of creativity, ⁣and managing your subscriptions is just one way to navigate ​through the waves. So, take charge, unwrap ⁢the content that sparks joy in your life, and toss aside the stuff‍ that doesn’t resonate with ‍you anymore.

Remember, your ⁤YouTube channel should feel like a cozy ​living room filled ⁤with all your favorite things. It’s your personal space—make it ‌count! If⁤ you have‌ any ⁢tricks or experiences you’d like to share, ‌or if you stumbled upon some hidden‌ gems you think ⁤others should check out, drop a comment ⁤below! Let’s ‌keep ⁤this conversation going. Happy viewing, ⁤and may your YouTube journey be endlessly entertaining!‍ 🎥✨

Can You Snag Clips from YouTube? Here’s What You Need to Know!

Ever found a ⁣YouTube video that​ has the perfect clip you just have to share or ‍use? Maybe it’s a hilarious moment​ from⁢ a comedy sketch, an inspiring quote⁣ from a motivational talk, or ⁤a breathtaking scene from a travel vlog. The problem‌ is, how ​do you ​snag those snippets without‌ getting tangled up ​in a​ web of copyright rules and ‌tech issues? Fear⁣ not!‌ We’re diving into the nitty-gritty of​ grabbing those golden⁢ moments off YouTube – from⁤ legalities to handy tools and tips.‍ Whether you’re ​looking​ to spice up your presentation, ‍create a mashup, ‌or simply share a ⁤laugh with friends, we’ve ⁢got ⁤you covered. ⁣Let’s unravel the mystery of how to snag those clips ‌like a pro!
Understanding YouTubes Policies on⁤ Snagging Clips

Understanding​ YouTubes Policies on ​Snagging ⁣Clips

When⁢ you’re diving⁢ into the world of YouTube, it’s essential to ⁣grasp the do’s and ‍don’ts regarding​ snagging clips. ⁢YouTube has ‍a detailed set of policies that aim to protect creators’ rights and their original content. You⁣ might think it’s a piece‍ of cake to just grab a snippet⁢ here or there, but‌ hold up! It’s crucial to understand that‍ using clips without permission could get you⁢ into hot water. YouTube’s ⁢copyright system is pretty robust and operates on ⁢a take-no-prisoners approach. ‌This means⁢ that if you unintentionally tread ‌on someone’s ⁤toes, you could face copyright ‌strikes or ⁣even⁢ a ‍channel takedown. Remember, just⁣ because it’s on‍ the internet doesn’t mean it’s free for all!

So, what are your options if you still ⁤want to⁣ share​ some of that great content? Here’s where it gets interesting.⁢ You‌ could explore a ‌couple of ⁣avenues that give you a​ fighting chance at legally using ​clips:

  • Fair Use: This doctrine allows⁣ for limited use of copyrighted material without permission, but it’s a gray⁣ area. Factors ‍like ​purpose, nature, amount, and effect on the market come into play.
  • Creative ⁢Commons: ‌ Some ​content ⁣creators⁢ license their videos under Creative ⁤Commons, which⁤ often ​allows⁣ you to use their clips as long as‌ you provide proper attribution.
  • Collaborating: ⁣Reach out​ to creators directly ‍for permission. It shows ‌respect and could lead to exciting⁣ partnerships!

The Best Tools and Techniques ⁣for Capturing Clips Effortlessly

The Best Tools and Techniques for Capturing Clips Effortlessly

When⁤ it comes to capturing clips from YouTube, having the right tools​ can make all the difference. Screen recording software ​ is your ⁤best friend here. Whether you’re using a PC or a Mac, options like OBS Studio or Snagit‍ make it⁤ easy to snag ⁣exactly what you want. They⁢ let you customize the recording area, so you don’t end up with unwanted clutter in your⁤ clips. Not to⁣ mention, they often come with editing features, so you can​ trim, add effects, or even annotate​ your ‍recordings. But if ⁤you’re looking for something super straightforward, browser⁤ extensions‌ like Video‍ DownloadHelper ​can make the process ⁣a breeze. ⁢Just install, click, and grab ‌the clip you need—talk about convenience!

There ‌are also handy online services, ​like ClipConverter or Y2mate, that enable you to snag clips without the need for software installation. ⁢Just copy and paste ​the YouTube link, choose your desired format, ‍and voilà—your clip is ready to ⁣download. Make sure to keep an eye on the quality options so that your‍ final product looks sharp and professional. Another tip? Organize your clips systematically in folders by category or project, which ​can‌ save you tons of time ‍later on.‌ Efficient ​management​ of your ​clips can be⁤ the difference between ⁢chaos and creativity!

Creative Ways ⁤to Use Snagged⁢ Clips‍ for⁤ Your ‍Content

Creative Ways​ to Use Snagged Clips for Your⁢ Content

So, you’ve snagged a couple of clips from YouTube—now what? There are​ tons of creative ways to incorporate these gems into your content! First off, why not spice up ⁢your blog posts or‍ articles? Embedding short clips can break up ‌the text and⁢ keep your ‌audience engaged. Think of​ your words as ⁢a beautiful cake; those clips ‌are the cherries on top! You can⁤ use‌ them to illustrate a point, provide⁢ examples, or add some humor. Just ​imagine a cooking blog where you demonstrate a ⁣tricky technique with a quick video snippet—your readers⁣ will appreciate the visual boost!

Another fantastic ‍way to utilize those clips is​ by creating⁤ stunning social media​ content. Grab attention on ⁣platforms like Instagram or Twitter‍ by sharing bite-sized clips that​ showcase highlights or key takeaways. You ‌can ​create ‍a series‌ of ⁢mini-videos, each ⁢focusing on a different aspect of your ⁢topic, ‌or even craft a fun compilation. Not only ⁢does this ⁤cater to the ever-shrinking attention spans of ‌online users,‍ but it also encourages sharing ⁣and interaction. Plus, who doesn’t​ love a good meme? Transform ⁤those clips into fun graphics ‍or GIFs that resonate ⁢with your audience, and you’ll be laughing all the way‌ to increased engagement!

Navigating Copyright: What You Can and Can’t Do with Clips

When it comes to snagging ‌clips ‍from YouTube, the waters can get a bit murky. ⁢Sure, you might ‌think, “Hey, it’s just a clip!” ‌But remember,​ it’s not​ just about your intentions; it’s about the laws that ‍protect those creative works. Here’s the scoop: if you’re using a clip ‍for personal, non-commercial use, you’re ‍generally in a safer space. But as‌ soon as you ⁤start thinking about sharing ‍it ⁣widely or ⁢monetizing it,⁣ things change. That’s when ⁢you’ll need to tread​ carefully and consider fair use—a ‌tricky concept that can sometimes feel like walking ​on a tightrope. Are ⁣you really transforming the content? ‌Are you adding‍ criticism, commentary, or educational value? If not, you‍ might want to think twice before hitting that upload button.

Here’s a quick rundown of what you can and can’t do:

  • Can: Use short clips for educational purposes with proper citations.
  • Can: Create mashups ⁣or remixes that significantly alter the original work.
  • Can’t: Download entire videos ‍without permission, even for personal use.
  • Can’t: Steal clips and claim them ⁣as ⁤your own or use them to make a profit.

It’s also helpful to know that some creators release their content under Creative Commons licenses, which ⁤can allow for more flexibility with sharing. Always check⁤ if the creator has specified any particular terms. When it comes to legality, best practice is always ‌to err ‍on the side‍ of caution ‍and actively⁣ reach⁢ out for permission when in doubt!

Key Takeaways

And there you have it! Snagging clips from YouTube is like trying to catch fireflies on a⁢ warm summer night—it’s tricky but totally doable with the right tools ​and a bit of finesse. Remember, just ⁣like‍ sharing your grandma’s secret pie recipe, ‍it’s all about respecting copyright laws and creators’ ‍rights. So, whether you’re looking​ to spice up your next project or just want to share a favorite moment with friends, make sure you‌ play by the rules. ​With the tips and tricks we’ve⁣ discussed, you’ll be ready to⁢ capture‍ those golden moments in no time. Keep exploring,​ keep creating, and​ remember: the internet is a canvas! ⁣Happy clipping!

Mastering YouTube: Capture Your Favorite Video Moments!

Ever sat down to watch a YouTube video and‍ thought, “Wow, I wish⁢ I could ‍capture that epic moment to keep forever”? Well, you’re‍ not alone! ⁣Whether it’s⁤ a jaw-dropping trick⁣ shot, a heartwarming scene, or that hilarious⁤ blooper that had you doubled over in laughter, YouTube​ is a treasure trove of unforgettable moments just waiting to be preserved.⁤ In this⁣ article, we’re ⁤diving into the exciting ‍world of mastering YouTube‍ to not only enhance ⁣your viewing experience but also help you snag those snippets that make​ you laugh, cry, ⁣or reminisce. Ready to ​become a ​pro at capturing your favorite⁢ video moments? Let’s get started!

Unlocking the Art of Effective Video Selection for Your YouTube Journey

Choosing the right videos to showcase ⁤on your ⁤YouTube channel ⁤is‌ like‌ picking out the perfect outfit for a big night out—you want to impress and express yourself! Start by focusing on what truly⁣ resonates with ⁢your audience. Ask yourself, what⁢ kind of content gets people ​buzzing?‌ Think about the ⁣themes,‍ styles, or even emotions that connect​ deeply. ⁢This ⁤means diving into your analytics to⁣ identify which videos perform best, but don’t just stop there. Follow your gut and intuition; sometimes the unexpected gems ‍can bring⁢ in surprising engagement!

Creating a selection strategy can be a game changer. Consider categorizing your content into distinct playlists, making it easier for viewers to discover⁣ what they love. Here ⁣are ​a few categories you might explore:

  • Educational – Tutorials or how-to videos that enlighten your audience.
  • Entertainment ⁣ – Funny moments, skits, or reaction ⁤videos ​that keep viewers laughing.
  • Inspirational – Uplifting stories or motivational content that leaves a mark.

Using a table can also help to visually ​break down your video selections:

Video⁢ Type Engagement Level Target Audience
Tutorials High Skill Seekers
Comedy Skits Moderate General‍ Audiences
Vlogs High Fans ⁣and Followers

By understanding ‍your audience’s preferences and strategically selecting videos, ​you can create​ a ‍captivating mix that keeps viewers coming back for more!

Unlocking the Art of Effective Video Selection⁢ for Your YouTube Journey

Essential Editing Tips to​ Transform Your‌ Footage into Engaging Stories

When it comes to editing‌ your videos, think of it as weaving a ⁤tapestry of emotions ​and visuals that resonates with your audience. Start by identifying the core message of⁤ your footage. What emotion do you want your viewers to feel? Whether it’s joy, nostalgia, or excitement, having a clear focus will⁤ guide your editing decisions. Utilize ⁤tools like ⁢ cutting and trimming to eliminate any unnecessary footage; this will keep your story tight and ⁣engaging. Don’t shy away from using dynamic⁢ transitions – they can help to maintain momentum and keep ⁢viewers glued ⁣to the ⁤screen. ​And remember, music isn’t just background noise; it’s the heartbeat of⁣ your video. Select tracks that complement your visuals, enhancing the⁢ overall narrative.​

Visual storytelling hinges on pacing and flow.⁢ If your footage is like a great book, the edits should⁢ act as ⁤chapters that build ⁢anticipation. Consider experimenting with different styles, like jump cuts or montage sequences, to convey⁤ emotions or​ shifts in time. Don’t forget to incorporate graphics and text overlays to emphasize key points—you can think of them as the seasoning that brings your dish to ⁢life. Below is a ⁣quick table to‍ outline some editing techniques that can elevate your video:

Editing Technique Purpose
Cutting Remove filler content to maintain ‌viewer interest
Transitions Create smooth shifts between scenes and⁣ maintain flow
Music Sync Enhance mood and reinforce the emotional arc
Graphics Highlight⁣ important information & create visual interest

Essential⁣ Editing Tips to Transform Your Footage into Engaging Stories

Strategic Tagging and Thumbnails that Draw in Your Audience

When it ‌comes to making ⁤your videos pop‍ in⁢ YouTube’s vast sea of content, strategic tagging and eye-catching thumbnails are your secret weapons. Think of tags as⁣ breadcrumbs that lead viewers right to your ⁣doorstep. By using ⁢ relevant ​keywords that match ‌your content, you’re not just aiding YouTube’s algorithm; you’re also bringing in folks who are genuinely interested in what​ you’ve got ​to say.⁤ It’s‍ like throwing out a fishing line with the right bait! Combine that with bold thumbnails—those little visual storefronts that can either hook⁤ a viewer or let them swim away—and you’ll⁢ have a winning combo. Channel your inner artist⁤ and use vibrant colors, ​clear images, and catchy text that make people want to click. Here are some quick tips for your thumbnails:
⁤ ⁣ ⁢

  • Use high-quality images ⁣to stand out.
  • Add a touch of‍ text, but keep it concise.
  • Incorporate your brand colors for⁤ consistency.
  • Consider a close-up shot of a key moment in your video.

Now, let’s talk about the magic‌ of effective tagging! Think of it as the behind-the-scenes work that lures in your​ audience. A well-researched set of tags elevates your video’s discoverability. Use a mix of broad and specific keywords ‌ to maximize your reach. Don’t just stop⁤ at⁤ describing what’s⁣ in your⁢ video—think⁢ about what ‌questions your audience might have and tag ⁣those as well. Below is a simple table that outlines a strategy for tagging your video effectively:

Tag Type Example
Broad Keywords Fitness Tips
Specific Keywords High-Intensity Workout at Home
Trending Tags #HealthyLiving

‌ With the right strategy,⁣ you’ll not only attract clicks but engage your audience in a way that keeps them coming back for more. Who knew that a couple ‍of well-placed tags and⁢ a killer thumbnail‌ could work wonders for your channel?

Strategic Tagging and Thumbnails that‍ Draw ‍in Your Audience

Using Analytics to Fine-Tune Your⁣ Content and⁢ Boost Viewer Engagement

One of the best secrets to captivating your audience is diving into video analytics. It’s like having a treasure map guiding you toward what keeps ‌your‌ viewers coming back for more. By​ examining ⁣metrics such​ as watch time, drop-off rates, ‌and viewer​ demographics, you can pinpoint exactly what resonates with your audience. For instance, if you notice that most viewers bail at ‌a particular moment, it might be time to rethink that⁤ part of your content. Maybe that segment was a bit too ‍long or didn’t hit the mark! Embrace the data and let it steer your creative ⁢ship. Here’s what ​you should ⁢focus‍ on:

  • Watch time: Discover which videos hold the viewer’s attention.
  • Engagement rate: Check likes, shares, and comments to gauge interest.
  • Audience ⁢retention: Understand where viewers drop off and why.

Once you’ve gathered your insights, it’s all about experimentation. Don’t hesitate to ⁤tweak your⁣ style, test different formats, or even​ play around with projects that might seem ​a bit out there! By creating⁣ content that’s both entertaining and informative, you encourage viewer ‍participation, possibly leading to a loyal following. Consider implementing a strategy like A/B testing your thumbnails or varied uploading‌ times to see which yields the best results. Below is a simple‍ table​ to help organize your⁢ experiments:

Experiment Description Hunch Result
Thumbnail ‌A Bright colors ⁢and bold ⁣text It’ll attract more clicks ✔️ High CTR
Thumbnail B Subtle design with minimal text Less is more ❌ Low CTR

Using Analytics to Fine-Tune Your Content and Boost Viewer Engagement

Final Thoughts

As we wrap ⁤up this deep dive into ⁣mastering YouTube and ⁤capturing​ those precious video moments, let’s take a moment to appreciate just how powerful this platform can be. It’s like a treasure chest filled with gold — every click could⁣ potentially⁢ lead you to something extraordinary. Whether you’re creating content that makes people‍ laugh, cry, or just think, remember that‌ every second you capture is a memory in the making.‌

So, grab‌ your camera, ‌your editing software, and possibly a snack (because who ⁤can create on an empty stomach?),⁢ and start curating your collection of video gems!⁤ You have the tools and the talent;⁣ now it’s time to let your creativity ⁤fly. Your journey‌ is just beginning, and the best part? You get to ‍shape ‌it however you like. Have fun with it, and don’t forget to share those moments with the world. After all, ‌everyone deserves to witness the magic you can create! Happy filming! 🎥✨

Using YouTube Music in Your Videos: What’s the Scoop?

Ever ⁢found yourself jamming out to your favorite⁢ tunes on YouTube Music, wondering how to sprinkle that ‍sonic‍ magic‌ into‍ your own videos? Well, you’re in ‍the right place! Navigating the world​ of music licensing can feel ⁢like trying to find your ⁤way through⁢ a maze blindfolded, ⁢but don’t⁣ sweat it!‌ We’re here ⁢to break it all ⁤down, so you can confidently amp​ up your content⁣ with ‍the right⁣ tracks. Buckle up,⁤ because we’re diving into the nitty-gritty of using YouTube Music, what you can ⁣and ⁤can’t⁣ do, and ⁣how to keep your creative juices ‌flowing without ‌stepping on any toes. Let’s get into it!

Understanding ⁤YouTube Music⁣ Licensing: What ⁤You Need to Know

Understanding YouTube Music⁣ Licensing: What You Need ⁣to ⁢Know

Let’s break it down. YouTube Music offers a treasure⁣ trove ‌of tracks that can jazz ⁣up your videos, ​but it’s crucial to​ know how ⁤the‌ licensing game works.​ Think ‍of licensing like ‌a backstage pass; without it,​ you might get kicked out of ‍the‍ concert. When ⁤you use ⁤music ​from⁤ YouTube’s ‍library, you’re‍ in the clear because these tracks are specifically ⁣licensed for creators. That means you can ‍amplify your ⁤project without the​ fear of⁤ copyright strikes. ‍Just ‍remember, not ⁤all ⁤songs‌ are fair game; some might‍ have⁤ restrictions depending‍ on the type of video or where it’s ⁢shared. It’s like navigating a maze—make sure ⁢to read the specifics!

Now,​ let’s chat about the different ⁣types of licenses ⁢you might ​encounter. Here’s a quick ⁢rundown:

  • Creative Commons License: ⁢ Often allows ‍you⁤ to use ‍the music freely,‍ but give ⁣credit to the creator.
  • Standard YouTube License: Great for your typical videos, allowing for ‌use without wading into the legal swamp.
  • Public ‌Domain: These⁣ tracks are ⁢like a ⁣free​ buffet—use ⁣them however you like, no strings‌ attached!
License Type Usage ‍Rights Attribution Required
Creative ⁣Commons Varies by type Yes
Standard YouTube Free use on YouTube No
Public​ Domain Free use anywhere No

Finding the Perfect Tracks:​ Tips for Choosing the Right Sound

Finding the⁢ Perfect Tracks: Tips for Choosing ⁢the Right Sound

Choosing the right tracks for your video can feel like hunting for treasure in ⁣a‌ sea ​of sound. You want that perfect melody or beat that ⁤makes your content pop, ‍don’t you? Start by considering the mood ​ of your​ project. Are you aiming ⁢for something upbeat⁤ and catchy, or ​perhaps something more somber and reflective? Think‍ about ⁣the message ⁣you’re conveying; ‌it should resonate with the sound. Genres ⁤play a crucial role, too! From ‍soft piano pieces for‌ heartfelt moments to energetic hip-hop⁤ for high-paced ​action,⁤ knowing your vibe‍ will guide you in selecting‌ tracks that enhance, rather than distract, from your narrative.

Don’t⁢ forget about the essentials like licensing. ‌YouTube Music provides ⁣a mix of ‍free tracks and those requiring attribution, so ⁣check those details before hitting publish! You definitely⁣ don’t ‍want to face copyright strikes,⁢ right? Consider creating‍ a ​ playlist of potential tracks, categorizing them by the‍ scenes they ‍will accompany. It’s‌ your⁢ own little library of inspiration! A few ⁢examples to keep in‍ mind include:

Track Type Best​ For
Upbeat Pop Fun vlogs, travel⁣ videos
Ambient Soundscapes Documentaries, tutorials
Acoustic Intimate storytelling, reviews
Epic Orchestral Trailers, sports highlights

Elevating Your Content: How ‌to Seamlessly ‌Integrate Music into​ Your​ Videos

Elevating Your ⁤Content: How to ​Seamlessly‌ Integrate⁣ Music into⁤ Your Videos

There’s something magical about music‌ that can transform an ⁢ordinary video into an⁣ unforgettable ⁢experience. Imagine your content⁣ like a ‍canvas ⁣and ⁣music as the‍ colors—together, they create a masterpiece that resonates with‍ viewers. When considering ⁤how to integrate music from YouTube Music, think about what⁣ kind of mood you’re ‌aiming to set. Are you looking ​for ‌something upbeat ‍and energetic, or ⁣perhaps​ something soothing and introspective?⁤ Taking time to explore the vast array ⁣of genres available allows you to select tracks that align ⁣perfectly with‍ your storyline, enhancing the emotional connection with your audience.

Next ‍up, let’s talk about the nitty-gritty of using YouTube⁤ Music without ‌a hitch. While the platform offers‌ a treasure trove of⁣ options, ⁢you’ll want to keep a few ‌things in mind to ⁣ensure everything runs smoothly. Here’s ‌a quick checklist to help you​ along⁢ the ⁢way:

  • Check⁤ Licensing: Make‍ sure the⁣ tracks you choose are free ‌to⁢ use ⁣or have appropriate licenses.
  • Sync⁣ Rights: Ensure your video stays in harmony with the music—timing‌ is‌ everything!
  • Create⁤ a Mood Board: ‌ Jot down key ⁢moments ⁤in⁢ your video where music can elevate‌ the experience.

If you’re serious about crafting compelling content,‌ taking the time ⁤to ​curate the right ⁤soundtrack is essential. It’s more than just background ⁤noise—it’s the heartbeat⁤ of your project! So go ahead, dive into those playlists, and ⁢let the⁢ rhythms‌ guide ⁢your storytelling. ​Remember, the⁣ right⁤ music ⁤not only ⁣sets​ the tone but can⁢ also‍ make your​ content shareable and memorable, inviting your viewers back for more.

Navigating​ Challenges: Common Pitfalls and How to Avoid ‌Them

Using YouTube Music in your ⁣videos can feel like ⁢walking a⁤ tightrope—one misstep ‌and you could find yourself in a world of copyright headaches. ‍ First⁤ and ⁣foremost, check the licensing terms explicitly. Many creators falter by assuming‍ all⁣ content ​is fair game when​ it’s⁤ clearly marked as copyrighted. To‍ steer ‌clear of ⁣this pitfall, always do your due diligence. If‍ you ⁢want to use YouTube Music, ⁤consider selecting ⁤tracks that are explicitly labeled‍ as royalty-free or available under Creative Commons ‌licenses. This way,‌ you ⁢can⁢ make your video ⁤sing without the fear of being struck down by copyright claims.

Another common trap is not ‌attributing⁢ the ⁣music correctly.​ Even if a song is⁤ free to use, most licenses require ⁣proper credit to the ‌artist. ​ So, how ⁣do you avoid this? ‍Create a consistent ​system for noting down​ source⁢ details ‍while ⁣you ‍browse tracks, ‍so you won’t scramble at the last minute. It’s like having a ‌map when ⁢exploring a ​new ‌city; it saves ​you ​from⁤ getting‌ lost. Check out the table below ‌for ‌quick reference on what ⁣you need‍ to keep in mind‍ when navigating these murky​ waters:

Common ​Pitfall How ⁢to Avoid
Assuming music is free to use Always read⁤ the licensing terms.
Neglecting to credit artists Keep a record ⁢of sources and include attributions.
Ignoring platform ⁣policies Familiarize ‌yourself with YouTube’s​ music ‌usage policies.

In Summary

So ‍there you ⁣have it—using YouTube Music in‌ your videos is like adding the perfect soundtrack‌ to‍ a movie night. It can elevate your content, ‍connect with ‌your audience, ⁤and⁤ give your project that professional polish everyone craves. ‍Just⁣ remember to navigate​ the licensing maze ⁢carefully—nobody ‌wants ​unexpected plot twists⁤ in their⁢ creative journey!

Whether you choose⁣ to crank⁢ up those good vibes​ with licensed tracks or explore the vast world of royalty-free⁣ options, the‌ key is to ‌find the sound that resonates with your vision. So grab⁣ your camera, hit that ⁢record button, and let the music ⁤flow! With the right ‍tune, your videos will not only‍ inform or entertain, but they’ll also leave ‍a lasting emotional impact. Now, go out‍ there and make ‌some audio magic! 🎶✨

Seamlessly Add Music to Your YouTube Videos: Here’s How!

Tired of staring at your​ YouTube​ videos, wishing they had that ⁤extra ⁣spark? You know, that pop of pizzazz that only the perfect ​music⁤ can bring? You’re not alone! Every creator wants to enhance their videos with that magical soundtrack that resonates with their audience. But,⁢ let’s be real: adding music can feel like navigating a labyrinth without‌ a map. ⁤Fear not! We’re diving into ⁤a treasure trove of‌ tips that’ll make adding music to your YouTube escapades as smooth as butter on warm toast. So⁣ grab your headphones ‍and let’s transform your videos from “meh” to mesmerizing!

Choosing the Perfect Soundtrack for Your Vision

Choosing the Perfect Soundtrack ​for Your Vision

Finding ‍the right soundtrack is like choosing the perfect outfit for‌ a night ​out—it‍ should ‌reflect​ your vibe and enhance the experience. Think about the emotions ⁤you want to evoke in your viewers. Are you going for excitement, nostalgia, ‌or maybe something a little more dramatic? Consider the pacing of your video, ‌too. ​A fast-paced track can ramp up the energy in action scenes, while a slow‌ melody might be perfect for heartfelt moments. To help narrow it down, ask yourself these questions:

  • What message do I want⁣ to convey?
  • What emotion do I want to trigger?
  • Do I want ‍something upbeat or calm?

Once you have a clearer picture, dive into the various music ⁣libraries available.⁤ Platforms like Epidemic Sound or Artlist can be gold mines for discovering tracks that resonate with your story. Create playlists for different moods or scenes, so you can easily swipe through your selections when ⁣editing. ⁣As you explore, keep an eye‍ out for tracks that have unique elements—like an unexpected instrumental twist or a catchy hook—that can leave a‍ lasting impression on your audience.​ And don’t forget to check​ the​ licensing⁣ if ⁣you’re planning to monetize ⁢your video; the last thing you want is to ⁢face copyright claims!

Navigating Copyright: Safe Places ⁤to Find Music

Finding the right music for your YouTube videos ‍without ​falling into copyright traps can feel like navigating a minefield. Fortunately, there are plenty of safe spaces where you⁢ can source quality tunes without the⁤ fear⁣ of legal repercussions. ⁢Check out ​platforms like:

  • YouTube Audio Library: This is ​a goldmine! The library offers a huge selection of royalty-free music and sound effects that are completely free ​to use in your videos. Just remember to check the‌ attribution requirements, if any.
  • Free Music Archive: This site is a treasure trove ⁤of creative commons-licensed music, allowing ⁢you to explore various genres while⁤ supporting independent artists.
  • Jamendo: Here, you can discover ‌a diverse array​ of music from emerging artists, and best of all, it’s available for commercial use! Just make​ sure to read the licensing options to avoid ⁢surprises.

Another clever ⁤strategy is to explore ​subscription services that grant access to a library ‌of​ music for⁢ a monthly fee. Services like Epidemic Sound ‌ and Artlist not only provide you with an ‌incredible collection of‌ tracks, but ⁣they also cover all licensing issues for you.⁢ With these, you could even think of music as the spice that makes your video dishes more palatable! Also, consider collaborating with artists directly; they ‌often welcome ‍exposure in exchange for allowing you to use their music, a win-win for both parties!

Platform Cost Licensing
YouTube Audio Library Free Royalty-free, some attribution
Free Music Archive Free Creative Commons
Jamendo Free/Paid Commercial use available
Epidemic Sound $15/month All rights covered

Editing Made Easy: ‌Integrating Your Chosen Tunes

Editing Made Easy: Integrating Your Chosen Tunes

When it comes to adding​ music⁢ to your YouTube⁤ videos, the process should feel as easy as pie. First things first, you’ve got to have a clear vision of the vibe you want ⁣your video to convey. Is it a fun and⁣ bouncy atmosphere or a more chill, mellow mood? Once you’re in tune with that, it’s time to choose⁤ your soundtracks wisely. Consider using royalty-free music libraries like Artlist, Epidemic Sound, or AudioJungle. These platforms are treasure troves of high-quality tracks that can elevate your video from basic to ​blockbuster! Remember to check licensing agreements; no one wants to⁤ face the music ⁢for copyright issues!

After picking out the⁤ perfect tunes, integrating them into your video editing software is a⁤ breeze. Most programs like Adobe Premiere Pro or Final Cut Pro allow you to drag and drop your audio files effortlessly. Just import your track, set ⁣the right start and end points, and adjust the volume levels to⁤ ensure your voiceovers and music don’t ​clash like cats and dogs. If you want a polished finish, don’t forget to use fade-ins and fade-outs—think of them as the cherry⁤ on top of your audio sundae. Here’s ‍a quick ⁢checklist to guide you through:

  • Choose the right music for your video’s theme.
  • Double-check licensing agreements to avoid headaches later.
  • Import your audio effortlessly ⁢into your editing software.
  • Adjust volume levels ‍for a balanced sound.
  • Use fade-ins and fade-outs for seamless transitions.

Enhancing Viewer Engagement with Music Selection

Enhancing Viewer ⁢Engagement with Music Selection

Choosing the right music for your YouTube videos is like picking the perfect outfit for a first date—it sets the mood and speaks volumes about your brand. The right soundtrack can⁢ elevate⁤ your content, making it ​not just watchable but memorable. Think about it: would you want to watch a⁤ thrilling action scene with a lullaby playing ⁣in the background? ‍ Absolutely not! That’s why you should put some thought into your music​ selection. Consider using genres that align with the‍ emotional tone of your video. For‌ instance, upbeat pop tracks can energize a‌ fun tutorial, while serene instrumental pieces can enhance a peaceful travel vlog. Engage your audience by choosing music that resonates with them, creating an emotional connection​ that keeps them coming back for⁢ more.

When it⁤ comes to selecting tunes for ​maximum engagement, don’t shy away from tapping into playlists that cater to your niche. Here are a few​ pointers to keep in mind:

  • Stay Relevant: Ensure ‌the music ⁤reflects ‍your video’s content and audience interests.
  • Use⁢ Themes: Create consistent thematic music choices across⁢ multiple videos to build familiarity.
  • Consider Licensing: Opt for royalty-free⁢ tracks or use services like Epidemic Sound to avoid copyright issues.

Incorporating music effectively also means knowing when to let it shine and when to tone it down. The right balance can⁢ lead to smoother transitions ⁤and enhanced storytelling,‌ so don’t hesitate to make adjustments during the editing process.​ Use audio editing tools to⁤ fine-tune the volume levels so your music ‌complements your voiceover or any on-screen action without overshadowing it. Think of the music as a supporting character in your video—it should enhance the narrative but never steal the spotlight.

In Summary

And there you have ‍it! You’re all set to level up your⁣ YouTube game by adding that perfect soundtrack to your videos. Imagine your audience ‍vibing with your content as​ the music elevates the experience, creating⁢ an emotional connection that leaves them hooked. It’s like adding a dash​ of spice ⁢to your favorite dish—suddenly, everything tastes better!

Remember, ​don’t just slap any old tune onto⁤ your footage; choose tracks that resonate with your audience and match the vibe of your content. Whether you’re going for upbeat, chill, or dramatic, the‌ right‌ music can transform your video from ‍good to​ unforgettable. So, why not get started? Dive into those music libraries, ​experiment with different sounds,⁢ and watch your creativity flow. Before you know​ it,‌ you’ll be rocking the YouTube world with videos that not only inform but entertain and inspire. Happy creating! 🎶

Mastering YouTube: A Fun Guide to Looping Your Videos!

Ready to take your YouTube game to‌ the next ⁤level? Looping your videos can be ⁤a game-changer, turning casual viewers into devoted fans. ⁢Imagine that immersive feeling when a ​catchy song or​ a stunning visual just keeps rolling, drawing you back in for ‍more. Whether you​ want to spice up your​ vlogs, keep your audience​ engaged, or make​ those viral ​moments‍ stick, mastering the art of looping can ⁣help. In this friendly guide, we’ll break down ⁢everything you need to ⁤know about looping videos on YouTube in ‍a way‌ that’s easy to grasp and fun to​ implement. Grab⁣ your laptop,‍ let’s dive in, and get those views rolling endlessly!

Unlocking the Magic⁤ of Video ⁢Loops for Endless‍ Engagement

Unlocking the Magic of‍ Video ⁤Loops for Endless Engagement

Imagine capturing your audience’s attention and keeping them hooked with the power of video⁢ loops! These nifty⁢ little tools are like the musical​ repeat ​button for your favorite jam;⁢ they create ⁢a mesmerizing‍ experience that encourages viewers to stick ​around longer. By looping ‌your ⁣videos, you can highlight key messages, showcase stunning visuals, ⁢or even create a ‌relaxing background for​ your content. ​It’s a ‍win-win—viewers‌ get to enjoy ⁢seamless⁣ entertainment ​while⁢ you increase watch time ⁣and engagement. How cool is that?

To effectively ⁣weave loops into your video strategy, consider these ​fun tips:

  • Choose Eye-Catching ‍Clips: Use captivating visuals⁢ that⁣ invite viewers to replay, much like‌ that catchy chorus you ⁢just ⁤can’t shake off!
  • Focus on Rhythm: Pick moments​ where ⁤the action ⁣flows smoothly,​ making it natural for anyone to get‍ lost in the cycle.
  • Utilize YouTube’s Built-in⁢ Features: ⁣ Leverage the looping functionality ‍available on your channel to ⁣keep the magic alive ⁤in just a few⁤ clicks.

Check​ out ⁣this simple table to see which video types ⁤work best ⁣for looping:

Video Type Engagement Level
Music Videos High
How-To Tutorials Medium
Nature ​Clips Medium
Short Skits High

By fine-tuning your approach to looping, not only do you entertain, but you⁢ also foster a deeper connection with your audience, transforming⁣ casual‍ viewers into ⁢loyal fans.

Crafting the ⁣Perfect Loop: ‍Tips to⁢ Keep Viewers Coming ​Back

Crafting the Perfect Loop: Tips⁣ to Keep Viewers Coming Back

  • Start with a Hook: Grab your‌ audience’s ‍attention right ⁤from⁢ the start. Use an ‌intriguing question ⁣or a bold ‌statement ‌to provoke curiosity. Think of it like a ⁢cliffhanger at the end of⁣ a good book—it makes viewers want to come back for more!
  • Create Smooth Transitions: Seamless transitions ⁢can‍ turn your ⁤video into one continuous journey. Instead of abrupt⁣ changes, use visuals ‌or sounds that connect scenes, like a well-crafted ⁣soundtrack that pulls you ‍into the next act.
  • Invite Interaction: Encourage viewers to⁣ engage with your content. Pose ⁤questions or⁢ create ‌polls within ​your videos. This engagement not only fosters⁤ loyalty but also makes ⁤viewers ​feel ⁣like they’re ‌part of a community.
  • Tease Future Content: ‌ Leave little ​breadcrumbs about what’s coming next! ‌End your​ loops ⁢with a hint⁣ about your next video or an exciting topic—this​ piques interest and ensures ⁣they’ll be back for more.

Using enticing imagery can work​ wonders. Think of the video as ⁣a canvas; ⁣vibrant visuals and striking thumbnails⁢ can captivate viewers at first ⁣glance. Combine colorful aesthetics with a distinct theme ⁤that resonates throughout your‌ content. This consistent vibe ​communicates ​your ⁤brand’s personality and‍ keeps ⁢fans engaged, much like a ‌favorite song ​that evokes ⁣specific memories and emotions. Furthermore, remember⁣ to sprinkle in‌ stories or personal‌ anecdotes. ​Relatable content has a unique way of ⁣creating a bond—after all, who doesn’t love a ‌good⁣ story?

Now, let’s ‌talk about pacing. ⁤Just‍ like⁣ a ⁣perfectly brewed cup of coffee, timing is everything! Maintain ‌an⁢ upbeat rhythm to keep viewers engaged;‍ if the‍ pace drags, viewers might lose ‌interest. Consider including little surprises ⁣or twists—these ‍moments can ‍spark joy and laughter, encouraging viewers to replay​ sections just for‌ that delightful ⁣kick. Keep ​your scripts tight‌ and⁢ focused ⁣on value,⁣ ensuring every second ⁣counts. To emphasize key⁤ points, don’t⁤ shy away from​ utilizing text overlays or graphics—these ⁢tools ​can highlight essential ‌messages and ‌make your content even more⁢ digestible.

Exploring ⁢Tools and Features: Make Looping⁤ Your Videos a Breeze

Exploring Tools ⁤and Features: Make⁣ Looping Your Videos a⁢ Breeze

Looping your videos on YouTube doesn’t have to be ⁤rocket ​science. Whether ​you’re jamming‌ to your favorite playlist or need that perfect clip ⁤on‍ repeat, there are some‌ nifty features ​that⁤ make⁤ this super easy. First off, if you’re watching a video,‍ just right-click on⁤ the player,⁤ and you’ll see the magic happen. It’s as ⁢simple as selecting ‍“Loop” from ⁤the‌ options. There you go! Your chosen ​video is now on an infinite loop. Imagine the joy of ‌uplifting‍ your mood with that⁣ one catchy tune playing over⁤ and over. How cool‍ is ⁢that?

But what if you want a whole playlist to play‌ on loop? No sweat!‍ Just create a playlist and add all ‌your favorite tracks. As simple as pie!‌ Once ⁣you’ve got‍ your playlist set up, click⁤ on the ⁢three dots for more options—then hit “Loop playlist.” Now,⁢ you’re gearing‍ up⁣ for​ an endless groove session! Here are​ some additional features ​to consider:

  • AutoPlay: Keeps the good times‌ rolling by automatically jumping to the next ⁣video in your queue.
  • Playback⁢ Speed: Perfect for slowing down‍ those intricate dance moves you’re‍ trying ⁣to ⁣master!
  • Quality‍ Settings: Control how ‍clear your videos look—because who wants to stare at pixelated music legends?

Transforming ​Your⁤ Channel⁣ with Creative Looping Strategies

Transforming Your Channel​ with ⁤Creative Looping‍ Strategies

Looking‌ to ​keep​ your ⁣audience glued to your⁢ channel longer? Creative looping strategies can ‍work wonders! Think of ⁣it like a catchy chorus that keeps playing in‍ your head. Here ⁢are some tips to help you master the art of looping:

  • Engaging‌ Hooks: Start your‍ video⁣ with⁢ a striking hook.‌ If viewers are captivated right from the get-go, they’ll stick around for‍ the loop.
  • Seamless Transitions: Create smooth‍ transitions between ⁤the end⁢ and the beginning of your video.‌ A little ⁤magic can make them feel‌ like they’re watching a continuous story.
  • Use Recaps: ⁤Briefly recap ⁢key⁢ points‍ before the video loops.⁢ This ​reminds viewers of ‌what they loved and resets their interest!

To make it ⁤even more effective, consider leveraging ⁣timestamps and chapters in your video description. ‌This⁣ way, viewers can⁢ easily‍ navigate to their⁤ favorite sections. ⁣You can⁣ even ⁤incorporate ‌a countdown ‍to encourage ⁣your audience to‌ re-watch segments⁤ without feeling a sense of redundancy!

Strategy Benefit
Engaging Hooks Keeps ⁤viewers ⁤curious
Seamless ‍Transitions Makes re-watching enjoyable
Use‍ of Recaps Refreshes‌ memory and sparks interest

Wrapping ⁣Up

So, there you have it! Looping ‍your videos on⁣ YouTube isn’t⁣ just⁤ a tech-savvy trick; it’s like giving your content a second lease on​ life—a ⁣flashy encore that ⁢keeps your audience engaged and ⁤coming back ​for​ more. ​Whether you’re a budding ‌content creator ​or ⁤someone just‌ looking to spice up your channel, ⁣looping can add that extra​ zing to your ​videos.

As you stroll down the digital path ‌of⁤ YouTube mastery, remember this: the‍ joy of creating‍ and connecting with your viewers is what truly ‍counts. So, go‌ on! Get those loops going, have fun with⁣ it, and let ⁤your creativity ‍flow like a never-ending stream. ​Your ⁣viewers will thank you, and you might just find yourself binge-watching ⁣your content too! ⁣Happy looping!

Should You Edit Your Video AFTER You Uploaded it?

Editing a ‍video post-upload can feel like trying to fix a⁢ leaky faucet after it’s ⁤already‌ flooding your‍ kitchen—risky and⁣ uncertain.⁢ You’ve poured your heart ⁢into ⁤creating content, hit that upload button, and only then do you start ‌scrutinizing the ​details. Audience retention dips? Yikes! It’s like getting‍ a reality check ‍that makes you ⁢wonder if your content hit the mark.‍ Should you⁤ jump back into your editing suite and ⁤start trimming those boring bits? Or ​is that a‍ recipe ‍for disaster from which ‌your ⁣video ⁤might ​never ‌recover?

Many creators, like Mr. Beast, have ‌taken the plunge‍ and edited videos‍ after they’ve gone live, aiming to boost engagement and retention. ⁢But‍ there’s ⁤a catch: You can only do so much with the tools in ‍YouTube Studio. Precision might take a ⁣hit, and you could ‌inadvertently create even⁢ bigger dips by⁣ removing‍ the wrong stuff. It’s a balancing act⁢ between salvaging⁤ what’s already been put⁣ out there and learning for the future. So, ​does editing post-upload truly improve viewer ⁣engagement? Or should you save those ⁤insights for the next project instead? Let’s‍ dive into these questions and​ unravel the ⁣pros and cons of post-upload⁢ video tweaking!

Identifying ​Audience ⁢Retention‍ Dips and Their Meaning

Identifying Audience Retention ⁤Dips and Their ⁤Meaning

When you’re analyzing audience ​retention graphs, those​ noticeable drops can feel‍ like ‌a punch​ to the ⁣gut. It’s crucial ‍to ⁤understand what those dips mean. Are ⁤viewers bored? Confused?⁢ Or⁣ is it just a⁣ simple case of the video dragging‌ on‍ too⁤ long? If ‍a particular section of⁣ your video shows a significant dip‌ in ‌retention, it might signal that viewers are tuning out, and that‌ can ‌be your cue to⁣ consider trimming it down in YouTube Studio. However, before you start snipping away, think about the context. ⁤Cutting ‍out a section might remove important information or a smooth transition, potentially leaving viewers scratching their heads.‍ So, while this could​ enhance your video’s overall engagement by cutting‍ out the fluff, you need to ⁢be cautious about creating new breaks in flow that could ‍confuse your ‍audience further.

Experimentation⁤ plays a⁢ key role⁤ in this process. It’s ​like being ⁢a chef who tweaks​ their signature dish—altering‍ ingredients slightly to see what elevates ⁣the flavor. If a​ video isn’t performing well ‌and viewer retention ‍is low, trying out cuts may help, but consider how those‌ changes stack up against your overall strategy. Each edit should be⁢ treated as ⁣a learning opportunity. Track⁤ the performance of your revised video over time and gauge whether those changes had a positive impact on audience ⁤retention. Remember, any adjustments you make are ⁤not just about improving one video; they’re also about gathering insights that will steer your ‍future content creation, gradually refining ​your approach until ‌you hit that sweet spot ⁢where your audience stays glued to the screen.

Strategic Approaches to Editing Based on ⁣Viewer Engagement

Strategic Approaches to Editing Based on ⁤Viewer Engagement

When it comes ‍to editing your video after it’s already live, focusing on viewer engagement can be your guiding light. When you notice a dip⁤ in audience retention—like that alarming drop-off you spotted on your ⁣retention graph—that’s your cue to evaluate the content. It‌ might be⁢ time ‌to ⁢trim those parts that aren’t holding viewers’ attention. Think of it as pruning a plant; you snip‍ away the dead bits to help it thrive. Consider this: if ‍viewers consistently skip a section, why not cut ⁤it out? But tread ⁢carefully! Editing in YouTube‍ Studio⁣ might feel a bit⁢ like trying to slice ‍a cake with a fork; precision is ⁤tricky, and removing the wrong portion ⁤could leave your video with awkward transitions or ⁢missing⁣ context. ⁢ Long intros? Out they⁣ go! Boring outros? ⁤Clip those too! Just remember⁤ to weigh the⁣ impact of each cut against the overall flow ⁢of your story.

Why⁣ stop at quick fixes⁣ when you⁤ can use these learnings for future masterpieces?⁢ Chopping a video might not elevate its performance drastically, like turning water into wine, but it can certainly help in metrics—making your retention graph a little prettier. Here’s a thought: if your video’s doing ‌fabulously with ⁢tons of views but​ poor⁢ average watch time,‍ should you really mess⁤ with it? Chances are, if it ain’t⁢ broke, don’t fix it! ‌But if you’re‌ dealing with⁢ a video that’s⁤ fallen flat, small tweaks ‍could be your secret weapon.​ Track those changes over time and find out if​ viewers ‌stick‍ around longer. ⁣The real takeaway? Use your past videos as stepping stones for ​the next. A retention graph isn’t just a number; it’s a treasure map⁤ guiding⁣ you to make those future videos shine! Curious about which cuts to‌ make? Start with ⁣the obvious offenders and let those‍ lessons ⁢shape ⁣your editing decisions moving⁤ forward.

The Pros⁤ and Cons of Trimming Content Post-Upload

The Pros and Cons of Trimming Content Post-Upload

‍ Editing your video after it’s live⁢ can feel like trying to catch smoke with your⁢ bare hands; it’s not always straightforward. On the flip side, though, there are⁢ definite perks! If you notice some clear dips in audience retention, like a part where viewers are bailing faster ​than you can say “cut,” trimming that segment could essentially boost your overall⁢ engagement. Think⁤ of it this way: you’re cleaning up the clutter, making your video flow better. A snipped intro or an‍ overly long ⁢outro‌ might give viewers ⁢an uninterrupted ride, keeping their attention glued to the screen. However, be cautious—without⁣ careful trimming, you could inadvertently‍ create new disjointed spots in the video that leave ⁢the audience scratching their heads.
⁣ ⁣

⁢ ‍ ​​ ⁣ But let’s not get carried away; this⁤ method‌ isn’t a magic fix. ​Say ⁤you make cuts ⁢based on retention graphs, but the ​overall viewership ‌remains lackluster. It could be a learning experience, giving you‍ insights for future uploads rather than resurrecting a zombie video. It’s like ‌adjusting your recipe after tasting a dish—sure, you ‍might⁢ find the ideal mix for your ⁣next creation, but changing ‍the ingredients mid-cooking could ruin the whole meal. So, weigh your options! Consider ⁤how much you care about that⁤ particular⁢ video and if it is worth the editing trouble. ‌Sometimes, it’s better to learn from it and​ pour that wisdom into creating fresh content that truly resonates with‍ your audience.‍
⁢ ‍

Turning‌ Insights into⁢ Future Video Success: Lessons Learned

Turning Insights into Future ⁣Video Success: Lessons Learned

When analyzing your video’s performance, diving into audience retention metrics is like peering through a ​window into your viewers’‌ minds. ‌If you spot ⁣a ‍ steep drop-off at a specific segment, it’s tempting⁢ to consider trimming that‍ section out in YouTube Studio. However, ​it’s not all ⁢sunshine and ‍rainbows. ‍Cutting out parts of your video can lead to a jarring experience for ⁢viewers,⁤ especially if the context gets lost in the process. Imagine flipping between two ‍distinct scenes without smooth transitions—it could leave ⁣your audience scratching their heads​ rather than‌ staying engaged. So,‍ while ⁢editing can⁣ enhance watch time, it’s a tightrope walk between improvement and ​potential confusion.

Before you whip out those editing tools, think ⁣about the ​overall message‍ you want to convey. Using insights from past videos is crucial; they are like breadcrumbs guiding your‍ future ‍content. If‍ a⁣ video is performing‍ well despite a shaky retention rate, you might⁢ decide ⁤to let it be.⁤ On the flip side, when​ faced with a ⁣poorly performing ⁣video, experimenting with ⁤edits could ⁣provide new data to analyze. Just remember: this isn’t a magic fix. It’s more‍ about learning—drawing from mistakes to craft something‍ better next time. Ultimately, each ⁢cut and trim should lead not just to a polished piece⁢ but⁢ to a clearer understanding of ​what ⁤resonates with ⁢your‍ audience. So,⁤ what‍ will you take from this ⁣experience to make your next⁢ video shine?

In Retrospect

Editing a video after it’s already been​ uploaded can feel like⁤ tiptoeing ​through a minefield, right? One wrong move and you⁣ could turn a decent video into a confusing mess. But as we’ve chatted about, a lot of⁣ that decision boils down to ‍context and viewer behavior. If you notice those pesky retention ⁤dips, maybe it’s time‍ to consider a few snips—especially if​ it’s an intro dragging‍ your ⁣whole vibe down.

But remember, it’s not just ​about trimming the fat; it’s about learning from the data you have. Did⁢ your viewers check‍ out right before⁣ that big reveal? That’s a clue! Use that knowledge to spice up‌ your future content instead of just⁣ polishing what’s ⁣already uploaded. The real magic happens when​ you take those insights and mold them into what you create next. Sure, a quick edit might make those metrics look ⁤nicer today, but if you want to really grow, be sure⁣ to ask yourself what you can do differently next time around. It’s all about progress, folks!

So, whether you choose ⁤to edit or leave your creations as is,⁤ keep that feedback loop going. Dive⁤ into⁢ those analytics and let them guide your creative journey. Remember, creating content‌ isn’t‌ just a one-and-done ⁣deal; it’s ‍a way to learn and evolve. Now, go ahead and⁢ put these insights into action, and let us know what ⁤works for you! Keep creating and keep experimenting, because,⁤ after all, there’s⁤ always room to grow!

Can You Change Your YouTube Thumbnail After Posting? Here’s How!

Ever hit that “publish” button on your⁢ YouTube video,‍ only to realize ⁢your thumbnail ​looks like it was designed during a​ power ⁣outage? We’ve ⁢all been there! The thumbnail ​is like the face of your video—it’s what grabs viewers’ attention and ⁣makes them click. But don’t sweat it if you’ve posted and feel that ⁣urge to switch things⁣ up. Can you change your YouTube thumbnail after posting? You ⁣bet! Think ​of ⁢it like updating your⁤ outfit​ before⁣ stepping ‌into a party; ⁤a fresh⁢ image ‌can make all the difference. Let’s dive into how you can quickly and easily⁤ spruce up that⁢ thumbnail ⁤without missing a beat!

Choosing the Perfect‍ Thumbnail: The Key to Catching​ Eyes

Choosing the⁢ Perfect ‍Thumbnail: The Key⁢ to ‍Catching Eyes

When it​ comes ‍to YouTube, your​ thumbnail is like the billboard‍ for‍ your video—it’s the first⁢ impression that can ​make or break⁣ your chances of grabbing someone’s ‌attention.‍ Think of it⁤ as​ your video’s handshake; if your‌ thumbnail is dull or ⁣cluttered, viewers ​might not even give it ‍a second glance. That’s why crafting the perfect ⁢thumbnail is crucial! Aim for bright colors, clear text, and strong ⁣imagery that reflects the ⁤essence of your content.⁤ You want to ⁢draw ⁤in your audience,⁤ whispering a little promise of ​what they can ⁣expect⁢ when they click. Ideally, your thumbnail should include:

  • High-contrast colors that‌ pop against the ⁤background
  • Clear, readable text that doesn’t​ overwhelm the visuals
  • Engaging imagery, ⁣especially if‌ it‌ involves human ​faces or emotions
  • Your ⁤branding, like​ logos‍ or specific colors, to maintain consistency

You’ve⁣ got the ⁣power to change⁣ your⁢ thumbnail even after⁢ your video goes​ live, ⁤which ⁣is a golden opportunity! This flexibility allows you to ​tweak your visuals based ⁤on viewer feedback or performance analytics.‌ Go ahead and⁢ A/B test different designs to ⁢see what⁣ resonates. While it’s‌ important ⁢to stand out, don’t forget to keep ⁣it⁤ relevant to your content—misleading‍ thumbnails can lead to higher ⁣click-through rates but‍ will hurt viewer⁣ retention. ​Striking that perfect balance is key! Here’s a quick‍ look at what works:

Element Impact
Color scheme High engagement
Text clarity Improved ​click-through rate
Emotional appeal Higher watch time

Navigating the YouTube Interface: A⁢ Step-by-Step​ Guide to Updating Your ⁤Thumbnail

To get started​ with updating your thumbnail, first, launch the ‌YouTube⁤ app or navigate to the website.⁢ Click on your profile picture in the top⁣ right corner, and select⁤ YouTube⁤ Studio from the dropdown menu. Once you’re in ​the studio, head to the Videos section on the left sidebar.‌ Here, ⁣you’ll see a list of all your uploaded videos. Find⁤ the‌ video for ⁣which ⁢you want ⁤to change‌ the thumbnail‌ and click on‌ it.​ It’s⁢ like browsing‍ a‌ gallery⁣ where‍ each thumbnail represents your​ art; you ‌want it⁣ to‍ stand​ out!

Now, look for ‌the Thumbnail option on the ​video details⁣ page. You’ll see the ‍current⁤ thumbnail displayed along with a ⁢few preset options from YouTube. But since you’re looking ‌to switch ‌things up, click on the Upload Thumbnail ⁣button. This is where you can select a snazzy⁢ custom thumbnail image ⁤from your device. Once you’ve got ​your ⁢new image selected,‌ make sure you hit Save at‍ the‍ top⁣ right corner.⁣ Voila! Your​ video ⁣now sports a fresh⁤ new ‍look, enticing ⁣more ⁢viewers ⁣just like a⁣ vibrant cover ⁢on a book ‌draws ⁢in curious readers.

Boosting Engagement: Best Practices for‍ Designing Thumbnails That Convert

Boosting Engagement: Best ⁣Practices for Designing Thumbnails That Convert

Creating a⁢ thumbnail ​that⁣ captures attention is like crafting the perfect⁤ bait for a fish; ⁢it needs‍ to be eye-catching and ​irresistible. Start by opting⁣ for bold colors and clear ​images that ​stand​ out against ⁤YouTube’s vibrant backdrop. Think about‍ using close-ups of faces, which can evoke emotion and‍ connection. When potential ‍viewers scroll, they should feel an ​instant ⁤urge to click. Opt ⁤for text overlays ⁢that are crisp and concise, delivering your video’s ⁢essence in just a ​few words. Using fonts that⁢ are legible even ⁤on smaller screens⁤ can make a world of difference—after all, you want your ⁤audience to grasp the core message in a split second!

Don’t underestimate ⁢the ​power of branding in your⁣ thumbnails.⁤ Incorporate elements of⁢ your channel’s aesthetic, ⁣like specific colors‍ or logos, so⁤ regular viewers immediately ⁢recognize⁤ your content. Testing different ⁣thumbnail styles to see what resonates more is also a ​wise move—it’s like‍ experimenting⁣ with flavors to find the⁣ perfect recipe. Consider⁤ creating a table to compare click-through rates ⁣for various designs:

Thumbnail Style Click-Through Rate (%) Viewer Retention (%)
Bright Colors, Large Text 12 65
Minimalist Design 8 70
Close-Up Faces 15 60
Bold ​Imagery, No Text 10 55

By regularly ⁣assessing these metrics, you’ll understand which‍ thumbnail strategies yield the⁤ best​ results. Adjusting as needed means you’ll always be on the cutting edge​ of engagement, keeping your audience⁢ hooked and⁢ ready for more!

Timing ⁤Matters: ‌When to Change Your ⁣Thumbnail for⁤ Optimal Impact

Timing ⁤Matters: When ‍to Change Your Thumbnail for Optimal⁢ Impact

When⁢ you’re looking ⁢to​ grab attention on ⁢YouTube, the timing of your thumbnail change can‌ be everything. Think about‍ it: your video has been live for a while, and ⁣maybe ‌the engagement ​isn’t what you hoped ‍for. Changing the thumbnail can breathe new life into it! ⁣This little tweak can make a huge difference in attracting viewers. The best ‌time ⁣to change your thumbnail is ‍usually within the first week of posting. During this crucial period, your⁤ content is still fresh, and you might catch the eye of⁣ those ​browsing⁣ through their ⁤feeds.

Consider this simple rule – ​if ⁤your click-through ‌rate⁢ (CTR) isn’t where you want it to be, it might be ‍time⁢ to rethink your visual strategy. A vibrant, ⁣eye-catching​ thumbnail can‌ spark curiosity just like ⁤a good book cover does. Here are some key moments when to consider⁤ a ⁣change:

  • Low CTR after a few days
  • Trending​ topics that⁣ relate to⁢ your video
  • Seasonal changes or⁢ major events
  • Feedback or analytics pointing to ⁣viewer disinterest

It’s all about being agile and responsive to what your audience ‍craves! The‍ quicker you ‌adapt, the better you’ll connect with potential viewers⁣ looking‌ for content just like‍ yours.

Concluding Remarks

And there you have it! Changing your ⁤YouTube⁣ thumbnail after posting ⁣isn’t just possible; it’s a game-changer.⁢ Just think of your thumbnail as the front ​door to ​your video—if it’s not inviting or eye-catching, people⁣ might‌ just walk right past it. ‌By ⁣updating your thumbnail, you‌ can breathe new life ⁢into your content and grab the attention ⁣it⁢ deserves. So don’t hesitate! Dive⁢ back ⁣into your​ YouTube studio, ‍make those‌ adjustments, and watch your views climb. Remember, every⁢ little tweak can⁤ make ‌a big difference ⁤in your channel’s success. Ready to ⁤give your videos​ the ⁤splash⁤ of color they need? ⁣Happy ‍thumbnail hunting!