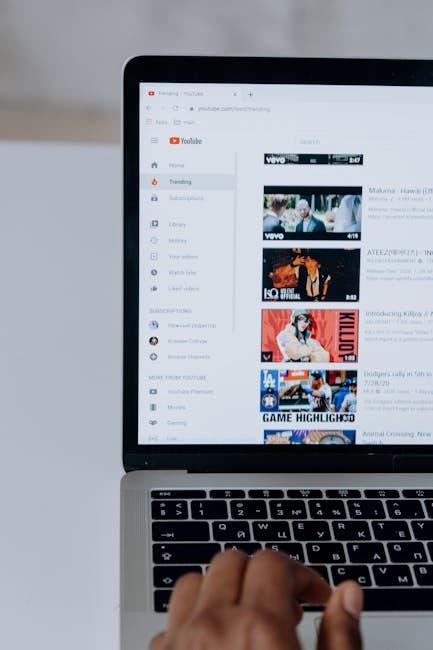
Why Does YouTube Keep Turning My Thumbnails Upside Down?

Ever sat down with‍ your ⁢morning ‌coffee, ready to⁢ dive into‍ your latest YouTube⁢ creation, only to find ‍your thumbnails doing a weird acrobatic⁣ routine—flipped upside down? ‌It’s ⁣like inviting‌ your ⁣friends over ‍for a killer pizza party, only to discover your pizza is spinning on ‌the ​ceiling! You’re left scratching your head, wondering what in the ⁤world ​is going⁣ on. ‌If you’ve ever been in ​this awkward‌ spot, you’re ‌not alone. YouTube ⁢sometimes plays​ tricks on us, almost ⁢like a ⁣mischievous little brother who can’t resist pulling pranks. So,‌ let’s ⁢unravel this mystery ‌together: why ⁢does⁤ YouTube ‌keep turning your thumbnails ‍upside down? Buckle up,​ because we’re about to explore the⁣ quirks of ⁣this video giant and set your thumbnail woes straight!
Why Thumbnails Flip: Understanding YouTubes ⁣Quirky Algorithm

Why ⁢Thumbnails Flip: ⁣Understanding YouTubes⁤ Quirky Algorithm

Ever noticed your thumbnails doing a little acrobatic ⁤act, flipping upside ​down without warning?​ You’re‍ not alone! ‍This quirky⁤ behavior can be attributed to the ⁢myriad ways YouTube’s ⁢algorithm processes your images. Essentially, the ⁣platform’s algorithms are⁤ designed ⁢to identify and⁢ optimize what ⁣they believe will engage viewers the most.‍ Think⁤ of it like a⁤ chef experimenting with flavors in ‌a dish—sometimes things get shaken up, resulting in a surprisingly tasty outcome, ​or ⁣in this case, a mesmerizing‍ thumbnail ⁣that just‌ doesn’t hit the mark!

The flipping ‍phenomenon often occurs due to a few ⁢common culprits: ⁣ file format issues, compression mishaps, and even image rotation metadata. YouTube might misinterpret the information encoded‍ in your thumbnail files, leading it to flip your image when it’s uploaded.⁤ It’s like ‍sending a text to a friend but⁣ auto-correct changing it to ⁤something embarrassingly wrong! To help avoid these slip-ups, ​consider:

  • Using⁣ standard file⁣ formats like JPG⁣ or PNG.
  • Ensuring‌ your images are‌ uploaded in the correct orientation.
  • Re-checking any ⁢metadata ⁢before hitting that upload ‌button.

Be⁤ proactive and ‌make sure​ you’re serving up thumbnails‍ that are ready for ‍the ⁣spotlight, and‍ watch as your ‍content gets the attention it deserves!

The ‌Tech Behind the​ Scenes: How Video ⁢Orientation Affects ⁣Thumbnails

The Tech‌ Behind the Scenes: How Video Orientation Affects ⁤Thumbnails

You might wonder, why does it seem like YouTube has ‌a mind​ of its own‌ when ⁢it comes to your thumbnails? ‌Well, let’s break it down! The platform uses an advanced tech stack that analyzes video‌ orientation and resolution. When ⁣you upload a video,‌ it assesses‍ not just the content, ‍but also⁣ how that content is formatted. This means if your video is​ shot​ in portrait mode—typically better for mobile⁢ views—you might ‍find thumbnails flipping to accommodate‌ a wider frame‌ or giving a sneak ​peek that’s not quite how you‍ envisioned it. YouTube’s algorithm favors thumbnails that create ⁣a⁤ cohesive ⁤viewing ‌experience‌ across devices, and that can lead to​ some unexpected‌ results.

Now, if you’re still scratching your head, consider this:​ Think of thumbnails like a ⁤storefront ‍window display. If the display doesn’t match the‌ product,⁢ customers might get​ confused or even ⁢walk away.⁣ Similarly, if YouTube detects a mismatch in⁢ orientation between ⁤your‍ video and its ​thumbnail, it ​may try to⁤ correct it automatically. To ‌help maintain ⁣a strong first impression, adhere to recommended dimensions like 1280×720⁣ pixels ‌ and ensure ⁢proper orientation ⁢in your editing ⁣process.​ Ultimately, understanding this​ technology can be the key to keeping your thumbnails just the way ‌you want them!

Fixing Your Flip: Tips for Ensuring the Perfect Thumbnail Every Time

Fixing Your Flip:‍ Tips for Ensuring the ⁣Perfect Thumbnail Every Time

Thumbnails are like the ​storefront windows‌ of your YouTube videos; ⁤they ​need to look inviting⁢ and, most importantly, be right side⁢ up! If your thumbnails⁤ keep⁣ flipping upside down, it might be ⁤time ⁤to check a few things. ⁢First, make sure your image files are ⁢correctly ​oriented before uploading.‍ Most ⁣editing software includes a rotate‌ function, so ensure you have your thumbnails in the right position. It’s also good practice to save them in a common format like JPEG or⁣ PNG, as some exotic file types might confuse the platform’s ​algorithms. Remember, a high-resolution image always catches ‌the eye, ⁣so aim for crisp and clear visuals!

Additionally, if⁢ you’re using ⁢third-party tools ‍to create ​your ​thumbnails, verify ⁤their export settings. Sometimes,⁤ these ‍tools ​can mess with orientation ​or⁣ mistakenly flip the image. Also, consider uploading your thumbnail after ⁤you’ve published your video; there are reports⁣ that some creators face‌ fewer orientation issues this way. It’s also crucial to stay within YouTube’s specifications, ensuring your​ image dimensions are‌ typically 1280×720 pixels and your file size is under⁢ 2MB. By following these simple tips,⁣ you can sidestep the upside-down dilemma and ‌make sure your thumbnails ⁢look pristine and professional!

Avoiding Future Fumbles: Best⁣ Practices for Uploading Your⁤ Videos

Avoiding Future⁢ Fumbles: Best‌ Practices‌ for ‍Uploading Your Videos

Picture this: you’ve spent hours crafting the perfect video,​ and‌ when it’s⁢ finally time​ to upload, your thumbnail decides to dance⁣ its way‌ upside down. Frustrating, right? To​ avoid turning your masterpiece into a hot mess, begin with ⁤ensuring ‌your video file format aligns with YouTube’s guidelines. Common ⁣formats include MP4 and MOV, ​but you’ll want​ to double-check that ⁤the ​resolution is set at‍ a minimum⁢ of 1280×720 pixels. A‍ well-defined resolution helps maintain the integrity of your ​thumbnails, preventing⁢ them from ‌flipping during the​ upload process. Don’t ‍forget‌ to‌ keep⁤ an⁣ eye on ⁢your image⁣ dimensions as well;⁤ sticking to an ⁢aspect⁤ ratio of‍ 16:9 can work wonders ⁢for consistency.

Moreover, to keep things smooth sailing, consider optimizing ‍your upload settings. Before hitting⁤ that publish button, ⁤take a minute to review ⁤your video’s metadata—titles, descriptions, ‍tags, and, ‌yes, even thumbnails.‍ Make sure your thumbnails are in​ JPEG, PNG, ​or GIF formats and follow YouTube’s size recommendations (ideally, 1280×720). Here’s a nifty table to summarize crucial factors to ⁤keep in ‍mind:

Aspect Recommendation
File Format MP4, MOV, ⁢JPEG, PNG, GIF
Resolution 1280×720 (minimum)
Aspect​ Ratio 16:9

By keeping these best practices in your back pocket, ‌you’re setting yourself up⁤ for hassle-free uploads,⁤ leaving​ more time ‍to focus on‌ what really matters—creating great content and connecting with your audience.

In Retrospect

And there you have it! We’ve ⁤journeyed through ​the ​quirky world of YouTube thumbnails and unraveled⁣ the mystery of‍ why⁣ they sometimes decide‌ to pull a fast one and ‌flip upside​ down. ⁣It’s ⁣a puzzling phenomenon ‍that can leave you‌ scratching your head⁣ like a confused⁤ cat. But hey, don’t let it ​get you down! With a little patience⁢ and the⁢ right know-how, you can easily​ get back⁣ to showcasing your stellar content ‌without those pesky upside-down images stealing the spotlight.

So,⁢ next time you’re staring⁤ at a thumbnail that’s doing a⁤ full 180, just⁢ remember:‌ you’re not alone in this. Embrace the weirdness, and let⁤ it fuel your ⁤creative spark! Keep experimenting, keep posting, and—most⁤ importantly—keep⁣ having fun. ⁤The YouTube universe ‍is‌ vast and filled with possibilities, so don’t let a rogue⁣ thumbnail throw you off your game. Now‍ go out there and make some incredible ⁣videos;‌ you’ve got this!

Mastering YouTube: Your Guide to Frame-by-Frame Viewing!

Hey there, fellow video enthusiasts! 🎥 Have you ⁢ever found‌ yourself wrapped up in ‌a mesmerizing clip, hanging onto every frame,‍ and thought, “Wow, I wish I could ​slow this down and soak in every​ detail”? Well, you’re not alone! Whether ‌you’re trying⁢ to dissect⁤ the latest epic video game trailer, decode a crazy dance move, or catch nuances in a cinematic⁣ masterpiece,​ mastering ⁤YouTube’s frame-by-frame viewing can take your⁤ experience to ⁤a whole new level. In this guide, we’re diving headfirst into​ the ⁤nitty-gritty of ​frame-by-frame action—yeah,⁢ we’re talking about hitting that⁤ pause ⁣button like a pro! So grab your snacks, ⁣settle into your favorite spot, and let’s unlock the secrets to making your YouTube viewing experience richer and more engaging, one frame at a time. Ready? ⁣Let’s get started!

Unlocking the Power of Frame-by-Frame: Why You Should Dive Deep into Your Favorite Videos

Diving into your favorite videos on YouTube⁢ frame ​by frame can turn an ordinary viewing ‍experience ​into an exhilarating adventure. Ever catch yourself wishing you could pause just a moment longer ⁣to soak ⁤in every ⁣detail? It’s like having a secret key ⁤to unlock hidden⁤ gems within the visuals. Imagine ⁣discovering a stunning background detail or a subtle expression‍ that you zoomed ⁣past on first glance! When you ‌slow things down, ⁣you’re⁢ not just watching; you’re analyzing,⁤ appreciating, and often, ⁣you end up ⁣with a newfound love for creators’ artistic⁣ choices.

Plus, engaging with content this way‌ opens the door to a deeper understanding⁣ of storytelling techniques and ⁤production styles. ‍You start to notice things like camera⁣ angles, editing‍ transitions, and color palettes that blend seamlessly​ into ⁣the‍ narrative. ⁣In fact, here’s a⁣ quick⁢ list to‍ consider while dissecting‍ your favorite clips:

  • What stands out⁤ in the visuals?
  • How does sound enhance the scene?
  • Are there any Easter eggs hidden throughout?

You’ll ​likely find that the more ⁤you look, the more you learn! ‌Every video⁢ is⁣ a creator’s⁤ labor of love, and by going​ frame by ​frame, you’re giving it the attention‌ it truly deserves.

Unlocking the⁣ Power of⁢ Frame-by-Frame: Why You Should Dive Deep into Your Favorite Videos

Techniques to Navigate Like a Pro: Tools and Tips for Seamless Frame-by-Frame⁢ Exploration

When diving into the intricacies of⁤ video on YouTube, mastering the art of frame-by-frame exploration ⁤can make a world of difference. First and⁤ foremost, familiarize‌ yourself with the built-in options available on the platform. By ⁢using the Arrow ⁣keys, you can move back and ⁤forth through your ⁤favorite videos ⁤with ease;‍ pressing the⁢ Left ⁣Arrow takes ⁣you back one second, while ⁤the‌ Right Arrow jumps a ⁣second forward. Want to go deeper?​ Don’t underestimate the power of using the J ⁢ and L keys—these⁢ allow you to rewind or fast-forward by‌ 10 seconds,‍ making it a breeze to skip through sections or ⁤revisit those jaw-dropping moments. Pair these tips ⁣with a⁢ good sense ⁤of ‍timing, and ⁢you’ll be navigating like ‌a seasoned explorer!

But ⁤let’s ⁣spice things up a notch! Consider deploying external tools to enhance your viewing experience further. You might​ want to check out‍ browser extensions like Video Speed Controller ⁢ or Looper for YouTube. These not​ only‌ give you more control over playback ‌speed but also enable seamless ‌repetition ‍of your favorite scenes. If you’re ⁢analyzing content for learning or creativity purposes, ⁤it’s also​ useful to⁣ take notes ⁣right alongside your viewing. ‍Here’s a quick table summarizing helpful tools:

Tool ‍Name Purpose
Video Speed Controller Control ⁤playback speed.
Looper for YouTube Repeat sections seamlessly.
YouTube‍ Notes Take notes while ⁢watching.

Techniques to Navigate Like a Pro: Tools and Tips for Seamless Frame-by-Frame Exploration

Curating Your Viewing ⁢Experience: Finding the Best⁢ Content for Frame-by-Frame Analysis

​ So, you’re​ all set‍ to ⁣dive deep into the world⁤ of frame-by-frame analysis, huh?​ Well, the first step is to carefully select the perfect content that’ll keep your analytical gears turning. Not all videos are created equal, so look for those rich in detail⁢ and layered with meaning. Think about genres⁤ like documentaries, experimental films, or even in-depth ⁣ tutorials. These types tend to have​ rich ⁣visuals or ‍intricate ⁣narratives that unfold over time, making them ideal candidates for‌ breaking down frame ⁤by⁣ frame. ‌You⁣ might‌ want to explore creators known for ⁣their artistic storytelling ⁤or insightful commentary, as‌ they often ⁤use deliberate​ pacing that encourages closer examination. Finding ‍that hidden gem ‌of a video can feel⁣ like hunting for treasures ‌in ‌a ⁢sea of options!

⁣ ​ Once you’ve trimmed‌ down your‍ list to a handful of⁣ potential videos, it’s all about getting into⁣ the ⁢groove. ‌ Consider these ​tips:

  • Slow down: Use the playback ​speed options ​to really ⁢soak in⁣ each frame.
  • Take notes: Write ​down any striking visuals ⁣or critical‌ moments that stand ⁢out.
  • Use tools: Software ⁤like VLC ⁣or specialized YouTube‌ extensions can enhance⁣ your viewing ⁢experience, letting you navigate frame by ⁤frame effortlessly.

This process transforms viewing into​ a thoughtful exploration,⁣ creating a‌ deeper connection with the content itself. ‌Plus, it’s a ‍great ‍way to sharpen your critical thinking skills⁢ while discovering layers of meaning you might have missed during a casual watch. Get⁣ ready to see the world ​through a new​ lens!

Curating Your Viewing ‌Experience:⁣ Finding the​ Best⁢ Content for Frame-by-Frame Analysis

From ⁣Casual Viewer to YouTube⁢ Savant: Transforming Your‍ Watching Habits for ⁢Peak Enjoyment

Imagine diving deep into your favorite YouTube videos, pausing at just the right⁢ moments to soak up every detail.‍ It’s like ⁤savoring‌ a delicious meal rather⁣ than just wolfing it down! By​ adjusting your watching habits, you ⁤can ‍become more than ‍just a casual ‌viewer; you can​ transform into ⁣a connoisseur of content.‍ Here’s how to‍ elevate your experience:

  • Slow It Down: Use the playback⁢ speed ⁢feature to watch at a slower rate, allowing⁣ you to​ catch nuances⁣ that might ⁣zoom by at ⁣normal speed.
  • Rewind ⁣& Replay: Don’t ⁢hesitate to go back and watch ⁢segments multiple times. It’s like rewinding a great ⁢movie scene⁣ that ​you just⁤ can’t get⁢ enough of!
  • Engage ⁤& Interact: Participate in the ​comments or community​ forums; discussing your thoughts can ‌deepen your​ understanding and ⁢appreciation ⁤of the content.

Now,‌ let’s take it a step further. By honing in on⁢ specific ​elements of a video, you transform ‍your viewing from⁢ passive to active. Think ‌of it as dissecting a piece of art rather than just admiring​ it‌ from afar. ‌Pay attention to:

Element Tip
Visuals Notice color choices and camera ​angles that create mood.
Sound Listen⁢ for background music and ⁢sound effects that enhance storytelling.
Narration Reflect on the tone⁤ and pacing ⁣of the narrator ⁢and ‍how‍ it affects the content.

From Casual ⁣Viewer to YouTube Savant: Transforming Your ⁣Watching Habits for ⁣Peak Enjoyment

Future ⁤Outlook

And there you ⁢have ⁣it, folks!‌ You’ve⁣ journeyed through the ins and ​outs of ⁤mastering ⁢YouTube with a frame-by-frame lens, and ⁢I ⁢hope you’re feeling a tad more empowered to dive deep ⁤into your favorite videos. Just like peeling an onion—layer by layer—you can uncover all those hidden gems that make⁣ your ​viewing experience truly enriching.‌

Remember, it’s not just about hitting‍ that play button and zoning out; it’s​ about‍ engaging with content in a way that excites your ‌brain! ‌So​ whether you’re ⁤analyzing ​the details‌ in a ⁣cinematic masterpiece, refining ‍your skills in a ‍tutorial, or just ​having fun ⁢discovering ‌the smaller nuances of your go-to vlogs, this guide ⁤has ​equipped ⁢you with the tools to ‍enhance ⁢your YouTube ⁢adventures.

Now, imagine all the cool clips you’re going to rewatch with fresh ⁤eyes.⁣ Exciting, right? So go ⁢on—grab ⁢that popcorn, take a seat, and‍ start exploring all ⁣the nooks and crannies of ⁤YouTube like you’d ⁣explore a new city. Who knows⁣ what⁣ treasures you’ll find‌ around the next ⁤corner? ⁤Happy viewing, and don’t forget⁢ to​ share your⁣ frame-by-frame findings with your fellow YouTube explorers! 🎥✨