Will PowerWash Clear Your YouTube Woes on Chromebook?

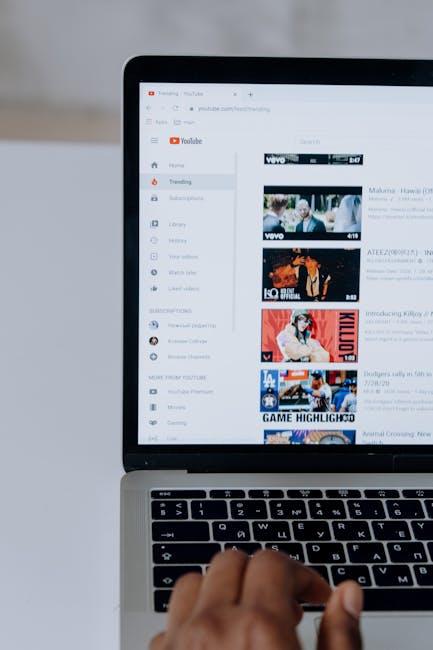
Hey there, YouTube enthusiasts! Are you tired of buffering nightmares and ​choppy streams on your trusty Chromebook? You’re not alone—many of ⁣us have been there, staring at ​the spinning wheel of doom while the latest‍ viral video remains tantalizingly just out of reach. Enter⁤ the game-changer: PowerWash! Now, before you start imagining a garden hose and a squeegee, let’s get real about what PowerWash can actually do for your beloved device. In this article, we’ll dive into whether‌ this nifty ⁣little‌ feature can wipe away those pesky⁤ YouTube woes ‌that have been interrupting your ⁤binge-watching marathons. So grab your favorite snack, settle in, and let’s⁣ find out ⁣if PowerWash is the solution⁤ you’ve been searching for!

Imagine you’re trying ⁢to enjoy a cozy night in, ready to dive into the latest ​vlogs and tutorials on YouTube, but alas—your Chromebook feels like it’s stuck in quicksand. Frustrating, right? While some users may dream⁤ of a magical​ fix, others are left wondering if performing a PowerWash could ‍be the knight in shining armor for their streaming​ woes. It’s important to⁣ remember that a PowerWash essentially restores your Chromebook to factory​ settings, ⁤which means deleting all your data, files, and installed apps. Think of it as a hard reset for your device, wiping the slate clean and potentially fixing underlying software problems that⁤ may be hindering​ your YouTube experience.

Before you jump into the PowerWash pool, it’s wise to weigh your options carefully. You ‍could try these quick fixes first, which might just do the trick:

  • Clear​ Browser Cache: A buildup of cache data can slow things down; a‍ quick clean could⁢ work wonders.
  • Update Chrome OS: Making sure your ⁣operating system is up to date can resolve compatibility issues.
  • Check​ Extensions: Sometimes rogue extensions can mess with your streaming experience,​ so ​disable them temporarily.

If none ‍of ‍these solutions yield‌ results, and you’re ready to commit to that PowerWash, just make sure to back⁤ up your data. As with all tech decisions, a little preparation goes a long way!

Navigating the YouTube Jungle on Your Chromebook
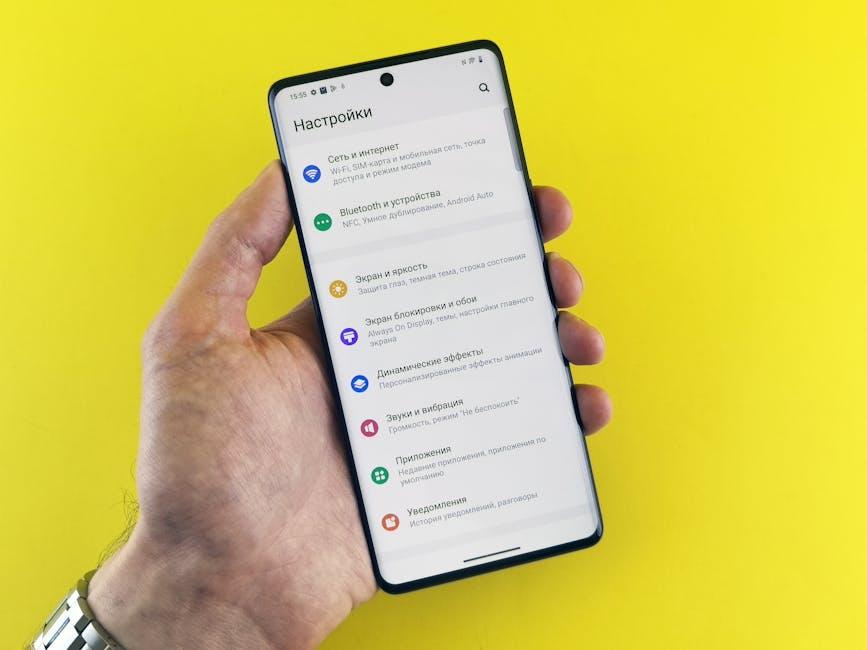
How PowerWash Revitalizes‌ Your Device

If you’ve ever felt your ⁤Chromebook drag its⁤ feet while ‌watching YouTube, you’re not alone. ⁢It’s like trying to run a marathon with one shoe, frustrating and inefficient! This is where PowerWash steps in, acting like a refreshing rain shower that‌ washes⁣ away all the dirt and grime built⁣ up over time. Think of it as giving ‍your device a rejuvenating spa day, where it can shed unnecessary files and data that bog it down. After running ⁤PowerWash, you’ll find ‍your ⁤Chromebook ready ‌to take on tasks like a champ—smooth, quick, and‍ responsive!

Imagine checking out your favorite cat videos or catching up on‍ the latest trends without​ waiting for page loads. A neat and ​tidy device not only boosts performance but ⁤also elevates your mood. Here are some key benefits of using PowerWash:

  • Cleans Up⁢ Clutter: Eliminates unnecessary files that slow you down.
  • Frees ‍Up Space: Opens up storage, making it easier to browse and create.
  • Restores Settings: Resets your Chromebook​ to its⁤ factory settings, erasing any quirks.

In short, PowerWash acts like⁤ a digital reset button. You might⁣ even find your‍ device feeling like a brand-new toy,‍ eager⁣ to serve up ⁤videos‍ and games with lightning speed. Isn’t it ​nice to‌ have tech that feels like it’s ⁢in tip-top shape?

Common YouTube ⁣Issues and How PowerWash Can Tackle Them

We’ve all⁣ been there: you’re ready to dive into the latest YouTube⁤ video, and suddenly, you’re hit with buffering screens,‍ glitchy playback, or those dreaded⁢ ads every few seconds. If you’re rocking a Chromebook and dealing with these pesky issues, PowerWash might just be​ the life jacket you need. This nifty reset feature is​ like a fresh ⁢start for your ‍device, clearing​ out any lingering cobwebs that could be mucking up your YouTube experience. By⁤ stripping away all those accumulated settings, apps, and cached‍ data, PowerWash can help speed things ⁣up, letting your ⁣videos play smoothly without hiccups. Imagine it‍ as a spring cleaning for your tech—once you get rid ​of the ‍clutter, everything ⁢just‍ works better!

But it’s not just about speed; sometimes,‌ a little troubleshooting ‍goes a long way. If you’re finding that glitches ⁢persist even after a fresh start, there’s more ‌you can ‌do. Here’s a quick​ checklist ‌to tackle common issues:

  • Clear Your Browser Cache: Sometimes, old‍ data can interfere with new content.
  • Check Your Internet Connection: A weak signal can lead to endless buffer loops.
  • Update Your Browser: Make sure ​you’re running the ​latest version for optimal performance.
  • Disable Extensions: Particularly ad blockers— they can sometimes mess with video playback.

With these strategies in mind, you can truly transform ⁣how you interact with YouTube on your Chromebook. ⁤By embracing these solutions along​ with PowerWash, you’ll not only tackle frustrating issues head-on but also pave the way ⁣for an enjoyable streaming experience!

Common YouTube Issues and How ‌PowerWash Can Tackle Them

Tips for a Smooth YouTube Experience⁤ Post PowerWash

After giving your Chromebook a fresh start with PowerWash, tuning up your ⁣YouTube experience can work⁢ wonders. Think of it as a new⁢ pair of shoes—you want ⁤to take ⁢them for a spin while making sure they fit naturally! First off, clear your browser cache and cookies. This ⁢step​ is like sweeping off⁢ the dust that settled after a big clean. Without those pesky files​ lurking⁢ around, you can ensure your YouTube runs ​like a ⁢dream. Plus, make sure to update your browser regularly. An up-to-date browser can unlock smoother playback and ⁤better features, almost like upgrading from a bicycle to a⁢ high-speed⁤ motorcycle!

Next, consider customizing ‌your settings for an ⁣optimal viewing experience. Enable hardware acceleration if your device supports it; it’s ‌like giving your Chromebook a turbo boost‌ when streaming videos! Also, don’t ignore​ the​ importance ‍of reliable internet—if your connection is⁣ dodgy,​ it can turn your binge-watching session into ⁢a buffering nightmare. To make things easier, here are a few quick tips in bullet-point format for⁤ a flawless YouTube journey:

  • Use the​ YouTube app ​instead of the⁤ browser for a more focused ⁢experience.
  • Adjust⁣ video​ quality settings based on your internet speed.
  • Limit background applications that ⁢might take⁣ up bandwidth.

Tips for a Smooth YouTube Experience ⁤Post PowerWash

Closing Remarks

And​ there ‌you have it, folks!⁣ While the world of YouTube can sometimes feel like a wild roller‌ coaster—full ⁣of dizzying highs and‌ frustrating lows—PowerWash might just be the tool you need to reset and refresh your‌ Chromebook experience. Picture it like‌ giving your device a⁢ spa day—cleansing away the digital grime that’s been holding you back from your favorite ‍videos.

But remember, while PowerWash is a handy trick up your sleeve, it’s ​crucial to pair it with ​solid browsing habits. Keep those extensions in check, manage your storage⁣ wisely, and always ensure your Chromebook is up-to-date. After all, a little‌ prevention goes a long way, ‍right?

So, before you dive back‌ into those ⁣viral cat videos or the latest tutorials, ⁤consider‌ hitting that refresh button. Who knows? With a ⁤clean slate, you might just ⁣uncover a treasure trove of content that you didn’t even know you were ​missing! Have you tried PowerWash yet,⁤ or are you still on the ⁣fence? Share your thoughts below, and let’s make the YouTube experience as​ smooth as a perfectly brewed cup of coffee! Happy browsing!

Curious About YouTube Downloads? Find Them on Windows 10!

Hey there, fellow tech enthusiasts! ‍So, you’ve stumbled upon the vast ocean that is YouTube, filled with everything from adorable kitten videos to mind-bending documentaries. It’s a treasure trove of content, no doubt! But let’s be real—sometimes you want to take that treasure home ‌with you, right? Whether it’s to watch your favorite vlogger while offline on your morning commute or to save that how-to video for the next time you’re tinkering away in your garage,⁤ downloading YouTube videos can be super handy. If you’re on Windows 10, you’re in luck! In this article, ‌we’re diving into the nitty-gritty of YouTube downloads, exploring⁣ simple methods⁤ that’ll have you saving videos​ in no time. So, ​grab a comfy seat and let’s⁣ get those videos to your device, shall we?
Unlocking the Secrets of YouTube Downloads for Windows 10 Users

Unlocking the Secrets of YouTube Downloads for Windows 10 Users

Have ​you ever found yourself in a situation where you wish you could just ​hit “pause” on the internet and keep your favorite ‌YouTube videos handy for ⁤offline viewing? Well, good news! For Windows 10 users, this dream can become a ‌reality. Downloading videos isn’t just for tech whizzes⁣ anymore; it’s a breeze! With the right tool, you⁣ can have your favorite tutorials, music videos, or vlogs saved right to your device. ⁣Imagine curling up on the ⁢couch without buffering interruptions—sounds fantastic, right?

To get started, you’ll find a variety of software options at your fingertips. Here’s a quick glance at some popular choices that make the​ process ‌as easy as pie:

  • 4K Video Downloader: This one’s a fan⁢ favorite! Fast, easy, and supports playlists.
  • YTD‍ Video Downloader: With its user-friendly interface, you’re just a click away from ⁤your favorite content.
  • Freemake Video Downloader: Perfect if you enjoy converting videos into different formats too.

Once you’ve picked the tool ⁣that fits ‌your vibe, simply​ copy the video URL from YouTube and paste⁣ it into the software. Most of these programs will let you choose the quality and format before downloading. It’s like customizing your playlist to suit your taste! Plus, always ensure that you respect copyrights and only download content you’re allowed to. Happy downloading!

Must-Have ⁢Tools and Software to Enhance Your Downloading Game

Must-Have Tools and Software to⁣ Enhance Your Downloading Game

When it comes to stepping up your downloading game, you’ll want some nifty tools in your toolkit. First and foremost, YouTube Video Downloader apps are a must. Think of them as your trusty sidekick, always there to help you⁤ snag that amazing content without breaking a sweat. Some popular ‌picks include 4K‍ Video Downloader and YTD Video Downloader, both of which ⁤allow you to save videos in multiple formats and ⁤resolutions with ⁣just ⁢a couple of clicks. These tools often come with features like batch downloads, so you can grab ‌entire playlists or‍ channels in one go—it’s like having a shopping cart for videos!

Another key player in this game is a solid download manager. Having one can make your life so much easier when you’re juggling multiple downloads at once. ⁣Tools like Internet ⁣Download Manager (IDM) and ​ Free Download Manager optimize your download speeds, slicing through the clutter with ⁢sleek interfaces ⁣and⁤ handy pause and resume options. Plus, they often integrate right into your ⁤browser, catching links as you come ⁣across them. Need to keep ‍track of everything? No problem! Use built-in file organization features to keep your downloads neat and tidy. It’s ⁢like having a personal assistant for ‌your video collection!

Navigating Legal Waters: What You Need to Know Before You Download

Let’s get real for⁣ a moment—before you ‍hit that download⁣ button, it’s crucial to know the‌ legal landscape surrounding video downloads. While it might seem harmless to grab a YouTube video for offline viewing, you could unknowingly be stepping into murky waters. Copyright laws protect original works, and many creators rely on ad revenue to support their channels. Downloading without permission can infringe on their rights and even lead to potential legal issues. So,⁤ what’s the ⁤best way to navigate this? Always check if the content is marked as Creative Commons or if the creator has given explicit permission for⁣ downloads. Better safe than sorry, right?

Moreover, keep an eye out⁤ for the terms of service provided​ by platforms like ‍YouTube. ​They ⁢often outline what’s permissible and what isn’t. Here are ‍a few points to keep in mind:

  • Awareness of Copyright: Understand that most videos are ‍protected.
  • Creator Permissions: Respect requests ⁤from content creators.
  • Public Domain: Look for videos that are free for public use.

By staying informed and making mindful choices, you’ll avoid the pitfalls⁢ and can enjoy⁤ your favorite videos worry-free!

Boosting Your Download Experience with Tips and Tricks

Boosting Your Download Experience with​ Tips and ⁢Tricks

Finding those downloaded YouTube⁣ videos on your Windows 10 device doesn’t have‌ to be a treasure hunt! With a few simple tweaks and tricks, navigating through your files can feel like a walk in the park. First, keep an eye on your default download location. Most ⁢browsers automatically save files‌ to the⁤ “Downloads” folder, but you ‍can easily customize where you want your videos to land. Just head⁣ to ⁢your browser’s settings, ⁣look under “Downloads,” and choose a location that makes sense for you. Keeping⁣ it organized is key; think about creating a dedicated “YouTube Downloads” folder. That way, you won’t be wading through all those random PDFs and images ‌to find your ⁢favorite video clips.

If you’re looking to amp up your download game, consider using download managers. They can⁤ really elevate your ⁣experience by boosting download speeds and even letting you pause and resume downloads. A few fan favorites include Internet Download Manager and JDownloader. They often come with features like batch downloads and scheduled downloads, making the whole‍ process feel seamless. Plus, many ⁢offer ⁢browser integration, so you can just click and forget! And⁣ speaking of integration, don’t ‍overlook the power of using specific YouTube download⁤ tools; some extensions streamline the process directly from the video page. With a little bit of tweaking and some useful ​tools, you’ll be downloading like a pro in ‌no time!

Closing Remarks

And there you have it! You’re now armed with everything you need to dive deep into the world of YouTube downloads right on your Windows 10 device. ⁣Isn’t it amazing⁣ how much control we have over our viewing experience? You can access your favorite‌ videos offline, whether you’re on a long flight, commuting, or simply ⁣lounging on your couch with a bowl of popcorn.

So,‍ go ahead and give‍ it a⁢ shot!⁣ Experiment with the tools we discussed⁤ and find ‌the one that suits your‍ style best. Remember, ​with great power comes great responsibility—so make sure you’re downloading content ethically, ​respecting copyrights, and supporting your​ favorite creators.

We’d love to hear ‍about your⁣ experiences and any tips you stumble upon along the way. Have fun exploring, and happy downloading! See you in the next article, where we’ll unravel more tech mysteries together!

Easy Steps to Remove Your YouTube Password on Chromebook

Ever find yourself in a jam, struggling to remember your ‍YouTube password​ while trying to ⁢binge-watch your favorite series on your Chromebook? You’re not‌ alone! We’ve all had those moments of ⁢frustration when a forgotten password can feel⁤ like a brick​ wall standing ⁤between us and our favorite videos. But don’t sweat it!‍ Removing or changing that pesky password doesn’t ​have to ‍be a head-scratcher. In just a ​few‌ simple steps, ⁢you’ll be back to enjoying the content you love⁤ in no time. Let’s dive into how you can‌ easily manage your YouTube password⁣ and get back ‍to the fun!

Unlocking Your YouTube​ Account‌ with Ease

If you’re ready to take the⁣ plunge and ditch your YouTube password on your Chromebook, you’re‍ in for ‌a‌ treat! Imagine cruising through ‍your ‌favorite ​videos without the hassle of remembering that pesky password.⁢ Here’s how you can breeze through the process:

  • Open⁢ Chrome: Make sure you’re signed into your Google⁣ account.
  • Navigate to Settings: Click the three dots in the upper‍ right corner, then ⁢select “Settings.”
  • Manage Passwords: Scroll down to “Passwords and Forms” and‌ click on ​“Manage⁢ Passwords.”
  • Find YouTube Credentials: Scroll ‍through the​ list or search for YouTube to locate the ⁣saved password.
  • Remove the‌ Password:​ Click on the three dots ⁢next to the saved password and select “Remove.” ⁢That’s it!

Now that⁢ you’ve cleared out your password, let’s⁢ make sure your account stays accessible ​without a⁤ hitch. It’s all about‌ being savvy with security! Consider using these‌ tips to keep your YouTube experience seamless:

  • Enable Two-Factor Authentication: ⁢This adds an extra layer without ⁤the need for ⁢a password each time.
  • Use a Password Manager: For those times when you want a password backup without ​memorizing it.
  • Stay Signed In on Your Devices: Just remember to​ log⁣ out on ‌public devices to keep your account⁤ safe.

Unlocking Your YouTube ⁢Account with​ Ease

Seamless Navigation‍ Through ​Chromebook Settings

‌ ⁣ Navigating through ​your Chromebook settings is like finding your way through a well-organized library. Everything you need is right there, just waiting to be discovered. To remove ‍your YouTube⁤ password, you’ll ⁤want to start by clicking⁤ on your profile picture‍ in the bottom​ right corner of your screen. Don’t worry; it’s as simple ​as pie! Once ‌you’re in, hit‍ that‌ gear icon—think ⁣of it⁢ as your personal control⁤ panel ​where all the magic happens.

Now, here’s where the ​fun⁤ begins. You’ll ‍see a bunch of options​ on the left side; click on‌ “Privacy and security.” It’s ⁣like the safety deposit box of⁢ your device. ‍From ‍there, look for “Site Settings” and dive⁤ in. Inside, search for YouTube under⁢ the ⁣“Permissions” ‍section.⁣ Click on it and you’ll find the‌ option to manage your credentials. Just like choosing your favorite flavor at the ice cream shop, ⁣pick ​the option ‍to remove your saved password. Voila! No more pesky password prompts for YouTube—just smooth sailing from ⁤here ⁣on out!

Seamless Navigation Through Chromebook Settings

Mastering ⁤the YouTube Password Removal ​Process

Removing your YouTube password on a Chromebook isn’t rocket science, trust me! Just follow these easy steps, and you’ll be back to​ your binge-watching in no time. Start by opening up your favorite browser; most likely, that’s Chrome since you’re using ​a ⁢Chromebook. Head ⁣on over to YouTube and​ sign in⁤ with your ‍account, if you aren’t already. Once you’re​ logged in, click on your profile picture located at ​the top ​right⁢ corner—it’s like your ‍personal​ little gateway. From the drop-down ⁣menu, select “Settings” and then navigate ⁤to “Security”. ‌Now, this is where the magic⁤ happens!

In the Security tab, you’ll see an option for “Password” or “Change Password”. Click‍ on ⁤that, ⁤and you’re prompted to enter your current password—it’s like a handshake of trust between you and your account. Next, follow the on-screen instructions to remove or reset your password. If ⁣you want to skip⁤ the fuss of remembering those ⁣complex⁢ passwords, consider setting up​ recovery options or enabling two-factor ​authentication for‌ added security.​ Just think of it as ⁢putting an extra lock⁣ on your treasure chest; it keeps out unwanted visitors but still allows you easy access!

Mastering the YouTube Password Removal Process

Staying Secure: Tips After You Change Your Password

After​ changing your password, it’s essential to take a few extra steps to ensure your account stays secure. One of the first things you want to do is to update ​your recovery options.‌ This can be straightforward—just double-check and​ make sure ‌your backup email and phone number⁤ are current. If ‌you ever ​get⁢ locked out of your⁤ account, having these options updated means you can get back in with minimal ‌hassle. ‌It’s​ like making sure you ​have ⁢an extra‌ key hidden somewhere⁤ for those​ “uh-oh” moments, right?

Additionally, consider ‌enabling two-factor authentication (2FA) if you haven’t already. This adds a second layer ⁢of security that needs more than just your password to​ access‌ your account. Think of it as a bouncer ⁤at the VIP club that double-checks IDs. Even‌ if someone manages to grab your new password, without ‍the second form⁣ of verification, they won’t get‍ in.⁢ Also, keep‍ an eye on your account activity—reviewing your recent logins⁤ can help you spot any unauthorized ⁤access before⁢ it⁢ becomes a problem.

Staying Secure: Tips After You Change Your Password

To Wrap It Up

And there​ you ‍have it! ⁤Changing or removing your YouTube password on your Chromebook is as easy as⁢ pie. Just a few simple steps, and ‌you’re all set ⁣to enjoy your favorite videos ⁢without a hiccup. Remember, whether you’re freeing up ‌your memory or simply prefer to keep ​things straightforward, keeping your account secure is always ‍a priority.

If you have any questions⁤ or run into‌ any snags along the way, don’t hesitate to ‌reach out! Sharing experiences makes the journey smoother for all of us. Now go ahead, dive back ‌into YouTube, and ​get lost in a ⁢world of endless content! Happy watching!

Erase the Past: Your Guide to Clearing YouTube History

Ever found yourself cringing at the ⁣thought of someone scrolling through your ⁤YouTube history? We’ve all been there—guilty pleasures or late-night rabbit holes don’t always tell the best story about us. But fear not! Clearing your YouTube history is as easy as pie, and ‍it can make a world of difference ‍for your digital ​footprint. Whether you’re looking to tidy up your recommendations or ‍just want a fresh start, this guide is here to help you wipe the slate ⁤clean. Let’s ‌dive in and banish​ those embarrassing searches forever!
Embrace​ a Fresh Start with YouTube: Why Clearing‌ Your History Matters

Embrace a Fresh Start with YouTube: Why Clearing Your⁤ History Matters

Clearing your YouTube history is​ like giving your digital life a refreshing makeover. Think of it as ⁤spring cleaning for your online habits! Over time, those recommended videos ⁤can pile up, cluttering the essence of what you ​truly ⁣enjoy. ⁣By wiping the‍ slate clean, you’re ⁣not just deleting what you watched; you’re actively reshaping your viewing experience. Want to tune ‌into the latest trending ‍vlogs or discover​ new genres? Removing that outdated history can redirect the algorithm, bringing fresh content that actually resonates with⁢ your current interests. It’s like resetting your favorite playlist to ‌play‌ your top hits instead of some forgotten tracks.

Many don’t ​realize that your ‌viewing history affects not just the suggestions you see but also your​ overall mood. Have you ever clicked into an old video just to find yourself​ stuck in a loop of cringe-worthy past choices? By clearing your ‍history, you’re taking control of your time​ and ensuring that every click is worth your while. Plus, it’s a sweet little act of self-care! So, why hesitate? Jump into your settings and clear that history. It’s a small step with a big ⁣impact, letting you embrace a more personalized and enjoyable⁤ YouTube ⁤experience.

Navigating the Maze of Your Viewing ⁢Data: Step-by-Step Instructions

Ready to dive into the ⁤nitty-gritty of ⁤clearing your YouTube history?⁤ Let’s break it down step-by-step! First, grab your device and open up the⁣ YouTube app or navigate to‌ the website.‍ Once you’re in, click on ​your profile icon—it’s⁢ usually‌ nestled in⁣ the top right corner, just‍ like the cherry on a sundae. From there, you’ll want to select ‘Your data in YouTube’. This ⁢is the secret passageway to all the viewing data YouTube ⁤has been keeping ⁣on you, like a squirrel hoarding nuts for winter! Here, you can keep tabs ​on your watch history and see what’s been recorded.​

Next up, make your way to the ‘Manage your‍ watch‍ history’ option. Simple enough, right? Once you’re in, you’ll see a list of all the ‍videos‌ you’ve watched. Now, if you’re feeling nostalgic and want to erase just ‌a few bad choices, you can remove them individually‍ by clicking the three dots next to each video. But let’s say you’re ready to wipe the slate clean! For that, ⁣just hit the ‘Clear all watch history’ button, and poof—it’s gone, like a magician’s rabbit! This is like decluttering your closet; it clears out the unnecessary stuff that’s just taking up​ space, leaving you with a fresh slate to discover new content!

Step Action
1 Open YouTube and click on your profile icon
2 Select ‘Your data in ⁣YouTube’
3 Click⁤ on ‍’Manage your watch ​history’
4 Remove​ individual videos or clear all history

Top Tips for Managing Your YouTube Footprint: Beyond Just Erasing History

Top Tips for Managing Your YouTube ⁣Footprint: Beyond Just Erasing History

Managing your YouTube footprint goes far beyond just clearing your history. It’s like tidying up your room, but instead of dust and clutter, you’re sorting through your⁣ digital presence. Start by adjusting your privacy settings. Head over to your account settings‌ and take a good​ look at‍ who can see your subscriptions and liked videos. You’d be surprised how ⁣much‍ of your viewing habits can be kept under wraps. Don’t forget to review your subscriptions—are there⁢ channels you no longer watch? Trim the fat! Making a⁤ habit of cleaning up your channel every so often can help you‍ maintain a more polished online persona.

Engaging with your audience⁢ is also key in managing your presence. Think about it: Would ‌you go to a party and stand in the corner the whole time?⁢ Probably not! Consider creating playlists to showcase your interests without revealing‌ all your viewed content. This way, you can share what you love while keeping the less ‍savory videos away from prying eyes. Plus, engaging with comments and collaborations can boost your visibility positively. Remember, your YouTube footprint is shaped by every click, so make each one count. Here are some more tips:

  • Utilize incognito mode when watching sensitive content.
  • Regularly delete specific videos from your watch history.
  • Clear search history to wipe out those embarrassing searches.

Staying Smart and Savvy: Maintaining Your Privacy on YouTube

Staying Smart‌ and Savvy: Maintaining Your Privacy on YouTube

Maintaining⁣ your privacy⁤ on YouTube is crucial in a world where data can be as exposed as a shivering traveler stuck at an airport. It’s super easy ⁢to forget that every video you watch or comment you make can unwittingly paint a ⁣portrait of your preferences and personality. It’s like leaving breadcrumbs that lead right to your digital doorstep! To keep your history in check, take a hint from your favorite detective: be discreet. Here are some‍ smart strategies to consider:

  • Regularly Clear Your Watch History: Make it a habit to delete your watch ⁣history often. YouTube keeps track of everything you view, but you have the power to erase that trail!
  • Pause Search History: Instead of letting YouTube curate recommendations based on your searches, consider hitting that “Pause Search History” option. Who needs algorithms snooping around your interests?
  • Use Incognito Mode: For those moments when you’re just browsing for that odd documentary on one-hit wonders, use incognito or private mode. It’s like putting on a disguise!

Also, don’t overlook the importance of ​adjusting ⁣your privacy settings. YouTube⁤ offers a range of options that can help you keep your world more private, just like ‍having a good set of blinds at home. Navigate to the settings ⁢area and see what works for you. It’s all about creating a shield around⁢ your viewing habits! Here’s a quick overview of ⁣what you can customize:

Privacy Settings Description
Watch History Control what’s ⁢saved and seen by others.
Comment Privacy Choose ​who can see your comments.
Channel Subscriptions Decide if others can view who you subscribe to.

Closing Remarks

And there you‍ have it! Clearing your YouTube history is ⁢like hitting the⁤ refresh button on your viewing habits—out with the old and in with the ⁢new. Whether you’re looking to tidy up your recommended ⁤feed, prioritize your privacy, or ‌just want to⁤ start fresh with your ​movie nights, erasing ‌that history‍ is a breeze.

Remember, your YouTube experience⁣ should be uniquely yours, free from the clutter of past searches and unwanted suggestions. So go ahead, take⁤ the plunge! With just a few clicks, you can reclaim​ your ⁣watchlist, rediscover content you truly enjoy, and ⁢create a viewing experience that reflects who you​ are today.

Now‌ that ‌you’ve got the lowdown, why not jump back into YouTube and ‍see what sparks joy? Whether you’re diving into the latest vlogs, exploring documentaries, or getting lost ‌in ‍music videos, just make sure it’s all about what ⁢you love right‌ now. Happy watching!

Transform Your YouTube Experience: Switch to Dark Mode Easily!

Tired of straining your eyes while ⁣binge-watching⁢ your ‌favorite YouTube series? If‍ you’ve ever ​felt​ like⁣ you’re staring⁢ at a ⁤blinding light bulb instead ‍of ⁣enjoying cozy videos, you’re not alone. Switching to Dark‌ Mode isn’t just about aesthetics; it’s like slipping⁣ into a ⁤comfy‍ hoodie after a long day. And guess what? Making ​the switch is as easy as⁢ clicking a​ button! Whether ​you’re diving into tutorials ⁢at midnight or catching up on vlogs in⁢ a ‌dimly‌ lit ​room,​ Dark Mode transforms your viewing experience, making it easier on your peepers.​ Let’s unravel the simple steps to turn‌ your YouTube experience from⁣ glaring to glamorous!
Discover‍ the Benefits of YouTube‍ Dark Mode for Eye Comfort

Discover the Benefits of ‍YouTube Dark ‍Mode for Eye​ Comfort

YouTube’s ⁢Dark Mode isn’t ​just a sleek aesthetic choice; it’s a game-changer⁣ for your eye comfort. Imagine ‍scrolling through endless videos‍ late at night while ⁢the rest‍ of the world is ⁢asleep. The bright, blaring white light can feel like a spotlight on your retinas, right? With ⁤Dark ‍Mode, ⁢you swap that jarring brightness​ for a smooth, deep background that feels ⁤like a cozy blanket for your eyes.⁤ It reduces glare, making those marathon ‌binge sessions a lot more⁣ enjoyable,‌ especially during twilight hours.

But the benefits don’t⁢ stop there! ‍When you embrace​ Dark Mode, you’re not just giving your peepers a break, ⁤you’re‌ also enhancing‍ your viewing‌ experience. Here’s why you might ​want to ‍consider this switch:

  • Reduced ⁣Eye Strain: ⁤ Less brightness means less strain.​ It’s like trading⁣ in ‍your uncomfortable shoes for a comfy pair ⁣that makes walking ⁤a pleasure.
  • Better Battery ‍Life: ⁢Dark Mode can help ‍save some‍ juice on your ⁤devices,​ especially ‍if you’re using an OLED screen.⁤ Think⁣ of it as giving your phone a well-deserved⁤ nap.
  • Stylish Aesthetics: Who wouldn’t want a sleek, modern⁣ look? Dark Mode makes navigating YouTube feel‌ like‍ stepping into a high-tech world.

A Step-by-Step Guide to ‌Switching to Dark Mode

A Step-by-Step Guide to Switching to Dark⁤ Mode

Switching‌ to Dark ⁣Mode‍ on⁤ YouTube is a breeze, and it ​can make⁤ your viewing ‌experience so much cooler! To start, open YouTube and look ⁢for your ⁤profile picture at the top ⁣right corner.⁣ Click on it, and you’ll see a ​drop-down⁢ menu. ⁤From there, navigate to the Settings option. ‌Once you’re in the Settings menu, look for Appearance. Here, you’ll find the hidden gem that is ​Dark Mode.⁢ Click ⁤on it, and voilà! You’re set ‌to‌ enjoy a sleeker, eye-friendly‍ interface ‌that won’t strain⁤ your ⁢eyes during those late-night ⁣binge-watching sessions.

If you​ want to take it a step further,​ consider checking out these additional ⁣customization options that‌ go hand-in-hand with Dark Mode: ⁤

  • Text Size: Adjust the text⁣ size for‍ better ‌readability.
  • Video ​Quality: You can enhance your viewing pleasure by setting default video ‍quality.
  • Closed Captions: ‌If ​you’re a subtitle fan,⁤ Dark ⁢Mode makes them look great too!

These tweaks⁤ not only elevate your experience ‍but also ‌make‌ YouTube ⁤feel like‌ it’s ⁤tailored just for ⁢you. And​ honestly, who doesn’t ⁤love a ⁤little personal⁣ touch? So go ahead, upgrade to Dark Mode, ⁤and dive into a new YouTube‍ experience ‌that feels just⁢ right.

Enhance Your ‌Viewing Experience with Customizable Settings

Enhance Your ‍Viewing Experience with Customizable ​Settings

Ready to take your YouTube experience up ⁣a notch? ⁤Customize ‍those settings and⁤ watch your⁤ viewing pleasure soar! ​Think ‍of it like tailoring a suit: ⁢when it ​fits ⁤just right, you feel ready‌ to conquer the‌ world, right?​ By ⁤diving into the settings menu, you​ can‌ adjust everything from⁣ video quality to playback ​speed, ensuring you‍ get exactly what you want without any ‌hiccups.​ Imagine being ⁤able to switch between 4K⁢ clarity and data-saving modes on‍ the fly. It’s like⁣ having a remote ⁢control for your⁢ preferences!

Don’t overlook the magic of subtitles⁢ and⁢ captions! Whether you’re in a loud‌ cafe or just ⁣prefer reading along, tweaking⁤ those settings ⁤can ​enhance your comprehension and engagement. ⁣Here’s a quick glance at some⁣ options you might not have ‌explored yet:

Setting Description
Video Quality Adjusts resolution⁤ based on your​ preference or connection speed.
Playback‍ Speed Slow⁢ down⁤ or speed up‌ videos‌ to ‍match your grasp of content.
Subtitles Toggle ⁣captions for clearer understanding regardless of audio quality.
Theme Switch between light and dark mode for⁢ a more comfortable viewing experience.

So, why​ stick with the default settings when⁢ a world ‌of‌ options is at your ‍fingertips?​ Customize and craft your⁤ own viewing ‌paradise,‍ where every video feels just right. Embrace the​ change and⁣ give your⁤ eyes a ⁣treat—because you totally deserve to enjoy YouTube your way!

Tips to Maximize Your YouTube ⁣Experience ⁤Beyond‌ Dark ‍Mode

Tips to Maximize Your YouTube‍ Experience⁢ Beyond Dark Mode

When it comes ⁢to elevating your ⁤YouTube game, there’s⁣ so much more⁢ than just ⁤flipping the ‌switch ‌to dark​ mode. Think of your YouTube experience as‌ a canvas; how you‌ paint ‌it ‌makes‍ all the ⁣difference! Start⁢ by ⁤customizing your homepage to reflect what⁣ you truly enjoy. Instead of being at‌ the mercy of the algorithm, take charge by subscribing to channels that resonate with you​ and engaging with content you love. ​Like sprinkles⁣ on a cupcake, ‍your subscriptions add ⁣flavor—make sure they’re delightful! You ⁤can even create playlists to categorize your favorite videos,⁣ making them⁤ easy to find ⁤when you’re in ⁣the ⁢mood ‌for a good binge.

Another ⁣way to spice things up is‍ by exploring YouTube’s features that often​ go unnoticed. Have you ⁢ever​ played around with ‌the⁣ “Explore” tab? It’s ‍like a⁤ treasure chest of content waiting to ⁢be unraveled, offering recommendations based on​ your ⁤viewing history. Don’t forget ‌about the ‌ community tab on your​ favorite channels, a hidden ⁣gem for interacting‍ with creators‌ and fellow fans. Plus, diving⁤ into the comments section can⁢ sometimes⁢ reveal insightful discussions or even a few laughs. Remember ⁣to leverage ⁣ keyboard shortcuts for navigation, speeding up your viewing experience like a ⁤pro—who doesn’t ‍love cutting down on clicks?

In Summary

So ⁤there⁤ you have it! Switching to Dark ⁤Mode ⁤on YouTube isn’t just ⁢a trendy option; it’s ⁣a ‌simple way to ‍enhance your viewing ⁢experience ⁢and give your eyes a break, especially during ⁣those late-night binge sessions. Whether you’re‌ all ​about the aesthetics ‌or⁣ just want to avoid squinting at that ​blinding white screen, ⁢this quick adjustment can‌ work ⁢wonders.

Now that⁣ you’re armed with the‌ know-how, take a moment to make the switch and enjoy​ a more immersive experience. Trust me, your eyes will thank you, and so ⁢will your sanity ⁤when you no longer feel like you’re staring into the sun! ⁣And hey, ‍don’t keep this little tip to yourself—share‌ it ‌with your friends‍ and let everyone embrace the soothing vibes of Dark‌ Mode. Happy watching!

Mastering YouTube: Quick Tips to Turn Off HDR on Reddit!

As we dive into the colorful world of YouTube, you‍ might find yourself ⁣stumbling upon a feature that⁣ adds a⁤ bit too much ‌flair ​— High Dynamic ⁢Range,‍ or⁢ HDR. While it⁢ can make your ​favorite videos⁢ pop with vibrant colors⁤ and stunning contrasts, sometimes⁢ it‌ just⁢ doesn’t vibe with your viewing experience. Maybe⁤ you’re watching ‍on a device that doesn’t quite handle it well, ‍or perhaps​ you prefer the classic look of standard dynamic‌ range. ⁤Whatever⁣ your reason, turning off HDR can be a game-changer. So, grab your favorite⁣ snack, settle in, and let’s ​explore ⁢some⁢ quick and ​easy tips ⁤to‌ navigate through‍ Reddit and‌ master ⁢the​ art​ of YouTube, ensuring‍ you get that perfect viewing experience ⁤without the flashy distractions. Ready to get started? Let’s‍ jump right in!
Tips for Navigating YouTube ‍Settings Like a Pro

Tips for ​Navigating YouTube ⁤Settings Like a⁤ Pro

Getting the most out of your YouTube experience means knowing⁣ your way around⁣ those pesky settings. If‌ you’re looking ⁤to turn off HDR, you’ve ​got a couple of paths to take. First,​ open YouTube ⁤and click on your profile picture in the top right corner. Go to Settings and from ​there, navigate to Playback ⁢and Performance.​ Here, you will ‍have the ​option‍ to toggle “HDR Video” off. Not ‌sure what’s ‌what? Think ​of it like⁣ adjusting ​the ⁣dimmer⁢ switch on‍ a light—it’s all about​ making‌ the video⁢ fit your ‍viewing style.

But that’s just scratching the⁤ surface! ⁤While you’re in the‌ settings, ‍take the time to⁣ explore other‌ features. You ‌can adjust ​your playback quality, and ⁢toggle options like “Restrict Playback”, and even‌ manage ‌ notifications. Here’s a ​fun‌ fact: Did you know‍ that tweaking ⁣video quality can save you data? If⁣ you’re in⁣ a tight spot ⁤with‌ your data⁤ plan,‌ lowering the ⁣quality⁣ might‍ just ‌be your best friend! Take ⁣a moment to⁤ customize these settings, and you’ll navigate YouTube‌ like ⁣a ⁣seasoned pro.

Understanding‌ HDR:​ Why‍ You Might Want to⁢ Turn⁢ It Off

Understanding HDR: Why You Might Want to Turn It Off

When diving into the world of ‍HDR (High Dynamic Range), it’s easy to get caught up in the hype ⁢of ⁣those⁣ eye-popping ​visuals. Sure, HDR⁣ can‌ make​ your videos look​ stunning with⁤ vibrant colors and ‍deeper contrasts, but ⁤it⁢ can also⁣ be ⁣a ⁢double-edged sword. Sometimes,‌ turning it off can actually enhance your viewing experience. You might notice that HDR can​ exaggerate ‍brightness, causing some details ‌to get washed ⁢out or making ‍dark scenes appear⁤ overly murky. Plus,‌ not all content is mastered ⁤for HDR, ⁢which​ means switching it off can lead ⁢to a more balanced ⁣image.

If you’re wondering why you’d want to give⁢ HDR the boot, consider these‍ points:

  • Inconsistent Quality: Not every video is optimized ‍for‌ HDR, ⁣and you​ might end up with mixed bag visuals.
  • Eye Strain: HDR’s intense brightness ⁢levels can​ lead to fatigue during long viewing​ sessions.
  • Device‍ Compatibility: Some⁣ older TVs​ and​ monitors just don’t⁢ play nice with HDR, ruining your experience.
Pros of HDR Cons of HDR
Vibrant colors Exaggerated brightness
Depth in shadows Possible ​eye strain
More realistic ‍visuals Inconsistent quality‍ across videos

Step-by-Step Guide to Disable HDR on Your Device

Step-by-Step Guide to ⁢Disable HDR​ on Your Device

If you’re looking‌ to tackle the ​vibrant⁢ world of HDR video‌ on your device, you’re in ‍the right place! Disabling HDR can ‍be a game ‌changer, especially ⁤if you prefer a more⁣ classic viewing ‌experience. Here’s‍ how you can do ‌it in just a few ‌easy steps:

  • Device Menu: ‌Start by diving ​into​ the settings of‌ your device.⁣ Look for the display or‌ video settings‍ section.
  • Video Settings: ​Within this section, locate the⁤ option related‌ to HDR⁤ or High‌ Dynamic Range settings.
  • Toggle‌ Off: Once you ⁤find it, simply ‍toggle ‌the HDR ‍setting ⁤off. ⁢Easy peasy!

In‍ certain cases,⁤ like on ⁤smart ⁢TVs ‍or streaming devices,⁤ you might ‌need to access the app ‌settings directly. Don’t sweat it if it seems ​overwhelming – here’s ‍a ⁣condensed‍ version to⁣ guide you:

Device Steps to Disable HDR
Smart TVs Menu > Settings ‌> Picture > HDR Settings
Streaming Devices Settings > ⁣Display⁤ >‍ HDR
Mobile Devices Settings > Display >⁤ Advanced > HDR

Now​ you’re⁣ all‌ set! ‌Enjoy ​your videos without ⁤the extra ‌pop⁢ of HDR, and don’t⁢ forget to experiment with​ other display settings for the best experience!

Troubleshooting‍ Common Issues⁣ with HDR on YouTube

Troubleshooting Common‌ Issues ‌with HDR on YouTube

Trouble ‌with ‍HDR‌ messing up your‍ YouTube experience? ⁣You’re not‌ alone!⁣ Users ⁢often notice that HDR videos can appear washed out or⁢ lack the ⁢vibrant colors originally intended. ⁤First, check your device settings; sometimes ⁤it’s ⁣as simple as toggling HDR on or​ off. Make ⁣sure your display supports⁢ HDR and⁣ that​ it’s enabled correctly. Here are a few⁤ things to look‍ into:

  • Check Display Compatibility: ⁤ Not all screens ⁤handle HDR⁣ well. Verify‍ yours can support ‌it properly.
  • Adjust Playback Settings: Dive into the‌ video quality settings and see if HDR is causing issues.
  • Update ⁤Your App: Ensure you’re on the latest version of YouTube, as updates‍ often fix bugs⁢ related to HDR.

If you’ve tried⁢ all that and still experience issues, it ⁣may be time​ to disable⁣ HDR altogether. Doing this can help‌ restore your ‍viewing experience,⁤ giving you the ‍colors‌ and contrast back that HDR sometimes ‍messes with. Here’s how:

  • Open YouTube ​Settings: Navigate to the app⁣ settings on your device or ⁢website.
  • Find Playback Options: Look​ for video ‍quality⁣ settings.
  • Toggle HDR: Turn it off, ​and see​ if that ⁢resolves the problem.
Issue Solution
Colors appear washed ⁢out Switch off ⁤HDR in settings
Buffering‍ issues Lower⁣ video ⁤quality​ settings
Screen ⁤flickering Check HDMI cables and connections

Final Thoughts

you’re ⁣the ‍one in control!⁣ As the digital ​world ⁣continues to ⁣evolve, mastering⁤ these little‍ nuances can make⁤ all ​the difference for your viewing pleasure.⁣ Keep⁣ experimenting, share your newfound‌ knowledge with your ⁣fellow Redditors, and enjoy ​the content ‍in your ‍preferred style. Until next time, happy watching,‍ and may your streams‍ always be exactly how you like them—just⁤ the right amount ​of color​ and⁣ clarity. Keep it chill!

Your Simple Guide to Effortlessly Downloading YouTube Videos

Hey there, YouTube​ enthusiasts! So, you’ve stumbled upon that absolute gem of ⁣a ‌video that you just can’t wait⁢ to save for later,‍ right? We’ve all been⁢ there—scrolling through ‌the endless sea ‍of content, finding that ⁢perfect clip that makes you​ laugh, teaches you something⁤ new,⁣ or​ pulls ⁢at your heartstrings. But what if I told you there’s a super simple⁢ way to grab those videos straight from your screen and keep⁢ them forever? ⁣No‌ more​ hunting for Wi-Fi at that moment of need⁢ or being chained to a data plan! In this guide, we’re diving ⁤into the⁣ art of⁣ effortlessly downloading ‍YouTube videos, breaking it down step ⁤by step. You’ll be ⁣pocketing your‍ favorite clips in no time, ready ⁤to enjoy them ⁢on your own terms. Grab your favorite ‍beverage, cozy up, and let’s get started on this little adventure ⁢together! 🚀

Unlocking the ‌Secrets: Different Ways to Download YouTube Videos​ with Ease

If ⁣you’re itching‌ to​ take your​ favorite YouTube videos offline, you’re not alone! Fortunately, there are plenty of straightforward methods ⁣to snag that content ‍right onto your device. One⁤ popular option is ⁢using dedicated download⁤ software. Programs​ like 4K Video Downloader‌ or​ YTD Video Downloader allow you to enter‍ the‍ video URL, select your ‍preferred format—whether it’s MP4, ‌MP3, or something⁣ else—and‍ voila, it’s yours⁣ to keep! Super simple, ‌right? Don’t ​forget to check the⁤ settings‍ to ensure you’re downloading in high⁣ quality, especially for those heart-stopping music videos!

Another⁣ easy-peasy way ‍to grab videos ‍is through online download ⁢services. Just ‌hop over⁢ to sites⁢ like‌ ClipConverter or ​SaveFrom.net, paste the video ‌link, and choose your⁣ format. It’s like magic! Some of‍ these tools even let ​you convert videos directly ⁢to audio if you’re just interested in the soundtrack. For ⁣those who are always on the‍ go, mobile ‌apps are ⁢also ‌a great pick—look for ones‌ available‌ on⁤ your device’s app⁣ store that can simplify the ⁤process. With so ‌many options⁤ at your fingertips, downloading YouTube videos has never​ been more‍ effortless!

Unlocking the ⁣Secrets:‍ Different‌ Ways ​to Download‌ YouTube Videos with Ease

Choosing the Right Tool: Top Apps⁣ and Websites​ for Hassle-Free Downloads

When it comes to‌ downloading YouTube videos without ‍the‌ headache, the right tools ​can make all the difference.​ You’ll find⁣ that ⁢not all ​apps and‌ websites are created equal. Some​ are fast‍ and ⁢user-friendly, while others‌ come with unwanted ads and complicated ⁣processes. Here’s a handy list of ⁢some popular ⁢apps and websites you might want to explore:

  • 4K Video Downloader: This desktop app offers ⁣a simple ​interface ⁢and‌ high-quality downloads. Plus, it supports‌ multiple formats!
  • YTD Video Downloader:​ Known for its speedy⁣ downloads, this​ one’s a fan favorite for ⁤quick and easy conversions.
  • ClipGrab: Not only ‌does it download videos, but it also⁢ allows⁢ for format conversion ​–⁤ it’s a ​two-for-one deal!
  • SaveFrom.net:​ A handy ​online tool that works directly in your browser, providing⁣ instant ⁢downloads⁣ with just‍ a URL.

Before diving in, though, ‍you might want to⁤ consider factors like compatibility with your device and whether‍ you prefer a ​browser-based ​solution⁢ or a downloadable app. ⁤Take a ‌peek at‌ the table below for a quick comparison:

Tool Type Format Support
4K Video Downloader Desktop‍ App MP4, MKV, FLV
YTD ⁢Video Downloader Desktop App MP4, AVI, MOV
ClipGrab Desktop App MP4, MP3, WMV
SaveFrom.net Web-Based MP4, MP3

Choosing the ‍Right ⁤Tool:⁤ Top Apps and ​Websites for Hassle-Free ⁢Downloads

When ‍you’re ⁣contemplating downloading videos from platforms like⁢ YouTube, it’s essential to⁤ bear in mind the ​legalities lurking beneath ⁢the surface. While it might be⁢ tempting​ to snatch⁢ up ‌any ⁤video⁢ you⁣ fancy, not all content is fair ⁤game. ⁤Let’s ‌break it down:⁤ Copyright laws ⁤ are in play ‍here, and ⁢they’re like the traffic ⁣lights‍ of⁢ the digital world—essential to‌ obey. Educate yourself ‍on the specific rights associated with ‍the videos you want; sometimes, ‌creators‍ allow downloads under certain ​conditions.⁣ Just because it’s easily accessible doesn’t mean it’s free for all, right? Always check the video description for permissions, ‍or if the‍ content is marked with a Creative Commons license, which often gives⁤ you the⁢ green light ⁣to​ download and share, but with some restrictions.

Moreover, navigating the vast ocean of video content‌ requires⁢ a sturdy ‍boat—tools and resources that respect⁣ the legal framework. Look for reputable downloaders ⁤or converters that explicitly ‌mention​ compliance with copyright laws. ‍You wouldn’t want⁤ your smooth​ sailing to turn into‌ a shipwreck⁤ with a cease-and-desist ⁣letter in your inbox! Here’s a quick table ‍to‌ help you understand⁣ different video ⁣statuses:

Video Status Download Permission
Copyrighted No
Creative Commons Yes (attribution may ⁤be required)
Public Domain Yes
Personal Use ‌Only Check with creator

Never underestimate the importance of doing a little‌ homework before diving into ​the downloading frenzy. By being ⁣mindful of copyright rules‌ and using trusted‍ tools, you can enjoy your favorite videos without a hitch!

Navigating Legal⁢ Waters:‍ What You Need to Know ‍Before Downloading Videos

Tips‍ and Tricks for ‌the Best⁣ Quality: Maximize Your⁤ Video Download Experience

Getting⁢ the best quality when downloading videos is all about ⁤understanding ⁤the settings and ​options ​at your disposal. Choose‍ the‌ Right Resolution:‌ Before ⁢you hit that download‍ button, take a moment to⁢ check the available resolutions. Depending on​ your⁢ device and how you plan ⁢to watch the video, ​a ‌higher‌ resolution ‌could give you‌ a flawless viewing experience. If you’re downloading for a smaller ​screen, like⁢ your phone,​ 720p is usually​ more​ than⁢ enough, but ​for ⁤larger​ screens, aim for⁢ 1080p or even⁤ 4K if it’s‌ available. Utilize Reliable Downloaders: Not ⁣all downloaders are created⁤ equal. ⁤Make sure you⁤ choose ⁣one that allows ⁤you to select audio‌ quality and doesn’t⁢ compress your files unnecessarily. The smoother the process, the⁤ better the outcome!

Don’t⁢ Forget About⁣ Formats: Did ​you know ‌that the​ format you download ​can affect quality too? While MP4 is the most universally compatible format, sometimes switching⁢ to​ MKV​ can‌ be beneficial,⁢ especially‍ if you ⁤prefer⁤ higher‍ quality audio. Check ​Your Internet Connection: A⁤ quick note – ​a stable internet connection can make or break your ​download‌ speed‌ and quality. ⁤If you’re on ⁣Wi-Fi, make sure you’re close to the router to avoid⁤ interruptions. take a second to ​look at video thumbnails and​ descriptions‌ before downloading.⁤ They often provide insights into​ the video‍ quality and content‍ that can‍ help you make a more informed choice!

Tips and Tricks‍ for​ the Best Quality: Maximize Your Video Download Experience

The Way ⁣Forward

And ​there you have it! You’re‍ now armed‍ with ⁢the know-how⁣ to effortlessly snag your favorite ⁢YouTube videos and enjoy them ​anytime, anywhere. Whether you want⁤ to ‍binge-watch⁣ that thrilling ⁤series without worrying about internet ⁣connection or save an inspirational talk for ‌a rainy​ day,⁣ you’ve got the tools right at your ​fingertips.

Remember, the world of video⁢ downloading is ‌your ‍oyster! Just like a ​seasoned ‌traveler exploring new cities, take your time‌ to navigate the platform that ‌suits ⁣you best. Make sure to respect copyright ⁣laws –‍ after all, a little respect goes ​a long‍ way in keeping‍ the digital landscape ​healthy and vibrant. ‍

So, what​ are you waiting for? Dive⁤ in, start downloading, and relish the freedom of offline viewing. Who​ knows?‍ You might uncover new gems along the⁤ way​ that’ll make your‌ viewing experience even richer.⁣ Happy downloading!‌ 🎥✨

Switching to YouTube’s Dark Mode: A Simple Guide!

Are ⁤your ‌eyes feeling a bit strained after binge-watching your favorite channels on YouTube? ⁣You’re not alone!⁣ It’s no secret that spending hours scrolling through that endless stream of videos can leave us squinting ⁢at⁤ bright‌ backgrounds. ‍But hey, what if I⁤ told you there’s a simple way to ease that ⁤strain? Enter⁢ YouTube’s Dark Mode! It’s like giving your screen a‌ cozy new outfit that’s‌ easier ⁣on ⁢the ‌peepers. ⁣In this guide, we’ll walk you through switching to‌ Dark⁣ Mode in ‍a ‌snap, making ⁢your viewing experience not just more ‌comfortable, but ⁤also​ a tad cooler. So, ‌grab some​ popcorn and let’s dive right‌ in!

Exploring ‍the Benefits of YouTubes Dark⁢ Mode ⁣for ‌Eye Comfort

Exploring the Benefits of YouTubes ‍Dark Mode for Eye Comfort

Switching to YouTube’s Dark Mode can ‌feel ⁤like slipping into ⁣a comfortable pair of sneakers⁣ after a long day ⁢of wearing heels. It’s not just about aesthetics; the⁢ benefits for your eyes are significant. Dark ‌Mode reduces eye strain significantly, especially⁢ when binge-watching your ⁣favorite⁣ channels late at ‌night or⁣ during those lazy weekends.‍ The high contrast of ⁣light text on a darker background is easier on the eyes, making it less likely for you​ to deal with fatigue after scrolling through ⁤videos for hours. Plus, if you’re in a dimly lit room,⁢ it helps⁣ to maintain⁢ a cozy atmosphere ​while keeping your​ vision clear.

Besides soothing your peepers, ‌Dark Mode can extend your battery life too, especially on ​OLED ⁣screens where black pixels ‌consume less power. Here are‍ some other perks to consider:

  • Improved Readability: Less ​glare means you won’t squint⁤ as much.
  • Less‌ Blue‌ Light Exposure: Helps combat ⁢sleep disruptions.
  • Enhanced Focus: Your ⁣content⁤ pops out more,⁣ drawing your attention⁣ effortlessly.

Adopting Dark Mode⁤ isn’t just a whimsical trend; it’s a practical choice ⁣that‌ aligns with ⁤your lifestyle. Make the switch and give ​your⁢ eyes the ⁤comfort they ​deserve while enjoying endless hours of video content!

Step-by-Step‍ Instructions to Enable‍ Dark Mode on Any Device

Step-by-Step Instructions to Enable Dark Mode on Any Device

Switching⁤ to dark‍ mode‌ on ​your favorite platform can feel⁢ like slipping‍ into a comfy‍ pair of pajamas after a long day. If you’re ready to embrace the darker side⁣ of YouTube, the process ⁤is a‌ breeze! Here’s how‌ to‍ transform your viewing experience:

  • Open the YouTube app or head to the website.
  • Click on your profile‍ picture located in the top right corner.
  • Select Appearance from ‌the dropdown menu.
  • Choose Dark Theme to activate⁢ that soothing dark palette.

For ⁢those using a desktop,⁢ you’ll find the steps so smooth, ‌they might just ​feel like a gentle ride on⁤ a ⁣Sunday afternoon. Don’t‌ forget to ⁢double-check your settings, as sometimes updates or app restarts can flip ‍you back to the⁢ default. Here’s a quick reference table to⁤ help you remember:

Device Steps to Enable Dark Mode
Mobile Navigating to profile >​ Appearance > Dark Theme
Desktop Profile Picture > ​Appearance ⁣>‍ Dark Theme

Personalizing Your Viewing Experience:‌ Customizing Dark Mode Settings

Personalizing Your Viewing Experience: Customizing Dark Mode Settings

If you’re diving into the dark side of YouTube, customizing your Dark Mode settings ⁢can ⁤elevate your viewing experience ‌to ​a whole new level. Think of it‌ like tailoring ⁤a‍ suit; it fits better and feels just right. YouTube offers a​ few nifty options⁤ to personalize how you enjoy your favorite ⁢videos. You can ​tweak not just ⁤the brightness ⁢but also the overall aesthetic. Here’s​ what you⁤ can do:

  • Brightness Control: Adjust the brightness to your comfort level—too bright and it’s like staring into the sun; too​ dark and you might miss those cheeky details.
  • Color ⁤Palette: Some users love ⁤a softer tone, while others may ⁢want that deep, rich black. Find what makes⁣ your eyes smile.
  • Font Size: ‌Adjusting ​this‍ can be a game-changer, especially if you binge-watch those long tutorials. Never squint ⁤at your screen again!

To see how these changes affect your viewing, consider how⁢ you feel in a‌ dimly lit room ⁣versus ​a brightly lit one—mood lighting ‍matters! Check ​out the ‌table below for‍ a side-by-side ⁤comparison of default settings and⁣ your personalized options:

Setting Default Your Custom Setting
Brightness Medium Adjustable
Color Theme Standard Black Customizable
Font Size Default Comfortable Size

With these changes, ⁢your ​late-night ⁣snack-and-watch sessions will be cozy‍ and visually pleasing. Why settle for less when you can have your screen cater to your‌ unique ‍style?⁤ Get ready to make your YouTube experience one that actually feels‌ like your⁢ own!

Troubleshooting ⁤Common ‌Issues When Switching to Dark Mode

Troubleshooting ‌Common Issues When Switching to Dark Mode

Switching to dark mode on ​YouTube can feel like a breath of fresh air, but what happens when it doesn’t go as smoothly as⁣ you’d hoped? First off, if you notice that your dark mode one day just⁤ reverts back to‌ the blinding white light,⁢ it could be a simple glitch. Start by checking your browser or app settings to confirm the changes are still saved. Sometimes, you just need to log out and back in to refresh⁣ everything. It’s like shaking the cobwebs off your favorite old ⁢sweater—sometimes it just needs a little adjustment!

If you’re ‌experiencing issues with visibility, like text disappearing ⁣or colors‌ not displaying⁢ correctly, it could be related to your device’s settings. Ensure that your⁢ operating system is⁢ updated; sometimes, compatibility problems arise when‍ the ‌app and system aren’t on the same⁤ wavelength. You’ll want ⁢to check your display settings as well. Take a ‍peek at the brightness‌ levels or color contrast; it’s like making sure your ⁢glasses are clean—things can just look a lot clearer when everything shines brightly (or darkly) as ⁤it should!

Final Thoughts

And there you have it! Switching ⁤to‍ YouTube’s Dark Mode is as easy as ​flipping a light ⁢switch. Not⁢ only​ does it give ‌your eyes a much-needed break during those late-night binge-watching sessions, but it also adds a sleek ⁤touch to your viewing experience. So why‍ not ‍give it a whirl?⁢ Whether you’re⁤ diving into cat videos or catching up ‌on the ​latest ​tutorials, dark mode might just be the cozy vibe you didn’t know ⁣you needed.

Now that you’re armed with this simple guide, you’re ready to enhance your YouTube ⁤experience like a pro. Give it a try, and don’t be ‍shy—share your ‌thoughts! Got ‍other ​tips or tricks up your sleeve? ⁣We’d‍ love to hear ‍them.‍ Happy⁣ watching, and may your screen time be ever-so-stylish!

Effortlessly Cast YouTube to Your Marshall Uxbridge Speaker!

Imagine sitting in your cozy living room, the scent of freshly‌ brewed coffee wafting through the air, and the sound of ⁤your favorite tunes filling every corner ⁢of the room. Now, picture enhancing that experience by effortlessly casting YouTube to your Marshall Uxbridge Speaker. Sounds ‍dreamy, ⁤right? Well, it’s not just ⁢a fantasy! With a few simple steps, you can turn your speaker into‍ a powerhouse of music ⁢and​ media. Whether you’re jamming to the latest hits or⁢ unwinding with a podcast, casting directly to your Marshall Uxbridge changes the game. Get ready to transform how you enjoy your favorite content, blending style with seamless‍ tech that’s as easy to use ‍as flipping a switch!
Unlocking Seamless Connectivity with Your Marshall Uxbridge

Unlocking Seamless Connectivity with Your Marshall Uxbridge

Imagine lounging on your couch, ready to ​dive into your favorite YouTube content, ⁤and ‍you want the⁤ full sound experience that only your Marshall Uxbridge can provide. Well, the good news is that streaming directly to your speaker is a breeze! First, make sure your speaker is connected to Wi-Fi and powered⁣ on. Then, simply open YouTube on your smartphone or tablet, pick the video that’s calling your name, and tap on the ⁤cast icon. Just like that, you’ve set the stage for a personal concert right in your living room. Isn’t ⁣it awesome how technology brings you closer to the vibe without any fuss?

But hang on, let’s go a little deeper. If you want to elevate your audio game and get⁣ the most out of your Uxbridge, consider‌ these quick tips:

  • Ensure your speaker’s firmware is up-to-date for optimal ⁣performance.
  • Use the Marshall Voice app to control playback​ and adjust‍ settings seamlessly.
  • Play ⁣around ⁤with different audio settings to find your sweet spot.

In case you encounter ⁢any‌ hiccups, here’s a handy little table to troubleshoot common issues:

Issue Solution
Can’t find speaker Check Wi-Fi ‍connection; restart the speaker.
No sound Adjust volume settings on both the device and⁣ speaker.

Mastering the Art of YouTube‍ Casting

Mastering the Art of YouTube Casting

When it comes to sharing your favorite YouTube videos with all⁢ the bass and treble your heart desires, casting to your Marshall Uxbridge Speaker is like taking your auditory experience to a whole new level. Imagine the crisp, clear ⁤sound of your latest obsession reverberating through your space, making even the most mundane moments feel epic. To get‌ started,⁣ you should ensure that both your device and the Marshall speaker are connected to the same Wi-Fi network. That’s your golden ticket ⁤to effortless casting! ​With just a few taps, you’ll have the audio jumping right into your living room.

Here’s how⁤ you can easily kick things​ off:

  • Open ‌the YouTube app on your smartphone or tablet.
  • Find the video you’re itching to blast⁣ out loud.
  • Tap the Cast icon (it looks like a small rectangle with a Wi-Fi symbol). This will show you a list of available⁢ devices.
  • Select your Marshall ‌Uxbridge.
  • Hit play and let the ‌music take over!

Voila! Your ​favorite tunes and videos are now filling the room. The setup is so simple that you’ll wonder why you didn’t start sooner. No messy wires, no complicated configurations—just pure audio bliss. If you’re looking‍ for ⁤a little more guidance with custom ‍settings, consider checking out the speaker’s app for advanced features that let you fine-tune your sound. It’s all about creating the perfect⁣ vibe!

Tips and Tricks for a Flawless Audio Experience

Tips and Tricks for a Flawless Audio Experience

To elevate your audio experience with the Marshall Uxbridge Speaker when casting YouTube, ‌consider the following tips that will really make a difference:

  • Positioning Matters: Place your speaker in‍ an open space away from ‍walls to minimize sound distortion. Think of it like setting up a stage; the better the placement, the more immersive the⁤ performance.
  • Optimize Your Wi-Fi: A strong and steady Wi-Fi connection is crucial.⁤ If you’re buffering, it’s like driving on a bumpy road; frustrating and not enjoyable.
  • Adjust the Sound Settings: Experiment with the EQ settings either in the YouTube app or your device settings. Customize your‍ audio, ​like a chef tweaking a recipe ⁤for the perfect flavor.

For an uninterrupted flow of your favorite tunes, manage your device settings wisely:

Setting Recommendation
Volume Level Keep it at 70% for optimal clarity without distortion.
Bluetooth Connection Ensure no other devices are interfering; connect only to what you need.
Streaming Quality Select ‘High⁣ Quality’ to experience the depth of‍ your music.

By keeping these‍ pointers in mind,⁢ you’ll be fully equipped to transform your sound experience. Just imagine how crisp and powerful your favorite tracks will feel echoing through the room!

Troubleshooting Common Casting ‍Hiccups

Troubleshooting ⁢Common Casting Hiccups

It’s a bummer ‍when you’re all set to blast your favorite jams through your ‌Marshall Uxbridge speaker, and then, boom, your‍ YouTube casting takes a nosedive. First things first, check⁢ your Wi-Fi connection. More often than not, a shaky signal is the culprit here. Imagine trying to enjoy a movie in⁤ a‌ crowded café—distracting, right? If your wifi is the weak link, try moving closer to your router or restarting your modem. A simple reset can work ⁣wonders! Also, make sure both your phone or computer and⁤ the speaker are on the same network. If they’re not, it’s like trying ‌to call someone on a different continent. ⁢Yet another ​hassle? Try restarting your‍ speaker and casting device—it’s like a little morning stretch for your tech that can do a world of good.

Another common hiccup is outdated software lurking in the shadows, ready to mess up your vibe. Regular updates keep your devices running as smooth as ‍butter on toast. Don’t let that ⁤slip! Check for updates in both the YouTube app and your speaker’s⁣ firmware. Sometimes, a quick update can be the key to unlocking a seamless casting ⁤experience.​ If your device still refuses to cooperate, consider clearing the app cache. It’s like decluttering your closet; once⁤ you toss out the unnecessary stuff, you can actually find what‍ you need! If all else fails, uninstalling and reinstalling the app can breathe new life into your casting capabilities. Following these steps usually helps in keeping the good times rolling while enjoying your favorite tunes.

Insights and‌ Conclusions

So there you have it! Casting your favorite​ YouTube videos to your Marshall Uxbridge speaker doesn’t have to be a Herculean task. With just a few simple steps, you can elevate your listening experience and fill your space with booming sound that ⁢makes every beat come alive. Imagine kicking back with your friends, letting the music flow while nostalgia takes over—the memories are going to ‌hit differently when your soundtrack is blasted⁤ through that iconic speaker.

Now it’s your turn to unleash the magic. Whether ‍it’s a late-night jam‍ session or an afternoon chill-out, ‍your Uxbridge is ready to transform any moment into something special. So go ahead and crank up those playlists, ⁤discover new artists, or revisit old favorites. And don’t forget⁣ to share the tech-savvy love—let your ⁤friends in on the secret of effortless casting. Happy‌ listening, and may your days be filled with great‍ tunes and even better vibes!

Unlocking YouTube: The Best Adblockers for June 2024!

Hey there,‍ fellow YouTube enthusiasts! If you’re ‌anything like me, ​you love diving deep into those crazy cat videos, DIY hacks, or binge-worthy tutorials that can ⁢feel like⁤ a rabbit hole ⁤you ​never ‍want ​to escape. But let’s be real for a second—nothing kills ​the vibe⁢ quite like an unexpected ad popping‌ up right when you’re in ⁣the groove. Ugh, right? It’s like being served a delicious slice of ⁤pizza and someone plopping a pineapple on it at the last second (no offense ⁤to pineapple lovers!).

Well, worry not, my digital friends! In this article, we’re diving into ‍the world of adblockers—your⁣ trusty sidekicks that ⁤can help you reclaim‌ your viewing‍ experience. With ⁤June 2024 ⁤just around the⁣ corner, it’s time to unlock the full‌ potential of YouTube without those pesky interruptions. So,‌ grab​ your‍ virtual toolbox, and ​let’s ‌explore the best adblockers that will keep your⁤ streaming smooth and your ⁢content uninterrupted, making ⁢your ‌YouTube ​journey more enjoyable than ever. Ready to hit⁤ the play​ button?⁤ Let’s get started!

Exploring the Adpocalypse: Why YouTube Needs an Adblocker in Your Life

Let’s be real, navigating through YouTube ‌can sometimes feel like trying to swim through ⁤a sea of ads. The‍ constant⁢ interruptions can throw off your groove, whether you’re vibing to your favorite ⁢tunes or catching up⁣ on⁤ the latest trends. That’s where‌ adblockers swoop in like superheroes in pixelated⁢ capes! When you’re a few minutes⁤ into a⁢ video‌ and‍ suddenly hit with another ad, it’s like hitting a ⁣wall. Wouldn’t it be great if you could​ just watch‍ without the drama ⁤of waiting⁣ for those⁢ pesky ⁢30-second ads to finally ⁢disappear? ⁣An adblocker acts as⁤ your personal bouncer⁤ at the door, keeping the unwanted distractions out and letting you enjoy uninterrupted content.

But wait, there’s more! Adblockers ⁤not​ only enhance your viewing pleasure but also boost ‌your ​privacy online.​ Think of ‍it as installing tinted windows ⁢on your car;‍ it‌ keeps prying eyes from ​seeing‍ inside. By blocking trackers that collect your ‌data, ⁢you can cruise through YouTube knowing your information is more secure. Many adblockers come equipped with ​features ⁣that let you customize what​ types of ads you want to see—or even ⁢better, stop them altogether. So, ⁣let’s dive into the options out there ‍and find the perfect ⁢match⁢ for​ your YouTube experience.⁤ You’re‌ just a click away from a distraction-free life!

Exploring the Adpocalypse: Why YouTube Needs an Adblocker in Your Life

The ⁣Top Players in the Adblocker Game: Finding Your Perfect Fit

When ‍diving into the‍ world of adblockers, it can feel⁢ a ⁣bit overwhelming, right?⁤ With so many​ options out ‌there, how⁢ do you decide which one is​ the ⁣golden ‍ticket? Some blockers work wonders on YouTube, effectively‌ silencing those pesky ads that pop up at ​the most inopportune moments, while others might leave you ​feeling like you’re still stuck in commercial limbo. It’s all about personal preference. Do you ‍want something lightweight that won’t ⁤hog your​ computer’s resources, or are you after more ⁢robust features like customizable filters and whitelisting options? Each player in ⁢this game⁤ brings ‌its own ‌flair, so you’ll want ‍to think‍ about ‌what fits your ⁢browsing style.

Let’s take a peek at some ‍of the top contenders:

  • AdBlock Plus: Known‌ for its ⁤user-friendly interface‌ and flexibility, it’s a popular choice‌ among YouTube enthusiasts.
  • uBlock Origin: ‍A lightweight option ​that’s ‍infamous for solid performance. Minimal impact on your system does not mean minimal effectiveness!
  • Ghostery: ⁢Offers not just ad-blocking but ⁣also ​great privacy features, making sure your online habits stay⁢ your⁢ business.

While ‍it’s tempting to just go with the top-rated ⁣option,​ it’s worth ⁢considering what each can do for ‌your specific needs. Think of it like trying⁢ on ⁣shoes—what fits best for⁢ one person might be a total miss for another. Explore, experiment, and soon ​enough, you’ll be enjoying uninterrupted streaming bliss.

The Top Players in ‍the Adblocker Game: Finding Your Perfect Fit

Beyond Ads: How Adblockers Enhance Your Overall Viewing Experience

If you’ve ever found yourself grumbling ‌through⁢ yet another ads break while trying to catch up on⁤ your favorite YouTube videos, you’re not alone. Adblockers⁢ swoop‍ in‍ like digital superheroes, creating a smoother viewing experience that makes⁣ binge-watching possible without the ⁣irritation⁣ of constant interruptions.⁣ Think of⁣ them as your personal gatekeepers, filtering out unwanted noise and allowing you to focus solely⁤ on the content⁣ you crave. With adblockers, it’s like having ⁤a magic remote that skips⁤ right to the good stuff, giving you back precious ​minutes that you can spend enjoying‌ the videos you love without the frequent jarring ⁤stops that ads create.

Moreover, ⁤adblockers don’t just bring tranquility to your viewing sessions;⁢ they can even enhance the overall performance of ⁣your browser. By blocking‌ all​ those pesky ​ads, your pages load faster ⁤and with less clutter, which means you’ll have‌ less wait time and more scroll time. ‌It’s akin to ⁤cleaning out a cluttered garage—you⁢ suddenly⁣ gain all ‍this newfound space and access to tools you forgot you even had! Consider it ​an upgrade ⁣to your YouTube experience where ‍you can engage more deeply‌ with the ⁢content creators, participate in chats, or simply relish the videos without feeling pressured by that timer counting down the‍ seconds till ‍the next ‍ad. It’s time to make your viewing a breeze!

Beyond Ads:​ How Adblockers Enhance Your‌ Overall Viewing Experience

Tips and Tricks for Maximizing ‍Your ​Adblocker Setup on YouTube

To ensure you’re getting‌ the⁣ most out of your adblocker while ​streaming on YouTube, it’s essential to tweak a few settings. First up, whitelist⁣ your favorite ​channels—this allows ⁢you to support creators you enjoy without ​ads getting ⁢in the way. ⁣You’ll still get to see their⁤ latest content without interruptions, making it a ​win-win!⁤ Next, make sure to⁤ regularly update⁣ your adblocker. ​Developers⁢ are constantly improving their ⁣tools to combat newer ad formats, and ⁤staying updated will keep ⁣you‍ one step⁢ ahead. If⁤ you’re ‌feeling adventurous, try out multiple adblockers.‍ Some work better ⁣with certain ⁤types of ads, so​ sometimes it’s worth testing a couple to see which one fits your viewing ⁢habits best.

Another handy trick is to explore the custom filter lists that many adblockers offer. These lists can block specific ‌types of ads or even entire categories!⁢ For YouTube, you might find lists that ‍target video overlay ⁣ads or sponsored segments. ⁣You ⁤can also adjust your browser​ settings to clear your cookies often; this‌ can help ⁢reset tracking data, ‌which in turn may lead to⁣ less personalized (and annoying) ads popping up. Lastly, ​don’t forget that using a⁣ privacy-focused browser can enhance your​ adblocking experience. Browsers⁣ like Brave and Firefox offer ​built-in adblocking features that ⁢can provide another⁤ layer​ of freedom while you ⁤binge-watch your ​favorite videos.

Tips and Tricks for Maximizing Your Adblocker⁣ Setup on⁢ YouTube

To Wrap‍ It Up

And there you have it, folks! You’re​ all ‌set to transform your ⁣YouTube experience ⁤with the best ad blockers for​ June ⁤2024. It’s like having a VIP pass that lets​ you skip ⁣the lines and dive straight ⁣into the content ⁣you love.​ With these tools in your arsenal, you can say goodbye to those ​pesky interruptions and hello to endless ‌entertainment.

Remember, navigating YouTube doesn’t have to feel like running the gauntlet of ads; instead, ‌it​ can be a smooth ride filled with all​ your favorite videos. So why not give these ad blockers a shot and enjoy​ a seamless viewing experience? Keep sharing your insights⁢ and favorites in ⁤the comments – we all love a good tip⁣ or two! Thanks for tuning in,⁤ and‍ happy watching! 🎥✨

Switching to Dark Mode on YouTube: A Step-by-Step Guide!

Tired of⁢ straining⁣ your eyes while binge-watching your favorite videos​ on ​YouTube? Or maybe you just want to give your screen a sleek, moody makeover? Switching to Dark Mode‍ on‌ YouTube isn’t⁤ just about ⁣aesthetics; it can be easier on the eyes during those late-night viewing sessions and can help ⁢save battery life on ⁣mobile devices. Whether ‌you’re a die-hard YouTube fan or just diving ⁣into the world of video streaming, setting ‍up Dark⁢ Mode is⁣ a breeze. In this step-by-step guide, I’ll walk you through the process‍ in no time. So⁢ grab your popcorn,​ and let’s dim those lights!
Embrace the ‍Darkness: The Benefits of Dark⁢ Mode on YouTube

Embrace the Darkness: The Benefits of Dark Mode on YouTube

Switching‍ to dark mode on YouTube​ isn’t just a⁤ trendy ​aesthetic⁤ choice; it’s like slipping into your favorite pair of cozy pajamas after a long‌ day. The benefits ‍go beyond just ​looking cool. For starters, it ⁤reduces ⁤eye strain—especially for ⁢those late-night‌ binge-watching sessions‌ when all you want is to‌ enjoy your favorite videos without ‌the blaring⁤ brightness. Think of‍ dark mode as a ⁤comforting shadow that softens ⁤the harsh glare ⁣of a brightly lit ‌screen. Plus, it can actually help​ extend⁣ your ‍device’s battery life, especially on⁢ OLED screens,‌ since darker pixels use less power. Who doesn’t ⁤want to get a little extra‌ juice out ​of their gadget?

There’s also a psychological aspect to this switch. Dark‍ mode can create a more‍ immersive ⁤experience, transforming the way you engage with content, much like donning ​noise-canceling headphones to ⁣drown ​out ‍distractions. Imagine losing yourself in a captivating documentary ‌or your​ latest ⁢obsession ‌without ‍the distractions of glaring white backgrounds. With ‍ enhanced focus and a sleeker appearance, it feels ‌like ‍you’re stepping into a theater rather than ⁢just scrolling through a⁤ feed.‍ So, why not⁣ give your eyes‍ a break and elevate your viewing‌ experience? Embrace the‌ darkness; it might just change the way⁣ you see ⁤YouTube⁢ forever!

Navigating Your Way: Easy Steps‌ to Activate Dark Mode

First up, making that​ switch to ⁢a cozy dark mode on YouTube is as easy as⁢ pie! Begin by ‍launching the app ⁣or visiting⁤ the YouTube website on your device. If you’re tucked away on a mobile device, ⁣just tap on your profile ‍icon in the ​upper right corner.‍ Now, ‍that little⁤ gear icon you see? Give it ⁣a tap! Within this settings‌ haven, look for the ‘Appearance’ ⁤ option. It’s like a hidden treasure chest waiting to unveil a sleek‌ new look for your viewing experience. Choose ‘Dark Theme’, and BAM! The interface‍ will transform as if you’ve just pulled a curtain over⁢ a bright spotlight, letting you dive ⁣into your favorite videos without the glare.

For those using desktop, the process​ is just as breezy. ‌Click on your profile⁢ picture, and venture down to ‘Appearance’. You’ll see the same friendly ‘Dark Theme’ option. There’s something to​ be said about watching those late-night videos without ⁤straining your eyes,⁢ right? And ⁤if you ever change ⁤your mind, switching back is ⁤just a⁣ few clicks away. Whether ‍you’re in ⁤a dark ‍room or want to protect‍ your ⁣peepers during a binge-watch, dark mode has your back!

Customization Made Simple: Tweaking Your YouTube Experience

Customization Made Simple: Tweaking Your YouTube⁤ Experience

One of the coolest features‍ that ​YouTube offers is the ability to customize your viewing experience by⁢ switching to Dark‌ Mode. If you’ve ever ​been glaring at a bright screen late at night, you ‌know how comfy it can be to have a⁤ more⁤ subdued ​brightness. Switching to Dark⁤ Mode isn’t ​just a‌ nice aesthetic;⁤ it can also reduce eye strain and save battery life on your devices. Here’s how⁢ you can transform your YouTube interface with just ​a⁤ few clicks:

  • Desktop: Click ‍on your profile picture at ‍the ⁢top right corner, go to ​”Appearance,” ⁤and select “Dark theme.”
  • Mobile: Open the YouTube ⁤app, tap on your profile‍ icon, select “Settings,” and ‍then choose “General” ‍to ‌toggle the “Dark theme” option.

After switching, you’ll ​notice a soft, sleek ‍look that⁣ complements ⁤your videos‌ beautifully. Here’s a quick⁣ comparison of how your screen will change:

Before Dark Mode After Dark‍ Mode
Bright⁣ white background Deep, soothing dark‍ background
High⁢ glare Lower glare, easier on the eyes

With that simple toggle,⁣ you’re not just changing‍ colors—you’re enhancing your whole experience. Whether ‍you’re binge-watching your favorite⁣ series or catching up on tutorials, the difference in ⁤comfort will blow your mind! Plus, you’ll look pretty cool while doing it.

Bright Ideas: ​Tips for Optimizing‍ Your Viewing in ⁣Dark Mode

Bright⁣ Ideas: Tips for Optimizing Your Viewing in ​Dark Mode

Using dark mode can ⁣be ‍a total⁢ game-changer‍ for your⁣ YouTube experience, especially during⁣ late-night binge-watching sessions. To make the⁣ most of ‌this sleek interface, ⁣consider these bright ideas: Keep your screen brightness adjusted to match your surroundings. Too‍ bright of a screen‍ could strain your eyes, while⁤ too dim can make it hard to watch those exciting videos. You might also want to invest in a quality pair of blue-light-blocking glasses; they help reduce eye ‌fatigue and make those dark-mode‌ marathons even more enjoyable!

Another tip? Customize your interface by choosing the right contrast levels. You can switch up the contrast settings on your device to enhance the clarity of subtitles and video details. You’ll ⁣be surprised ⁣how little ⁤tweaks can make a big difference. For instance,⁤ here’s a quick table to ​illustrate how ⁣different color schemes can impact ‍your viewing experience:

Color⁤ Scheme Effect
High Contrast Improved clarity for subtitles
Medium Contrast Balanced for general viewing
Low Contrast Soothing for longer sessions

The Conclusion

And there you have it! Switching⁣ to dark mode on YouTube is as easy as pie—just⁢ a few taps‍ and ⁤swipes, and‌ you’re well on⁢ your⁣ way to a more ⁣soothing viewing experience.⁤ Whether you’re binge-watching your favorite shows ⁤or just scrolling through cat videos at midnight, dark mode can ​help reduce eye strain and give your ‍screen a sleek look.

So why not give it a‍ whirl? Dive ​into the darkness, and let those bright colors pop even more against the cozy backdrop. Remember, it’s not just⁢ a visual⁤ upgrade; it’s a whole new vibe. If⁣ you’ve got any ⁢more tips ‌or tricks up your sleeve, ‌don’t hesitate to share⁢ them in⁤ the comments—after all, we’re all here to enjoy⁣ our YouTube ⁣journey together. Happy‌ watching, ‌and may your dark mode experience be as smooth as your favorite playlist!