Imagine you’re sprawled out on your couch, ready to dive into the latest viral video that everyone’s raving about. But wait—it’s in a language you don’t understand. Frustrating, right? You’re not alone! With billions of videos uploaded in countless languages, the world of YouTube can feel a bit like a vast ocean where only a few understand the waves. That’s where translating comes in. It’s like holding a universal key that unlocks the door to cultural insights, humor, and stories that might otherwise slip right through your fingers. In this article, we’ll explore how translation not only bridges the language gap but also enriches our global community, making every video accessible to anyone, anywhere. Ready to dive in? Let’s break down the barriers together!
Unlocking Global Access to Youtube Content
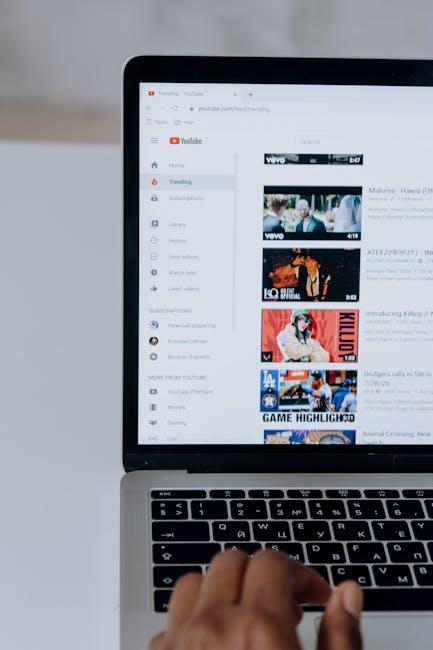
Imagine scrolling through an endless sea of videos on YouTube and suddenly hitting a barrier—language. It’s like finding a beautiful treasure chest, only to realize you’ve lost the key. But what if you could unlock that treasure trove, gaining insights from creators around the globe? That’s where translations come in. By translating video content, you can dive into diverse cultures and ideas that you might never encounter otherwise. It’s almost like taking a global road trip without ever leaving your couch!
Benefits of Translating YouTube Content:
- Bridging Language Barriers: Understanding different languages opens doors to connect with creators and their audiences.
- Cultural Exchange: Translations provide a deeper appreciation of diverse perspectives and experiences.
- Enhanced Learning: Educational content becomes accessible, empowering viewers to grasp new concepts from anywhere.
- Wider Reach: Creators can expand their audience base, making their content available to eager fans in various regions.
| Language | Number of Viewers | Popular Content Types |
|---|---|---|
| Spanish | 500M+ | Vlogs, Tutorials |
| Mandarin | 1B+ | Entertainment, Drama |
| Hindi | 600M+ | Music, News |

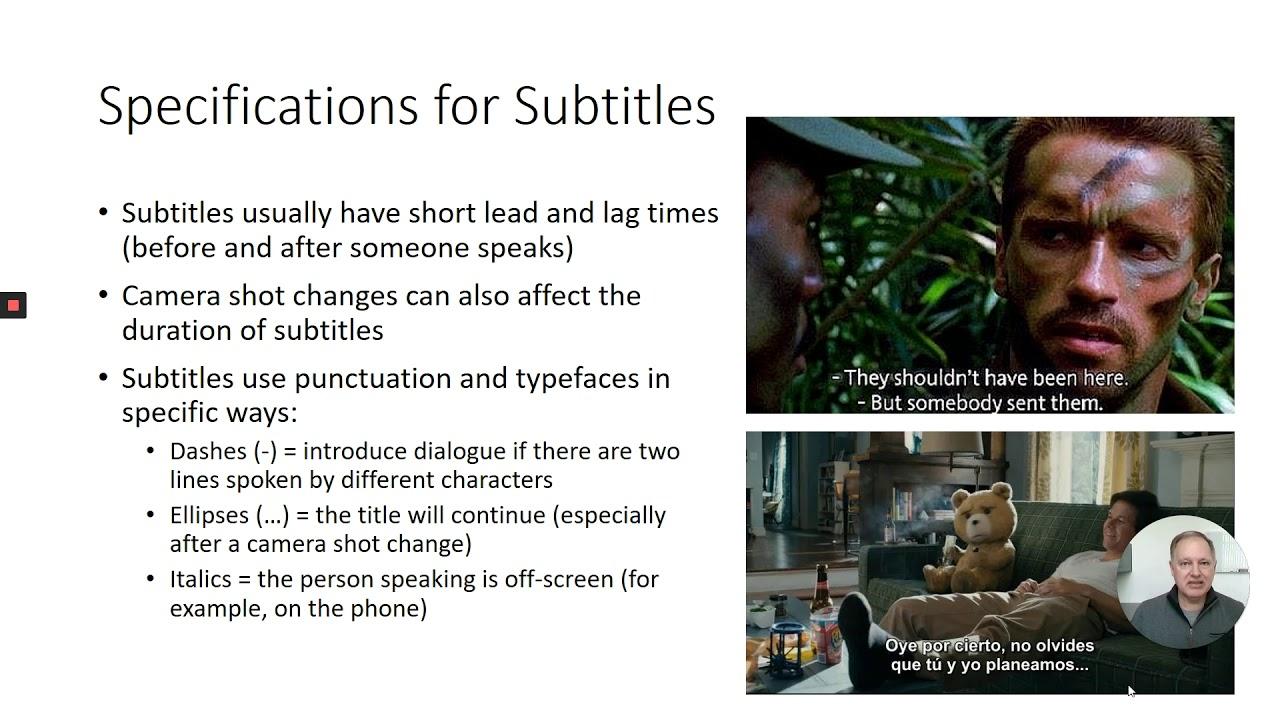
The Power of Subtitles in Bridging Language Gaps
Subtitles are like cool translators whispering in your ear, effortlessly helping you bridge language gaps. Imagine flipping through different cultures with just a click! They transform a video that might feel alien into something familiar and relatable. With accurate subtitles, you’re not just reading words; you’re diving into conversations, jokes, and stories that make you feel part of a global community. Plus, they lend a clear voice to accents and dialects that might otherwise trip up your understanding. So, whether it’s a thrilling documentary from Brazil or a light-hearted DIY video in Japanese, subtitles open the door to all of it.
And let’s talk about accessibility. Subtitles aren’t just for those who speak different languages; they’re a game-changer for the hard of hearing, allowing everyone to enjoy content on an equal footing. With captivating subtitles, you can:
- Enhance comprehension: Catching every detail becomes a breeze.
- Boost engagement: Boosting viewer retention because who doesn’t love a good story?
- Promote inclusivity: Make your content inviting for everyone.
Embracing subtitles is like offering a warm welcome mat to viewers from all walks of life. It’s like hosting a dinner party where everyone’s invited, and no one has to sit at the kiddie table! With this shared experience, we can turn simple videos into global phenomena.

Choosing the Right Translation Tools for Seamless Viewing
Finding the perfect translation tools can feel like searching for a needle in a haystack, but the good news is, there are options out there that make the process smoother than you’d think. Real-time subtitle generators and AI-powered translation apps can turn your viewing experience from frustrating to fantastic. Here’s what to look for:
- Accuracy and Context: Ensure the tool can grasp idiomatic expressions and cultural nuances.
- User-friendly Interface: Choose one that’s easy to navigate, so you spend more time enjoying content instead of wrestling with settings.
- Compatibility: Make sure your choice works well across various devices and platforms.
Excerpting a video’s charm beautifully relies on these factors.
Once you’ve identified the right tools, the next step is to seamlessly integrate them into your viewing routine. Playback options play a big role here. Imagine you’re watching a thrilling documentary—wouldn’t it help if you could switch languages on-the-fly? Additionally, consider community tools, where fellow viewers share their translations or insights, enhancing your understanding. Here’s a quick overview of some recommended tools:
| Tool Name | Main Feature | Best For |
|---|---|---|
| Google Translate | Instant translations | Quick fixes |
| Amara | Subtitles editing | Collaborative projects |
| Kapwing | Audio to text | Content creators |
Embrace the right tools, and you’ll unlock a universe of knowledge that’s just a click away!

Tips for Engaging with Multilingual Audiences on YouTube
When diving into the vibrant world of multilingual audiences on YouTube, the key lies in making your content feel accessible and inviting. One of the easiest ways to achieve this is through subtitles. By adding captions in various languages, you’re not just translating words; you’re inviting viewers from different backgrounds to connect with your message. It’s like opening a window for people who would have otherwise stood outside looking in. Consider employing platforms that auto-generate subtitles but don’t forget to refine them! The nuance of language can sometimes get lost in translation, so a little human touch goes a long way. You can also encourage community-driven translations. Let your viewers contribute by adding translated captions, fostering a sense of belonging and engagement.
Another nifty trick is to embrace regional references that resonate with local cultures. Instead of simply using the same examples, think about how to spin a story or analogy that makes sense for your international audience. For instance, if you’re discussing sports, mention local favorites rather than universally-known teams. This makes your content feel tailor-made, like you’re sitting across a table with your viewers, sharing a laugh over something that matters to them. Additionally, engage with your audience in the comments; ask for feedback or even what language they’d love to see next. This not only builds a robust community but also helps you understand the cultural preferences of your viewers—transforming every video into a truly global experience!
Final Thoughts
And there you have it! Translating YouTube videos opens up a universe of knowledge just a click away, showing us that language barriers are no match for curiosity. Whether you’re diving into intricate tutorials, entertaining vlogs, or thought-provoking documentaries, the ability to translate not only broadens our horizons but also connects us with diverse voices from around the globe.
So, the next time you stumble upon a captivating video in a language you don’t speak, don’t just brush it off—embrace the challenge! With the right tools and a sprinkle of determination, you can unlock its treasures. Just think of it as hunting for hidden gems; every translation is a new adventure waiting to be explored. Remember, understanding a different culture enriches your own, so dive in and happy watching! Each click brings you closer to a world that’s filled with stories, ideas, and creativity that deserve to be shared.