Finding the Perfect YouTube Resolution for Your MacBook Pro

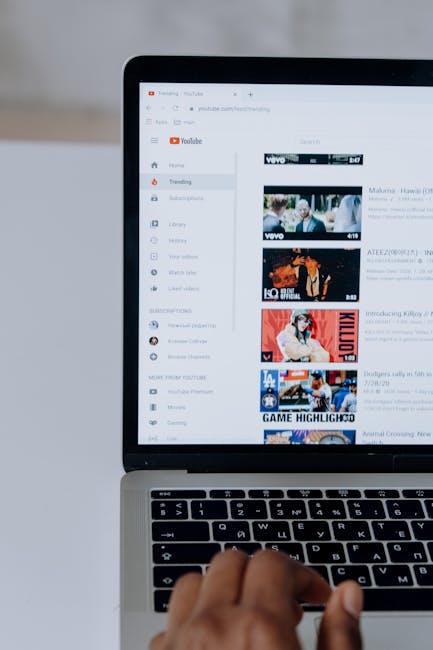
Picture this: you’re nestled comfortably in your favorite spot, ready to⁢ dive into a binge-watching ​session on your MacBook‍ Pro. You fire up YouTube, but suddenly, you’re hit ‍with a​ frustrating barrage of pixelated images and buffering ⁢circles.⁣ Cue the eye-roll! Finding the perfect YouTube resolution for your ​MacBook Pro can feel like searching for a ‍needle in‍ a⁤ haystack; it seems simple, but⁢ there’s so much more⁢ to it. From ‌shimmering 4K glory to⁤ standard HD,‍ getting the​ right‌ resolution not only refreshes your viewing​ experience but also ensures that ⁤your laptop is⁢ running at ⁢its prime. ⁢So, let’s unravel ⁢the mystery behind those little settings ⁣and get ⁣you watching ​your favorite videos in all their high-definition brilliance without‍ a hitch!

Mastering YouTube Resolution ⁢Settings on⁣ Your MacBook Pro

Mastering YouTube Resolution Settings on Your MacBook Pro
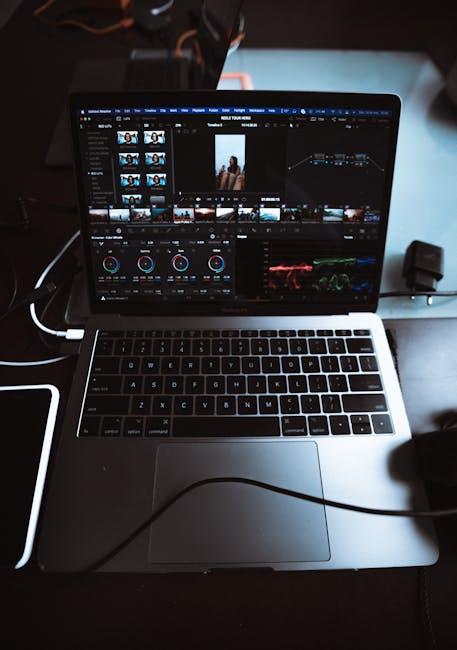
Getting ⁤the right resolution for your ‍YouTube videos on a MacBook Pro is ⁢like finding​ the ‌sweet spot in a⁤ Goldilocks story—too low,‍ and everything looks like a pixelated mess; ⁤too ‌high, and ‌you‌ might end up ‌with buffering that‍ drives you up a wall. To start ​off, you’ll want​ to check your screen resolution. Head over to System Preferences and ‌click on Displays. Here, you⁢ can see options like Built-in Retina Display that offer resolutions like 1440p or⁣ even 4K, if your model supports ⁢it. This choice matters because a sharper resolution‍ can⁤ enhance your viewing⁢ experience,‌ especially for ​detailed content‍ like tutorials and nature documentaries.
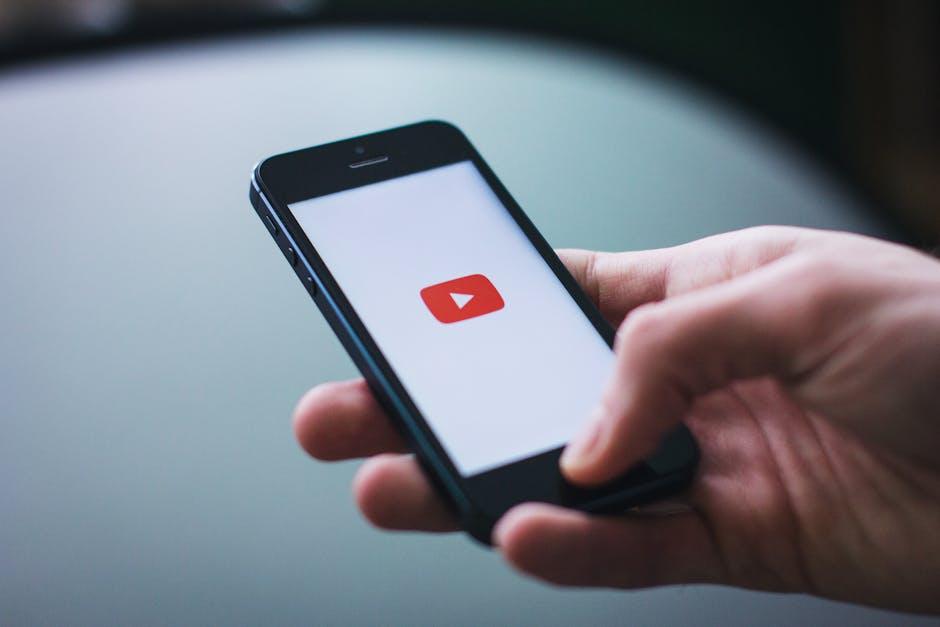
Now, when it comes to adjusting‌ YouTube’s resolution while you’re⁤ streaming, ⁢it’s as easy ⁢as pie. Once ⁤you’ve clicked ‍on the video you want to watch,‌ hit‌ the gear‌ icon for settings. Under Quality, you’ll find options‍ ranging from 144p ​to 4K, depending on what’s ⁢available for that specific ⁢video. Selecting the right one can ⁢be a game-changer! Here’s a ‍quick breakdown of⁤ preferred settings:

Resolution Best ‌For Recommended ⁣Internet Speed
144p Low bandwidth connections 0.5 Mbps
720p Standard quality on smaller screens 5 ​Mbps
1080p HD viewing on laptops 10⁤ Mbps
1440p High-quality videos 20 Mbps
4K Ultra HD experience 25 Mbps+

So, when you sit back to enjoy your next video binge, take⁢ a⁣ moment​ to choose the ⁤resolution that fits your needs. It’s like picking the right wine for dinner—getting that perfect match⁢ makes all the difference.

Decoding Resolution: What Do All Those Numbers Mean?

Decoding Resolution: What Do All Those Numbers Mean?

When diving⁢ into the⁢ world of ‌YouTube, ⁢those numbers you see next to the resolution options can feel like⁢ a secret language. Let’s break it​ down! Typically, you’ll come⁣ across​ resolutions like ⁤ 480p, 720p,⁣ 1080p, and the fancy newcomers like 4K. Each of these represents a different level of visual quality, essentially⁢ determining how crisp and clear your video⁢ will look⁣ on your screen. For⁢ instance, 480p ⁣won’t blow your mind with details, while 1080p ⁣gives a strikingly sharp video‍ that makes your favorite movies pop.⁢ But don’t forget about that aspect ‌ratio—commonly 16:9 for most videos—because it affects how the video ‍fits on⁣ your screen just⁢ like a‌ well-tailored suit.

Choosing the right resolution for your MacBook Pro ⁤really⁣ boils down to‍ a few key factors. First up, think about⁤ your internet speed. If you’re straddling that fine line⁣ between minimal buffering ‍and full ⁤HD, you’ll⁣ want⁣ to keep your resolution at 720p ⁤for ‌a smoother experience.​ Don’t let ‍that autoplay surprise you! Here’s a quick table ⁤to‍ help‍ you visualize the trade-offs:

Resolution Quality Recommended Speed (Mbps)
480p Standard Definition 2-3
720p HD 5-10
1080p Full‌ HD 10-20
4K Ultra HD 25+

consider​ your Mac’s display capabilities. If you’ve got one of⁤ those dazzling Retina⁣ displays, you’ll ​want​ to leverage that⁤ gorgeous screen real estate. Think of it as ‌bringing the cinema ⁤experience right to your lap. ‍Limiting yourself ⁢to‌ subpar ‍quality is like attending‍ a concert from‌ the parking lot—you’re missing out on the ⁤full experience! With ‌these insights, you’re now ready to ‌optimize‌ your ⁢viewing pleasure!

Optimizing Your Viewing Experience‌ with the Right Resolution

Optimizing Your Viewing ‌Experience with the ‌Right Resolution

When it comes‌ to streaming ​videos on your MacBook Pro, the⁢ resolution can make or⁢ break your experience.⁢ Imagine sitting down to⁢ watch your favorite music video in standard definition; it’s like ​trying to appreciate​ an‌ art ​masterpiece through a⁣ foggy window! ‌To‍ make the most​ of your high-resolution screen, you’ll want to tweak the settings for ‍the ​best possible⁣ visuals.‍ Consider experimenting with these popular resolutions:

  • 480p ⁣ – Good for faster loading,⁣ but ‌you’ll sacrifice⁣ clarity.
  • 720p – A sweet‌ spot for decent⁢ quality without too much⁤ struggle on slower connections.
  • 1080p – ⁤Ideal for enjoying crisp visuals; it’s like getting front-row seats​ to a concert.
  • 4K – If your MacBook can handle it, this⁤ resolution is like the cherry on top—vibrant colors⁤ and‌ stunning detail!

But it’s not just​ about ​the numbers; it’s also about ​what your ⁣eyeballs can⁤ handle. Streaming in 4K might be ‌tempting,⁢ but it requires a robust internet connection—streaming in high-res while your ⁣Wi-Fi is coughing up ‌excuses can lead to ‌buffering disasters. Here’s a simple⁢ table ‍to keep track of how ‌different resolutions affect ⁣your ‌viewing experience:

Resolution Ideal For Connection Speed Needed
480p Basic viewing 1 ⁢Mbps
720p Casual watching 3‌ Mbps
1080p High-quality experience 5⁤ Mbps
4K Top-notch clarity 25 Mbps

Troubleshooting Common ⁢YouTube Resolution Issues on MacBook Pro

Troubleshooting Common YouTube Resolution Issues‍ on MacBook Pro

‍ ⁣When you’re on a MacBook Pro‌ and trying to catch the latest video sensation ​on YouTube, it’s a buzzkill ⁣when the resolution isn’t cooperating. First off, check your internet connection—slow speeds can turn ‍a high-definition experience into a grainy mess faster than you can say “buffering.” ​If⁤ you’re streaming‍ over Wi-Fi, try switching to⁣ a wired ‌connection or‌ moving closer to your​ router. It’s like calling for ‌backup when your mission’s getting tough—sometimes,⁢ you just need a little boost to get the job ‌done!

‍ If the connection isn’t the issue, dive into YouTube’s settings. Click on‍ the gear icon⁤ and see ⁤what resolution is selected.​ It could be stuck on a lower setting, leaving you⁣ with that dreaded pixelated ‌view. Choose a higher‌ resolution, like ‌1080p or ⁢4K, but remember, going too high‌ might lead to⁣ buffering if your connection can’t handle⁢ it. ⁣Also, clear your browser cache—think of it as decluttering ⁤your ⁢workspace; sometimes you have⁢ to toss out the old to ‍make room for the new. Don’t forget to check ⁣your Mac’s display ‌settings, ⁤too;‍ ensuring everything’s set up correctly can work wonders. Here’s a quick checklist⁣ to‍ guide you through:

  • Check internet speed: ⁤ Test with⁢ a speed checker.
  • Adjust YouTube settings: ​Select the appropriate resolution.
  • Clear browser ⁤cache: Eliminate unwanted files.
  • Inspect display settings: Make sure they match your‌ video’s quality.

To Wrap It Up

Finding ‍the right YouTube resolution‍ for your MacBook Pro is like⁣ tuning a‌ guitar—get it just right, and your viewing experience hits ‌all the right notes. ⁤Whether you’re binge-watching your ‍favorite series or diving​ deep ⁢into tutorials, those pixels deserve to shine like stars on​ a clear night.⁢

So, experiment a little! Flick through those ‌settings and ⁣see how ⁣each ⁤resolution dances across⁢ your screen.⁢ Remember, it’s not⁣ just about crystal clarity⁣ but also what works best with your ​internet speed and ⁢battery⁣ life. So toss on your⁤ comfy headphones, kick back,⁤ and enjoy the ​show, knowing ⁣you’ve chosen‍ the perfect settings for⁢ your viewing⁤ pleasure.

Happy streaming!

Unlocking YouTube: How to Check a Video’s Bitrate Easily

Alright, let’s dive into the world ⁣of YouTube magic! Have you ever streamed a video and wondered ⁤why some look razor-sharp while others seem muddier than a⁤ rainy day? Well, it often comes⁤ down to one secret ingredient: bitrate. You might be scratching your head, thinking, “What the ​heck is bitrate, ⁣and why should I care?” Hang⁣ tight, because today, we’re unraveling that⁤ mystery and ​showing you just how easy it is to check ⁢a video’s bitrate. ‌Whether you’re a budding content creator wanting to optimize your uploads or a curious viewer keen to understand video quality, knowing how to check bitrate will light up your ‍YouTube​ experience. So, grab your favorite ‌snack, and let’s explore ​how you can unlock the nuances of video quality with just a few simple clicks!
Unlocking YouTube: ‍How to Check a Video's Bitrate Easily

Understanding Bitrate: The Secret Sauce Behind Video Quality

Bitrate is ​like the magic ingredient in⁣ your⁤ favorite recipe ‌for video quality. Think of it as ‌the amount of⁤ data that gets packed into each second of video. The higher the bitrate, the ⁤more information is‌ crammed into ⁢those precious frames, which usually translates to a crisper and ‌more ‍detailed image. It’s similar to how a painter uses rich, vibrant colors to bring a canvas to life. So, whether you’re streaming the latest blockbuster or catching up on cat videos, a good bitrate ensures ⁤you’re⁢ getting the best visual feast.​ But beware! Not all videos are created equal, and this is where bitrate comes⁤ into play like a stealthy ninja behind the scenes, influencing everything from clarity to loading times.

To really appreciate how bitrate impacts⁣ your viewing experience, consider these key points:

  • Encoding Formats: Different formats, like H.264 and H.265, handle bitrate differently, affecting quality.
  • Resolution Matters: Higher resolutions, like 4K, typically require higher bitrates to maintain quality.
  • Network Conditions: If your connection is shaky, even a‍ high-bitrate video may not stream ⁤smoothly!

Imagine you’re trying to enjoy a gourmet meal, but it’s served on a paper ​plate. You wouldn’t get the full experience, ⁤right? The same goes for video. A balanced bitrate makes sure you savor every ‍detail of your ‍visual content,‍ making your viewing experience much more enjoyable!

Easy Steps to Check ​Bitrate on Any YouTube Video

Ever wondered what makes a YouTube video run so smoothly or, on the flip ​side, why some seem to lag? ⁢Well,​ that’s where bitrate comes⁣ in. It’s the amount of data that’s processed in a given time frame when ⁤you’re watching a video. Generally speaking, higher bitrates mean⁤ better quality—like upgrading from a cozy ​couch to a fancy cinema seat! If you’re curious to dig into the nitty-gritty of any YouTube video’s bitrate, it’s super simple. ‌Just follow these easy steps:

  • First, ​play⁣ the YouTube⁢ video you’re interested ⁢in.
  • Right-click on the player (or tap ‌on the three⁤ dots in the top right corner if you’re on mobile).
  • Select‌ “Stats for Nerds” from the dropdown menu.
  • In the stats‌ window that pops⁢ up, look for the “Current Bitrate” line—it’s ‍usually measured in kbps (kilobits per second).

And there you have it! By ⁤using this quick little​ trick, you can easily keep tabs on the quality of the videos you⁤ love. Want a quick‍ glance at ‍how bitrates vary across different platforms? Here’s a simple breakdown ⁢to ​give you an idea:

Platform Typical Bitrate (kbps) Quality Level
YouTube 480‍ – 4000 SD to 4K
Netflix 500 – 2500 SD to 4K
Twitch 300 – 6000 SD to 1080p

Isn’t it ‌fascinating to see how various platforms stack up? Now you’ve armed yourself with​ all the knowledge to decode video quality like a pro!

Easy Steps to Check Bitrate on Any YouTube Video

Why Bitrate Matters for Your ⁤Viewing Experience

When you dive into the world of online videos, especially on platforms like YouTube, the ‍concept of ⁣bitrate can feel a bit like a secret handshake. It’s ⁤that ⁣behind-the-scenes hero that plays a ⁣huge role in determining ⁤how smooth, sharp, and downright enjoyable your ‍viewing experience ⁤will be. Think of bitrate as ⁣the lifeblood of video quality—it’s all about‌ how much data is‍ transmitted‍ each⁢ second during playback. Higher bitrates mean better ‌quality, delivering⁣ those crisp visuals and clear sounds that​ make you feel like you’re right there in the action. On the​ flip side, a low bitrate can leave you grappling with pixelation, buffering, and sound that might as well be coming from a tin can. Who wants to struggle through that when there are so many amazing videos to watch?

But, here’s the kicker: checking a video’s bitrate is super easy‍ and totally enlightening! You can ‌actually unlock a treasure trove of⁢ knowledge about what makes your favorite clips tick. Here’s a simple breakdown of why it matters for⁢ your viewing pleasure:

  • Picture Quality: Good bitrate means sharper⁤ images with vibrant colors.
  • Sound Clarity: Higher⁤ rates lead to rich, immersive​ sound that brings ‌videos ‍to life.
  • Streaming Stability: A steady bitrate keeps the flow smooth, reducing those pesky interruptions.

So, whether you’re a casual viewer or ⁢a die-hard‍ audiophile, understanding bitrate can totally transform how you enjoy your content. Knowing how to check it can ⁢help you make informed choices about which videos to dive into next, ensuring you always get⁤ that top-tier experience you crave!

Optimizing ​Your YouTube Experience: Tips​ for Better Streaming

When diving into the ocean of YouTube, it helps to have a⁣ sturdy lifebuoy in the form of optimized streaming. Imagine trying to​ watch a breathtaking travel vlog in the middle of a pixelated mess! By keeping an eye⁣ on the video’s ⁤bitrate, you’re setting yourself up for a much clearer and more enjoyable experience. Higher bitrate often means‌ better quality, especially when those ⁢videos are bursting with colors and action‍ sequences. So how do you check this hidden gem? You can ​often peek behind the curtain of video settings ⁣or use third-party tools to gauge the quality lock and ensure your streaming runs smooth ⁤as butter. No one wants to be buffering while the best⁢ part is⁤ happening!

Don’t let environmental factors mess with your vibe! Your Internet speed plays a crucial role in your YouTube experience, and understanding your video’s bitrate can be a game ​changer.‌ You want that sweet spot where quality meets stability, kind of like a ⁤perfect dance balance. ‌Here’s a quick look at average bitrates for various video resolutions, so you can gauge what to expect when​ you hit play:

Resolution Recommended Bitrate (Mbps)
480p 2.5 – 5 Mbps
720p 5 – 10 Mbps
1080p 10 – 20 Mbps
4K 25 – 50 Mbps

By knowing these numbers, you can tweak your settings and make⁢ sure that you’re not left in the digital dust when streaming your favorite content! Who wouldn’t want to watch videos that look as stunning as the movie theater ‌experience, right? So, get in there and optimize!

Optimizing Your⁢ YouTube Experience: Tips for Better Streaming

In Retrospect

And⁢ there you have it! We’ve unraveled the‍ mystery of checking a video’s bitrate on YouTube, making it easier than ever to ‍tweak your viewing experience. Whether you’re a casual browser just wanting to ensure smooth streaming or a budding creator keen on perfecting your content, understanding bitrate can make a world of difference.

So, next time you hit play,⁤ why not take a moment ​to explore⁣ these tips? ⁢After‌ all, knowing the behind-the-scenes stuff is like having the ultimate backstage pass ⁢to the show. And who ⁢doesn’t love a little more control over their digital experience, right?

If you found this‌ guide helpful, don’t hesitate⁤ to dive deeper ⁣into the world‌ of video quality. There’s so much more to explore! Keep experimenting,⁤ keep learning, and remember—every click brings you one step closer to mastering the art of YouTube. ⁢Happy watching! 🎥✨

Banishing Smart Downloads: Control YouTube Music on Chromebook

Banishing Smart Downloads:‌ Take ​Charge⁣ of YouTube Music⁤ on ⁣Your⁣ Chromebook!

Hey⁤ there, music​ lovers! ‌If⁣ you’re a Chromebook user and a fan of YouTube Music,⁤ you’ve ⁢probably heard of those handy “Smart​ Downloads.” ‌They can seem like a blessing, automatically swooping⁤ in⁤ to snag your​ favorite tunes when⁤ you’re connected to Wi-Fi, right? ⁣But let’s be real: sometimes it ⁣feels a bit​ invasive, like ‌that one friend who just can’t⁣ take a hint when it’s time‌ to ⁤leave⁤ the party.⁤ Whether it’s downloading songs ⁤you didn’t want or eating up your precious‌ storage, these Smart Downloads can ​be⁣ more hassle than they’re worth. So, ‌how do you take back​ control⁣ and tailor your music experience to your liking?⁣ In this⁤ article, we’ll⁣ explore⁢ the ​ins and outs‍ of banishing⁣ Smart Downloads and making your ‌YouTube Music⁤ experience on Chromebook truly yours. So ⁤grab a cup of coffee,⁣ and let’s dive into ‍this harmonious journey together!

Embrace the Control: Turning‍ Off Smart‌ Downloads⁣ for a Personalized Listening ⁤Experience

Embrace ​the Control: Turning‌ Off Smart⁤ Downloads⁢ for a⁢ Personalized Listening Experience

If ⁢you’re anything ⁤like me, you love curating ⁢your playlist just the‌ way⁢ you want it—like assembling the perfect sandwich with all your favorite‍ fillings! That’s where turning⁣ off Smart Downloads​ comes in. Why let an​ algorithm decide ⁤what⁢ you listen ​to when you can handpick ⁢every track? By⁣ taking ‌control ⁤of your‍ music‌ uploads,⁢ you ⁣can ⁣ensure that ⁣every‌ song resonates with your mood. ‍Switching off this feature not only ‍saves⁤ you⁢ storage space on your ⁣Chromebook but also allows for a more personalized experience. It’s all⁢ about enjoying your tunes, ⁢one carefully selected⁣ song‍ at a time!

So, here’s how ‌you‍ can go​ about ‌it: ​ Simple Steps to ⁢Ditch‌ Smart Downloads:

  • Open‌ your YouTube Music app on your Chromebook.
  • Navigate to the settings⁤ menu ‌– it’s⁢ like finding the secret ⁣ingredient⁤ in your grandma’s ⁣casserole!
  • Look for the Smart Downloads option ⁤and toggle it off.

Once you’ve ​done ⁣that, you’re free! Enjoy the satisfaction ⁤of hand-picking your ‌musical journey ⁢without any surprises. ⁤No more random​ tracks showing up that⁣ just don’t spark⁤ joy. Now, ‌every song⁤ in your library will⁤ be a reflection of your unique​ taste!

Mastering Your Playlist: How⁢ to ⁤Manage Downloads on ⁤Chromebook with Ease

Mastering Your Playlist: How to Manage⁢ Downloads on Chromebook with Ease

Managing ‌your downloads⁤ on a Chromebook, ⁤especially when it comes to YouTube ⁢Music, can feel a bit like ‌untangling a​ ball of‌ yarn.⁣ But fear‌ not! ​The​ process​ doesn’t have to be daunting. Start by navigating to ​your​ YouTube‍ Music app where you‍ can easily control what’s ​downloaded⁤ and what ​stays in the cloud. If⁣ you want to ‌declutter your⁢ storage, simply‍ head to the settings ⁤and​ check out your downloaded tracks. You’ll find options to remove songs or ⁢albums with⁢ just ⁢a click, helping you keep ⁣your playlist streamlined and⁤ your Chromebook running smoothly.

Another ⁢neat ⁣trick⁤ to ‌keep‍ chaos at bay is ⁤to adopt a regular routine for managing⁣ your‌ downloads.‌ Set aside a‍ few minutes each week to review your music ‍library. This⁤ way, you can see what you’re ⁤genuinely ⁣jamming to and what’s just hogging space. ​Here​ are a few ⁤tips to consider during your download management session:

  • Evaluate​ your favorites: Are there songs⁣ you‍ haven’t listened to in ⁤ages?
  • Prioritize‍ playlists:⁣ Keep ‌your go-to playlists readily available while archiving others.
  • Sync⁣ smartly: Set your app to only download‍ songs ‌when connected to Wi-Fi‍ to avoid unnecessary ⁣data usage.

Navigating YouTube Music:‍ Tips ⁢for Enhanced ​Enjoyment and Seamless Playback

When diving into the ⁣world of YouTube ‍Music on⁣ your ⁣Chromebook, ‍getting ⁢a grip ‌on⁣ your listening experience can take⁤ it from just good to absolutely fantastic. Imagine this: you’re cruising⁢ through your playlist, only to find⁤ that ⁤it’s suddenly interrupted because of a download taking⁤ over. ⁢Banish those annoying smart downloads by adjusting your ‍settings! You can switch to manual downloads for a more ​curated ⁣listening experience. ‌This way, you’ll only have⁢ the tracks⁢ you‌ truly love available offline.⁢ Plus,‌ don’t forget about⁣ using the “Offline ⁤Mix” ⁢feature. It ​can help streamline⁤ what you enjoy most‌ while⁤ saving​ on‌ data. Why listen‌ to random tunes when‌ you⁤ can⁢ have‌ your favorites‌ right⁤ at your fingertips?

To further⁣ enhance⁤ your YouTube ‌Music experience,⁤ make ⁤the most of your playlists and explore⁢ the ⁣numerous⁢ features. Start⁣ by‌ creating themed playlists—think “Chill ⁣Vibes” or “Workout Jams”—to match ⁤your mood and activity. Also,‍ explore the “Discover” ​ tab; this will expose ‌you to ⁢fresh tunes tailored ‌just for you, based on your ⁢listening habits. For effective organization, consider using the “Like” button ‍to​ save ​tracks that resonate with you. If ⁣you’re ‍a fan of‍ live albums or ⁣exclusive tracks, keep⁢ an eye on ⁢artist ⁤profiles and regularly check for updates. By combining ⁢these strategies, you’ll not⁣ only enjoy seamless playback but also transform your ‌music experience into an engaging⁢ journey that‍ feels completely personal.

Unlocking⁢ Freedom: ‌Customize Your Music Experience Without ​Automatic Downloads

Unlocking Freedom: Customize Your Music Experience Without Automatic ‌Downloads

Ever felt‍ the struggle ​of managing‍ your music library, especially when it seems like ‌your device ⁤is on⁣ a download spree without your permission? YouTube Music can sometimes feel like that friend who just can’t ‌take a hint about personal ​space. By disabling automatic downloads, you gain⁢ the ⁤freedom to curate your ‍playlist the way ​you⁤ want, ​without the extra⁢ clutter. ‍Just imagine, instead of ‍drowning in⁢ a⁢ sea of tracks​ you didn’t even want, you ⁤can hand-pick⁤ your favorites and enjoy a⁢ cleaner, more tailored experience. Here’s how you can take control:

  • Open ⁤the YouTube Music App: Start ​by ‍diving ‌into your settings.
  • Navigate⁤ to Downloads: ⁢This‌ is where​ the‌ magic‌ happens.
  • Toggle Off‍ Smart Downloads: Voilà! ‍You’re​ now the captain of your own musical ship.

But wait, ‍there’s more! Think of your ​playlist as your personal ⁣mixtape. Classic tracks,‌ new hits, or even obscure‍ indie​ gems⁤ can all coexist harmoniously if you manage them yourself. You can enjoy the satisfaction of choosing each song that complements your mood or activity, whether it’s a chill evening⁤ at‍ home or ‌a lively road trip. ⁢Plus, let’s not forget the sweet, sweet benefit of‌ conserving storage space, because why let those uninvited songs crash the party when you ​can keep things sleek ⁤and ⁢smooth?‍ Here’s a quick reference on how ⁢much storage‍ you can save by customizing⁢ your downloads:

Content Type Estimated⁣ Size
Offline‍ Songs 5-10 MB each
Podcasts 30-50⁢ MB each
Albums (Full) 300-800 MB ⁢each

The‌ Conclusion

As ⁤we wrap up‌ our ‍journey ⁣through ⁢the world of YouTube ⁢Music on⁢ your Chromebook, it’s clear that taking‍ control of ‍your smart downloads doesn’t ⁤just make your listening experience more ​enjoyable—it‍ also ​keeps your device running ⁢smoothly. Whether you’re ⁣jamming out to your favorite playlist​ or discovering⁣ new hits, knowing how to ‍manage‌ your downloads empowers you to tailor your tunes to your needs. So, go on—take ⁢that ⁣newfound knowledge‍ and make your music experience truly yours!

But ⁤remember,⁤ the‌ adventure doesn’t stop here. With every⁣ click, ‌swipe, and playlist you curate, you’re discovering more about your ⁤musical⁤ tastes and⁢ preferences. ‍Don’t be afraid to experiment, find those⁢ hidden gems,⁣ and keep those ⁤unwanted⁣ downloads at bay.

Have ‌questions or tips about⁣ managing your music? Share them‌ in the comments below! After all, we’re all‍ in ⁢this together,⁤ and your ‌insights might ⁢just ⁢lead to​ the next big discovery for someone else. Happy listening, folks!

Mastering YouTube: How to Disable Autoplay with Ease!

Ready to ⁣take control of ⁤your‍ YouTube⁤ experience? We all know that moment when you’re​ cozy on your ⁢couch, about ⁤to ⁢dive into⁤ your favorite ⁤video, only‍ for the next one to ​start playing automatically—sometimes with content​ you didn’t⁤ even want to​ see. It can feel⁢ like that⁤ unexpected⁤ guest⁣ who just won’t leave! Fortunately, disabling⁤ that autoplay feature ⁤is a breeze, and once⁣ you know how to ⁤do ‌it, you’ll‌ reclaim ⁢your viewing freedom. Imagine settling down with just the⁤ videos you ⁢want, without the ⁤endless scrolling or‍ random recommendations taking ‍over your screen. Whether you’re in‌ it for‌ the cat videos or the latest vlogs, let’s‌ walk ‌through the simple ⁤steps ⁤to‍ tweak those settings, so you can watch on ‍your ⁢own terms.

Understanding the Autoplay ⁤Feature⁣ and Why You Might Want to Turn It ⁤Off

Ever find yourself mindlessly⁤ watching video after video, only⁤ to realize hours have slipped away?​ The‍ autoplay feature⁣ on YouTube can be ⁢a double-edged sword. On one⁢ hand,⁤ it keeps the content rolling, serving up one ‍enticing ​video after another like ​a ​conveyor ​belt of entertainment. But on the other hand,⁣ it can pull you ‌down‍ a rabbit ⁣hole ‌you​ didn’t ⁢intend to ‌enter,​ often ⁣losing⁣ track of time and⁣ maybe even interest.⁢ Turning it off can save ​you‍ from the⁤ surprise of realizing you’ve⁤ spent​ your evening⁤ binge-watching cat videos when you really meant to check ‌in on your favorite vlog. ⁣Autoplay might⁤ seem harmless,‌ but‍ it ⁣can ⁤also turn​ your viewing⁣ experience into a passive activity rather than a curated choice.

If you’re looking for a bit⁢ more⁤ control over what you watch, disabling⁣ this feature is ‌super easy. ⁢Just think ​of it like ‌putting your phone‍ on “Do⁢ Not ⁢Disturb” when you want some⁣ quality alone time. ⁤Here’s ​a quick ‍rundown‍ of why you might want to hit that off ‌switch:

  • Reduce distractions: Stay‍ focused on your ⁤chosen content.
  • Improve time management: ‌Clearly decide ‌how long you want to⁤ watch.
  • Customize your viewing: Pick videos that truly interest you without interruptions.
  • Maintain engagement: ⁤ Enjoy ⁣your videos⁢ with greater intention and ‍connection.

Understanding ⁣the Autoplay Feature ⁢and Why You ⁢Might Want to‌ Turn​ It ​Off

Step-by-Step Guide‍ to ⁢Disabling⁤ Autoplay on Desktop and ​Mobile

Disabling ⁤autoplay on YouTube is super simple, whether you’re on⁣ your desktop or mobile⁢ device. Just grab ⁢your favorite device and follow these easy⁢ steps:

  • For Desktop:
    • Open⁣ YouTube and‍ sign ⁤into your account.
    • Head over to any video. ⁣Below the ⁢video​ player, you’ll find​ the ‌autoplay toggle.
    • Click the toggle button ‌to turn it off. You’ll see it switch from blue (on) to gray (off).
  • For Mobile:
    • Launch the⁤ YouTube app and‌ log in.
    • Tap on your profile icon in​ the⁤ top right corner.
    • Select “Settings” from ⁤the ⁢dropdown menu.
    • Go to “Playback” and ⁤disable the “Autoplay” option.

And ‍just like that, you’re ⁣in control! ⁤Isn’t ​it satisfying to‌ know you decide which videos ⁣roll next? Instead of letting a ‍random video play, you⁢ can ⁤take a moment to breathe or find something ⁣else that truly⁤ piques your interest.

Step-by-Step Guide to Disabling Autoplay ‌on Desktop ⁢and Mobile

Tips ⁢for ‌a Customized Viewing Experience Without ⁣Autoplay

Customizing your⁣ YouTube‍ viewing ⁢experience can make all the difference when it comes to⁣ enjoying your favorite content. Disabling autoplay helps you take control,​ allowing you to‌ delicately​ choose what to watch next⁢ without the site deciding for you. ⁤Try ⁢these handy tips to optimize‌ your experience:

  • Adjust ​Video Quality: Lower the quality to speed up loading times‍ or crank it up for ⁤that ⁢crystal-clear ​clarity.
  • Create ⁢Playlists: Gather your ​must-watch ​videos in⁣ a playlist. This way, you ‌can curate⁤ your experience without ‍the‍ mess of ⁢autoplay leading you astray.
  • Use the Watch Later ‍Feature: This tool ⁣is your best friend for⁣ saving videos⁤ you stumble upon​ while scrolling.​ Keep ‍your ⁢viewing ‍organized and focused!

But hey, customization ⁤doesn’t stop there. You⁤ can⁣ also explore‌ some lesser-known ⁢features and settings:

Feature Description
Restricted‍ Mode Filters out content ⁣that may not be⁣ suitable ⁤for all viewers.
Captions and Subtitles Enable captions for better ⁣understanding ⁤or​ to enjoy videos in ⁤silence.

With ⁣these options at⁣ your fingertips, you’ll create ⁢a personalized ‌viewing atmosphere that’s all ⁣about you. ⁢So go ahead,‍ take​ the reins,​ and enjoy⁢ every⁤ moment‌ without the pesky autoplay interrupting your vibe!

Tips for a Customized Viewing Experience Without Autoplay

Troubleshooting ⁤Common Issues When Turning Off Autoplay

Sometimes, disabling‌ autoplay on YouTube⁤ can ‍feel ‌like trying to solve ‌a Rubik’s ‍Cube ‌while​ blindfolded.⁢ If you⁤ find that the‍ autoplay feature persists even ⁢after you’ve turned it ‍off, there are a⁣ few⁢ common‍ culprits to consider. First, make sure ⁣you’re signed⁢ into⁤ your account, as ‍autoplay⁣ settings can reset ​if you switch‌ users or aren’t logged ‍in. Additionally, try clearing⁢ your cache or switching ‌to a ⁣different browser. Ever had to ⁤pop a stubborn‍ lid off ​a jar? It’s kind of like that—sometimes, you ​just need to⁤ try a ‌different angle to make ‍it work!

If you’ve ‍checked the basics and⁤ autoplay continues to ​thwart‌ you,⁣ there⁤ could ⁢be a⁤ glitch at play. Device-specific issues ⁤are often overlooked.⁤ For ⁢instance, if ⁤you’re on a mobile ‍device, ensuring​ your app is updated to the latest‌ version‌ can eliminate⁤ a lot of⁤ potential hiccups. You ‍could even restart the app or your device altogether—like ‌giving ⁤it a little ⁣reboot ⁤to shake off any stubborn bugs. Here’s a ⁣quick checklist to help‌ you troubleshoot:

  • Log in‍ to your ‌account: Ensure ‍you’re not in guest mode.
  • Clear​ browser cache: Old data can mess⁢ things up.
  • Update the app: Check​ for any available updates.
  • Restart the app/device: A fresh start can do wonders.

Troubleshooting ‍Common‌ Issues ‍When⁤ Turning‍ Off Autoplay

The⁤ Way Forward

And ⁣there you have it—disabling ⁢YouTube’s autoplay feature​ is as easy as‍ pie! Just⁣ a few clicks, and you’re in control of what plays⁢ next.⁢ No more‌ endless loops of videos ⁤that make you ‌feel like you’re trapped ‍in ⁢a digital⁢ time⁤ warp.⁤ You ⁢can ‍now curate your viewing​ experience one ⁢video at a‌ time, savoring ​your picks instead of ⁣being swept away by the algorithm’s whims.

So, whether you’re‌ bingeing on‍ tutorials or catching up⁢ on ⁣the latest vlogs, you’re crafting your own YouTube journey. Go ⁢ahead, give yourself ‍that little sense of ‌satisfaction ‍knowing you are the captain of your viewing ship! And ⁣if ever you find yourself ⁣getting sucked ⁢back into the ‌autoplay vortex, ⁣just⁣ remember—taking‍ control is just ‍a⁢ few clicks‌ away. Happy watching!