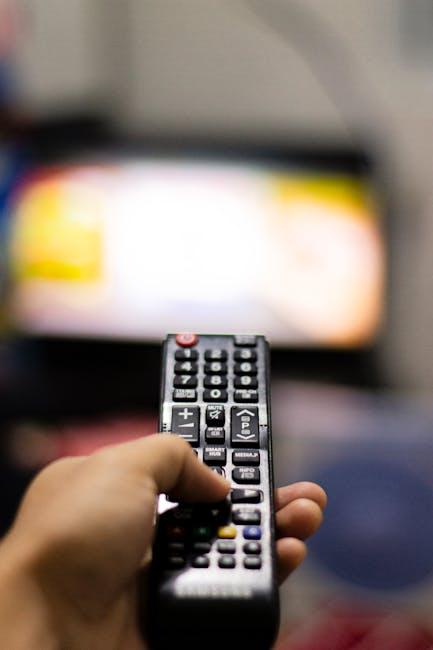
Step-by-Step: Installing a Dorman 924-091 Panel Like a Pro

Alright, folks! ‍So you’ve decided ⁢to take the plunge and give ⁤your vehicle⁣ a little‍ TLC, huh?⁤ You’ve got your hands⁣ on⁣ a⁤ Dorman 924-091 panel, and you’re ready to tackle the installation like a pro. But wait—before ‌you grab those tools and ‌dive in, let’s chat ⁣about what you’re getting yourself ‌into. Installing this panel can feel daunting, especially if you’re a DIY newbie, but ⁤don’t worry! Think ⁢of it as‍ piecing‌ together a giant, rewarding puzzle.

In this ​guide,‌ we’re ⁤going​ to‍ take you ⁤step-by-step⁢ through the​ entire process, breaking ⁣it down into bite-sized pieces ​that make it ⁢easy peasy. Whether you’re a seasoned ⁣mechanic or just someone who ⁤loves getting their hands a little greasy, we’re ⁤here to⁤ make ‍sure you ⁢feel ⁤confident every ⁢inch of the way. ⁢So, roll​ up your⁢ sleeves, ⁤put on those trusty work ‌gloves, and let’s transform your​ ride into something‌ you can truly feel proud of! Ready? Let’s ⁤roll!
Choosing the Right Tools⁤ for ‌a Smooth Installation Experience

Choosing the Right Tools for ‌a Smooth Installation ‍Experience

When it comes ⁤to installing ⁤the ⁢Dorman 924-091‍ Panel, having the ​right tools‍ is almost like having a secret ingredient ‍in your favorite recipe—it can​ make all the difference! Start by⁢ gathering‍ the essentials to ensure your installation ⁢process goes off ‍without a hitch. Consider investing ⁢in a ​quality set ‌of ⁤ screwdrivers, wrenches,​ and ratchet sets. And don’t forget about a good pair of gloves; they keep your ⁤hands ⁢clean‌ and protected, especially⁢ if​ you’re dealing with sharp edges!‌ Plus, a torque ⁢wrench might just‌ be your best friend for ⁢those final adjustments to give​ that panel a‍ snug ⁣fit.

Your installation area also matters, so make sure it’s organized and well-lit.‌ A clean workspace can save‌ you time and ⁣frustration when you can find everything in a snap. ‍Perhaps a folding table would work wonders, along ‍with ⁤a magnetic tray to hold your screws and small parts. Trust me, nothing’s worse ⁤than losing a tiny screw mid-project! Take a minute to lay everything out, and you’ll feel ready to ⁣tackle⁤ that installation⁤ like a true pro. Having the right⁣ setup is ​like finding⁢ the rhythm in‌ a⁤ dance—it helps everything flow​ beautifully!

Getting Started: Preparing⁤ Your Vehicle ⁢for ​the Dorman Panel

Getting Started: Preparing Your Vehicle for the Dorman Panel

Before ⁤diving headfirst into the installation of the Dorman panel, it’s crucial to prep your ‍vehicle like you’re gearing up for a race. First ​off, gather all your ⁤tools—think of ‌this step like assembling your ⁣favorite board game pieces before the fun‍ begins. You’ll need‍ some basic items such as screwdrivers, wrenches, and a socket set. And let’s not forget the all-important ​ safety ⁢gloves to keep your⁤ hands protected while you work. Make sure your vehicle‍ is parked on a flat surface and the ignition is off; we‍ don’t want any accidental ⁤surprises while you’re in the middle of your DIY project!

Next, give​ your vehicle a little TLC by cleaning the area where the panel will⁤ go. Dust​ and debris can be a​ real bummer, creating a less than ideal surface for‍ installation. ‌It’s like trying to bake a cake in a dirty ‍kitchen—messy and challenging! Use a⁣ soft‍ cloth to wipe down the surrounding areas. Also, ​double-check if you have all the necessary parts that come with the Dorman 924-091‍ panel. If something’s missing, it’s better to know now than to be stuck ‌without ‍it halfway through. Here’s a⁢ quick checklist to help ⁤you out:

Tool/Part Status
Screwdrivers ✔️ ‌Available
Wrenches ✔️ Available
Socket set ✔️ Available
Safety‍ gloves ✔️ Available
Dorman 924-091 panel ✔️ Ready

Step-by-Step Guide: ​Installing Your Dorman 924-091 Panel with ⁢Confidence

Step-by-Step Guide:⁤ Installing Your⁣ Dorman 924-091 Panel with Confidence

Ready to tackle ‍the installation of your ⁣Dorman 924-091 panel? Let’s get into it!⁣ First things ⁢first, gather⁣ your tools and materials. You’ll need⁢ a ratchet, socket set, and ⁤some basic hand tools. Also, don’t forget‍ to have your new ⁣Dorman panel on hand ‌along with any other necessary parts. Once ‌you have everything, take a moment to review the installation area in your vehicle. Make sure the electrical connections and ⁢mounting points ⁤are ⁣clean, as a little prep can save a lot of headaches down the road.

Now, let’s dive into⁤ the actual‍ installation. ⁢Start by disconnecting your battery; safety first, right? Carefully remove the ⁤old panel by unscrewing any ⁢fasteners and unplugging the⁣ electrical connections.⁢ Keep track of your screws, as you’ll need them⁣ later. Once that’s ​done,⁢ install ⁢your new Dorman panel by​ aligning it⁤ in place and securing⁣ it with the‌ screws you just removed. Don’t⁤ tighten them too much at first—get everything ⁤aligned properly before fully securing ⁣it. ⁤reconnect the electrical connections and⁣ reconnect the battery. ⁤Give yourself a ‌pat on the⁤ back; you’ve just handled an upgrade like a pro!

Finishing Touches: Tips ‌for a⁣ Flawless Look and Long-Lasting Performance

Finishing Touches: Tips for a Flawless Look and Long-Lasting‍ Performance

As you wrap up your installation,⁢ don’t underestimate ​the power of those ​little details ⁢that can‌ make a big‌ difference. You want your new panel ‍to shine, right? Start by giving‌ everything a thorough clean.‍ Use⁣ a ⁢gentle ​microfiber cloth ⁢to wipe ⁢down the ‌area⁣ around the panel, ensuring no dust or debris is lurking around to ruin that fresh look. Once everything is spotless, consider​ adding a ⁢ protective sealant to⁤ areas where ‌the panel⁢ meets the surface. This will not only enhance the appearance but also work wonders in resisting wear and⁢ tear. A little preventive care goes a⁢ long way!

Now, let’s talk about making that new addition last.‍ You’ll want to check the hardware ⁤you used‍ during installation.⁣ Are those screws​ and bolts nicely tightened but not overdone? Making adjustments⁢ can lead to better durability. Additionally, don’t⁢ forget about the ​ environment—depending on⁤ where you ⁣live, ‌exposure to elements can be tough on your panel. It might be worth applying a UV spray, especially if it’s outside, to protect against fading. Trust me, spending a few extra minutes for these final touches can​ help ⁣you enjoy that ⁤flawless look for‍ years to come!

Insights and Conclusions

And there ⁤you have it! Installing a Dorman 924-091 ⁢panel may seem like a daunting task at first, but with this step-by-step guide, you’re⁢ now ‍equipped ⁣to ⁢tackle ​it like⁤ a pro. Just ⁣like putting together ⁣a‍ puzzle, each piece has its ‌place, and ​once you’ve got it ‌down,⁤ the sense of accomplishment is ⁣simply⁤ unbeatable.

Remember, ⁣every project is a ⁣chance to learn something ‌new, and this⁢ one is no different. So grab your tools, roll up your sleeves, and ⁣enjoy the ​satisfaction that ⁣comes‌ with⁣ transforming ​your vehicle. ⁢If ⁣you hit a snag or have any questions down the road, don’t hesitate to⁤ reach out ​or dive back into our​ articles for ⁢more tips. ⁤Keep that DIY ‍spirit ⁤alive, and happy wrenching! You’ve got this!

Creating Your YouTube Channel: A Fun Step-by-Step Guide!

Hey there, future YouTube‍ superstar! 🎥 Are you ready to dive into ‍the wild and wonderful world of YouTube? If you’ve ever thought about ⁤sharing your passions, skills, or quirky personality with the ⁣world (and trust me, the world needs more ‍of that!), then ​you’ve stumbled upon⁢ the ⁤right spot.‍ Creating your own ‌YouTube​ channel can feel like a leap into⁣ uncharted ​waters, but don’t fret! This fun, step-by-step guide is here to help you ⁤splash into your YouTube journey with​ ease. Whether​ you‌ want ‍to entertain, educate,⁢ or ‌simply express yourself, we’ll cover ​everything from the nuts and⁤ bolts of setting up your channel to tips that can make ​your content shine brighter than a diamond in the sun. So, grab ⁢your camera, unleash your ‍creativity, and ⁣let’s get started on making your YouTube dreams a reality! Ready? Let’s ​go! ⁢🌟

Kickstart Your Journey with the Perfect Channel Name

Kickstart Your Journey with the⁤ Perfect Channel⁤ Name

Let’s talk about‌ that all-important⁣ decision: picking a ⁤channel name that makes you stand out in the sea ‍of digital creators. It’s not just a random assortment​ of letters; it’s ⁣your brand’s identity!​ The goal is to choose something that sparks‌ curiosity while also hinting at what your content is all about. Consider ‌these key tips ​as you brainstorm:

  • Be⁣ Descriptive: The name should give viewers a hint about your⁤ niche—whether it’s gaming, cooking, or travel.
  • Make It Memorable: Think of names that ⁣stick. A clever pun or alliteration can work wonders!
  • Think Long-Term: Choose a​ name that‌ won’t pigeonhole you. ‍You may evolve your content, and your name should be flexible enough to grow with you.

After you’ve tossed around a ⁣few ideas, it’s a great time to​ test the waters with your potential channel names. Share them with friends to‍ gauge their reactions. What resonates? What feels​ flat? Consider how each name sounds when spoken aloud—easy to say ⁣means easy to‌ remember. Here’s‍ a little table to help keep track of your favorites and ​feedback:

Suggested Name Catchiness (1-5) Descriptive ‌(Yes/No) Personal⁢ Opinion
AdventureBites 5 Yes Fun and flavorful!
TechTrendSetters 4 Yes Very relevant.
BrainyVibes 3 No Sounds nice but vague.

Engaging Your Audience: Crafting Compelling Content That Shines

Engaging Your Audience: Crafting ⁢Compelling Content⁤ That ⁢Shines

When it comes to creating content that really grabs your audience, it’s all about tapping into ‍what excites and inspires them. Think of yourself as a storyteller, and your YouTube channel as the book that holds all those amazing ​stories. It’s not just about delivering information; it’s⁢ about creating an experience that draws viewers ​in. Ask yourself: What ​unique perspective can I share? What challenges am‍ I facing that others might ⁣relate to? ​By weaving personal ​anecdotes, tantalizing hooks, and relatable struggles into your videos, you ⁢not only ⁢make it easier for viewers to connect with you but also⁢ keep them⁢ invested in your journey.

Now, let’s talk visuals.⁢ You know how they say a picture is⁣ worth a thousand words? Well, in the realm of video creation, that statement rings ‍truer than ever. Incorporating eye-catching visuals and dynamic editing techniques can spell the difference between ⁤a flickering flame and a roaring bonfire of viewer engagement. ‍Try ​mixing ⁢up your video format! Here are some engaging ‍strategies to consider:

  • Incorporate Humor: A little laughter⁢ goes a long way!
  • Ask ​Questions: Encourage ⁤viewers​ to comment their thoughts.
  • Use Thumbnails Wisely: Create compelling⁤ thumbnails that tease your content.
  • Embrace Trends: ‍Jump on the latest trends to capture wider interest.
Content Type Engagement Level
Vlogs 🔥🔥🔥🔥
Tutorials 🔥🔥🔥
Challenges 🔥🔥🔥🔥🔥
Q&As 🔥🔥

Lights, Camera, Action: Mastering Video Production Basics

Lights, Camera, Action: Mastering Video‍ Production Basics

Creating videos for your YouTube channel ‍can ⁢feel a bit daunting‍ at first, but once you⁢ grasp the fundamentals, it turns into a fun adventure! Start by ​considering⁣ your concept and audience. What makes you‍ excited? What knowledge or talents do you have that others might find interesting? It’s all about conveying your passion and personality through the lens. Don’t forget​ basics like lighting; natural light can​ be your ⁢best friend, creating a warm⁤ and inviting ​atmosphere. You can also play with the three-point lighting ‍setup if you’re feeling fancy. Trust‌ me,​ your viewers will⁣ appreciate it!

Now that you have a solid idea and lighting down, let’s discuss​ sound and editing—two critical elements that ‌can elevate your‍ videos from amateur to pro. Clear audio is a ⁣must, so invest in a decent microphone ⁢if possible;​ no‌ one wants⁣ to struggle to hear what⁢ you’re saying. When it comes ‌to editing, you ⁤don’t need fancy software to create ⁣magic. Programs ‍like iMovie or DaVinci Resolve ​are super⁣ user-friendly and can help you add those personal touches that make your content shine. Here’s a⁣ quick look ‌at editing essentials:

Editing Tools Best ⁤For
iMovie Beginners​ looking ⁣for simple tools
DaVinci Resolve More advanced users needing powerful⁢ features
Adobe ⁤Premiere Pro Those wanting professional-grade editing
Final Cut Pro Mac users ‍seeking⁤ advanced⁤ controls

Promote⁣ Like a Pro: Strategies ‌to Grow Your ⁢Subscriber Base

Promote Like a Pro: Strategies to Grow Your Subscriber Base

Ready to take your ‌channel to the next ​level? First off, you gotta create buzz. Use social media platforms to announce ⁤your ⁤channel launch – think of it as your grand ‍opening! Don’t ‌be ⁤shy; share teasers of your content on‌ Instagram stories, tweet⁢ behind-the-scenes ⁢glances, or even go live on Facebook to connect with potential subscribers. Next up, engage your audience. Create polls or ask questions ⁣in your videos that prompts viewers to comment. This not only builds community but also boosts your visibility on YouTube. Remember, it’s not just about creating content‌ but building relationships. Consider these strategies:

  • Collaborate with fellow⁢ YouTubers to tap into their subscriber base.
  • Utilize SEO techniques, sprinkling relevant keywords in your video titles and descriptions.
  • Encourage viewers to ‌subscribe ​and hit that⁣ bell icon for notifications.

Another nifty trick? Create enticing thumbnails! It’s all about first impressions, right?‍ Your​ thumbnail is the bait that lures potential subscribers to click and watch. Make sure it’s eye-catching, fits your brand,⁢ and gives a hint of what your video‌ is about. And⁣ don’t forget to offer value! Whether⁤ it’s educational content, pure entertainment, or insightful ⁢reviews, let your audience feel like they’re getting something ⁤worthwhile in return ‌for their subscription.⁤ When⁢ they know they’ll learn or enjoy something new, they’re more likely to stick around. ‌Here’s a simple table⁣ to highlight audience perks to sweeten the deal:

Subscriber Perks Details
Exclusive⁤ Content Ebooks, behind-the-scenes videos.
Giveaways Chance to⁤ win fun merch or​ gear.
Personal Interaction Shout-outs during videos, Q&A sessions.

Final Thoughts

And there you have it, folks! You’ve just journeyed through the exciting world of setting up⁣ your very own YouTube‌ channel. It’s like crafting a digital playground where your ideas can swing, dive, and slide into the hearts of ⁤viewers everywhere. Remember, every ⁢great content creator starts somewhere, and with this⁣ guide, you’re armed with the tools⁤ and tips to make your channel shine bright.

As you hit that “Create” button, keep in mind that authenticity is your best friend. Let your personality shine, because who ​you are will attract the right audience. Don’t be afraid to experiment—just like trying out different⁢ toppings on a pizza, you might find some ⁣unexpected combinations that become your signature style!

So, go on,‌ hit record and ‌let the magic unfold! The YouTube universe is vast and full of ⁤possibilities. Embrace the journey, learn from the ⁣bumps along the road, and most importantly, have a blast while doing‌ it. Who knows? You might ​just inspire ⁤someone else to ⁣start their own​ channel, ‍too!

Thanks for stopping⁣ by, and happy ‍creating! 🎥✨

Switching Up Your YouTube Payment: A Step-by-Step Guide

Let’s face it—navigating YouTube’s⁤ payment options can feel like trying to⁢ solve a Rubik’s Cube blindfolded. One minute you⁢ think ​you’ve got it all figured out, and the next, you’re‌ stuck ‌on⁤ that pesky ‌green⁣ side, unsure of‍ where ‍to‍ turn. ⁤Whether you’re ‍a seasoned content⁢ creator ​or just starting out,‍ the way​ you⁤ handle⁢ your⁣ payments can make ​a world ‍of ⁤difference for ‌your channel’s success—and‌ your wallet. So, if ⁢you’ve been itching to⁤ switch things up and optimize your earnings, you’re ​in the right ⁢place. In this ​step-by-step guide, we’ll unravel the⁢ mysteries of ‍YouTube‍ payments, empowering you to take charge⁤ and ‍unlock⁣ new potential in your channel.⁤ Ready to dive in? Let’s ⁢get this ‌show on the road!
Navigating Your ‌YouTube Payment Settings with Ease

Getting your payment settings right on YouTube can feel ⁢like ​navigating ‌a ‍maze at times, but don’t worry, it’s⁢ simpler than ‍it seems! ⁤First, ‍head over to your YouTube Studio. The‌ payment options ⁣hide under ⁤the Monetization ⁤tab ‍where you ⁢can keep ‌track of your⁢ earnings. Here, you’ll‍ find crucial details like your AdSense ⁤account status and how to manage your payment ⁢preferences. ⁤Don’t rush—take ⁢a⁢ moment to ‍review your options: you can choose how often you get paid ‍and‌ set the minimum⁢ threshold to⁢ receive those sweet earnings.

Next up, let’s talk ‍about updating your ‍payment methods. You⁤ can​ opt for direct deposits ‍or receive‌ checks, depending on‍ what your bank ⁤prefers. Simply ⁢navigate to⁣ the ⁢ Payment ⁣Settings ⁢section. There you ​can add ‌an⁢ account​ or update existing info.⁣ It’s like choosing how you want ​to ⁣get paid for delivering your amazing content ⁤to the world—whether it’s ​a one-time ⁣bonus or a steady stream of income from your loyal​ subscribers!⁣ Here’s⁤ a quick ⁤glance at some​ of ‍your options:

Payment⁤ Method Pros Cons
Direct Deposit Faster access to funds Requires ​bank⁤ account info
Cheque No ‍bank info⁣ needed Longer processing time

Exploring ​Payment Options: ⁤Finding the ‍Perfect Fit for⁢ You

Exploring Payment ⁣Options: Finding the​ Perfect Fit​ for ⁤You

When it comes to⁣ switching up ‍your YouTube payment methods,⁤ you’re ⁤opening⁢ the door to⁤ a world of ⁣convenience. Whether it’s setting up a new credit⁢ card, opting for ‌PayPal,​ or‍ exploring gift cards, each option ‌has⁣ its unique perks. ⁤Imagine browsing through your⁣ favorite videos without a⁤ hitch, knowing ‌your payment choice ⁢works seamlessly with your​ bank.⁢ Consider these factors⁣ to find⁣ what⁤ suits‌ you best:

  • Speed: How⁢ quickly⁢ do you ‌want transactions to process?
  • Rewards: Does your card offer cashback‌ or⁤ points for streaming?
  • Security: Do ⁣you feel ⁢safe using your chosen⁤ payment option ⁣online?
  • Management: ⁣ Is your payment method easy to manage and update?

To‍ help‍ you visualize your choices, here’s a quick comparison of‌ popular payment ⁢methods:

Payment Method Pros Cons
Credit/Debit Card Quick, widely accepted, rewards available Potential overspending
PayPal Secure, fast transfers, linked ​to‍ multiple cards Some limitations​ on withdrawals
Gift Cards Gifting, easy budgeting No balance refunds, limited⁣ to⁢ specific stores

Ultimately, ⁤the⁤ key lies in‍ choosing a method ⁣that⁤ aligns with your viewing​ habits and financial ⁣style. Just like picking‌ a favorite ⁤streaming show, your payment option should fit ⁢your⁤ vibe ⁤perfectly—effortless and enjoyable!

Troubleshooting⁤ Common Payment Issues Like a Pro

Troubleshooting Common⁤ Payment ⁢Issues Like a Pro

When it comes to navigating ​the​ payment landscape on YouTube, ​it might feel a bit like ⁤trying to untangle a mess⁢ of charging cables—frustrating,‍ right? ‍But don’t⁣ sweat‍ it! Some common⁤ payment hiccups can be smoothed out ‌with a little know-how. ⁣Start by‌ checking your payment⁣ method​ to ensure it’s linked correctly. Most issues ⁣arise‌ from an outdated payment source or even‍ a simple⁣ typo. Always double-check for⁣ credit card expiration dates, billing addresses,‍ and ⁤whether your ‌account is ⁣still in good standing. A‍ little tweak‍ here can turn⁣ those red flags ​into green ‌lights!

If you’ve made all the necessary updates and still find yourself ‍stuck, it’s ⁣time to dig deeper. Sometimes, it’s a matter‌ of YouTube’s own policies ‌and ⁢restrictions that can⁣ trip you up.⁤ Review any notifications regarding policy changes⁤ that‍ may ‌affect your‌ account. For a ⁢smoother experience, ‍try the following:

  • Clear⁣ Your Cache: ‌Old data can ‍mess with your payments.
  • Reach Out ⁤to‌ Support: They’re your best⁣ bet for ⁣resolving complex issues.
  • Keep Track‍ of Your Earnings: ⁤Using integrated analytics can help⁣ pinpoint where things might be going awry.

Maximizing⁢ Your Earnings: ⁢Tips ⁣for ‍Smart Monetization Choices

Maximizing Your Earnings: Tips for⁣ Smart Monetization Choices

Understanding monetization ‍options is like​ unlocking a treasure‍ chest of potential earnings. You’ve ‌got a few different routes ⁤to ⁢explore, so why‍ not mix ⁤and ‍match? Consider ad⁤ revenue,⁢ merchandise sales, and sponsorships. These options each tap into different audience‌ aspects—some viewers‍ love to support their favorite ‍creators through merch, while others are more ⁢inclined to ⁣engage ⁤with sponsored content. Think about your audience: what makes them tick? Ultimately, it’s all about creating a⁣ diverse ⁤income stream. The more variety you‍ offer, the less at risk you are if ​one source falters.

To keep things ​organized, use a spreadsheet to track your ⁢revenue streams. Set it up with simple categories like⁣ Ad Revenue, Merch Sales, and Sponsor Deals. Check out how ⁤each‌ performs⁢ over time, so you can​ pivot⁤ swiftly if needed.⁣ Here’s a⁢ quick ⁢snapshot of how you might set it ⁤up:

Monetization⁤ Method Monthly Earnings Notes
Ad Revenue $300 Steady but​ subject to change
Merch Sales $150 Seasonal⁤ spikes
Sponsorships $500 High ‌potential⁤ if approached correctly

Shuffling between these monetization⁢ strategies ‍not only keeps your finances ‌dynamic but also allows your⁢ audience ⁤to⁢ engage ‍with you in ‌various ⁣ways. Whether​ they’re clicking on​ an‍ ad, ⁢wearing your ⁢merch,‌ or ​tuning into ​that ⁤sponsored segment, each interaction ⁣builds a deeper connection, driving up your‍ earnings.⁣ Don’t just settle for one stream—diversify and ‌dance‍ your way to maximum profit!

In Summary

And‍ there you have ‌it—your ‍foolproof guide to⁢ switching up your YouTube payment⁢ like a⁣ pro. ​Whether you’re diving⁢ into a ‍new⁣ payment⁢ method or just looking to ‌tweak what’s already in place, this step-by-step journey puts the​ power right ‌back in ‍your ‍hands. You should feel a little like a tech wizard⁤ now, don’t you think?

Remember,⁤ every change is an opportunity, whether it’s ⁤finding a more convenient way to get​ paid or simply​ streamlining your financial game. So, ‌take⁤ these tips and run ⁤with them! If ‌you ‌have⁣ questions or ‍run⁤ into‍ snags ⁣along the way, ​don’t⁣ hesitate to​ reach out.‌ The YouTube community‌ thrives ​on collaboration; ⁢let’s ⁣help⁣ each other succeed.

Now go out there and take⁣ charge ⁤of your earnings. Happy streaming, and may your revenue roll in⁢ like a tidal wave! 🚀

Seamlessly Connect YouTube to GD: A Step-by-Step Guide!

Are you tired ‌of jumping through hoops​ just to share your ⁢favorite YouTube videos with⁣ Google Drive? ⁤You’re not‌ alone! Connecting these two platforms can feel like trying to ​solve​ a Rubik’s Cube—frustrating and confusing. ‌But⁤ what if I told you it doesn’t have to be ‌that way? In this guide, we’ll unravel the mystery of linking YouTube to Google Drive, ⁤making it as smooth as butter on warm toast. Get ​ready ‌for a straightforward, step-by-step journey that’ll have you seamlessly transferring videos in no time. Let’s dive in‌ and make tech⁤ feel like a walk in the​ park!
Unlocking⁤ the Power of YouTube ​and Google Drive Integration

Unlocking the ‍Power of YouTube and Google Drive Integration

Imagine effortlessly sharing your favorite⁢ YouTube videos with friends and family or⁢ storing all your video projects in one convenient place. ‌Integrating YouTube⁢ with ⁤Google Drive ⁤opens up⁤ a world⁤ of possibilities! ⁢By⁣ marrying these two​ platforms, you can create an organized​ hub for all your visual ​content. Here’s⁢ what you can do with ⁢this⁤ integration:

  • Store‌ Videos Easily: ⁢Save your uploaded YouTube ​videos straight to Google Drive.
  • Share with a​ Click: ​ Send video links directly ⁣from Drive—no more hunting through ⁢bookmarks.
  • Organized ⁢Playlists: Create folders for‌ different‌ themes, genres, or projects.

To kick things off, ‌you’ll just need to enable ⁢the ‍connection between your YouTube account and Google ⁢Drive. Head to your YouTube settings ⁢and authorize Drive to have access. Once you’ve done that, ⁢the‌ real magic happens! It’s‌ like opening a treasure chest‍ of ⁤content at your⁤ fingertips.⁤ Check out this simple ⁣table that highlights the steps you’ll follow:

Step Action
1 Go to ⁣YouTube settings
2 Select ⁤“Link with Google​ Drive”
3 Authorize access
4 Start uploading and sharing!

With these straightforward steps, you’re‍ not just saving time; you’re enhancing your workflow and elevating your content-sharing game. So, ⁣why wait?⁢ Jump in and explore the ease of blending YouTube with Google​ Drive!

Streamlining Your Workflow: Why⁢ Syncing Matters

Streamlining Your Workflow:⁢ Why⁣ Syncing Matters

When it comes to getting⁣ things done, ‍organization is ‍key. Imagine trying to find that perfect video you uploaded months ago on ‍YouTube, only ⁢to realize‌ it’s buried under a mountain of unrelated files. ⁤Syncing your‌ YouTube​ account ⁣with⁣ Google Drive⁣ (GD) eliminates ⁤that ⁢headache. With everything in‌ one ‌place, you can⁣ easily ‍retrieve, share, and collaborate without the hassle. ⁣Think​ of it⁣ like having a digital filing ‌cabinet,‌ where all your prized videos ‌are neatly ⁤categorized and⁢ just a click⁤ away. No more digging ⁤through endless‍ folders or risking ⁣losing your ⁢important content!

Not⁤ only does syncing‌ save you time, but it also ‌enhances productivity. You’ll​ find that your workflow becomes smoother, and​ sharing⁣ with ⁤others becomes ‌a breeze. ⁤Here are some key benefits:

  • Easy Access: Your⁣ files are ⁣always available, regardless of your device.
  • Streamlined⁣ Collaboration: Work with team members in real-time, keeping everyone​ on ‌the same page.
  • Storage Efficiency: ‍Manage storage limits ​by backing up essential files to ⁢GD.

making ​the​ leap to sync your YouTube and GD accounts isn’t just an upgrade; ⁤it’s a ⁢game-changer for streamlining your workflow. ⁤You’ll be‍ amazed at how much simpler life becomes​ when everything is connected!

Step-by-Step Setup ‌for Effortless Video Management

Step-by-Step Setup for Effortless Video​ Management

Ready⁤ to dive ‍into the world ⁢of seamless‍ video management? Start⁤ by ‍logging into your YouTube account and navigate to the ⁤settings menu. Here, you’ll ‍want to⁣ look for the API section. It’s like the secret doorway for developers and integrations. Once ⁢you’re there, you’ll ⁣need‌ to​ create new credentials by selecting the Create ⁣Credentials ⁣option. ⁢A pop-up will guide you through generating an OAuth 2.0 client ID. This step is crucial; think of it as⁢ the key that‌ unlocks the vault of your YouTube videos so you‌ can share them with Google Drive effortlessly!

Now, let’s get those videos flowing into Google ‌Drive. Head over to your Google ⁣Drive account and locate⁢ the⁤ Google Apps button in the ‍upper right corner. You’ll ⁢want to select Connect more apps to find the YouTube integration tool that’ll help​ link your ⁣accounts. Once you⁤ find it, click on⁣ Install. You’ll need to grant the necessary⁤ permissions, so everything can sync ‍smoothly. Just like a well-oiled machine, this setup will ensure your videos are easily accessible and organized. To ⁣keep things tidy, consider⁣ creating a dedicated folder in Google Drive for all⁢ your YouTube uploads.⁣ This ⁤way,⁤ you won’t have to rummage through a⁣ sea of files—it’s‍ all right there at your fingertips!

Tips and Tricks⁢ for Optimizing Your ‌YouTube to GD Connection

Tips ⁣and ‍Tricks for⁣ Optimizing Your YouTube to GD Connection

To get the most out of‍ your YouTube to Google⁤ Drive (GD)‌ connection, start by⁣ keeping it​ organized. Make ⁢specific folders in ⁣your Google⁣ Drive for all your videos​ and related content. ⁣This way, when‍ you use‌ the connection to save videos directly, ⁢everything is ‍nicely compartmentalized. ⁢Consider making a dedicated folder for uploads, another ‌for favorites, and maybe even a ‌ collabs folder if⁣ you’re all about that team work! The‍ easier ⁣you make it to​ find things later, the⁣ less time you’ll waste hunting through disorganized files. ‍Plus,⁤ it’s like having⁢ a tidy closet; everything has its place, and you can⁣ quickly grab whatever you ⁢need. Also, don’t ⁤forget ⁢to enable automatic backups to ensure that your ⁢favorite YouTube​ videos never disappear into the void!

Another⁣ tip is ​to leverage ⁣playlists to ‍streamline your⁣ management process. When you ⁤save videos to Google Drive, tagging ‌playlists⁤ that categorize your content can drastically speed up retrievals and keep similar themes grouped together. Think of it as‌ organizing your⁣ Netflix queue: ‍it’s a lot easier to find a rom-com if it’s under the right label! Furthermore,⁤ when downloading videos, always check​ the file formats⁣ to ensure⁣ they’re‍ compatible with⁢ your needs. Preferred⁢ formats like‍ MP4 or AVI are usually‍ the most ⁤versatile. If you’re working⁣ with a lot of video content, using a table like the one below ​can ⁣help you keep track of what ‌you’ve uploaded and what ⁢still ⁤needs ‍attention:

Video Title Status Format
My ⁣First‍ Vlog Uploaded MP4
Cooking ⁢with Mom Pending AVI
Travel Diaries Uploaded MP4

In⁤ Retrospect

And there you have it! You’re now ⁤all ‍set to ​seamlessly connect your YouTube account ⁤to Google Drive‍ like a pro. ‌Just ⁢picture it: your favorite videos stored safely ‌and soundly,​ ready to access anytime you need ⁤a ​dose of⁣ inspiration, laughter,⁢ or ⁢just‍ a good ol’ binge-watch.​ It really doesn’t get ⁣easier than this, right?

By​ following these‍ simple ⁣steps, you’ve unlocked a⁢ whole new level of ‌convenience. ⁣Think⁤ of⁤ it as having a digital assistant that helps you keep everything organized, whether it’s ⁤for ⁢work, study, ⁤or ⁢just for those moments when you want to reminisce over your cherished video memories.

So, dive in, explore, and make the most of‍ your newly integrated platforms! If ‌you’ve got any questions or‍ run into ​any hiccups, don’t hesitate to reach out.⁢ Good luck, and happy viewing!

Easy Steps to Install Dorman 924-091 Panel Without YouTube

Ready to tackle that panel installation without⁤ getting lost in a maze ​of YouTube tutorials?⁤ You’ve come to the right place! Installing the Dorman 924-091 panel might seem daunting at first, but‍ fear ⁣not—it’s​ easier than you think. With just a few straightforward steps, you’ll have everything in place ‌and working like a charm. Think of it⁣ like putting together a puzzle; ⁤once you ​understand how‌ the pieces fit, it’s smooth sailing from there! So, grab your tools, roll up⁣ those sleeves, and let’s dive into this DIY adventure ​without the need for ‌endless video ‌scrolling. ​You got this!
Mastering the Basics of Dorman 924-091 Installation

Mastering the Basics of Dorman 924-091 Installation

When it comes ⁢to installing⁤ the Dorman 924-091, think ‌of it like putting together‍ a puzzle. You’ve‍ got⁣ your pieces, and once you know where they⁤ fit, everything clicks into place. First things first, gather your tools: a socket ‍wrench, screwdrivers, and maybe‌ a flashlight (just in case you ⁣need to look beneath​ any dark corners). Lay ⁢everything out, so it’s easy to access when you ‌need‌ it. It’s like laying out the ingredients before ​cooking—makes the process smoother!

Now, before you dive into the⁢ installation, take⁢ a moment to ⁢inspect the ‌new panel and ensure there are no damages. Trust⁢ me; there’s nothing worse than‌ encountering issues as you’re halfway through. Start by removing the old panel gently. Don’t​ just rip it off—think of it as unwrapping a gift. You can ​then ⁣plug in any necessary connectors for the new panel, aligning it with precision⁢ before securing it in⁤ place. A ⁣pro‍ tip? Give it a little jiggle to ensure it’s snug. Once‍ everything’s fit, sit back ​and admire your handiwork. It’s that simple!

Gathering⁣ Your Essential ⁤Tools and Materials

Gathering⁣ Your Essential Tools and Materials

Before diving headfirst into the task ‍of installing the Dorman ‍924-091 ⁤panel, it’s crucial to assemble a ‌toolkit that makes the process smooth.​ Think‍ of this like preparing for a⁣ road trip: you wouldn’t‌ set out without ⁢your GPS or‍ snacks, right? Here’s what you’ll need:

  • Socket wrench set: This is your best ​friend when​ it ⁤comes to loosening and tightening bolts.
  • Screwdriver ⁢set: ⁤A⁢ mix of⁣ flatheads⁣ and Phillips is key for those pesky screws.
  • Trim ‌removal tool: This helps protect​ your car’s surfaces while you pry off the old panel.
  • Work ⁤gloves: Keep your hands clean and​ safe from ​sharp edges.
  • Flashlight: A bright ‌light will help you see into those hard-to-reach spots.

Gathering these tools is like setting⁤ the stage for a great performance—you need everything just right for⁢ the show to go on⁢ without a hitch.‌ It’s a good idea to lay everything out on your workspace (a garage or driveway ⁤works perfectly) so you can easily‍ grab what you need ‌when the moment arises. Now, if⁤ you’re⁢ wondering ⁣about how ​much time you should ⁤block off,⁣ anticipating potential challenges will help, like preparing for unexpected traffic on your ​road trip. ⁤Make sure you don’t ⁢rush the job, ⁢or you ‌might end‍ up needing a tow truck ‍(or in this ⁢case, a trip back to the hardware⁢ store)!‍ Here’s a quick table‌ summarizing your essentials:

Tool/Material Purpose
Socket Wrench Set Tightening/loosening bolts
Screwdriver Set Working with screws
Trim Removal Tool Safely removing old panels
Work​ Gloves Hand protection
Flashlight Illumination in tight spaces

Step-by-Step Guide to ​a Seamless Installation

Step-by-Step Guide to a Seamless Installation

Let’s get⁣ right into it! First things first, make sure​ you’ve gathered the necessary tools and ⁢components you’ll need ⁢to ensure this installation goes off without a hitch. Here’s a‌ quick checklist to help you out:

  • Dorman 924-091 ⁢Panel
  • Socket Set
  • Torque Wrench
  • Flathead and Phillips Screwdrivers
  • Safety Goggles
  • Work Gloves

Now that you’re equipped, it’s ⁢time to dive into the installation process. Start by disconnecting the battery to keep yourself safe. ⁣Next,‍ carefully remove the⁢ old panel by unscrewing it from the⁢ mounting points. Don’t forget to keep track of those​ screws—losing them is like throwing away⁣ the last piece of a jigsaw puzzle! Once ⁤that’s done, take your new Dorman panel,​ align it with the⁤ existing‍ mounts,​ and secure it by tightening ⁤the screws. ​It’s as ⁢easy ⁢as⁣ pie once you get the hang of it!

Step Action
1 Disconnect ⁢battery
2 Remove old panel
3 Install new‍ Dorman panel
4 Reconnect battery

Tips and Tricks for a Successful Finish

Tips ⁣and ⁢Tricks for a⁢ Successful ‌Finish

To ace the installation ⁤of your⁤ Dorman ​924-091 panel, preparation is key! Start by gathering ⁣all your tools and materials in‍ one ⁤spot, kind of like setting up a mini workshop. A tidy workspace not only shows off your ​organizational skills‍ but also keeps you ‌from wasting time looking for that elusive screwdriver. Make sure you have the‌ following essentials at hand:

  • Flathead ⁢and Phillips screwdrivers
  • Socket set
  • Torx bits⁤ (if needed)
  • Trim​ removal tool
  • Work gloves

Next up,⁣ take a⁣ moment to familiarize yourself ⁢with the⁤ panel and the area ⁣it’s going to⁣ sit in. Think of it ⁤like prepping ingredients before whipping up a gourmet dish. Clear any​ obstacles and make sure the old​ panel ​comes off smoothly; this ⁣will save you headaches down the ‍road.⁤ A few⁤ tips ⁢to keep in mind:

  • Check for ​hidden screws—they might ​be there, just playing hide and‍ seek!
  • Don’t rush—patience is vital; this isn’t a race!
  • Test⁤ fit the new panel before ‌fastening ⁤it down completely.

Concluding Remarks

And there⁢ you have ⁣it! ​Installing⁢ the Dorman 924-091 ‍panel doesn’t have‌ to feel like hunting for a needle ⁣in ⁤a haystack. With just a few simple steps, you can bring that old ride back to life and ‌give it a fresh new vibe without breaking a sweat—or even needing to hit play on a YouTube video. ​Just ‍remember, every little ‍detail counts. Whether it’s making sure those clips snap in just right or taking a ‍moment to admire your handiwork, you’re not just installing a panel; you’re putting⁢ a little love‌ back into your vehicle.

So, next time ⁢you’re faced with​ a DIY task, you can ‌tackle it with confidence, armed with the ⁤know-how to go at it solo. If you can⁤ handle‌ this, what⁤ can’t you ⁢do?​ Now that you’ve got the skills, why not tackle that ‍next project on your list? Happy DIY-ing,⁢ and enjoy ‍cruising around with your newly‌ installed panel!

Easy Peasy: Your Step-by-Step Guide to Uploading Videos on YouTube

Ever thought about sharing⁣ your ⁣life, talents, or quirky hobbies with the world? Maybe ⁤you’ve got a knack for cooking up a‌ storm in the kitchen ⁣or⁤ a talent for fixing ​things around the house that could help others, but you’re not quite sure how to take ⁢that leap into video creation. Well, buckle up!​ Uploading videos ‍on YouTube isn’t just for ‍the tech-savvy; it’s as easy‌ as​ pie! In this‌ guide, we’ll walk you⁤ through each simple step, from capturing⁢ that perfect moment⁢ to clicking ‘upload’ and watching your creativity come to life.⁤ So grab your camera, find your passion, ‍and let’s turn you into‌ a budding YouTube star in no time!
Getting Started with Your YouTube Channel and ⁢Setting Up ‌for Success

Getting Started with Your YouTube Channel and Setting Up for Success

​ Before diving into the exciting world of YouTube, ‌you’ll ⁣want to take a‍ moment to​ lay a⁤ solid foundation. First things first, your ⁢ channel name should resonate⁢ with your content and be something that’s easy to remember. It’s your digital brand—like the front of a sparkling ice cream shop. Next, customize your‌ channel’s ‌look by setting⁢ an eye-catching⁤ profile ⁣picture and a banner that reflects your ⁢style. Think of this as dressing up for​ a first date; you want to ‌make ​a great impression from the get-go!‍ Additionally, ‍craft a⁢ compelling channel description that tells​ viewers what to expect. The goal ​is to make them so curious they can’t ⁢help but ⁤hit the subscribe​ button.

Now, ⁣let’s ⁢step⁣ into ‌the nitty-gritty of video uploads. ‍You’ll need to ⁣get comfortable with a ‍few key⁢ tools. For starters, familiarize yourself with the YouTube ⁤Studio—your creative command center for⁣ managing all things video. When you’re ready to ​upload, click that big, friendly “Create”⁤ button and follow the prompts. ​Pay ⁤attention to important details like thumbnails,⁤ titles, and tags—they’re your⁣ secret⁣ weapons to stand‍ out in⁤ a sea⁢ of content.⁢ Use high-quality thumbnails‍ that pop⁤ and titles that entice curiosity.⁤ And ⁤don’t forget the ⁣power of social media; share your new videos across your platforms ⁢to drive traffic.‌ Think⁣ of it‍ like dropping little breadcrumbs leading to your digital‍ treasure!

Key ⁤Element Tip
Channel Name Reflect your content style
Cover Image Create an inviting banner
Video Titles Be catchy and relevant
Thumbnails Use bright, engaging visuals

Crafting the Perfect Video: Tips for Captivating Content ⁢Creation

Crafting the Perfect Video: ‍Tips for⁢ Captivating⁢ Content ​Creation

Creating engaging video content isn’t just about hitting the record button and hoping for‍ the best. It’s all ​about storytelling! Think ‍of your ⁣video as a journey that takes‍ your ⁢viewers along⁢ for the ⁣ride. Start strong with an eye-catching hook in⁣ the first few ⁣seconds to grab their attention. Use visuals that pop and‌ audio ‍that resonates—it’s like setting the stage for an epic ​performance. Other tricks include:

  • Crafting a ⁣script: ⁤ Outline your key points​ but ​keep it conversational.
  • Incorporating humor: A joke or two‌ can ‌break the ice!
  • Selecting the right background: Make sure it complements, not distracts.

Now that you’ve got their attention, ⁣keep it! Use pacing and editing to ⁢hold viewers’ interest. Consider⁤ inserting⁢ questions or prompts for them to engage ⁤with, ‌like asking⁢ them to‌ share their thoughts in the comments. The rhythm of your editing is just as important as what’s being said—think​ of it like the heartbeat of your narrative. A well-timed cut can ⁣enhance the drama or elevate the humor,⁤ adding layers to your message.​ Want ​some examples? Check out the table below:

Video Elements Purpose
Opening hook Catches attention quickly
Transitions Keeps flow ⁣smooth
Calls to action Encourages viewer interaction

Mastering ⁤the Upload Process: Step-by-Step to Get Your Video Live

Mastering‌ the Upload Process: Step-by-Step to Get Your Video Live

Ready⁤ to⁤ share⁢ your creative ⁢masterpiece‍ with the ⁤world? Let’s ‌dive straight ‍into⁣ the ‌process. ‍First up, sign in ⁤to your ‌YouTube⁤ account and‍ hit​ that big ol’ upload button, usually sported ‌as‌ a camera⁣ icon with a⁢ “+” ⁤sign. Once you’re in, you’ll see a dashboard⁤ where you can select your video file. Drag and drop it⁣ into the designated area or click to browse through your device. While the video ⁣is uploading, this is ‍a ‌golden moment ‌to sprinkle ‍in some flair.⁣ Think about your title, description, and tags—these are‌ your secret weapons for getting discovered! Make sure your title is catchy‌ and relevant, ⁣your description provides context, and tags help categorize your content for curious viewers searching‍ for similar topics.

Now, let’s⁤ talk about the vital next steps.⁢ Once your​ video is⁣ uploaded, you’ll be greeted with⁣ a few options to ​customize your upload. Thumbnail selection is crucial—choose one​ that ‌pops or, better yet, ⁢create a custom one that screams your channel’s vibe! After that, select the visibility settings. Do ⁢you ​want it to be‍ public, private,⁣ or unlisted? The choice⁤ is yours! before hitting “Publish,”​ consider enabling⁣ monetization ‌if you’re looking to make a little ⁢cash ⁣from your creativity. Stumped‌ on any of these‌ points? No⁢ worries! Just hover⁢ over any of the options for quick tips or help, and remember, practice⁣ makes perfect!

Optimizing Visibility: Smart Strategies for Keywords and Thumbnails

Optimizing ⁢Visibility: Smart Strategies⁣ for Keywords and Thumbnails

To make your videos ‌stand⁣ out in the YouTube sea, harnessing the right keywords and crafting enticing thumbnails is crucial. Start with keyword research; tools like Google Trends or ⁣keyword planners can unveil‍ what⁤ your audience is searching for. Think‍ of keywords ​as ‌the breadcrumbs leading viewers​ to your video feast.​ Sprinkle these throughout your video title, description, and tags, but hold back ⁢on ​overstuffing—too many can trigger ​a‍ red flag​ for algorithms. You want your​ keywords to ​be‍ the charming signposts guiding potential viewers effortlessly to your content.

Now, let’s talk thumbnails—they’re like⁤ the cover of a book, luring people ‍in with a sneak peek. ⁣Aim for bold colors, ‌clear images,⁣ and snappy text⁤ that ​conveys the ⁣essence of your ​video. Consider ​using a design ⁢tool like Canva, where you can‌ whip up a professional-looking‍ thumbnail in minutes. Keep in mind the ideal dimensions⁢ (1280×720 pixels is a good sweet spot) and make sure your thumbnail ‌pops against the​ sea of content on YouTube. A/B test different‍ designs if you can; sometimes, a⁣ tiny tweak ⁢can transform the click-through rate‍ from meh to magnificent!

Strategy Tip
Keyword Research Use tools to find trending search terms.
Optimize Titles Incorporate main keywords ‍naturally.
Thumbnail Design Use contrasting colors and readable fonts.
A/B Testing Experiment with ​different ​styles.

Concluding ‍Remarks

And⁣ there⁣ you have it! You’re now equipped with all the tools and tips⁢ needed to upload your videos ‌on⁢ YouTube like a pro. Remember, every viral sensation started as a novice just⁣ like you. So, don’t be afraid to‌ hit that upload​ button and share your creativity‍ with the​ world. ⁢

As you dive ⁣into this vibrant community, keep experimenting, engaging, and evolving. Don’t forget to check your video analytics—you know, those insights are like a treasure⁢ map‍ leading you to ‍what your⁤ audience loves. So, stay curious and let your ⁤passion shine through ‍every frame.

Got questions⁢ or need a bit of encouragement? Drop a​ comment ​or connect‍ with fellow creators. Who knows, you might just⁤ inspire someone ⁢else to take⁢ the plunge!​ Now,‌ go ahead, unleash those videos, and ⁢let’s make some⁣ waves on YouTube! You’ve got this!

Crafting Your YouTube Channel: A Fun Step-by-Step Guide

Ready to​ dive⁤ into the vibrant world of YouTube? Imagine your very own channel bursting with‍ creativity, where you share ‌your‌ passions, hobbies, or quirky ideas⁢ with like-minded folks from across the ⁢globe.‍ Whether you’ve got‌ a burning desire to showcase your cooking skills, ⁤share gaming tips,‍ or embark on⁣ exciting travel adventures, building a YouTube channel can‌ be one of the most thrilling​ experiences of your life! ⁣But​ where do you even begin? ‌Don’t fret! In ​this⁣ playful step-by-step guide, we’ll ​break down‌ everything you need to craft ⁢your unique ⁤YouTube experience. Think of‌ it as setting up your own digital stage—each step⁤ an opportunity to ‍shine bright and connect with viewers. So, grab your‍ camera and your imagination; let’s get this ​creative party started!

Discovering Your ⁤Niche: Find Your⁤ Passion⁤ and Audience

Discovering Your Niche:​ Find‌ Your Passion and Audience

Finding your​ niche is ​like unearthing a treasure chest buried beneath the sands ​of time. It’s ‌all about identifying ⁤what sets your heart on ​fire and what resonates with the crowd. Think about your hobbies, interests, and experiences. Does cooking up gourmet meals make your heart sing?‌ Or maybe⁣ you’re ⁢a tech wizard ⁢who loves‍ unboxing the latest gadgets? Pinpointing your passion ‍ is the first⁣ step in connecting with an audience that shares your ⁢enthusiasm. It’s‌ not just about ‌views; it’s about‍ building a community ​around something you ⁣love. Who‌ knows, you might inspire someone to pick up a⁣ spatula or a smartphone!

Once you’ve​ got your passion, the ⁢next step is to figure out who’s going ‍to be‌ watching your videos. Consider crafting ‍a viewer​ persona, which could include details like age, ​interests,‍ and even what challenges they face. You might want ‍to ask yourself these questions:

  • What are their favorite YouTube ​channels?
  • What do they struggle⁢ with⁢ that I can help ⁤solve?
  • How do they spend their free time?

This understanding​ can steer your ⁢content creation in the right direction,‍ ensuring you’re not just shouting into⁢ the void.⁣ Remember, a ⁢targeted⁣ approach ⁤will have a⁢ far greater impact than shooting ‌blindly at a massive audience. It’s‍ all about striking that perfect balance between passion and ‍listener needs!

Creating Eye-Catching Thumbnails: The Art of ‌First Impressions

Creating Eye-Catching Thumbnails: The Art of First ⁤Impressions

When it comes ⁢to YouTube, your thumbnail​ is like the first handshake; it needs to​ be​ firm and‌ inviting. An eye-catching thumbnail can be the difference between ​a scrolled ⁤past⁤ and a click that ⁤leads to a ⁢new subscriber.⁤ Think of it as a storefront window​ display—it should⁣ pop, ‌tell a story,⁤ and draw people ⁢in. Use bold colors, compelling ‍images, and clear text that ​hints ‌at what viewers can expect. ‌Consider including⁤ human faces; studies show that‌ thumbnails with ‌people tend to attract more views. It’s all about creating that ‍enticing‍ visual⁣ that screams, ​“Click me!”

Keep⁢ it simple yet impactful. Here are some tips to ensure‌ your thumbnails stand⁣ out‍ in a sea​ of ​content:

  • High-Quality Images: Blurry or pixelated images say “meh.” Use crisp, vibrant visuals.
  • Consistent Branding: Use similar fonts⁢ and colors ⁤so viewers⁤ recognize your style instantly.
  • Text Contrast: Ensure your​ text ⁢is legible,⁢ using contrasting colors against⁣ the ‌background.
  • A/B Testing: Don’t be afraid to‍ play around!⁢ Test different designs to see what‌ resonates‌ with your audience.

Consider this ⁣simple ‍comparison​ table to visualize what works and what‍ doesn’t:

Thumbnail Style Impact
Bright⁢ Colors High engagement
Cluttered Layout Low clicks
Simple​ Text Clear message
Generic Images Easy to ‍overlook

Planning Engaging ‌Content: Structure, Schedule, ‌and Strategy

Planning Engaging Content: Structure, Schedule, and Strategy

Alright, let’s⁢ dive into the nitty-gritty of creating‍ content that’s not only engaging but also keeps your viewers coming back for more. First things first, a well-structured plan is your ⁤best buddy ⁣here. Think⁤ about your content⁢ as⁤ a movie; there’s a beginning, a middle, and⁣ an end. Use hooks ⁢in your introduction to⁣ grab attention, delve ​into the ‍meaty stuff​ in the middle, ⁣and⁣ wrap it up with⁢ a strong conclusion that encourages viewers to engage‍ further—whether ⁢that’s leaving a ​comment, subscribing, or⁢ hitting that like button. Use lists and bullet points ‌throughout ‌the⁣ video for clarity and⁢ to keep ⁤your viewers engaged. Remember, the⁣ goal is to ‌create a rhythm⁢ that makes your​ content flow effortlessly.

Next up, let’s talk⁤ about ⁢scheduling and strategy. It’s⁤ like cooking a five-course meal; you need to plan⁤ when to prep, cook, and⁤ serve each dish.​ Start ‍by mapping out a content⁢ calendar. ‌You can use simple tools ⁤like Google ‌Sheets or dedicated apps. Don’t forget to revisit your schedule and be flexible⁤ with it; if your audience is buzzing about a particular topic, jump on ⁤that!⁣ Here’s a nifty table idea for your schedule:

Day Content Type Title/Topic Notes
Monday Vlog A Day in⁢ My Life Engage with my audience
Wednesday How-to Tutorial DIY ‌Tips for Beginners Include step-by-step visuals
Friday Q&A Answering Your Questions! Encourage ‌viewer ‌submissions

Promoting Your Channel: Building a ‍Community ⁤and Growing ‌Your ​Reach

Promoting Your Channel: Building a Community and Growing Your Reach

Building a community ‍around your ⁢YouTube channel is like⁢ nurturing⁤ a garden; ​it needs consistent care and ⁢attention to flourish. Start by ⁣engaging ‍with your audience in the comments section—don’t just drop a heart emoji and move on. Ask questions, seek feedback, and really dive⁢ into‍ conversations. Encourage viewers to share their thoughts and ideas, ⁣making them ⁢feel like integral ⁢parts of ⁤your channel.​ Host‍ live Q&A sessions to foster that sense ‌of⁤ community, and experiment ​with polls to gauge ⁣what content excites your audience. Add calls-to-action in ⁣your‍ videos, like inviting ⁣them to subscribe or ‌follow you on social media where you can connect more personally.

Consider also tapping into other ‌creators ⁢for collaboration—think of it as a‌ potluck⁢ where everyone ‌brings ⁣a dish. By collaborating, you not only introduce fresh perspectives to your ⁣content, but you also⁢ gain ⁢access to a wider audience.⁣ Promote your content across various platforms like Instagram, ⁤Twitter, and TikTok. Each⁢ platform has its own vibe, so tailor your ​approach accordingly. Here’s a quick look at effective strategies:

Platform Strategy
YouTube Engaging video thumbnails and hashtags
Instagram Behind-the-scenes ​stories and sneak⁤ peeks
Twitter Quick updates and polls to spark ‍interest
TikTok Short, fun clips that tease upcoming content

Closing Remarks

And there you have it! You’re⁣ now equipped ​with all the tools to turn your YouTube dreams into reality. Remember, starting ⁣a channel is ​like⁢ planting a seed in your⁤ garden; with a little creativity, ‍nurturing, and patience, you’ll see it ​grow and⁤ flourish. Don’t be afraid to sprinkle in⁢ your personality and ⁢let your unique voice shine—after all, that’s⁣ what makes ⁤your⁤ content relatable and ‌engaging.

As​ you embark on this ‌exciting journey, be sure to⁤ keep experimenting and learning because the YouTube⁤ landscape⁤ is always⁣ evolving. Whether ‍it’s trying out ‍new video⁣ styles, engaging with your audience, or ‌collaborating with fellow creators,​ the sky’s⁢ the‌ limit! ​So grab that camera,⁣ unleash your imagination,⁣ and ⁢start crafting ‌your ‌digital masterpiece.‍

Happy filming, and don’t forget to enjoy ​the ride! Your adventure in⁣ the YouTube universe is just beginning!

Step-by-Step Guide: Install Your Dorman 924-091 Panel Easily!

Have you ever found ​yourself wrestling with a‌ complicated car ⁤repair, feeling like you ⁢need a ⁢degree in rocket ⁢science ‌just to fix a‌ simple ⁢panel? Trust me,‍ you’re not ⁣alone!‍ But what if I told you that installing ‍the‌ Dorman 924-091 ⁢panel​ could ​be⁣ as easy as pie? Whether your‍ old panel has ⁢cracked from sun exposure or‌ simply looks like it’s ‍been through a battle with ⁤a⁣ flock of angry‍ birds, this ​step-by-step guide is here to help you ⁢tackle the job with confidence and ease. With just a few⁣ tools and some good old-fashioned know-how, you’ll have your vehicle‍ looking sharp in no time. So, roll⁤ up your sleeves, grab your tools, ‍and let’s dive⁤ into this ​simple⁤ and satisfying‌ project together!

Mastering the Basics of Your Dorman 924-091 Panel Installation

Installing your Dorman 924-091⁣ Panel is ⁤simpler than you ⁢might think! Start by gathering all the necessary tools​ and materials. You’ll need a ⁢screwdriver, pliers, and possibly a socket ‌set⁣ to tackle any ⁤stubborn bolts. Once you’ve got everything laid out, it’s time⁤ to prep your ​workspace. Make sure to ⁤have‍ a clean, well-lit‍ area, which is crucial when working⁢ on an intricate‌ install like this.⁢ It’s like setting up a cozy little workshop – a little organization ⁤goes ‌a long ⁢way⁣ in making the whole process smooth⁢ and ‍hassle-free.

Now that you’re⁤ geared up, let’s break down the​ major⁤ steps to get that panel installed like a pro:

  • Remove Old Panel: Gently take out the old ‍panel, ensuring‍ you don’t damage surrounding areas.
  • Disconnect Wiring: Carefully‌ disconnect any wires attached to the panel; ‍taking‍ a photo‌ can ‌help you remember where everything goes.
  • Fit the​ New Panel: Align your‍ Dorman‌ 924-091 Panel⁤ and ​slide ⁤it into place, checking that it fits snugly.
  • Reconnect Wiring: Refer ⁤back to ​your photo and reconnect the wires, ensuring a solid connection.
  • Secure with Screws: Tighten all ⁢screws and bolts, but don’t overtighten to avoid cracking‌ the panel.

This⁤ simple checklist will guide you through the ⁣installation⁣ process without⁢ a‍ hitch. If you encounter any issues, troubleshooting is just a ‍few clicks away on forums‍ or guides from folks who’ve been there before!

Mastering ⁤the Basics of Your Dorman 924-091 Panel ‌Installation

Tools ⁢Youll Need ​for⁤ a ​Smooth ⁣Installation Experience

Embarking‌ on the⁣ journey⁤ of installing your ⁢Dorman‌ 924-091 Panel? ‌Trust me, having the right tools ‌on hand can make all the difference between a smooth⁣ sailing experience and ​a bumpy⁤ ride. So, let’s get you geared⁢ up! Here’s a quick rundown of the essentials you’ll need:

  • Screwdriver Set: A mix of Phillips ⁢and flathead‌ screwdrivers is vital for tackling those pesky screws.
  • Socket⁢ Wrench: This ⁣tool will help⁢ you securely fasten bolts and nuts, ⁣ensuring a solid installation.
  • Pliers: A⁣ good pair of pliers can ⁣be a lifesaver when‌ you⁤ need‍ extra grip.
  • Utility Knife: Perfect for trimming or ⁣cutting through‍ any materials that may be ⁤in​ the way.
  • Tape Measure: To double-check your dimensions and ensure ⁤everything fits just right.

Now, if you’re ⁣feeling fancy and ​want to streamline your workflow, consider ​investing in some additional gear. Check⁤ out this handy table for ‌a few optional ⁢but recommended tools that can enhance your installation experience:

Tool Purpose
Torque⁢ Wrench Perfect ⁢for applying the right amount⁣ of force to ‌bolts.
Flashlight Illuminates dark corners ‌and hard-to-see ‍areas.
Safety Gloves Protect your hands while working ‌with potential hazards.
Work Light Provides⁤ ample lighting for⁤ a clear view of your workspace.
Magnetic Tool‌ Holder Keeps your screws and small tools organized and within⁢ reach.

Tools Youll ​Need for a ⁤Smooth⁢ Installation ⁤Experience

So, ‍you’ve got ⁢your ⁢hands on​ the ​Dorman 924-091 panel, and ‍now it’s time to dive in and get it​ installed ‍without breaking a ‍sweat. First things first, make sure you have​ all the tools‍ you need close⁢ by. It’s like preparing for a ‍camping ⁤trip; if you⁤ forget the essentials, you’ll ‌be sleeping on the ground. Grab your socket wrench, screwdrivers, and don’t⁤ forget⁤ some protective gloves for an added‌ layer of‌ safety. Don’t worry ‌if you’re not a pro—this‍ setup‍ is designed ⁢for folks like ‍us who might‍ not be seasoned mechanics but still ‌want to ‍contribute to our ride’s‌ well-being.⁢ Check ⁤out the basic‍ steps below:

  • Preparation: Clear ‌the area around your working space.
  • Removal: Carefully detach the old panel using the screwdriver.
  • Installation: ‍ Align​ the‍ new Dorman panel ‌with the mounting points.
  • Secure: Use your socket ​wrench‌ to fasten it in ⁢place.
  • Final Checks: Ensure⁤ everything is tight and ⁤looks good before moving on.

Now, to make⁤ sure you don’t⁤ experience‌ any⁤ hiccups, let’s take​ a⁤ moment to chat ⁣about troubleshooting. Sometimes‍ everything seems perfect ⁢on the outside,⁤ but‌ a ⁣small issue could‌ sneak‌ in. If the panel doesn’t fit as it should or you run ​into a snag while securing‌ it, don’t ‍panic! Here’s a handy ​table with some common‌ hiccups and​ quick‍ fixes:

Issue Quick Fix
Panel ⁢doesn’t align Loosen and reposition slightly.
Screws‌ won’t tighten Check for stripped threads; consider using a ⁣thread repair‍ kit.
Noise after ⁤installation Double-check all screws are fastened‌ and⁤ secure.

Navigating⁤ the Steps: ⁤A Simple Walkthrough to Success

Tips and ​Tricks ⁤for ⁢a‌ Flawless Finish on Your Panel Installation

To achieve ⁤that immaculate look for your panel ​installation, preparation‍ is key. Start by clearing‌ out the⁣ space, ensuring ⁤it’s free​ of debris and distractions. ​Having the ‍right tools at your​ fingertips makes a ​world of difference. Consider ⁢investing in a good quality ratchet‍ set⁢ or ⁤a power drill—nothing beats the ‌feeling of smooth, ⁣easy installation⁢ when you’re well-equipped. Don’t forget to inspect⁤ the panel ⁢before​ you dive⁢ in;⁢ look for any imperfections or defects. This⁤ attention to detail early on can⁣ save‍ you from headaches later. And let’s be ‍real—taking ​a little extra time⁤ now can prevent ⁣the dreaded install redo!

Next⁤ up, let’s talk alignment. Nothing ruins⁤ a polished ⁤finish faster than misaligned panels. Use a level to check your ​work at various stages; trust me, it’ll pay off! ⁣When it comes to securing your ⁣panels, a steady ‌hand is essential. Tighten⁣ screws snugly, ⁢but be careful not to overdo it—think of it like giving ‍a gentle hug​ rather than a bear trap! And if⁣ you’re ‍feeling fancy,‌ throw in some trim molding around ‌the edges ⁢for that pro touch. The final result will ⁢not only look awesome but ‍will also provide a‌ neat, finished edge ‌that pulls‍ everything together.

Tips and⁣ Tricks ‌for a Flawless ⁢Finish on Your ⁢Panel Installation

Key ⁣Takeaways

And there you have ​it, folks! ‌Installing⁤ your Dorman 924-091 panel doesn’t have to feel ​like‌ climbing ⁤Mount​ Everest. With a little bit of patience, the right tools,⁢ and​ our step-by-step ⁣guide, ‍you’re equipped to tackle this project like a pro. You’ve not only ‍enhanced​ the looks of your vehicle but also embraced that ⁤sweet sense of accomplishment​ that comes ‍with DIY ⁣tasks.

Remember, ⁤every car journey starts ⁢with a single step—much⁤ like this project! ​So, whether⁤ you’re ⁤cruising‌ down the‌ open road ⁢or just taking a quick trip​ to ⁢the‌ grocery store, give yourself a little pat on the ‍back for​ a job ‍well done. If⁢ you’ve got any‍ questions or want to ⁢share your experience, don’t hesitate ‌to drop a ‍comment down ⁢below. Happy driving, and‌ may your rides be smooth and stylish! 🚗✨

Wave Goodbye: Easy Steps to Delete Your YouTube Playlist!

So, you’ve decided it’s time to declutter your​ YouTube ‍playlists? Maybe those old jams just aren’t hitting the same, or​ perhaps your watchlist has turned into a⁤ bit of a‌ digital hoarder’s paradise. Whatever the reason, deleting a ⁢YouTube‍ playlist doesn’t have to be a ‌headache. In fact, it can ⁢be as simple⁣ as waving goodbye to an old friend—no hard feelings! Let’s⁣ dive into some easy steps to help you clear out the digital cobwebs and create⁣ a playlist that‍ truly sparks joy. Ready‍ to swipe left‍ on those outdated tunes? ⁣Let’s get started!
Decoding Your YouTube Library for‌ a Fresh Start

Decoding Your YouTube Library for a Fresh Start

​⁣ Ready to give your YouTube library a little TLC? Think of your playlists as the bookshelf of ​your⁢ digital life. Over time, those initial must-watch collections might ⁢collect dust, and let’s be real—some⁤ songs just don’t hit the same anymore. So, how ​do you declutter that cluttered ‍library and make ⁣way⁣ for⁣ fresh content? Start by reviewing ‌your playlists. Ask yourself:
‍ ⁤

  • Which videos still resonate with you?
  • Are there any that you’ve outgrown?
  • Do you really want ⁤to keep that viral cat video from five years ago?

‍ ⁣ Once you’ve identified the guilty culprits, it’s time to take‌ action! Simply go into your⁣ library, click the playlist you want to remove, and hit that delete button like it’s ​a noisy⁤ alarm clock you just‍ can’t stand. It really is that easy! If​ you’re feeling fancy, ‍you might ​even create a new playlist⁣ that reflects‌ your current vibe—something fresh and new, like planting a garden after winter. Switching things up can be just ⁣what you need to reignite ‌your passion for discovering new content.

Letting Go: Tips for Deciding Which Playlists to Delete

Letting Go: Tips for Deciding Which Playlists to Delete

Deciding which​ playlists to part with can⁤ feel like sorting through a treasure chest; some gems shine, while others may have lost their ⁢luster over time. Start by evaluating your playlist purpose. ​Ask yourself: “Does this collection‌ still resonate with‍ me?” If it’s gathering virtual dust ‌with songs ⁤that aren’t hitting home anymore, consider letting it go. A‌ playlist‌ that once matched your vibe might now⁤ feel like an ‍awkward⁢ pair of shoes – great in theory, but not really your style anymore. When ‍in doubt, think ⁤about how often you listen⁤ to it. If it hasn’t made your soundtrack in months, it might be time to say goodbye.

Another effective way to trim the fat is​ to ⁤ review your song choices. ⁣You can run through your playlist and weigh ‍how ⁣each track makes you feel. Jot down a few thoughts ​about each⁢ one: Does it spark joy? Does it remind you of a fun time, or is it just background noise? If any tunes incite‌ a “meh” feeling, they probably don’t deserve a spot in your curated collection. Consider creating a decision table to ‍visualize what stays and what goes. Here’s a simple layout to help you out:

Track Title Vibe​ Check Keep or⁣ Toss
Song A ❤️ Love it! Keep
Song B 😐 Just okay Toss
Song C 🎉 Party anthem! Keep
Song D 🧐 Who‌ even is this? Toss

Step-by-Step Guide to Erasing Your Playlists with Ease

Step-by-Step Guide to Erasing ‍Your Playlists with Ease

Ready to wipe the slate⁤ clean ‍and declutter your YouTube experience? Deleting‌ a playlist is as easy as pie!⁤ Just‌ follow these simple steps to​ send that unwanted playlist packing:

  • Log into your YouTube account: Open your ‍favorite browser and head over to YouTube. ⁣Make sure you’re signed in.
  • Navigate to Your ⁣Library: ⁣Look for the Library icon on ​the left sidebar. Click it to reveal all your playlists.
  • Select ​the Playlist: ‍ Find the playlist you want to delete and click on its title to open it.
  • Access Playlist Settings: Hit​ the three dots ‍(⋮) right next to the playlist ‍title ‌to⁤ unveil more ⁣options.
  • Delete the Playlist: Click on “Delete playlist” ​and confirm your choice. Boom! It’s gone.

But, wait a minute!⁣ Are you sure you want to part⁣ ways with that ‍collection of bangers? Once you hit that delete button, there’s no going back. If ​you’re feeling unsure, you can always take a moment to rethink your decision. And hey, if your playlist ⁤holds too many good‍ memories, ‍why not⁣ just keep ⁢it around for‍ a bit longer? It’s ‌like reminiscing over an old photo album – sometimes the best treasures lie in what ⁣we choose to remember!

Celebrating Your Clean Slate: Making the Most of Your YouTube Experience

Celebrating Your​ Clean Slate: Making the Most of Your YouTube Experience

Embracing that fresh start on YouTube can feel like‌ unboxing a ​shiny new ‍gadget. Think about it! Each playlist is like a collection of memories we created with‌ the click of a button. Yet, sometimes​ we have to part ‍ways with old favorites to make ⁣room for new passions. When you delete a‌ playlist, it’s not just a digital ⁤cleanup; ​it’s an emotional declutter, allowing space for what truly resonates with‌ you now. It’s like clearing out your closet to only showcase ‍those ⁤outfits⁣ that make you feel fabulous.​ So, grab a comfy⁢ chair and let’s dive⁢ into this process a little deeper.

As you navigate through your YouTube settings, consider how‍ refreshing it is ⁤to ‍streamline your viewing experience. Here are a ‌few steps to keep ​in mind ⁢while you’re on this journey:

  • Evaluate Your Favorites: Take a moment to scroll through your playlists and ⁢decide which ones still inspire you.
  • Make a Backup: If there are any sentimental‌ tracks, don’t forget to save them elsewhere first.
  • Hit Delete: Once you’re ready, the delete button is just a click away—like shedding old skin!
  • Celebrate Your‌ Progress: Each playlist you delete is a step toward your ideal‌ YouTube space!

Once you’ve⁢ pressed that delete​ button, ⁤revel in‍ the satisfaction of your clean ​slate. It’s more ⁣than⁤ just a digital clean-up; it’s ⁤an opportunity to explore new‍ trends, discover fresh content, and align your playlists with who‍ you are today. Remember, your YouTube journey​ is yours alone, ⁢so curate it‌ in a way that sparks joy and reflection. As you⁤ hit ‘Play’ on those new ⁤interests, think of it as​ turning the page on a new chapter—one filled with excitement ⁣and endless possibility!

In Conclusion

And there you have it! With ​just a few simple ​steps, you’re all set to wave goodbye to those playlists that no longer tickle your fancy. It’s like spring cleaning for your YouTube account—out with the old, in with the‌ fresh ⁤and ⁤fabulous! Remember, it’s totally okay to curate your collection and ‌keep only the gems that resonate‌ with you. So go ahead, dive into ⁢that YouTube library, and make⁣ it your own. If you have any questions or need a helping hand, don’t hesitate to ask! Happy editing, and may your future playlists be nothing short ⁢of amazing! 🌟