Have you ever been watching a YouTube video, only to think, “Wow, I wish I could save this for later!”? You’re not alone. The desire to keep a favorite video at your fingertips—or to revisit that unforgettable tutorial—can strike at any moment. Enter Ontivo, a tool that promises to let you capture those moments and preserve them for your future binge-watching sessions. But how effective is it really? Can you trust it to deliver that sought-after recording without a hitch? Buckle up, because we’re diving deep into the scoop about using Ontivo to record YouTube videos. Get ready to find out how it works, what you need to consider, and if it’s worth your time!
Exploring Ontivos Recording Features for YouTube
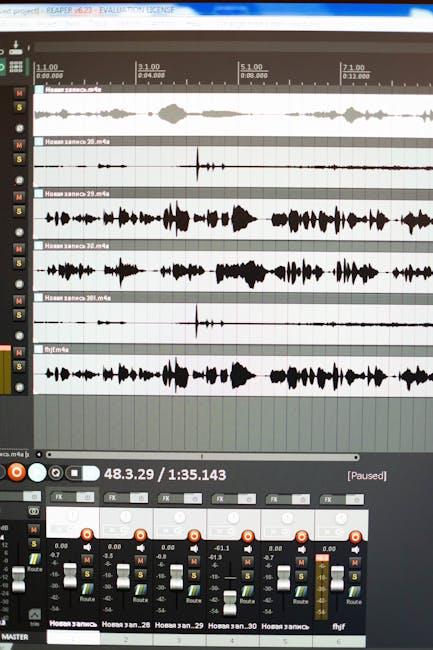
When diving into Ontivo’s recording features, it’s like opening a treasure chest packed with goodies specifically designed for YouTube enthusiasts. This tool not only allows you to record videos effortlessly, but it also enables you to customize your experience like a chef spices up a dish. You can choose to record the entire screen or just a specific area, making it super flexible for whatever type of content you’re creating. Imagine being able to capture tutorial videos, gameplay sessions, or even reaction videos with just a few clicks—it’s as easy as pie!
One of the standout features is the ability to schedule recordings, which feels like having your own personal assistant. Want to catch that live stream while you’re out? No problem! Just set a schedule, and Ontivo takes care of the rest. Plus, you can also take advantage of its editing tools post-recording, making it a one-stop shop for content creation. Check out some key recording features:
- Screen Recording: Record full or partial screens.
- Audio Capture: Record both system and microphone audio.
- Scheduling: Set recording times for live events.
- Editing Tools: Basic editing after your recording session.
Navigating the Installation Process with Ease
Getting started with the installation process doesn’t have to feel like you’re navigating a maze blindfolded. With Ontivo, you’ll find a user-friendly layout that helps you find your way. First things first, make sure you’ve got the right version of the software for your operating system. Once you’ve snagged that, simply follow the prompts on the screen. No hidden traps or complicated steps here—just a straightforward guide designed to take you from download to fully functional in no time. Breathe easy, you’ve got this!
Once installed, take a moment to dive into the settings. This is where the magic happens! Customizing your experience can enhance your recording capabilities and ensure you’re capturing your favorite YouTube videos just the way you want. Here are a few key settings to consider:
- Video Quality: Choose the resolution that fits your needs.
- Audio Recording: Select whether to include background sounds or mute them.
- File Format: Pick the format that works best for you, whether it’s MP4, AVI, or something else.
By taking a few moments to adjust these settings, you’re setting yourself up for a smoother recording session that feels just right!
Maximizing Your Recording Quality: Tips and Tricks
To ensure your recordings from YouTube with Ontivo shine like a diamond, you need to pay attention to some key factors. Start by checking your internet connection – that steady stream makes all the difference. A wired connection beats Wi-Fi any day for stability and speed. Next, consider your microphone. Using a quality microphone can elevate your audio game significantly. The clearer your voice, the better your audience can connect with your content. Also, don’t forget about your recording environment! A quiet, echo-free space works wonders. If you can’t find a perfect spot, just hang up some thick blankets or cushions around to absorb sound.
Another trick involves adjusting your recording settings in Ontivo. Aim for the right resolution and bitrate for your needs; 1080p at 30 frames per second usually does the trick for most YouTubers. Keep in mind the balance between file size and quality – you don’t want files that are too huge to handle. Here’s a quick checklist for maximizing your recording quality:
- Stable Internet: A wired connection is preferable.
- Quality Microphone: Invest in a good mic for clear audio.
- Quiet Environment: Minimize background noise.
- Right Settings: Optimize resolution and bitrate.
Troubleshooting Common Issues to Keep You Rolling
When recording from YouTube using Ontivo, you might hit a few snags that can feel as perplexing as trying to assemble IKEA furniture without instructions. If your recordings keep turning up blank or the audio sounds like you’re underwater, here are some handy tips to get you back on track:
- Refresh Your Connection: Sometimes, a simple refresh of your internet connection can solve a lot of problems. Unplug your router, wait for about 30 seconds, and then plug it back in.
- Check Permissions: Ensure that Ontivo has permission to access your microphone and speakers. Sometimes, operating system settings forget to grant this access, and it can lead to frustrating dead ends.
- Update the Software: Just like you wouldn’t run an old app on your phone, make sure you’re using the latest version of Ontivo. Updates often fix bugs that could impact your recordings.
If you’re still struggling, you might want to look at your storage space. A full hard drive is like trying to bake a cake without any flour – it just won’t work! Make sure you have ample space available; recordings need room to breathe. Here’s a quick checklist to help you out:
| Storage Status | Action Needed |
|---|---|
| Less than 1 GB available | Free up space by deleting old files |
| Between 1-5 GB available | Consider clearing temporary files |
| More than 5 GB available | Everything should work smoothly! |

The Conclusion
And there you have it—the lowdown on using Ontivo to record YouTube! Whether you’re looking to snag some highlights for a project or save a full tutorial for offline use, Ontivo makes it all super simple. Think of it as your trusty sidekick on this wild adventure through the vast sea of videos. Just remember to respect copyright rules and keep things above board.
So, what are you waiting for? Dive in and start making the most of your streaming experience. With the right tools at your fingertips, the world of YouTube is yours to explore—record, relive, and share those epic moments! And if you have any questions or tips of your own, drop them in the comments. Happy recording!