Picture this: you’ve just spent countless hours curating the ultimate YouTube playlist for your upcoming school project, only to realize it’s cluttering your account and you don’t need it anymore. Sound familiar? Deleting playlists on your school Chromebook might seem like a daunting task, but it’s as simple as a click and a swipe. Whether you’re looking to tidy up your channel, free up some mental space, or just want to keep your YouTube experience fresh, this quick guide will walk you through the process effortlessly. Let’s dive in and reclaim your playlist paradise!
Mastering Your YouTube Playlist: The Step-by-Step Deletion Process
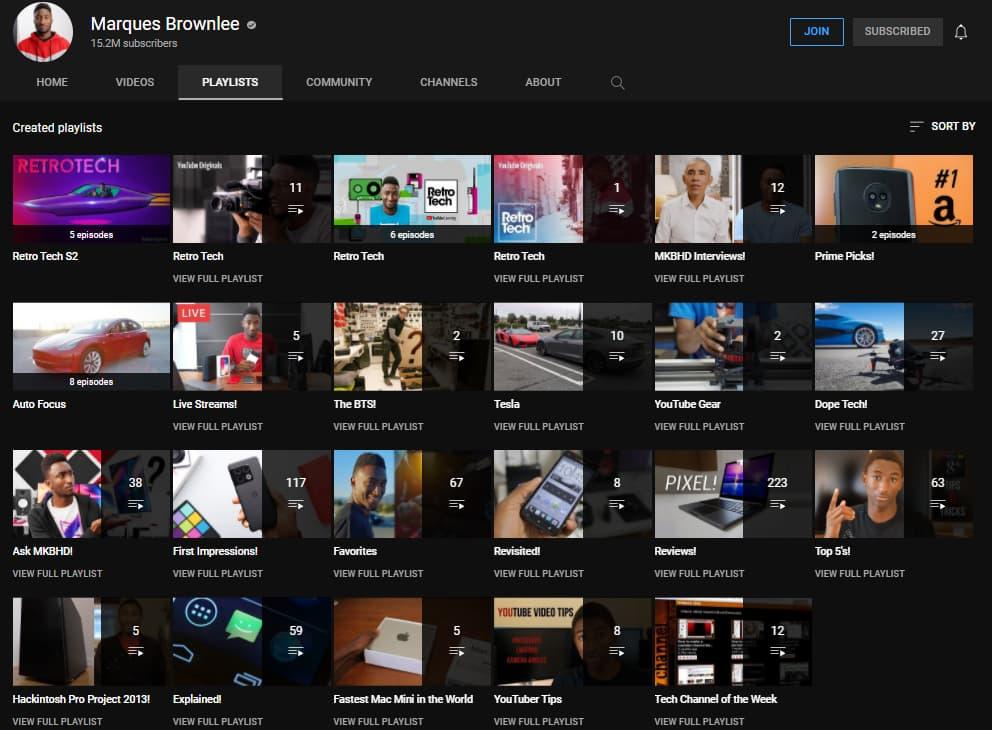
Clearing out your YouTube playlists on a school Chromebook is like spring cleaning for your digital space—refreshing and satisfying! To kick things off, log in to your YouTube account and head over to your Library where all your playlists hang out. From there, simply scroll down and find the playlist that’s been taking up unnecessary space in your collection. Once you spot it, click on it to dive in further. At this juncture, it’s like picking up that long-lost shirt you haven’t worn in ages; are you really going to keep it?
Next up, look for the three-dot menu icon next to your playlist title—this little gem is your best friend. A menu will pop up, giving you the option to Delete Playlist. Tap that, and YouTube will throw a friendly confirmation your way, just to make sure you’re totally sure about this decision. After clicking OK, your playlist will vanish—poof! Just like that, you’ve lightened your digital load. If there are more playlists to say goodbye to, repeat these same steps. It’s quick and easy, and you’ll feel a ton lighter afterward!
Navigating the Chromebook Interface for Effortless Playlist Management
Navigating the Chromebook interface is a breeze once you get the hang of it! When it comes to managing your playlists, you’ll find that everything you need is at your fingertips. Start by launching the YouTube app or accessing it through your Chrome browser. Once you’re there, click on the Library icon located on the left sidebar. It’s like your personal playlist haven! You’ll see Playlists right at the top; click that and enjoy the sight of your carefully curated collections. Each playlist will have three little dots next to it—think of them as magic buttons for swift actions. Don’t worry, you won’t get lost; the clean design keeps everything neat and tidy.
Now, if you’re ready to say goodbye to an old playlist, just follow these steps. Hit those three little dots, and a menu will pop up, revealing options for editing and deleting. Click on Delete playlist, and voilà! A confirmation box will appear, simply asking if you’re sure you want to take the plunge. If you really are ready for that playlist to vanish into thin air, hit Delete again. BAM! It’s gone! This method is not just hassle-free; it gives you that satisfying sense of control over your musical journey. Keeping things organized has never felt so good!

Troubleshooting Common Playlist Deletion Hiccups
It’s not uncommon to run into a few snags when trying to delete your YouTube playlists on a school Chromebook. First off, if you find that the delete option is grayed out or missing, take a moment to double-check your internet connection. A shaky connection can create delays in syncing, making it seem like the playlist is untouchable. Additionally, ensure you are logged into the correct Google account—sometimes, students accidentally switch accounts, leading to confusion about which playlists they can edit. Always verify your settings and account details before diving into playlist management.
If you’ve confirmed everything looks good but still can’t get that playlist deleted, try clearing your browser cache. Sometimes, old data clings on like a stubborn stain, causing weird glitches. To clear the cache, head over to your Chromebook’s Settings, navigate to the Privacy section, and select “Clear browsing data.” It’s like giving your machine a fresh start. One last tip: if all else fails, don’t forget the trusty ol’ reload button or restarting your device. You’d be surprised how often a quick reboot can resolve issues that seem more complicated than they really are!

Keeping Your YouTube Experience Fresh: Tips for Organizing Playlists
Organizing playlists on YouTube can feel like a wild ride sometimes, especially when you’ve got a ton of videos and channels scattered around. Think of your playlists like a personalized buffet; you want to serve up the best bits in the most appealing way! Here are some tips to keep your YouTube journey enjoyable and your playlists fresh:
- Group Similar Content: Create playlists based on themes or moods. Whether it’s your favorite study tunes, hilarious fail compilations, or some well-deserved relaxation videos, organize them like chapters in a book.
- Regularly Update: Treat your playlists like the latest fashion. What was cool last month might not charm you today! Add new favorites and remove the ones that no longer spark joy.
- Collaborate: Sometimes your friends have the best suggestions. Invite them to contribute to your playlists. You’ll end up discovering gems you didn’t even know existed!
- Create Private and Public Playlists: Want to keep some videos just for your eyes? You can make those playlists private while sharing others with the whole school to showcase your cool finds.
If you’re looking to take your playlists to the next level, consider using a power tool like the following table. This quick reference can help you decide what type of playlists to maintain or create:
| Playlist Type | Examples | Benefits |
|---|---|---|
| Study Aids | Explainer Videos, Tutorials | Boosts understanding and retention |
| Fun Times | Comedy Skits, Music Videos | Lightens the mood during breaks |
| Inspiration | Motivational Talks, Life Hacks | Encourages personal growth |

In Summary
And there you have it! Deleting those YouTube playlists on your school Chromebook is a piece of cake. It’s all about a few simple clicks, and just like that, you can clean up your account and get ready for your next binge-watching session without clutter. Remember, it’s like tidying up your room: a little effort can make a big difference in how you enjoy your space! So next time you find a playlist that doesn’t spark joy, you know what to do. If you have any questions or hit a snag along the way, don’t hesitate to reach out. Happy watching, and may your YouTube experience be ever-more delightful!