Mastering Screen Recording on Your Laptop for YouTube Fun!

Ever found yourself watching a tutorial on YouTube and⁢ thinking, “Wow, I could totally do that!”? Whether it’s gaming, crafting, or even‌ just sharing tips and tricks, screen recording is like the magical wand of the digital world, turning your laptop ​into a personal production studio. Imagine capturing every click, every movement, and every moment of your creative genius to share with ⁢the world. Sounds enticing, right?

If you’re‌ nodding along, you’re in the right place! In this article, we’re diving into the delightful realm of screen recording, where we’ll walk you through the ins and outs of mastering this skill on your laptop. From choosing the right software to snagging those perfect clips for your YouTube channel,⁢ it’s ‍all about making your content shine. So, grab ⁢your laptop, cozy up, and let’s embark on this fun-filled journey together. By the ⁤end, you’ll ⁤be ready to hit that record button and show off your talents⁢ like a pro! Ready? Let’s go!

Unlocking the Secrets: Choosing ​the​ Right Screen Recording Software for Your Needs

Unlocking the Secrets: Choosing the Right Screen Recording ⁤Software for Your Needs

When‌ diving into the world of screen recording,⁣ you might feel a bit like ​a kid in a candy ‍store—so many options, but which one to choose? Start by considering your specific needs. Are you looking ‌to record video tutorials, gameplay, or⁢ perhaps some exciting webinars? Not all tools cater to the same audience, so it’s ‌essential to align the software’s features with your goals. Also, think about the⁢ user interface; a clean and intuitive layout can make your recording sessions a breeze. Too many bells and whistles ⁤can‌ overwhelm, while a‍ straightforward design can save you precious ⁢time.

Another crucial aspect is the system compatibility. Make sure the software runs smoothly on‌ your laptop—whether you’re a proud Mac user or a Windows aficionado. And don’t forget about export options. You’ll want software that easily saves your recordings in formats that suit YouTube and social media platforms. Here’s a quick look at the features you should weigh:

Feature Importance
User-Friendliness Essential for quick learning
Editing Tools Helps refine⁣ your ‌content
Output Formats Compatibility with platforms
Customer Support Helps when you’re in a bind

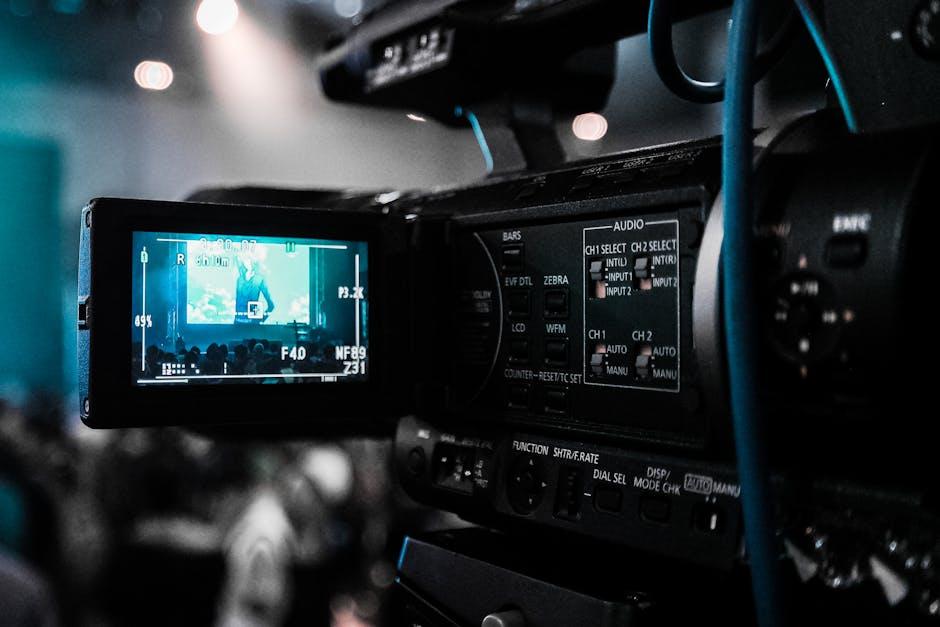
Perfecting Your Setup: Essential Tools and Settings for Flawless Screen Capture

Perfecting Your Setup: Essential Tools ⁢and Settings for Flawless Screen Capture

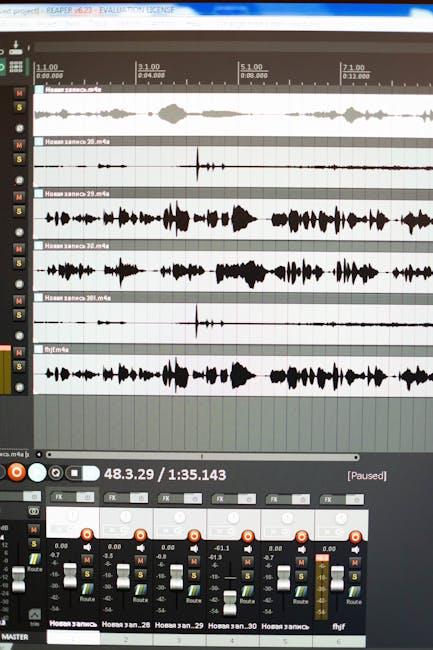
Getting your screen recording just right takes more than just hitting the record button; it’s about having ‌the right tools at your​ disposal. First off, consider investing in‍ a reliable screen recording software. Whether you prefer ‌something ⁣straightforward like OBS⁤ Studio or​ a more user-friendly ⁣option like Camtasia, having the best software simplifies the ⁣whole process. Audio quality can’t be⁤ overlooked either—use a quality microphone to ensure your voice comes through crystal clear. Remember, ‍if your audience can’t hear you well, they might just bounce to the next video!
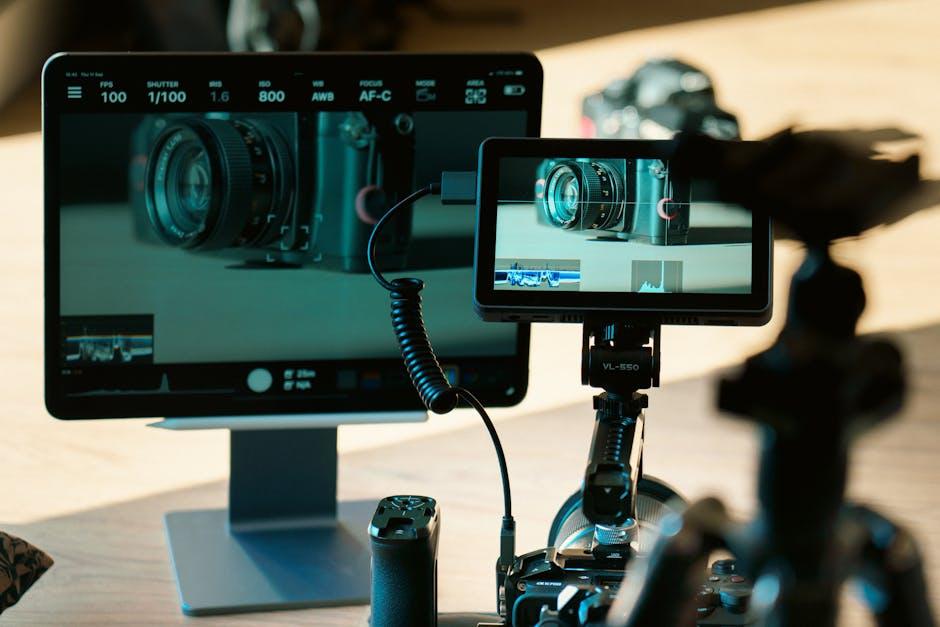
Now, let’s talk settings! ⁢The resolution of your recording plays a crucial role in the viewing experience. Aim for at least⁢ 1080p for crisp ‌visuals. When it comes ⁤to frame rates, ​a consistent 30 to 60 FPS ​is ideal. ⁢It keeps everything looking smooth and professional. Additionally, consider using a green ⁢screen effect if you’re feeling adventurous. It adds a layer of professionalism and can enhance your content’s appeal. To help ​you ⁢visualize the best software ‌and settings, here’s a quick comparison of popular tools:

Software Ease of Use Price
OBS Studio Moderate Free
Camtasia Easy $$
Snagit Very Easy $

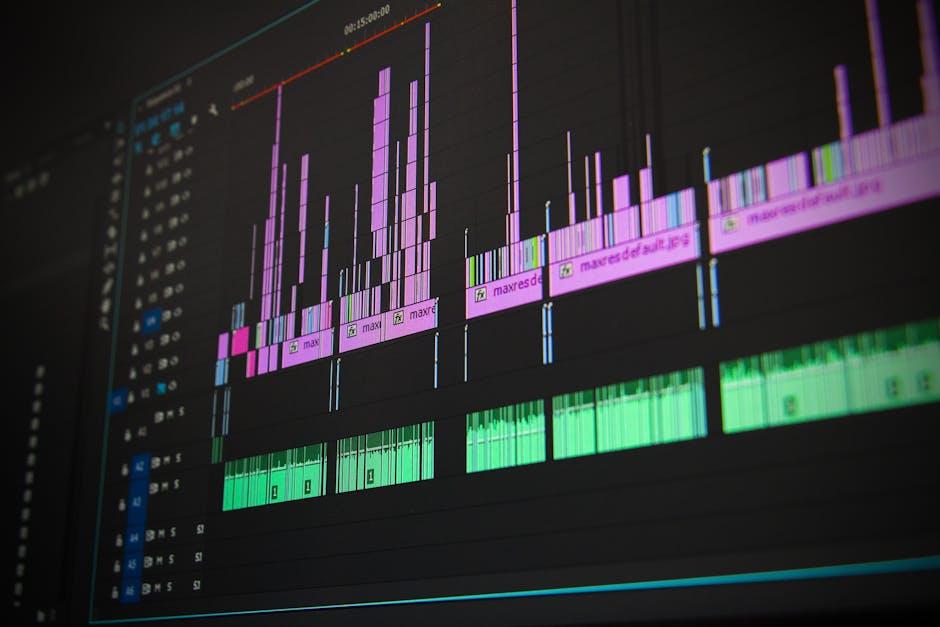
Editing Magic: Transforming Raw Footage into YouTube Gold

Editing‍ Magic: Transforming ⁣Raw Footage into YouTube Gold

When ⁤you’re sitting ⁤on‍ a treasure trove of⁤ footage, that raw video from your screen recording can feel overwhelming.‍ But here’s where the real magic happens! ‌Think of editing as turning a rough stone into a sparkling diamond. ⁣You’ve got to chip away at the excess and polish it until it shines. Start by cutting out the fluff – those awkward pauses or flubbed lines ‍– and make sure ⁤your video flows smoothly. Consider adding dynamic text overlays or engaging transitions to keep your viewers glued to the screen. Color correction⁢ is also key; it’s like adding a filter to your‍ favorite selfie before posting. Bring out those colors and give your audience a visual‌ treat they can’t ​resist!

Don’t forget about sound—it’s just as​ important as the visuals! Crisp, clear audio can elevate a good video to greatness. You can enhance your recordings by incorporating background music or sound effects that resonate with the content. Use audio ⁣tools to adjust levels, ensuring that every word is easy to catch. Plus, a well-timed jingle can leave a lasting impression, like that catchy tune you can’t shake off. And remember, it’s⁤ not just about the end product; it’s‌ the journey of ⁤transforming that raw footage into something you’re proud to share. So grab your editing software, unleash your ⁤creativity,⁢ and​ watch ⁣your YouTube channel come to life!

Tips and⁤ Tricks for Engaging Your Audience with Dynamic Screen Recordings

Tips and Tricks ‍for Engaging Your Audience with Dynamic Screen Recordings

Want your viewers‌ to stick around for ⁤the entire ​video? Make your screen recordings pop! Use​ visual aids like arrows or highlights ‌to direct attention‍ where it’s needed. When you’re demonstrating how to ⁤navigate​ a tricky software or app, incorporating these elements ​can turn a dry explanation into an engaging‌ journey. Pair that with a well-timed voiceover to add some personality—think of it as the cherry on top of an already delectable sundae! You could ask open-ended‌ questions throughout your recording to invite viewers to think critically as they follow along. For example, “What do you think happens next?” keeps them on their toes and invested.

Another ‍way to spice up your recordings is ⁣by mixing up your content. Don’t⁤ just hit record and talk your way through the same old routine. Imagine you’re ‌preparing a gourmet meal; each ingredient plays a vital role!⁤ Incorporate different techniques such as screen annotations, zooming in on ​critical areas, or even speeding up certain parts to‌ maintain a lively pace. Think of your screen recording as storytelling—create ‍a narrative flow that keeps folks engaged. To visualize this process, check out the table below:

Technique Effect
Screen Annotations Clarifies ‍key points
Zooming In Focuses viewer attention
Speed Up Sections Keeps content lively
Voiceover Variation Adds personality and⁤ engagement

Key Takeaways

And there you have it! You’re now ‍armed with the tools and tricks to master screen recording on your laptop, ready to dive into the vibrant world of ‌YouTube content creation. It’s like having a personal magic wand—except instead of casting spells, you’re crafting videos that can captivate an audience. ​

Whether you’re ⁣planning to share gaming highlights, create tutorials, or⁤ just document ⁢your daily digital adventures, remember that practice makes perfect. Don’t be afraid to ​experiment and let your personality shine through. Think of your screen recordings as a canvas; the more creative you get, the more engaging your videos will be!

As you embark on this journey, keep an eye out⁣ for updates in software and trends. The digital landscape is⁤ always shifting, and staying informed will help you stay⁢ ahead of the game. So, are you ready to hit that record button and unleash your creativity?⁣ I⁢ sure hope so!

Thanks for reading, and happy recording!‌ May your uploads be smooth, your edits sharp, and your views sky-high. Let’s make some YouTube magic! ✨

Mastering Screen Recording on Your Laptop for YouTube

Ready ⁣to take your YouTube game ‍to the next​ level? ​Screen ​recording is like the secret sauce for creating awesome content;⁢ it lets you share your know-how, gameplay, or‍ tutorials ⁣with the world right from your laptop. Picture this: you’re‌ guiding your viewers​ through a complicated software, sharing epic gaming moments, or⁤ showcasing a step-by-step craft‌ tutorial, all while your laptop captures it perfectly. But let’s be real, diving‍ into the world of screen recording can ⁣feel ‍a⁣ bit daunting. Fear not! We’re here to break it down into bite-sized chunks, turning you into​ a screen recording pro faster ‌than you can say “Let’s hit ⁤record!” ​Whether you’re just starting ‍or looking ⁢to polish your skills, we’ll ‌guide you through the essentials so you‌ can⁢ create ⁣stunning⁢ videos that keep your audience coming⁢ back for more. So, ⁣are you ready to unlock ⁤your ‍laptop’s potential? Let’s get into it!

Choosing the Right Screen ‍Recording Software for Your Needs

When diving into the world of screen recording, ⁢there are a ⁤few​ key factors to consider to find⁣ software that⁤ fits like a glove.​ First off, ⁢think about ‌your operating system. Are you team Windows or Mac? ⁢Some applications are⁢ designed specifically for one or the other, ​while others flourish as cross-platform⁣ solutions. Next, consider how you ⁤plan to use your recordings. Are you sharing⁢ tutorials, gameplay,‍ or perhaps vlogs? This will dictate whether you need features like audio integration, editing‌ tools, or even video resolution options. It’s like choosing a bike: if you’re cruising around ⁤town, you might want something⁤ lightweight, but if you’re hitting ‌a bumpy trail, durability and ​shock⁤ absorption are ​key!

Another aspect to weigh is your ⁢budget.‌ There are fantastic free options like OBS Studio that ⁤can hold⁢ their own against ⁤the paid competition, but they might require a bit of a learning curve. Conversely, premium tools often come packed with ‌handy features and customer support—think‍ of them as the luxury vehicles‍ of the bunch.​ You should also look for tools that allow for easy⁣ file sharing and ‍come with solid‌ customer ‌reviews. A good way to compare ​is to create a simple⁤ table to weigh ⁤your options side by side:

Software Price Key Features Best For
OBS ⁢Studio Free Customizable, ⁤Multi-source Tutorials,⁢ Streaming
Camtasia $249 Built-in​ Editor, Annotations Tutorials, Presentations
Screencast-O-Matic $1.50/month Easy Upload, Sound‍ Recording Quick ‌Recordings

Choosing the Right Screen Recording Software for Your⁢ Needs

Mastering Settings and ⁣Optimizing Video ​Quality

When ‍it comes to screen recording on your⁤ laptop, diving into​ the settings can feel like wandering through a maze. But fear not! ⁢With ⁣the ⁢right ‌tweaks,‍ you⁤ can elevate your ‍video quality‌ from okay⁢ to⁤ absolutely stunning. Start by selecting the​ appropriate resolution and frame rate.‍ Ideally, ⁤you want ⁤at least 1080p ⁤for crystal-clear clarity, but if your laptop can handle it, 4K is a‌ showstopper. Consider⁤ adjusting the frame rate ⁢too—30 FPS should suffice ​for most content, but if you’re showcasing fast-paced gaming or ⁤dynamic software, bumping it‌ up to 60 FPS can make ‍a world⁤ of difference. Don’t forget about choosing the correct recording format, as some are more ‌compatible ⁢with editing software than ⁢others.

⁤ Next up, ⁣let’s talk audio. It’s easy to overlook, ‍but nobody ‍wants‍ to listen to a video that sounds like⁤ it ‍was recorded​ in⁢ a tin ⁣can.​ Invest ⁣in a ⁤decent microphone​ or headset‌ to⁣ capture crisp‌ audio.​ You might⁢ also want to ‌check the input levels in⁤ your recording software to⁢ ensure your voice (or gameplay sounds) aren’t muted by ⁣the chaos of background ⁤noise. To‌ keep​ things‌ organized, here’s a ​quick checklist‌ to optimize your ⁢settings:

‍ ‍ ⁤‍

  • Resolution: ‍1080p ⁢or 4K
  • Frame ⁣Rate: 30 FPS ⁢or 60 FPS
  • Recording Format: MP4 or MOV
  • Audio Source: ‍Use an external microphone
  • Input ⁣Levels: Check ​to avoid distortion

⁣ ​ By getting these​ settings just right, you’re ‍not ⁢just recording ⁤a ⁢screen; you’re ⁣creating an experience​ that ‌viewers will⁣ want to ⁣stick around for! Whether it’s tutorials,‍ gameplay, or‍ reviews, optimizing these elements can turn your videos ⁣from bland to grand.

Mastering Settings⁢ and Optimizing Video Quality

Tips for Engaging and Professional-Looking Recordings

To make your recordings ‌truly shine, focus on creating a ‌visually appealing ​environment. ⁤ Lighting plays a​ crucial⁢ role; natural⁢ light ⁤is your best friend. Position your‍ laptop near a window or invest in a ring ​light⁢ to ensure your face is well-lit and clear. And don’t forget about your background! ⁤A ⁤clean,‍ uncluttered space not only​ looks more professional but also ⁢minimizes distractions for your viewers. Consider a ‍simple bookshelf, a vibrant plant, or even a stylish poster as a backdrop⁣ to enhance ‌the overall vibe of your video. Is there anything worse ⁢than‌ a‌ messy room stealing the spotlight ‌from your expertly crafted content?

Next, sound⁢ quality can ‍either make or break⁤ your recordings.⁤ Investing in a decent microphone ⁤can work wonders for your audio. Don’t underestimate‍ the power of a⁢ quiet room;‍ background noise​ is ⁣the enemy! Close your windows, mute notifications, and, if possible, record during quiet times ‍of ‌the day. It’s also ⁢helpful to rehearse your script ⁢or points ahead of time to maintain a smooth flow. Remember, ⁤if you sound confident and enthusiastic, ​your audience will feel engaged. So go ​ahead, practice those‍ speaking skills—they’re just ​as important as the visuals!

Tips ​for Engaging and‌ Professional-Looking​ Recordings

Editing and Enhancing Your ⁣Videos for Maximum ‌Impact

Once you’ve captured your screen recordings, it’s time to sprinkle‌ that magic dust⁤ of‌ editing, ‌right? Think of ⁢editing as​ the secret ⁢sauce that transforms a good video into⁤ a⁣ great one. Start by ‍trimming the edges—nobody wants to sit through⁢ a 20-minute recording when all they need is a ⁤quick ⁤tutorial! Utilize transition‍ effects⁣ to give your video a smooth flow; ‌quick cuts ⁣can keep viewers engaged, while fades can add a professional touch.⁢ Don’t ⁤forget to incorporate text overlays to ⁢emphasize key points. ‌After‌ all,⁣ adding bold‍ captions can‌ help viewers absorb‌ important information without straining⁢ their ears.

Sound is just as crucial as your visuals,‍ so‌ let’s⁢ not neglect⁣ it! ​Use background music to⁣ set the ‌mood, but make sure it doesn’t overshadow your⁢ voiceover; it’s like finding ⁢that sweet spot between salt and⁢ sugar in⁤ a recipe. Consider using a balanced audio clip that complements without overpowering⁣ your message. And if you have the chance, add more elements like graphics ⁢or⁤ animations—they can make⁤ complex ideas​ much‍ easier⁣ to⁤ digest.​ With these⁤ tips,‍ your videos won’t just inform; they’ll⁢ resonate, leaving a memorable impact ⁢that encourages viewers to⁢ hit ‍that “subscribe” button!

Editing and Enhancing Your⁢ Videos for Maximum Impact

Final Thoughts

And there you have it! Mastering screen recording on ‍your laptop ​for YouTube is like‍ throwing a party: ⁢you need the right setup, some cool tricks up⁢ your sleeve, and ‌a touch of personality to⁢ keep your audience engaged. ⁣With everything from selecting the best software to perfecting your audio, you’re now equipped to create engaging content that‍ viewers will love.

Remember, practice makes‌ perfect, and every recording is ⁣a chance to improve ‍your skills. Don’t stress too ⁣much⁤ about getting ⁣everything right ‍on‌ the​ first go; learning is all part of the‌ journey. So, grab your laptop, unleash your creativity, and‌ start sharing‍ your knowledge with⁣ the world! ⁢Who knows?​ Your next‍ video could be ⁤the‌ one ‍that goes viral. Happy recording, and may your ‌YouTube channel shine ⁤bright⁣ like a⁣ diamond!