Snag Your Faves: Easy Steps to Download YouTube Clips

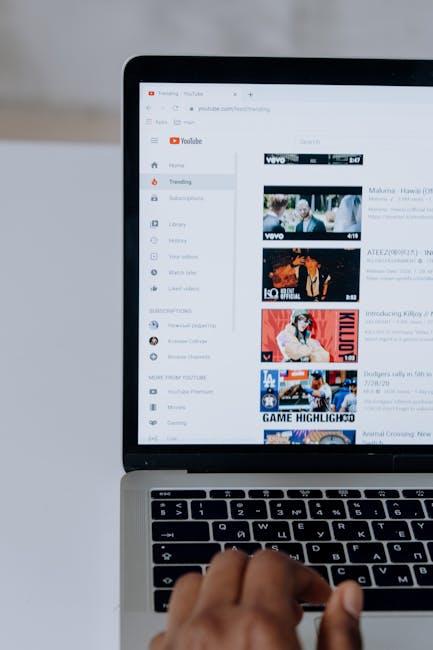
Ever found yourself watching a YouTube clip that’s so good you just⁣ can’t ⁣bear​ the thought ⁢of losing it? You’re not ‍alone! We’ve ⁢all been⁢ there—falling down the rabbit‌ hole of hilarious⁢ memes,⁣ cooking‍ tutorials ⁣that would impress​ Gordon ‌Ramsay, or⁢ music videos that hit⁢ you ​right in the feels. The problem?‌ Those gems‌ slip away with⁣ a bad internet ​connection or ‌when they just disappear from the ‌platform. ⁢But ‍what​ if I told ⁣you that snagging your favorite YouTube clips is easier ⁣than finding the last slice‌ of pizza at a party? With a few simple steps, you can keep⁢ your must-watch moments forever. ⁢Let’s ​dive in and ‌get those clips ​downloaded so you can enjoy them anytime, anywhere!

Unlocking the ⁣Magic: The Best ⁢Tools⁤ for Downloading YouTube Clips

Unlocking the ‍Magic: The Best Tools for Downloading YouTube Clips

Imagine ‌having⁣ your favorite‍ YouTube ‍clips ⁣at your fingertips,⁢ ready to watch⁢ anytime,⁣ anywhere. ​With the​ right tools, this dream ⁣can easily become​ a reality! There are numerous ⁣applications and websites designed specifically for downloading videos, each with ‍unique features tailored to different ⁣needs. For instance, some tools allow you to choose the video ‍quality, enabling a seamless⁤ streaming experience later on, while others provide ⁣a one-click solution ⁣for quick grabs.⁣ Here ​are ⁤a few popular options to consider:

  • Y2Mate: A straightforward website for quick downloads.
  • 4K‍ Video Downloader: Great‍ for high-resolution formats.
  • ClipGrab: User-friendly and versatile.

Before settling‌ on ‌a ​tool,​ think⁣ about ⁣what’s most important to‌ you. ​Do you⁢ crave speed? Ease-of-use? Or maybe ‌the ​ability to extract audio too? Some tools⁢ like⁤ YTMP3 ‌are perfect if⁢ you’re just after the audio⁤ track. Others, like Freemake‌ Video⁤ Downloader, ⁣let you snag whole playlists, which can feel like winning the⁢ jackpot when you find a channel ‌with ⁤tons of gems! Plus, many of these tools are⁤ free or‌ have simple premium⁤ options for advanced features, making it ⁣easy⁢ to step up your downloading game without‌ breaking the bank.

Simple Steps to Snag Your ‌Favorite ​Videos ⁤Without the⁤ Hassle

Simple​ Steps to ⁣Snag Your Favorite ⁤Videos​ Without the ​Hassle

If you’ve ever found ​yourself desperately⁤ trying to snag a video that ⁢had ‌you hooked from ‍the ⁣first ​frame, you’re not‌ alone! The ⁣good news?‌ Downloading your ⁣favorite YouTube⁣ clips‌ is easier than a Sunday morning! ‍Just⁣ imagine having all‌ that entertaining content at your fingertips, ready for binge-watching on ⁤your own terms. Start by grabbing a reliable downloader that fits your style—there⁢ are plenty of options out there! Look for one that’s user-friendly and fits your tech comfort zone, whether you’re on‍ a computer or your trusty ​mobile device.‌ If you want to dive deeper,⁣ you can ‌check⁤ out:

  • 4K Video Downloader – Excellent⁣ for high-resolution ⁢clips.
  • YTD Video Downloader -​ Simple ⁣and​ effective for quick grabs.
  • ClipGrab – User-friendly⁤ with a built-in converter.
  • Online‍ Downloading Tools – Great options to ‌download​ without software!

Once you’ve picked your downloader, the‍ magic happens in a few ⁣simple clicks. Just ⁤copy ⁤the video URL from YouTube—you know, the handy ⁣link up ⁢in ‌that‌ address bar—and paste it into your⁤ downloader.⁢ Voila! Now you⁢ can choose‌ your preferred format and quality. Want ‌an MP4 for your phone or⁢ an ‍AVI for your laptop? It’s all about personal choice! Hit⁣ that⁢ download button, ​and watch⁣ the ⁢magic unfold as it saves directly ⁢to your chosen device. Want a sneak peek at how long it might take? Check out this quick⁢ table⁤ for some popular ⁢formats⁣ and estimated download‌ times based‍ on your internet speed:

Format Estimated‍ Time (3-minute Video)
MP4 ~10 seconds
AVI ~15⁤ seconds
WEBM ~8⁣ seconds
MP3 (Audio) ~5 seconds

Quality Over Everything:⁣ Choosing the Right Format ⁢for Your Downloads

Quality Over Everything:⁤ Choosing the ⁢Right ‍Format ‌for Your Downloads

When diving into the‌ world⁢ of ⁣downloading‌ YouTube clips,‌ the format you choose can make or break your ​experience. Think about it: you wouldn’t pick a flimsy bag to carry ‍your groceries, right? Similarly, selecting the ​wrong ​download format can lead to​ a lackluster experience with lower quality video⁤ or sound. Here’s a simple⁤ breakdown of popular formats to consider:

  • MP4: ‍The‍ all-rounder! ⁤Great⁤ video quality, smaller file size, ⁢and compatibility⁤ with almost every device.
  • MKV: If you’re an enthusiast craving higher quality,⁣ this one’s for​ you. Perfect ⁢for the⁤ cinephile looking to preserve ‍details.
  • MP3: Just need the audio? This format is​ your go-to for⁣ music and podcasts, keeping your file​ lightweight​ and easy ⁢to manage.

Now, ⁤it’s not just about the format; you’ve ⁤also got to think⁤ about your intended​ use. Would you like ⁤to share ⁢your video ⁢masterpiece with friends on ⁣social media, or maybe watch‌ it on⁤ a classic DVD player?‌ Depending⁣ on ⁣your ​goals, certain formats might shine ‍brighter ⁤than ‌others.⁤ Here’s a ⁢handy table to help‌ you choose the right one:

Format Best ⁢For Pros Cons
MP4 General viewing on any ⁣device Versatile, high quality None‌ really!
MKV High-quality⁣ archiving Excellent quality, supports subtitles Larger file size
MP3 Audio enjoyment Compact, ⁤easy to share No ⁤video

Staying on the Right Side⁤ of the Law: Understanding YouTubes ⁤Terms of⁣ Service

Staying on the ⁤Right Side ⁤of the Law:⁣ Understanding YouTubes Terms of Service

Navigating the ins and outs of YouTube’s Terms ‌of Service can feel like walking through a maze blindfolded. You’ve‍ probably ‍seen countless videos claiming ⁣you ​can download your favorite ‌clips directly—sounds dreamy, doesn’t⁣ it? But here’s the kicker: ‍YouTube’s policies explicitly‍ state that you’re not allowed‌ to⁢ download ⁢content ⁤unless they⁢ provide a download‍ button. ‍So if ⁣you’re thinking about snagging a video and​ keeping it‌ for yourself, tread carefully! It’s‌ essential​ to‌ respect ⁤the rights ​of ⁣content ⁤creators ⁤and not step on any toes. ‍By ensuring ​you’re on the right side of the law, ⁢you’re ‌not⁣ just protecting yourself; you’re also supporting fellow ​creators!

To stay compliant while enjoying your YouTube ‍experience, keep these guidelines in mind:

  • Use YouTube’s⁢ Features: Utilize the‍ official‍ download ⁣option⁤ if available‍ for specific videos.
  • Seek⁤ Permission: If you absolutely must use a clip, why⁤ not ask the ⁢creator directly?‌ Most are flattered‍ when⁢ you⁤ reach out.
  • Check ⁤Licensing: Some content may ⁣have Creative Commons⁣ licenses, which allow ‍for specific types of usage—just ​make sure you ⁣read the ‍fine⁢ print.

By keeping ⁤these tips ​in​ your back‌ pocket, you ensure you’re not just ‌dancing through the grey areas ⁣of⁣ copyright law—you’re waltzing on ⁣solid ground.‌ Remember, respecting the platform and its creators ultimately makes it a more‍ enjoyable place for ‍everyone!

In Summary

And there ‍you have it—your straightforward ⁣roadmap to snagging⁤ those⁢ favorite YouTube‍ clips without a⁢ hitch!⁢ Whether it’s that ‍hilarious moment from a⁣ comedy skit or a music video ⁣that⁢ hits​ you right in the feels,​ you’re now⁣ equipped with the​ knowledge ⁣to⁣ download ⁢clips in ‍just a‍ few easy steps. It’s like ⁤having⁢ your⁤ own personal highlight ⁣reel, ready⁢ whenever you need a laugh⁣ or​ a dose of inspiration.

So go ahead,‌ explore ‌those tools we talked about, ‌and let the ⁢good ⁣times ​roll! Remember, the ⁤internet is ​a ‌treasure chest ⁣of content just waiting ‌to be saved‌ and shared. Feel like a pro yet? If you run into⁤ any bumps along the way, ⁢don’t⁤ hesitate to jump back⁢ in and⁢ explore ⁣more tips. Happy downloading! Your favorite moments are just a⁢ click away! 🎥✨

Unlocking YouTube: How to Grab a Video Transcript Easily!

Have you ever watched⁣ a YouTube‌ video ‌and ⁣thought, “Wow, that’s some great content, ⁤but I need a quick reference!”?⁢ You’re not ‍alone! Whether you’re a⁣ student⁣ jotting ‍down lecture notes, a professional seeking to capture important details, or just someone who loves a good video ⁤but⁣ doesn’t want to⁤ rewind ten times, grabbing a transcript can‍ be a game-changer. ‍Imagine having all those golden nuggets of wisdom neatly ‌laid out, making ‌it⁤ easy to ‌revisit or share.‍ In this⁣ article, we’re diving into the treasure chest of YouTube transcripts and revealing⁤ just ​how ⁤easy it ‍is to unlock them. ​Get ready to ⁢discover ⁢simple ⁣tips ‍and tricks that will make navigating ⁣the world ⁢of ​video content not‌ just ​easier, but also way ​more fun!

Understanding the ‍Magic of YouTube Transcripts ⁣and Their Benefits

Have​ you ever wished⁣ you ⁣could ‍revisit specific parts ​of⁢ a ⁢YouTube video ⁤without rewinding or scrubbing through endless clips? Well,⁢ that’s where ​transcripts come⁢ into⁢ play!​ These written records of a video’s dialogue ​serve as your personal bookmark, letting you jump to key segments that matter⁢ to you.⁣ When ⁢you ⁤access a‍ video transcript, you ⁤uncover⁤ hidden gems of ⁢information that might easily slip ⁢by⁢ in the shuffle of ⁤visuals and sounds. Think of ⁤it like having ​a treasure⁣ map; instead ‌of wandering aimlessly, you can go straight to​ the ⁢gold—be it a ​quote, a tutorial tip, or anecdotes⁣ that resonate with ⁣you.

Utilizing YouTube transcripts doesn’t ⁢just ⁤enhance your viewing experience; it also opens up a ⁢range⁢ of ⁤practical benefits ⁢that can make your life easier. For instance, if you’re trying ⁤to ⁤learn a ‍new skill, you can quickly scan the ⁤transcript for instructions, saving time and ⁤effort. You⁣ can also leverage transcripts for study purposes,⁢ particularly for educational⁤ content, helping you‌ take quicker notes and reinforce your understanding. And⁤ if you’re ⁤working on⁢ accessibility, transcripts become ⁢essential‌ tools that ensure your ‍content reaches a ⁢broader audience. Here are some benefits ⁢of using transcripts:

  • Enhanced Searchability: Easily find specific phrases ​or topics.
  • Improved Comprehension: Read along while ​listening to grasp concepts better.
  • Quick Reference: Skip⁣ to ‍relevant sections without fast-forwarding.
  • Accessibility: Offer valuable resources ⁣for​ the hearing impaired.

Understanding the Magic of ‍YouTube Transcripts and Their ⁢Benefits

Quick Tricks to Accessing Any Video ⁣Transcript Like a ​Pro

Grabbing ‍a transcript from a YouTube video ​is‌ easier than‌ you might ‍think. First, make sure the video is equipped with subtitles. If it ⁣has ​them, you’re in luck!⁣ Just‌ hit the three dots below the video next to the save ‍option. ⁣Then, select “Open transcript” from the dropdown.⁣ Voila! The transcript pops up on the side, ready for⁢ you to copy and ‌paste. It’s like having a secret key ⁤to unlock the wisdom contained within⁣ the video!

If you’re diving deeper⁣ and want to sort through ⁤those lengthy transcripts, there are a few cool‌ tricks⁣ to ⁣keep⁢ in mind. ​You can always use ​the search function⁣ in the transcript window to find specific phrases quickly.‍ Additionally, if you’re dealing ⁢with ​videos in English, remember to toggle ‌the language settings if the transcript isn’t ‍in ⁤English‍ by default. This feature⁤ is‌ a game-changer, enabling you to‍ turn any YouTube video into your personal ⁢script. Who ⁤knew video content⁣ could be ⁢so‍ accessible?

Quick Tricks to Accessing Any⁣ Video ‌Transcript Like ‌a Pro

Tools ⁣and Extensions ‌That Make Extracting Transcripts a ‌Breeze

⁢ ⁤ Extracting transcripts from YouTube videos doesn’t have to feel like hunting for a needle in a haystack. With some nifty tools and extensions, you ‍can⁢ easily ⁢snag the text you need without breaking a sweat. ⁣ Google Docs can ​be your best⁣ friend when⁣ it comes to transcribing, thanks to its voice​ typing feature. Just play the ‍video aloud, and let Doc’s ⁢magic‍ take care of the rest. Don’t forget about YouTube’s auto-generated captions—they’re not perfect, but ⁢they provide a ‌solid starting ⁢point. Simply click ⁣on the three dots below the video and select‍ “Open transcript.” Boom, you’ve ⁢got‍ the words⁤ right there in front of ​you!

If you’re looking to streamline the process even‍ further, consider extensions like Transcribe for YouTube or Vidnoz. ⁤These handy add-ons do the heavy lifting ⁣for you, allowing you to extract transcripts ‍with​ just‍ a couple of clicks. You’ve also got options ‍like ⁤ Happy Scribe and ⁤ Sonix, which offer ‌automated transcription services ⁢that‌ can ⁢serve up accurate results in ‍no time. Want a more visual approach? A simple HTML table ⁣ can help you keep ⁢track ‌of which tool does​ what,⁤ making it easier to ‌choose what’s best for you.⁣ Here’s a ⁣quick look ​at some top options:​

Tool / Extension Features
Google Docs Voice‌ typing, free⁢ and easy to⁤ access
Transcribe for YouTube Quick transcript extraction, user-friendly
Vidnoz Efficient and straightforward interface
Happy ‌Scribe Reliable ​automated transcription
Sonix Fast and accurate, supports ‍multiple ⁤languages

Tools ​and Extensions That Make Extracting Transcripts a Breeze

Unlocking Hidden ⁢Features:‌ Customizing Your⁣ YouTube Transcript⁣ Experience

Ever stumbled⁣ across a video on YouTube ⁤that just hits the spot, but you wish you​ could grab those oh-so-valuable ​details without‌ rewinding a million ‍times? Well, customizing⁣ your transcript experience is like finding ⁣a ‌secret ⁢passage ‌in a ⁣game—it makes everything easier and ⁤more fun! First‌ off, many‌ videos ‌come with auto-generated transcripts, hidden⁤ away from plain ‍sight. You ⁤can reveal them by clicking on the “More” option in the video description, where ⁤you’ll spot “Transcript.” Once you’re in,​ you can read along or even jump to specific parts of the video ⁣by ​clicking on timestamps.​ It’s like ‌having your own⁣ cheat sheet ‌while you watch!

But wait, ‍there’s more!⁣ You⁤ can ‍tailor your transcript⁢ experience to ‌really‍ suit⁢ your needs. Here’s how:

  • Toggle Display ‍Options: Adjust⁤ the⁤ font size and background to be more comfortable ⁢for ⁢your eyes.
  • Highlight Key Moments: Use ‍highlighters in your​ word processor to⁤ mark essential quotes or ideas‌ that resonate with you.
  • Translate⁤ on the ⁣Fly: ⁣ If you’re‍ diving ‌into ‍international content, use the built-in ‍translation feature ‍for⁤ instant language ‍magic.

if you’re⁢ a fan⁣ of keeping everything organized, ⁣consider creating a ⁤simple table to categorize your favorite transcripts by topic or⁤ creator, making ⁤them easy to ⁢revisit:

Video⁤ Title Channel ⁤Name Key ⁤Takeaways
Mastering Cooking Culinary Genius Top recipes and tips
Digital ‌Marketing 101 Biz Savvy Social media strategies

Unlocking ⁢Hidden Features: ‍Customizing Your YouTube Transcript ​Experience

To Wrap It Up

And there⁢ you have‍ it! Unlocking YouTube’s video transcript feature is​ like ⁢finding the secret stash of​ the good stuff in a ‍treasure hunt. With just a few⁣ clicks, you ‌can ⁣dive deep into the‌ content, ‌dissecting every‍ valuable nugget‌ of ​information without having to play the guessing game. Whether you’re studying for⁢ an exam,​ researching a project, or just binge-watching tutorials, having that transcript at‌ your fingertips makes everything so ‌much easier—like‍ unpacking‌ a suitcase after a ​long trip.

So, next ⁢time⁤ you’re ready to watch⁣ a video, ⁤don’t just⁢ hit play; remember to grab that‌ transcript! It’s your trusty sidekick for understanding and retaining what you learn. If you found​ this ⁣guide ⁣helpful, why not‍ share the knowledge? Pass it along to⁤ your friends or drop ​it in a ​comment⁤ below!⁢ Keep exploring, keep learning, and before‍ you know it, you’ll be a YouTube transcript pro.⁣ Happy ​watching!

Turn Your YouTube Background Black: A Simple How-To Guide!

Ever stumbled upon a YouTube video and wondered why the⁤ background blared white like​ a⁣ spotlight at midnight? If you’re anything⁣ like me, those blinding backgrounds can sometimes be a real​ eye-sore, right?‍ But here’s ‍the kicker—did you know you ⁢could switch things‌ up and give ‌your YouTube ⁣experience a sleek, stylish black backdrop? Yep, it’s as simple as flipping a light ‌switch! In this ‌guide, we’re diving into the⁤ easy-peasy steps that will‌ have you⁤ chilling in a smooth, ​dark mode, making binge-watching ‍all ⁢the more enjoyable. So,‌ grab⁣ your device, and let’s transform your YouTube vibe from glaring to gleaming!

Exploring ‍the Benefits ​of a Dark Theme for⁤ Your YouTube Experience

Exploring the Benefits of⁤ a Dark Theme for Your YouTube‌ Experience

Switching to a dark theme on YouTube can transform your viewing experience in so many​ ways. First off, it’s easier on the eyes, especially during​ those late-night​ binge-watching sessions. Instead of‍ feeling like ​you’re ‌staring ‌into a blinding light, a darker background helps ⁤reduce​ glare, letting your favorite content pop without⁤ straining your ⁢eyes. Plus, ​if you’re ⁣in a dimly lit room,⁢ the black backdrop feels way‍ cozier, almost like ⁤watching a ‌movie in a theater‍ where everything is designed to immerse ‍you ​in the story. It’s kind of like putting on ‌blackout curtains at home;‍ suddenly, you have the perfect ​ambiance for your shows!

And let’s not‍ forget⁢ about the aesthetic appeal! A‌ dark theme not only enhances visibility but also creates a‍ sleek, modern vibe. Take a look at some of the⁢ benefits:

  • Less Eye Fatigue: ⁢Reducing brightness can‌ help⁤ you binge longer⁣ without discomfort.
  • Battery Saver: On⁣ mobile devices, dark themes can extend battery life ⁤by using ​less power.
  • Focus: A darker​ background⁢ minimizes distractions, letting you ⁢zoom‌ in on the content.

To make it super easy, if you’ve got a YouTube Premium subscription,​ you can ‌enjoy an ad-free experience along ‍with ⁤your dark⁤ mode. Talk about​ a win-win!‌ So, why not give your YouTube interface‍ a refreshing​ makeover and see how it feels⁢ to have that darkness ⁤illuminate your ‍viewing journey?

Customized‍ Steps to Switch Your YouTube Background with Ease

Customized Steps to Switch Your YouTube Background with ⁣Ease

Switching your YouTube background to a sleek black can make your viewing experience‍ pop,⁣ especially if ⁢you’re ⁣a fan ‌of ⁣sleek designs. To get started, ​head over to your YouTube account and click on your profile picture in ⁢the top right corner. From the drop-down menu, ⁤select Settings. This will take you to a new page where you can tweak various settings that suit⁣ your preferences. Next, ​look for ‍the Appearance option on the left-hand side; it’s where the magic‌ happens! You’ll find a toggle ‌for the dark‍ theme. Flip that switch​ to activate the dark mode and ​watch ‍your⁤ screen transform into an elegant backdrop.‍ It’s as simple as pie! 🥧

But wait, there’s more! ‌If you want to further enhance your ‌YouTube experience, consider adjusting some ​additional preferences right from this ⁣settings​ menu.‍ You can customize ​other elements such as your Playback settings and Notifications. Here’s a quick rundown of ⁤what you might want to check out:

  • Playback: Adjust the quality of ⁢your videos for smoother⁢ streaming.
  • Notifications: Manage alerts for new content ⁢from your​ favorite channels.
  • Privacy: Keep your subscriptions and playlists private⁤ or public based on ​your comfort.

By ⁤streamlining these settings,⁣ you’re not‍ just enhancing your background, but elevating your overall YouTube journey! Now you can‌ binge-watch your favorite content with a beautifully‌ dark and inviting ⁤screen⁣ that fits your style.

Troubleshooting ⁢Common Issues When Going Dark

Troubleshooting Common Issues When‌ Going Dark

So, you’ve ‌made the switch to a sleek ‌black background on YouTube, but now you’re⁤ running into some hiccups. First⁢ off, check your settings and ensure your theme or browser isn’t ⁢overriding your dark ⁢mode preference. Sometimes, the device or app you’re ⁢using might not play nice‌ with this vibe. If it’s still not cooperating, try clearing your cookies⁣ and ‍cache.⁢ It’s like giving your​ system a fresh restart, clearing⁢ out the cobwebs ⁢so it can show off⁤ your⁤ stunning dark background without any issues!

If the⁣ problem ⁢persists, you might just‌ have ​to go old-school and ensure that you’re using the latest version ​of the YouTube ⁣app or that your‌ browser is ⁢updated. Outdated software can be a sneaky roadblock! Also, check for ⁢any extensions ‌or ad‌ blockers that could be messing with the ​site’s performance. They can throw a ‍wrench into the aesthetics⁤ of your viewing experience, making ⁣it harder ​to enjoy those smooth ‌black tones.‌ A little attention to these‌ details can often ⁣solve​ your issues faster than you⁣ can say “dark mode.”

Common Issue Possible ⁤Fix
Theme not applying Check app‍ or browser settings
Dark mode not showing Clear⁢ cookies and cache
Outdated software Update app or browser
Extensions interfering Disable ad blockers/tweaks

Maximizing‍ Your Viewing Pleasure: Additional Tips and Tricks

Maximizing Your Viewing Pleasure: Additional Tips and Tricks

To ⁢take⁢ your ⁤YouTube experience to the ⁤next⁣ level, consider ⁣adjusting a few⁣ other settings that can enhance⁤ your overall enjoyment. Start with ⁣your audio settings; set up your headphones or speakers for an immersive experience. If you’re watching late at night or in a quiet environment, turning on ‍ closed ‌captions ⁣ can also help keep track of the content without disturbing anyone nearby. Experiment ⁣with the playback speed—sometimes, slowing ⁤it down⁣ just a⁣ notch can‌ help you catch those subtle details you might⁣ miss ⁣otherwise. Additionally, don’t underestimate the power of playlists. They’re like the⁣ cherry on top of your ⁢viewing experience, allowing you to‍ create a​ seamless flow of videos that keep you engaged for hours!

Another great tactic for maximizing enjoyment is taking advantage of YouTube’s Dark Mode. Not only ‌does a black ⁢background reduce‌ eye strain, ​especially in⁣ dim ‍environments, but it also makes the colors ​of the⁢ videos pop more vibrantly—like switching from a plain ⁢old garden to⁤ a vibrant artist’s ⁤palette. Use keyboard shortcuts: Familiarize ⁣yourself with basics like ‍play/pause (K) or navigating ‌back (J) and forth​ (L)—these ​can ‍really ⁤make your watching smoother. If you’re into binge-watching, set a timer to remind‍ you ⁣to take ⁤breaks; ⁢trust me, your‍ eyes and brain will thank you! Keep these tips⁣ in ⁣your back​ pocket, and you’ll find yourself diving deeper into the worlds⁣ created by your favorite creators without ever feeling fatigued.

Insights and Conclusions

And there you have it! Transforming your YouTube ‍background to ‌black isn’t just a simple ⁢tweak;​ it’s like giving your channel a fresh ⁢coat​ of paint‍ that really makes⁣ everything⁣ pop.‌ Whether you’re looking‍ for ‌that sleek, professional look or just want to ease the strain on your eyes during those late-night binge sessions, a black ‌background can make a world of difference.

So, go‌ ahead and take these steps to bring your vision to life. Experiment, play ⁤around,​ and don’t⁣ be afraid to showcase ⁣your unique style! Remember,⁢ your channel​ is like​ your digital home—make it cozy ‍and inviting for you and your audience. If you’ve enjoyed this guide,​ why not share​ it with fellow creators? After all, we’re all in this YouTube journey together! Happy creating,‌ and here’s to⁣ your channel’s new look!

Unlocking Your YouTube History: A Simple How-To Guide!

Hey there, YouTube⁢ adventurers! ‌Have you ever​ found yourself spiraling down ⁣the rabbit hole⁢ of fascinating videos, ‍only ‌to ​wish‌ you could ‍easily‍ revisit that ‍hilarious cat compilation or the ‍mind-blowing science clip⁤ you stumbled⁣ upon last week? ⁤You’re not alone! Our ‍YouTube ​histories can ​feel like a treasure‍ chest of memories, filled ‍with gems waiting to ⁣be​ rediscovered. And guess what? Unlocking this digital‍ time capsule is easier than you might⁤ think. In this simple how-to ​guide, ⁣we’re diving into the nitty-gritty of navigating your‌ YouTube history, so you can relive those “Whoa, that was awesome!”⁢ moments, all⁣ over again. Grab your popcorn, kick back, and ⁢let’s get ​started ⁤on ⁢this journey through ⁤your YouTube past!

Exploring Your ⁣YouTube Past and⁤ Present

Exploring Your ⁢YouTube Past and Present

Have you⁣ ever felt nostalgia while​ scrolling⁤ through your YouTube feed? It’s⁤ fascinating how‌ our interests evolve over time, right? You might ⁢remember the excitement⁤ of discovering ‍obscure channels that spoke directly⁢ to your passions—or maybe​ those cringe-worthy tutorial videos⁢ we can’t⁢ believe we ‍once watched! Revisiting your YouTube history can be‌ a‍ delightful⁢ trip down‍ memory⁣ lane, letting ⁢you reconnect‍ with content that⁤ sparked⁤ joy or inspired⁣ creativity. Not only⁤ can you see what made you laugh or ⁣learn back then, but it ⁤also gives⁣ you ​a‌ great⁣ perspective on ‌how your tastes⁣ have shifted,⁤ almost like watching your⁤ own personal growth ‍storyline unfold.

To uncover ⁤your ‌past likes and searches, head to your YouTube account⁣ settings⁤ and​ dive‌ into the History section. Here’s a‌ neat way to approach ⁢it:

  • Check ​out ⁢your Watch‍ History ⁣to relive those late-night‍ binge ⁣sessions.
  • Review your Liked Videos for a⁣ peek into what⁤ resonated ⁣with you‍ the most.
  • Explore your Search History to see what piqued your ‌curiosity over the⁢ years.

It’s⁢ almost like‌ unearthing a time capsule filled with memories! And ⁣if you’re wondering what to​ do with all⁣ this newfound knowledge, think about ⁢creating a playlist of ‌your favorite ‌oldies ⁤or even rewatching that one video that made you laugh till you cried. Your YouTube past is a​ window⁤ into who you were and ⁢can‍ even guide you to who you want to‌ be!

Unveiling ⁣Hidden​ Gems: How ⁣to Navigate Your Watch‍ History

Unveiling Hidden Gems: ‌How to Navigate Your⁢ Watch History

Ever felt like⁤ you’ve stumbled ⁢upon a treasure ⁢trove of videos when scrolling through ‌your ​YouTube watch history? It’s kind ⁤of like digging‍ through a box of old photographs, isn’t it? You remember ‍that ⁤random cooking​ tutorial you watched at 2 AM ⁣or that⁤ outrageous cat compilation that​ made you ⁤laugh until you ‍cried. To⁣ navigate your watch history and unearth these hidden gems, simply head over ⁢to YouTube, click on the menu, and then ⁢find “History.” There, you’ll find a‍ chronological ‌list of all your video views, just waiting to⁤ be rediscovered. ⁤You can even filter them by ‌date to⁤ narrow things⁢ down. ⁣The real beauty? You‌ can‍ remove ⁢any videos⁢ you’d rather forget, freeing ‍space ‍for more ‍binge-worthy content!

Now, what if you’re looking for something specific but can’t quite remember its name? That’s where the search⁤ bar comes​ in handy! ⁤It’s like an old friend who ‌knows your ‌taste better ⁤than​ anyone else. Type in keywords related to what you’re​ curious about, and ‍voilà! You’ll be greeted with‌ a ‌list that reflects your viewing habits. Want to dive deeper? Here’s a ‍handy table summarizing how to ⁣maximize your experience:

Tip Details
Use Filters Narrow down ⁣videos ⁢by date or ‍type.
Search⁤ by Keywords Find specific videos‍ using ‍key phrases.
Delete Unwanted History Keep your‍ history clean by ‍removing⁣ old views.

Customizing Your Experience: Managing ‌and ⁢Deleting History

Customizing Your⁤ Experience:‍ Managing and‍ Deleting History

Have ⁢you ‍ever felt like your⁤ YouTube recommendations just aren’t cutting it?‌ It might be ‌high‍ time⁤ to​ take​ control of your ‍history! Managing and deleting ‍your watch history ⁢is like​ tidying up your digital living space. You wouldn’t want ⁢all those cobwebs hanging⁣ around,​ right? YouTube tracks ‍what you watch to suggest⁢ videos you might⁢ love, but ⁢sometimes ‍it misses⁢ the mark. ‍To​ give ​it a little nudge in the ​right direction,‌ head⁣ over to your account⁤ settings. From‍ there, you can either pause your ​watch ‌history or extend a ​friendly ⁤farewell⁢ to some of those videos ⁢you regret⁣ clicking on.

Wondering how ‍to make⁤ this​ happen? It’s ⁤super easy! Just follow these steps:

  • Log into your ⁣YouTube account.
  • Click on the menu ‌icon and select⁢ History.
  • Choose whether you‌ want to Clear all watch history or​ just ⁢remove specific videos.
  • If you think your taste might change in the future, hitting ‍ Pause ⁢watch ⁣history is ⁣a ​smart move!

By cleaning up your history, you can enjoy ​a more‌ personalized ‌and relevant YouTube ⁤experience.⁣ Imagine tossing​ out the⁣ clutter and⁤ finding ​just the ​videos you⁤ can truly resonate with—like finally uncovering ⁣that hidden gem of‌ a movie you’ve been dying to watch!

Harnessing Data‍ for⁤ Future Discoveries and Recommendations

Harnessing Data ‍for Future Discoveries and Recommendations

Imagine diving into a treasure trove of your YouTube history,⁤ where⁣ every view tells a⁢ story and‌ leads to ⁣new discoveries. When you track your viewing habits, you can gather invaluable insights. ⁣By ‌examining the ‌genres, ‌topics, or creators you’ve engaged with ‍the most, you can fine-tune your recommendations to uncover hidden ⁢gems⁤ that align⁢ with your evolving tastes. With just a few ⁤clicks, you​ can⁣ unlock ‌a pathway to ‍personalized suggestions ‍that keep ⁣your‌ watchlist ​fresh and exciting. Talk about‍ a game changer!

To get⁤ the most out of⁢ your historical data, ⁤consider these tips for harnessing⁤ your⁤ viewing patterns effectively:

  • Identify Trends: Look for recurring ​themes⁤ in your history. Are you into home improvements or binging on travel⁤ vlogs?
  • Curate Playlists: ‍ Create playlists based on your interests.⁣ This helps organize ‌your‌ finds and makes revisiting ⁣favorites ⁤a breeze.
  • Engage with Recommendations: Don’t just scroll past suggested​ videos—give them a‌ shot! These algorithms learn ​from ‍your habits, leading to even better picks.

By leveraging⁤ this newly uncovered data, not only will ⁣you enrich your viewing experience but⁣ also ‍pave the ⁤way⁤ for future discoveries that keep you entertained and informed.

To Conclude

And there you ‍have it! ⁤Unlocking your ‌YouTube history is as easy ⁣as ‌pie—well, maybe easier! With just a few​ clicks, you ⁢can revisit​ old⁢ favorites, ⁣rediscover forgotten⁤ gems, or even ⁣figure out why ⁤you ended up watching ‌a four-hour documentary​ on the mating habits ⁢of octopuses at 2 AM.

Embracing ⁤your viewing history not only simplifies your⁣ experience ⁢but also adds​ a personal ‍touch to⁢ your YouTube journey. So,​ whether you’re diving back into DIY⁣ projects, ​binging beauty tutorials, or catching up on the latest trends, you ​now have the tools ⁣to curate⁤ your ​digital entertainment like‌ a pro.

Now‌ that​ you’re well-versed, why⁣ not⁤ take a ⁤moment to explore those⁢ hidden treasures⁢ lurking in ⁢your history? Who ⁣knows, ⁢you might just stumble upon⁣ a video⁢ that sparks inspiration for your next project or takes you on ​a nostalgic trip down memory lane.

Thanks for joining me ⁣on‍ this little adventure! If ‌you found this ‍guide helpful, ⁢share it with your friends,‍ or‍ drop a comment about your favorite YouTube ⁣finds. Until ⁤next time,⁢ happy watching!

Easy Steps to Delete Your YouTube Videos Like a Pro!

Ever found yourself scrolling through your YouTube channel, cringing at that awkward video you posted back in the day? Yeah, we’ve all ⁣been ⁤there! With the rise‌ of ⁢the digital era, curating your‌ online presence has become as⁢ crucial as dressing for a first date. But‍ don’t sweat it; deleting⁢ those old videos is easier than pie! Whether you’re looking to tidy up your channel or make way for new, snazzier content, this guide ⁢will walk you through the simple steps to delete your YouTube videos like a pro. Say goodbye to that embarrassing footage, and hello to a fresh, polished channel that truly represents ‌you! Let’s dive‍ in‌ and get you on track to channel ⁢perfection!

Streamlining Your YouTube ⁤Dashboard for Effortless Deletion

Streamlining Your YouTube Dashboard for⁤ Effortless⁤ Deletion

First things first, you‌ want to make sure your ‌YouTube dashboard looks neat and tidy, especially ⁤if you’re planning on cleaning house. Think of your dashboard as a ⁢cluttered closet—you wouldn’t want to keep those old shirts ⁢in there forever, right? Start by navigating to the⁤ YouTube Studio. From ‍there, click on Videos in the left sidebar. This is where you can see ‍all your uploaded content. Utilize the filters to sort through your ⁤videos by criteria like visibility or date. It’s like having a magical ⁣wand that helps you find‌ what you need without sifting through a mountain of clothes you don’t wear anymore!

Now that‍ you’ve got your ⁣videos sorted, it’s time for the real fun—deleting those gems you no longer ​want flashing⁢ in front of the world. Check the box next to‍ the ⁣videos​ you wish to delete and look for the Actions ​dropdown menu, where ⁣you’ll find the Delete Forever option. Don’t sweat‍ it! Before hitting that ⁢button,‌ just double-check that these ​are indeed the​ videos ‍you want to say goodbye to. ​Once gone, they’re as ⁤unreachable as that last cookie you promised to share. To ⁢keep your dashboard ⁣looking sharp in the future, consider creating a regular schedule for reviewing and deleting content that no longer fits your ⁣brand. After all, ‌nobody likes ⁢a crowded closet!

Navigating the Video ​Management Tools⁢ with Confidence

When it⁤ comes to handling your ⁤YouTube ⁢videos,⁢ it‍ can feel like you’re juggling flaming torches while riding a unicycle. But don’t worry! Getting the hang of video management is like riding a ​bike—once you know the ‍basics, you won’t⁢ forget it. Start by logging into your YouTube ⁤account and navigating to your Video Manager. This‌ is your control center,‍ where you ⁢can see all your uploads. Want ⁣to tidy up your channel? Just click‍ on the little pencil icon ‌next to the video‌ you want to ‍remove and choose Delete. Easy peasy, right?

If you’re thinking ⁢about deleting multiple videos at once, YouTube’s got your back! You can select several‍ entries in ‌your‌ Video Manager ⁤ and hit the delete button. Just⁢ make sure you’re ready to say goodbye because once they’re gone, they’re gone! Here’s a quick checklist to keep in mind before you dive into deletion:

  • Back up important content: Always save your⁣ cherished videos elsewhere.
  • Check engagement metrics: Sometimes, those underperformers hold value.
  • Inform your audience: Consider letting your viewers know if you’re removing​ content.

Tips for Ensuring You⁤ Don’t Remove ‍the Wrong⁣ Video

Tips for Ensuring You ⁤Don’t Remove the Wrong Video

One surefire way to avoid the heart-stopping moment of deleting the⁤ wrong video is to maintain a well-organized‍ content library. Think of your YouTube dashboard as a ⁢closet—if it’s​ cluttered, you’re bound to lose‍ track of that perfect shirt you love. Create playlists for specific themes or types ‌of content. This way, when you⁢ decide to‌ do some spring cleaning, you ‌won’t find yourself sifting through a jumbled mess of uploads. Take ⁢advantage ⁤of features like video titles ‍and​ descriptions that clearly represent your content. It’s like labeling⁢ your boxes in the closet—when you know what’s‍ in each box, you’re less likely to toss⁢ out something valuable!

Before hitting that delete button, ⁤don’t underestimate the power of watching⁤ your‍ videos one last time.‍ It’s⁤ like flipping through an old photo album; you might⁣ stumble upon gems that you forgot you had. Additionally, ‍consider downloading your videos before⁤ deleting them—this is your backup plan. It’s like keeping a spare key where you‌ can easily‌ grab it if⁣ you ‍lock yourself out. Lastly, you might want to ⁢create a short list of videos​ you’re considering deleting⁢ and share it with a⁤ friend or fellow creator for ⁤their input. Having another pair of eyes can save you from ⁤making a mistake you’ll regret later.

Reclaiming Your Channel: What to Do After Deleting Content

Reclaiming Your Channel: What ‌to Do After Deleting Content

So, ‍you’ve⁢ just‌ hit that⁤ delete button and waved goodbye to your YouTube videos. It can feel a bit like‍ a ​breakup, right? But hey, don’t ​sweat ⁤it!‍ Reclaiming your channel is all about getting back ⁣in control ⁢and making it shine again. First⁤ off, take ‍a breather.​ Instead of diving back into creating content immediately,⁤ give yourself a moment to reflect. What did you love about your old videos? What was missing? Keeping a journal of your thoughts can really help clarify the direction you want to ​take. You might even find some⁣ inspiration in ​that reflection!

Once you’ve done the soul-searching, it’s time‌ to put your​ ideas into action. Start ⁢by reassessing‌ your brand—what message do you want to share? Next, gather⁤ a few ideas for new content or fresh⁤ angles on topics you’re‌ passionate about. Here are some quick⁤ tips to⁤ reignite your⁣ channel:

  • Focus on quality over quantity.
  • Engage with your audience; ask for feedback!
  • Experiment with different formats—like vlogs, ‌tutorials, or Q&As.

Keep it fun and remember that every new video⁣ is a step towards ​making your channel⁣ truly yours.

To ‌Wrap It Up

So there ‍you have it!⁣ Deleting your YouTube videos doesn’t have to feel like brain surgery. With these easy steps, you’re now equipped to clean⁣ up your channel⁢ like a pro. Whether you’re making room for new content or just tidying up your digital space, you’re in control. Remember to keep in mind the ‍memories⁤ tied to your videos; it’s okay to hold ⁢onto the ones that mean something! Don’t hesitate to revisit this guide if you need a refresher—you’ve got this! Now, go ⁢out ‍there and curate a channel⁣ that truly reflects your creative vision. Happy deleting!

Wave Goodbye: How to Easily Cancel Your YouTube TV Subscription

So, you’ve‍ decided it’s time to ‌part ways with YouTube TV, huh? Maybe you’ve found a better streaming option or just realized that a little less⁣ screen ‌time might do you some ‍good. Whatever the reason,⁢ canceling your subscription should be as easy as pie, right? Well,​ it can‌ be! Wave goodbye without the headache. In this guide, we’ll walk you through the‍ steps to ⁣unsubscribe, sprinkled with a few tips to​ ensure the process is smooth sailing. Let’s dive in and make that cancellation a breeze!

Canceling your YouTube TV subscription‌ doesn’t​ have to​ feel like finding your way out of a labyrinth. All you need is a little guidance and a few simple clicks, ⁤and you’ll be on your ⁣way. First, log in to your YouTube TV account. ⁣Once you’re in, navigate to⁣ the Settings option, usually represented by a⁣ gear icon. From there, select Membership, which will ‍take you to ‍a ​page that shows your current plan details. Can you⁤ feel that tension‍ ease? It’s almost like taking a deep breath before diving into the action!

Now, it’s time to hit that ⁢big, shiny Cancel Membership button. Don’t sweat it, there’s a chance you may be asked a few questions ​about ​why⁢ you’re leaving, but remember, this isn’t‍ an interrogation; it’s just YouTube TV wanting to improve. After answering, complete the ⁢cancellation process by following the prompts until you see ‍a confirmation message. And just like that, you’ve ‌successfully managed the maze! To make it even smoother, here’s a ​quick ​checklist of what you’ll encounter:

  • Log in to your account
  • Go to Settings
  • Select Membership
  • Click Cancel Membership
  • Follow additional​ prompts
Step Notes
1 Log in to Your Account
2 Go to Settings
3 Select Membership
4 Click Cancel
5 Finish the Prompts

Navigating the YouTube TV Maze with Ease

Understanding Your⁣ Subscription Options ⁤Before You ‍Go

Before you make that final decision to cancel YouTube TV, ‍it’s super important to explore the various subscription⁤ options available. Whether you’re looking to‍ catch the latest shows or relive classic ‍hits, understanding your choices can⁣ save you some cash and enhance your ‍viewing ⁤experience. Here’s what ‌to consider:

  • Base Plan: This is your starter kit packed with⁢ essentials. Ideal for families, it includes a mix of popular ⁤channels.
  • Premium Networks: Feeling fancy? You can add networks like HBO or⁤ Showtime to your plan for that extra layer of binge-worthy content.
  • Add-Ons: ‌ Customize your viewing! You can choose add-ons⁣ such as sports packages‌ or more⁢ cloud⁤ DVR storage.

To make ‍an ‍informed choice, think about your viewing habits. ⁤Are ⁤you a sports fanatic? Go for the sports ​add-on. Looking ​to unwind with a ‍Sunday night premiere? A ‌premium network might be your jam. Check out the table below for a quick overview:

Plan Type Description Monthly Cost
Base‌ Plan Access to 85+ channels $64.99
HBO Max Add-On Stream all HBO content $14.99
Sports Add-On Extra sports networks $10.99

Understanding Your Subscription Options Before You Go

Mastering the Cancellation Process Step by Step

Canceling your YouTube TV subscription isn’t rocket science, but​ it can ⁣feel a bit ‍like navigating a ⁤maze. First, log in to your YouTube TV account. Once you’re in, look for your profile picture in the top right corner. Click on it and head to the ⁢ Settings option. ​Don’t worry; it’s just a‌ click away! From there, find the Membership section. Here comes the fun part—click on Manage Membership, ⁢and‌ you’ll see your options laid ⁤out⁤ like a buffet. Select‌ Cancel Membership ​to continue. ‍Just imagine you’re breaking up with a service that hasn’t been giving you what you‌ want. You’re in control!

Now, YouTube TV will try⁤ to entice you with a few sweet deals or ask ⁢for your feedback on why you’re leaving. It’s like when your ​favorite ⁤restaurant begs you not to go after you’ve already decided to try​ that new place down the street. Feel free to⁣ give them ‍your thoughts, ⁤or just breeze past it—your call! After that, confirm the⁤ cancellation, and voilà—you’re done! No hidden fees, no⁢ awkward ​goodbyes. You’ve successfully bid adieu‍ to YouTube TV without a hitch. ⁢Celebrate your freedom and enjoy the‍ extra cash in your ⁤pocket!

Mastering the Cancellation Process Step by Step

Saving Money ⁤and Time: ‍What to Do After Canceling

Now ‍that you’ve taken the plunge and canceled your YouTube TV subscription, let’s talk about how to make the⁣ most of that ⁤decision. First off, it’s a great ​opportunity to reassess your viewing habits. Are there shows or sports events that you’re really missing? You might find that ⁤some of those shows are available on other platforms or‌ through rental services. Plus, think‍ about the bundle‌ options ⁣available with other streaming services that might ⁣give you a bit more⁤ bang for your buck.

But don’t ⁣stop there! It’s⁣ also a fantastic time to put those canceled funds to good use. Consider creating a budget for your entertainment expenses moving forward. Here are some ‌ways to spend smart:

  • Explore free alternatives: Check out platforms like Tubi or Pluto ‌TV ​for free content.
  • Sign up for trials: Keep⁢ an eye out for free trial periods with other ‌streaming services.
  • Host‌ watch parties: Get friends together for movie nights; it’s cost-effective and social!

With a bit of planning, you’ll find that saving‍ both money and time can lead to ⁢a refreshing new entertainment experience.

Saving Money and Time: What to Do After Canceling

Concluding Remarks

So ⁣there you have it! Cancelling your YouTube TV subscription doesn’t have to feel like pulling teeth. With a few clicks and some easy-to-follow steps, you can wave ​goodbye ⁤to your ⁣subscription without breaking a sweat. Whether you’re looking to save some cash, switch up⁢ your viewing habits, or just take a breather⁤ from those endless ⁤streaming options, you’re ⁤in control. Just remember, if you ever find yourself⁤ missing those binge-worthy shows, you can always come back—like an old ‌friend. Until then, happy⁢ streaming (or not streaming)! Stay cozy⁣ and catch you on the flip side!

Snagging Free YouTube Videos: A Simple How-To Guide!

Are you tired ‍of buffering​ videos and ‍spotty internet connections while trying ‍to catch up on your favorite YouTube clips? Or maybe you just‍ want ‌to⁣ enjoy those epic ⁣fails and ⁣adorable cat⁣ antics offline at ⁣your ‌leisure? ​Well, you’re in luck! In this fun and straightforward guide, we’re ⁣diving ⁤into the‍ world ⁢of snagging free YouTube videos so⁣ you can save those gems directly to⁣ your device. Just think of it as⁢ packing⁣ a ⁣little snack for later—who doesn’t love ⁣having​ a ⁣delightful treat ⁤on hand‌ when you need a quick‌ pick-me-up?​ Whether‌ you’re gearing up for a⁤ long ⁢flight or simply want to binge-watch without draining ‍your data, we’ve got you covered. ​So let’s jump in⁢ and explore the simple steps to keep ⁤your favorite YouTube videos right at your⁣ fingertips! ‍Ready ⁢to‌ get​ your video stash going? Let’s do this!

Unlocking the Secrets:⁢ Why⁢ Downloading ⁤YouTube Videos Might Be Right for You

Have you ever found yourself in a situation where‍ you’re scrolling through your favorite YouTube channel, and you ⁢hit ⁤that dreaded buffer icon? It’s ⁤frustrating, right? Downloading videos comes in handy ‍when​ you‌ want⁤ to ⁣watch your favorite content without any interruptions from⁤ Wi-Fi issues or data ‌limits. Imagine settling down for ‍a cozy evening and ​diving into your preferred ⁤DIY ⁤tutorials or ⁣binge-watching that hilarious‌ vlog—all without waiting around⁣ for ‍your internet connection to catch up. Plus, it’s ⁤not just about ⁣entertainment; ‍having‍ videos offline is​ a lifesaver ⁢for those moments⁤ when you’re commuting, traveling, ⁤or just chilling⁤ somewhere ⁣with no signal.

Now, let’s talk about convenience. Think ‌about how many awesome videos are out there, packed with knowledge​ or entertainment that ⁤could up⁣ your game. By downloading them, you can create your own personal library ‍of inspiration and information at your fingertips.‍ Here are some ⁣ key​ perks of keeping YouTube videos‍ locally stored:

  • Offline Viewing: Perfect​ for flights or long ⁤journeys.
  • Accessible Anytime: No more hunting ‍for ⁤that ⁢perfect tutorial when you need⁣ it!
  • Data Saver: Watch what you love without eating up your data plan.

Unlocking the Secrets: Why Downloading YouTube Videos Might Be Right ‌for You

Getting⁤ Started: The ⁤Tools ‍You Need for Effortless ‍Video Snagging

When diving into the world ‍of snagging videos from YouTube, having‌ the right ‌tools can make all the difference. Think⁣ of ⁤it like trying to cook without the ⁢proper utensils; ‍it​ just doesn’t turn out the​ same. To⁤ kick things off, ⁣you’ll⁤ want‍ to gather ⁣a few essential resources that simplify the process and ⁤ensure a⁢ smoother experience. Consider exploring options like video downloaders, browser extensions, and screen‌ recording software. Each⁢ tool ⁣serves ​a unique purpose ⁤and‌ can help you capture those amazing videos​ you want to ⁤keep⁤ without the hassle. Popular ⁤choices often include 4K Video ‌Downloader, YTD Video Downloader, and handy browser add-ons like Video DownloadHelper.

Additionally, knowing how to optimize your workflow can really elevate your snagging game. Here’s a quick rundown of some helpful‍ tips to⁢ keep in mind:

Tool Purpose
Video Downloader Directly downloads video files
Browser ⁢Extension Easy one-click downloads
Screen⁤ Recorder Records content in​ real-time

With these tools at your disposal, snagging your favorite YouTube⁤ videos will ‍feel like a walk in the⁤ park. Don’t be‍ afraid to experiment and⁤ find ⁤what works best for you—everyone’s style ​is a little different after all! So, why wait? ⁤Get equipped and⁤ start capturing those gems⁤ today!

Getting ​Started: The Tools You Need⁢ for ⁤Effortless Video‌ Snagging

Ready to dive into the⁢ world ‍of downloading free ​YouTube videos? It’s simpler than you think! First, make​ sure you have a ⁤reliable video downloader installed or⁢ ready⁢ to use. ‍There are plenty of options out there, ranging from desktop applications to online services. Once you have everything set up, just follow these straightforward steps:

  • Find Your Video: Browse YouTube and pick‍ the video you want.
  • Copy the Link: ⁣Hit the share‌ button and copy the URL from the pop-up.
  • Open ​Your Downloader: Launch the application ​or website where‌ you’ll ‍be downloading ⁤the video.
  • Paste the URL: In the downloader, look ​for the‌ box that ​allows you to enter ⁢the ‌video link and paste it ‍there.
  • Select ​Format: Choose the ‍video quality ⁣and⁣ format you prefer, whether it’s MP4, ​AVI, or ‍something else.
  • Hit Download: ⁣Click the download ​button and watch the magic ‌happen!

After your video is downloaded, it’s time for the fun ⁣part:​ Enjoying your content offline! You can make your own playlists,⁤ share them with friends, or simply binge-watch your favorites without worrying‍ about internet ‌connectivity. Just remember to respect⁣ copyright rules; ‍snagging content ⁢for personal use is one thing, but ‍sharing it broadly ⁢without permission can get ‌you⁤ in hot water.⁢ Here’s a quick recap of the basic downloading methods:

Method Advantages Best For
Desktop Apps Fast, ⁢comprehensive⁣ features Regular users
Online Downloaders No installation needed Occasional users
Browser Extensions User-friendly, quick access Frequent browsers

Navigating the Download ⁤Process:‌ Step-by-Step Made Simple

When ‍diving ​into the world of YouTube videos,‌ it’s easy to get swept⁤ up in the excitement; however, that⁤ thrill⁣ can drown in a sea of copyright⁤ complexities if you’re not careful. Understanding the art of ‌balance ‌here⁤ is crucial. So, how do you know what content⁤ you⁣ can use without risking an unwelcome email from ⁣a copyright holder? First off, it’s important to‌ highlight fair use. This legal concept allows for limited use‌ of copyrighted‌ material⁤ without permission, especially‌ for‍ purposes like criticism, comment,‍ news reporting, teaching, scholarship,⁣ or ‌research.⁢ But remember, it’s not as ‌cut-and-dry ‍as a black-and-white sketch. Many factors come‌ into play, like the⁤ purpose of your use and​ the amount of ​content​ involved. To put it simply, ‌fair use⁣ can feel like walking a‌ tightrope—exciting but a bit precarious!

Now, let’s break it⁢ down with some key points to consider:

  • Purpose: ⁢Is your use transformative? Are ⁣you adding new meaning‌ or message?
  • Amount: How much⁤ of the video are you using? Less is usually more in this case!
  • Market Effect: Does ​your use ⁢harm the ‌market for the original? Keep that in mind.

‌ ​
Understanding these elements will ⁢help you‌ gauge when you can hit​ “download” ‍without⁤ hesitation or regret. While YouTube offers a treasure trove of videos, it’s ⁣wise to ⁣treat this treasure⁤ with respect.‌ Just like ⁤borrowing⁤ your friend’s favorite game, be mindful‌ of⁣ returning it in​ the same​ condition—or risk‍ losing access altogether!

Staying Within ⁢the Lines: Understanding Copyright and⁢ Fair⁢ Use

In Retrospect

And there ‌you have it! Snagging free YouTube ⁤videos doesn’t have to feel like rocket science. With just a⁣ pinch ‌of practice and the right ​tools ​in your back pocket, you can easily download your favorite‍ content and access it anytime, ⁢anywhere.⁢ Whether ‍you’re looking to save those hilarious⁣ cat ‍videos for⁣ a rainy day or want‍ to revisit that tutorial on how to ‌bake ⁣the perfect chocolate cake, you’re now armed with⁤ all​ the‍ know-how ​to do it ‌without breaking a sweat.

But remember,⁢ just because you‌ can download ‍doesn’t always⁢ mean you should. ​Respect the creators and⁣ their⁢ hard work by sticking to personal use and‌ avoiding those shady grey areas. So go​ on, give ‌it a ​whirl! ‍Dive into ‌the ⁤world ⁣of offline viewing and let the fun follow you wherever‍ you roam. Got questions or need more tips? ​Don’t hesitate to reach out! ⁢Until next ‌time, happy watching!

Easy Guide: How to Install YouTube Videos in a Playlist

Are you sitting ⁤there, scrolling through your favorite YouTube videos and‌ thinking, “Wouldn’t it be⁢ awesome to have all of these⁤ in one neat little playlist?” Well, ⁣you’re in luck! Creating a⁣ playlist is like ‍tossing your best jams into a mixtape, but with a modern twist. ⁢Whether you want a collection of hilarious cat videos, inspiring TED Talks, or the latest drops from your ‌favorite musicians, curating a playlist doesn’t have to ⁤be a‌ chore. In this‍ easy guide, we’ll walk you through the simple steps ‌to compile those must-see videos into a seamless playlist that’s all your own. So, grab ​your device, and let’s turn that scattered⁣ video collection into‌ a cohesive viewing experience ‍that you, your friends, or even your grandma can enjoy. Ready to dive in? Let’s ​get started!

Easy Steps ‌to Create Your YouTube Playlist Like a ​Pro

Creating a YouTube playlist is as simple as pie! First things ⁣first, you want to dive into your favorite YouTube channel, find those gems you’d like ‍to include, and click ‌on the ‘Save’ button beneath each⁣ video. It’s like ​gathering a collection of your ‌favorite tunes for a road trip – you’re building the ultimate movie night or study‍ session lineup. Once you’ve clicked the ‘Save’ button, you’ll have ⁢the option to create⁤ a new playlist. Go ahead, name ‍it​ something catchy that tells everyone what to expect. You ⁣can even set it to Public, Unlisted, or Private depending on whether you want⁢ to share your curated​ collection with the world or keep it⁢ just for ​you.

As⁢ you add more​ videos, think about the flow. Just like a DJ mixes tracks,⁤ you want your playlist to have​ a ⁢rhythm and theme. Consider grouping things by genre, ⁣mood, or series ​to make ‌it cohesive and enjoyable to watch. To ‍rearrange your⁢ playlist,​ just drag‍ and drop the videos; it’s⁣ that easy! You can spruce it up by adding a ‌description, which gives your audience‍ a sneak peek of what they’ll ⁣find. Want ‍to make your playlist stand out? Create a custom‌ thumbnail! A collage ⁤of the video covers or an eye-catching ‍graphic can really grab attention. So, grab your virtual crafting tools ​and let your creativity​ flow!

Easy Steps to Create Your ​YouTube Playlist Like a Pro

Unlocking the Power of Playback: How‍ to Add Videos Smoothly

Imagine you’re throwing the ultimate movie ⁣marathon and‍ you want everything to flow seamlessly. That’s the charm of⁤ adding videos to a⁣ playlist—it’s ⁤all about smooth transitions ‍and ‌enjoyable viewing. To pull ‍this off, the ⁣first step is to start by finding those awesome ‍YouTube videos you simply can’t live without.‍ It’s like curating‍ a mixtape⁣ of your favorite songs; each‌ video should vibe well with the others.‌ When you’ve got your selection ‌ready, head ⁣on ⁤over to⁢ YouTube,⁣ and take a good look at​ each video’s URL. It’s ⁢as simple as grabbing ⁣the​ cake, slicing it​ just right,⁣ and‍ serving it up one layer at a ​time!

Now, ‍moving⁣ on to the ‌technical bits,‌ how ​you add these videos can really make or break the experience. You’ll want to ‌use the YouTube GUI to create your playlist. Just hit that lovely “Create Playlist” button and start adding your curated gems.⁣ As ⁢you’re doing this, don’t forget to ‌ opt ​for the functionalities ⁣available,‌ like setting your playlist to public or private, allowing‌ others to see your ⁤masterpiece or keeping it just for your eyes. Here’s ⁣a quick look at what you can adjust:

Option Description
Privacy Settings Choose‍ between public, unlisted, or private.
Order of Videos Drag and drop to rearrange the videos to your liking.
Collaborators Invite ‍friends to add their favorite videos too!

With these simple steps, you’ll be unlocking the true potential of your video playlist,​ making sure ⁢that every viewer, whether it’s just you or‌ a hundred friends, ‌will feel like they’ve hit the cinematic jackpot!

Unlocking the Power of Playback: ‍How to ⁤Add Videos Smoothly

Tailoring ‍Your Playlist: Tips ‌for Organized and ⁤Engaging Content

Creating a captivating⁣ playlist ⁤is like hosting a great party—you​ want⁤ each‍ song to flow seamlessly into the ⁢next, keeping your guests‍ engaged and entertained. ⁢To ‌tailor your ​playlist effectively, consider ‌these simple strategies that ⁤will elevate ​your content from ordinary to extraordinary. ​First, think about the theme of your playlist. Is it a chill vibe for lounging? An upbeat collection for working⁢ out? Having a clear focus helps you select videos that not only fit together but also set ⁢the‌ right mood. With that in mind, curate your selections to tell​ a story⁤ or take listeners on a journey—beginning, ‍middle, and⁣ end serve⁣ as the ⁣structure ‌that keeps everything cohesive.

Next, it’s important to keep your⁢ playlist organized. Try these tips for⁤ maintaining a tidy collection:

  • Use descriptive titles for your playlists ‌that ‌reflect their content.
  • Group similar genres or themes together for easy navigation.
  • Regularly ⁢review your playlists to ⁣update or⁣ remove outdated content.

You might consider‌ using a tool like a simple table to visualize your playlist structure ‍and track which ‌videos⁢ flow well together. Here’s a quick example of how you might format this:

Video Title Genre Length
Chill Vibes Only Lo-fi 2:30
Get Pumped! Pop 3:15

By using‍ simple ⁤organization techniques and keeping your audience in mind, you’ll⁢ find your playlists become not just a collection ⁢of videos,‍ but ⁤a captivating experience that keeps viewers coming back⁢ for‌ more.

Tailoring ⁢Your Playlist: Tips for Organized and Engaging Content

Shared Joy: How to ‍Make Your Playlist Accessible to Others

Sharing your playlist can be one of​ the most ‍rewarding ways to connect with ⁤friends and‌ family. Imagine curating a collection of your favorite tunes and then‍ inviting others to dive into⁢ your musical world! ⁣To make‍ your playlist⁢ truly accessible,⁣ consider these tips: use social⁣ media platforms to‌ instantly broadcast your ​playlist link, or even create a collaborative playlist on Spotify or YouTube. ⁤It’s super easy—just make sure you adjust the settings to allow others to⁤ contribute. Have fun with⁢ it and maybe even host a virtual ‍listening party⁣ where everyone can join‌ in and⁤ vibe together!

Another great method is to‍ spice ​up ⁢your playlist with⁤ personal⁢ notes or theme titles.​ Instead of just listing songs, why not explain⁤ why​ a certain track stirs nostalgia or ⁣brings ⁣a smile? It adds a personal touch that invites ⁤conversation, making your playlist not just a‌ collection of ⁤songs,⁣ but a story. Here’s a quick⁣ comparison to illustrate how simple tweaks can enhance⁢ your shared joy:

Standard Playlist Engaging Playlist
“Chill Vibes” “Chill Vibes: Songs that feel‍ like ‌a warm hug”
No comments “Track 3: The song I danced to at ‌my first ​concert!”
Just links Add emojis⁤ and visuals to ​evoke feelings!

Shared Joy: How ⁤to‍ Make⁣ Your Playlist Accessible to⁤ Others

To Wrap It Up

And there you have‌ it, folks! ​You’re now‌ armed ⁤with all the know-how you need to seamlessly install YouTube videos into a playlist. Wasn’t that easier than pie?⁢ Just think of⁣ a playlist ‍like a mixtape for the digital age,⁤ and you’re the DJ curating the perfect vibes for every occasion. Whether you’re gathering your favorite workout tunes,⁢ crafting a cozy movie night lineup, or ⁤channeling your⁢ inner chef with cooking videos, your playlist‌ is your canvas.‍

So go ahead, take this knowledge⁤ and run⁢ with it! Dive into YouTube,‌ start collecting those videos,‍ and get‍ ready ⁣to enjoy a tailored viewing experience ⁤like never before. And hey, if you ever hit a snag or have ​any cool tips of your own, feel free to ⁢drop a comment below. Let’s keep this ⁢content creation⁤ party going! Happy playlisting! 🎶

Your Easy Guide: Downloading YouTube Videos Made Simple!

Ever ⁢sat down to watch a great YouTube video, only to find yourself wishing you could save it for​ later? Whether it’s a‍ hilarious tutorial, an inspiring travel vlog, or that catchy music video you can’t​ get out of‌ your head, sometimes you just want to download those gems for offline​ viewing. Good news: it’s easier than you think!⁣ This guide ⁢breaks down the ins and outs of downloading YouTube videos into bite-sized steps that won’t⁤ leave your head spinning. So grab your device, and let’s embark on this simple journey together! By the end, you’ll be downloading videos faster than you can say “cat video marathon.” Ready? Let’s dive in!

Mastering ⁢the Art of YouTube Video ‌Downloads

Mastering the Art of YouTube Video Downloads

Downloading YouTube videos might sound tricky, but it’s actually ⁤as simple as pie once you get the hang of it. Picture this: you’re on the go, craving that hilarious cat video or an epic cooking tutorial, ⁤but there’s no Wi-Fi in sight. With ⁣a few smart tools, you can snag those videos ‍directly to your device. The best methods often ‍involve online services ⁣or handy software⁢ that makes grabbing your favorite clips​ a breeze. Think of these options as your digital toolbox — perfect for any situation! Here are some popular choices:

  • Online Downloaders: ⁣Websites like Y2Mate and SaveFrom.net let you paste a video link ‍and download it instantly.
  • Browser Extensions: Add-ons⁣ for Chrome or Firefox ⁣can turn your ‍browser ‍into a downloader with just a click.
  • Desktop Applications: Programs like 4K Video⁤ Downloader can​ handle larger batches​ and offer quality options.

Now, when it comes to choosing the right quality ‌for your downloads, consider making⁤ a short summary table to simplify your decision. After all, nobody‍ wants to be stuck with a grainy‍ version of their favorite video! Here’s a quick look:

Video Quality Best For File Size
720p Mobile Viewing Medium
1080p TV Screens Large
4K High-end Devices Very Large

Armed ⁢with the right tools and knowledge, downloading YouTube ⁤videos ⁤will feel like second nature. Just remember ⁣to respect copyright regulations and⁢ choose ⁢what ‌to download wisely —⁢ it’s all about keeping the balance while enjoying your favorite content offline!

Choosing the Right Tools for a Seamless Experience

Choosing the Right Tools for a Seamless Experience

When ‌it comes to downloading YouTube videos, the right tools make all the difference. Think⁣ of it like cooking a meal—sure, you can whip something up with a dull knife⁢ and a rusty pot, but why not ‍use high-quality tools that make the⁤ process smoother and the results tastier? For a seamless experience, you’ll want to choose software or applications that ⁤are user-friendly, reliable, and possibly even offer extra features like batch downloading ⁣or format conversion. Some popular options to consider are:

  • 4K Video Downloader – Great for high-quality downloads.
  • YTD ‍Video Downloader – Simple interface for beginners.
  • Freemake Video Downloader – Offers diverse format options.

Another important aspect of your‌ toolkit⁣ is ensuring that the tool ⁤you choose ⁢remains up-to-date with​ YouTube’s policies. ‌You wouldn’t want to start⁢ a project with tools that are outdated, ⁣right? For those tech-savvy folks, browser extensions can⁣ also ​provide a way to download videos directly from ‍the site. Check out the pros and cons of each option in this handy table:

Tool Pros Cons
4K ⁤Video Downloader – High-quality ⁢downloads
– User-friendly
-‌ May have limited‍ features on free version
YTD⁣ Video Downloader – Easy for beginners
– Fast download speeds
– Ads on free version
Freemake Video Downloader – ​Supports multiple formats
– Simple user interface
– Some features require premium version

Understanding‍ the Legal Landscape ‌of Downloading Content

When ‌it comes to⁣ the world of downloading content,⁤ especially from platforms like YouTube, the legal landscape can feel as⁣ complex as a maze. It’s crucial‌ to recognize that not all downloads are created equal. While some ⁤content is fair game, like⁤ videos from creators who explicitly allow downloads, others might land you in hot water. Essentially, ‌you’re wading into a pool of copyright laws and terms of‌ service agreements ‌that can change faster than you⁤ can click⁣ “download.” Understanding what’s allowed can save you headaches down the line, so always check for the permissions associated with the video you’re interested in.

Here’s a handy breakdown ‍of ⁢what you should be‌ aware of:

  • Content Ownership: Most videos ⁣on YouTube are protected⁢ by copyright; ⁤using ‌these without permission is a no-go.
  • Creative Commons: Some creators use this license, allowing others to share or remix their ‌work, but still check the specific terms.
  • Fair Use: This legal doctrine permits some use of copyrighted material without permission, but it’s a slippery slope—usually reserved for commentary, criticism, or education.
Type ​of Content Download Permission
Personal Use Often⁤ allowed, but verify
Commercial ⁣Use Typically requires permission
Creative Commons Check specific license terms

Troubleshooting Common Issues with ​Ease

Troubleshooting Common Issues with Ease

Troubleshooting YouTube video downloads can feel like trying to solve a Rubik’s Cube blindfolded, but‍ let’s simplify it. First, ensure⁢ your internet ⁤connection is stable. A shaky connection can ⁤throw a wrench in the download process. If a video refuses to download, it might⁢ just need a little TLC: try refreshing⁢ the page or restarting the ⁢app. If you’re using a software tool, check for updates. Developers often push out patches that can fix bugs ‌or improve performance. Here are‌ a few other reasons ‍why you could be facing hiccups:

  • Format compatibility: Some videos may not download due to format ⁤restrictions.
  • Device storage: Insufficient storage space can halt the process.
  • Blocked content: Geographical restrictions can ‌prevent downloads of specific videos.

Sometimes, the​ issue can slip through the cracks, and‍ using⁤ a different ‌download method ‌might​ just do the trick. For ‍instance, if you’re using a browser extension, consider ​switching to a dedicated application or‌ vice versa. ⁣ Here’s a handy comparison table to‍ help you choose the⁣ right method based on your needs:

Method Pros Cons
Browser Extension Quick and easy to use Can be limited​ in functionality
Standalone Software More features available Requires installation
Online Download Services No need ⁢to ​install anything May have⁤ ads or pop-ups

With these tips and tricks in your back pocket, you’ll breeze through ⁢the troubleshooting process like a pro! ​Remember, sometimes persistence is key, so don’t get discouraged if you face a ⁤few bumps along the way.

The Way Forward

And there you have ‍it! Downloading YouTube‍ videos doesn’t have to feel ​like cracking a code or navigating a maze. With the tips and tricks we’ve unpacked, you can snag your favorite content for offline viewing in no time. Whether it’s for a long flight, a road trip, or just​ to⁢ avoid buffering during binge-watching sessions, you’re all set. Remember to respect copyright‌ rules, though—there’s ​a fine line between convenience and infringement.

So, grab your ‍popcorn,​ make that playlist, and enjoy your videos anytime, anywhere. Got any questions or other tips that worked for you? Don’t hesitate to share! Happy downloading! 🎥✨

Linking YouTube Videos in Word Docs Made Easy: A Guide!

Hey there! So, you’ve got some fantastic YouTube videos you want to share, and you’re thinking, “Why not⁢ add ⁢them to my Word documents?” That’s a brilliant idea! Whether it’s for a school project,​ a business proposal, or just ‌a fun thing to spice up⁤ your personal notes, linking videos can really take your documents​ to the next level. But if⁤ you’ve ever ​tried to figure⁢ this out ‌and felt like you were navigating a ⁢maze blindfolded,‍ don’t ‌sweat it! In this guide, we’re ⁢going to unravel the mystery of linking YouTube videos in Word Docs ⁤and make ​it as easy as pie. Imagine breezing through your document with video links ⁤that not only look great‍ but also significantly enhance ⁢your content! Ready to dive in? Let’s get ​started!

Mastering the Art of Embedding: ⁤How to Seamlessly Insert YouTube Links in Your Word Documents

When it comes to sharing‌ video content in your ‌Word documents, embedding YouTube links can add a whole‍ new layer of interactivity. Think of it like seasoning in your favorite dish—just the right touch can elevate the whole ⁣meal! To get started, grab the YouTube link of your choice and copy it. In Word, navigate to the section where you want‌ the video to appear. All you have to do ⁣now is paste the ⁤link directly into your document, and voilà! Your video is just a click away. No fuss, no muss!

If you‍ want to jazz things up a bit more,⁢ consider using ​an object embedding feature. Here’s how you can take⁢ it a step further:

  • Open​ Word and go to⁤ the place in the document where you want⁣ the video.
  • Select the Insert tab and choose Object.
  • In the ‍window that pops up, pick From File,‌ and paste your link there.

This method allows you to‌ integrate the video so it plays right within the document, providing a dynamic reading experience. Imagine⁤ your​ readers clicking play and being‍ greeted with visuals that enhance your narrative. It’s like having a mini-theater right in your Word ⁤file!

Unlocking the Power of Hyperlinks: Tips for Creating Clickable YouTube Video References

Creating hyperlinks for your YouTube videos in Word documents can ⁣transform your content into something interactive and engaging! ​Imagine your readers clicking through directly ‍to your‍ video content with just a tap or a⁤ click. To​ start, highlight the text you want⁢ to turn ⁢into a link. ‍Think of this as giving them a shimmering pathway⁤ right to your video treasures. Once you’ve selected your⁣ text, simply hit the​ link button (usually looks like a chain link) and‌ paste‌ your YouTube URL into the provided field. Voila! You’ve just created a clickable link ⁤that can take your audience on a journey through ⁢your visual storytelling.

But why⁣ stop at basic⁤ links?‌ Spice things up a bit! You‌ could‍ include a call to action in your ⁢text that draws attention and prompts viewers to take that leap. Here are some⁤ tips to enhance your hyperlinks:

  • Use descriptive anchors: Instead of “click here,” try something like “watch my cooking tutorial,” which​ gives a clearer idea of ​what to expect.
  • Include⁤ links at​ the⁤ right moments: ​ Scatter your links throughout relevant sections of your‌ document to maintain ⁢reader interest.
  • Test your links: Always check if they’re working before hitting send. A dead link can be a real mood breaker.

Incorporating these tips ⁣can elevate the experience for ‌your readers and encourage them to explore more of what you have to offer.‌ Whether it’s a how-to guide or a fun vlog, linking effectively can direct your audience exactly where you want them to go.

Enhancing Your Content: Making YouTube Video Integration Work for Your Word ⁢Docs

Enhancing ‍Your Content: Making YouTube Video Integration Work for Your‌ Word ⁣Docs

Integrating YouTube videos into your ⁣Word documents ‍can transform your text-heavy content into a more engaging experience. It’s like adding⁤ a splash of color to​ a black-and-white painting! To make this happen effortlessly, start by copying the video link directly from YouTube. After that, ⁢navigate to your Word document and paste​ it⁣ where ‌you want your audience to see that captivating​ video. Word ‌will automatically convert it into a clickable link. But why stop there? You can also embed the video. ⁢All you need to​ do is click on “Insert,” then select “Online Video” ⁤and paste your link. ‍With just a few clicks, your ​video can become live, taking your readers from words to visuals in an instant!

But wait, there’s more! You can improve the overall look of your Word document ‍by customizing or adding a little flair. Consider these options:

  • Video Thumbnails: Grab attention with eye-catching thumbnails by adjusting the size of your embedded video.
  • Add Captions: Include brief descriptions below the video link to give context. This is your chance to showcase key⁢ points⁣ or themes!
  • Use Callouts: Create a table ⁤highlighting important details. This can help draw your viewers ‍to the content within the video.
Video Title Description Link
Exploring New⁢ Trends A dive into‌ the latest​ trends shaping the industry. Watch Here
DIY Craft Ideas Fun and creative crafts ‍you ‍can do at home. Watch ⁤Here

Troubleshooting Tips and Tricks: Ensuring Smooth Playback from Your Linked ‌Videos

Troubleshooting Tips‌ and Tricks: Ensuring⁢ Smooth Playback from Your Linked Videos

When your embedded videos decide to throw a tantrum during playback, it can feel like⁤ a tech ‍gremlin⁤ is at work! Before diving ‌into more complicated solutions, try these ​simple checks first. Ensure​ your internet connection is stable; ‍a weak signal can turn smooth streaming into a buffering nightmare. Also, check the link syntax in your Word doc. A misplaced character or forgotten “http” can trip​ things up. refresh the document—sometimes all it⁤ takes is ⁣a little nudge to get things going again.

If the video ‌still refuses to play nicely, ‌it might be time to roll‌ up those sleeves and dig deeper. Start by clearing out your browser cache; old data can interfere with new content. Make sure your browser and plugins are up ⁢to date—incompatible software can lead to playback issues. In rare cases, ‌certain⁢ browsers⁢ may not support specific video types.​ If you encounter‌ trouble, try​ switching browsers​ to‍ see if that resolves⁢ the issue. To sum it up, a little patience and ‍these troubleshooting tips can help you get back to enjoying that ‍sweet ⁢video ⁣content!

In Summary

And there you ​have it! Linking YouTube videos in⁢ your Word⁢ documents ⁢doesn’t have to be a daunting task. With the steps ‍we’ve gone through, you can seamlessly‍ integrate video content into⁢ your documents, transforming‌ them from plain text into ⁢engaging multimedia ‍experiences. Imagine sharing your ⁤thoughts, presentations, or reports with a ‌touch of flair that keeps your audience hooked!

Whether you’re ⁢crafting a report for work, preparing a school project, or just wanting to add a personal touch to your writing, ‌embedding a YouTube video⁣ can make a difference. It’s like seasoning ⁣a dish — a little sprinkle can elevate the​ entire experience!

So, the ⁢next time you find yourself typing away ⁣in Word, don’t forget ​to bring the magic of YouTube along for the ride. Experiment, have fun, and remember that creating content doesn’t have to be serious business. Just think of it as connecting with your audience in a whole new way.​ Happy linking, and may your documents shine with creativity!