Looking to snag some YouTube videos for offline viewing on your Android device? You’re not alone! With our hectic schedules, sometimes we just want to have our favorite content at our fingertips, ready to go whenever we are—like a trusty sidekick. Whether you’re prepping for a long flight, a road trip, or just want to binge-watch during a lazy Sunday, having videos on hand can be a game-changer. But how do you navigate the maze of apps and options out there? Don’t worry, we’ve got your back! In this guide, we’ll walk through the ins and outs of downloading YouTube videos on Android like a pro, so you can enjoy your favorite clips anytime, anywhere! Let’s dive right in and unleash the power of offline viewing!
Navigating the YouTube App for Seamless Downloads
Navigating the YouTube app for downloading your favorite videos can feel a bit like finding your way through a maze, right? But don’t sweat it! YouTube makes it pretty straightforward to save content for offline viewing – especially on Android. First things first, make sure you’ve got the latest version of the app. Once you’ve got that sorted, just dive into the video you want to download. Right below the video, you’ll spot a Download button. This little gem is your ticket to offline bliss. A simple tap, and you’re set! Now, you can choose the quality you prefer – higher quality might take more space on your device, so pick wisely!
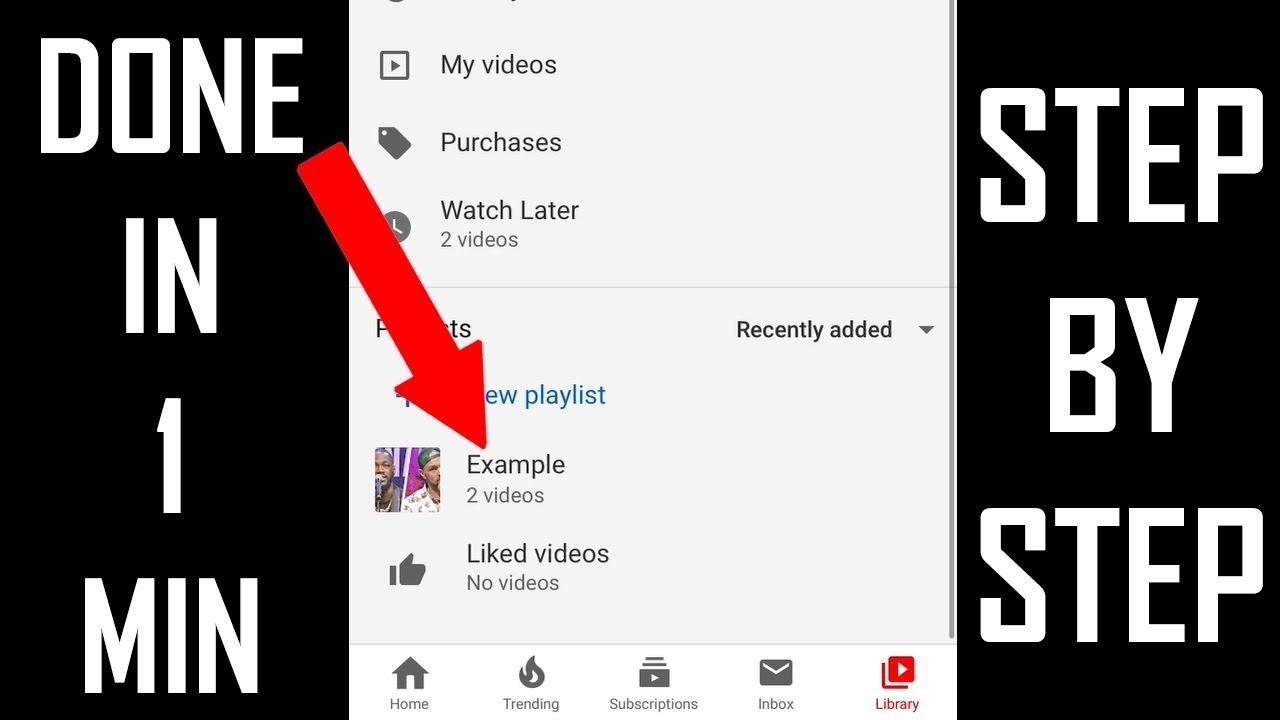
Once the download’s in motion, sit back and relax while your video gets saved. Want to find your treasures later? Head over to the Library tab at the bottom right of your screen. Here, you’ll see a section labeled Downloads. It’s like your personal vault of saved videos, easily accessible whenever you’re ready to binge-watch. If you ever decide to clear out some space, you can manage downloads directly from this menu. Just a quick swipe or tap, and you’ve got your storage back – no fussing around needed! So, whether you’re prepping for a long flight or just want to enjoy some videos away from Wi-Fi, downloading on the YouTube app makes those moments a lot easier and tons more fun!

Essential Tools and Apps for Downloading YouTube Content
When it comes to downloading YouTube videos on your Android device, having the right tools can make all the difference. There are various apps that cater to this need, each offering unique features that can enhance your downloading experience. Some popular options include TubeMate, known for its intuitive interface and high download speeds, and VidMate, which lets you not only download videos but also stream them directly. If you’re looking for simplicity, you might try Snaptube, which supports multiple formats and has a user-friendly design. Don’t forget about YouTube Go—perfect for those with limited data plans, allowing you to preview videos before downloading them. Each of these apps provides a unique spin on downloading, so choose one that fits your needs like a glove!
It’s important to remember that while these tools can be incredibly handy, they should be used responsibly. Here’s a quick breakdown of some features to consider:
| App Name | Key Feature | Best For |
|---|---|---|
| TubeMate | Fast downloads and multiple formats | Speedy downloading |
| VidMate | Integrated streaming | Versatile users |
| Snaptube | User-friendly navigation | Simplicity seekers |
| YouTube Go | Data-saving options | Data-conscious users |
By understanding the features and benefits of each app, you can select the best option for your YouTube downloading needs and enjoy your favorite content on the go!

Steps to Enhance Your Video Quality During Downloads
To achieve crisp video downloads, it’s crucial to start with quality settings. First things first, always opt for the highest resolution available. 480p might suffice for casual viewing, but if you’re after those stunning visuals, bump it up to 720p or 1080p. When you’re downloading, keep an eye out for settings during the process. Often, apps allow you to choose resolutions, so take a moment to tweak these preferences. It’s like choosing the best ingredients before whipping up a delicious meal; the better your choices, the tastier the result!
Another tip is to ensure that your internet connection is stable while downloading. A solid connection is like a loyal friend—you can always count on it when you need it most! Dropped connections can result in buffering or lower quality downloads. Consider downloading during off-peak hours when your network isn’t crowded. And just for a cherry on top, you might want to free up some storage on your device ahead of time. There’s nothing worse than that “insufficient storage” notification popping up halfway through your download. Stay prepared, and you’ll enjoy your favorite content in all its glory!
Staying Legal: Understanding Copyright and Fair Use on YouTube
When it comes to downloading videos from YouTube, you might think it’s a free-for-all. Unfortunately, it’s not that simple. YouTube videos are protected by copyright laws, which means that the creators hold the rights to their content. You can think of it like borrowing someone’s favorite book; you wouldn’t take it without asking, right? Understanding copyright is key here. If you download a video without permission and redistribute it, you could find yourself in legal hot water. That said, there are exceptions, notably fair use, which allows limited use of copyrighted material without permission for purposes like commentary, criticism, or education. So, when in doubt, always check the video’s licensing information and consider reaching out to the creator if you’re unsure.
Navigating the waters of copyright may feel like walking a tightrope, but it doesn’t have to be all doom and gloom. Here are some tips to remember to stay on the right side of the law:
- Check the License: Some videos come with a Creative Commons license, allowing more freedom to use and share.
- Use Fair Use Wisely: If you’re creating something transformative or for educational purposes, you may be able to argue fair use.
- Cite Your Sources: Always give credit where it’s due. Tagging the original creator improves your reputation and respects their work.
Moreover, if you’re looking to create a fair use argument or educate others on this topic, remember that context is everything. Keep in mind that the amount of video you use and the purpose of your use can significantly affect how fair use applies. Here’s a quick table summarizing the key factors:
| Factor | Description |
|---|---|
| Purpose | Transformative works, educational use, or commentary. |
| Nature of the Work | Creative works are less likely to be fair use. |
| Amount | Using smaller segments is more likely to qualify. |
| Effect | Your use shouldn’t negatively affect the market for the original. |
To Conclude
And there you have it! With these tips and tricks in your back pocket, downloading YouTube videos on your Android device can feel like a walk in the park. Whether you’re saving that hilarious cat video for offline giggles or capturing educational content for your next road trip, you’re now equipped to keep your favorites close and accessible anytime, anywhere. Just remember to respect copyright and always play fair!
As you venture into your downloading journey, don’t forget to explore the various apps and tools out there—they’re like a treasure chest waiting for you to discover. And if you hit any snags or have a moment of doubt, just circle back to this guide. Think of it as your trusty map in the vast wilderness of the internet.
So go ahead, embrace the freedom of offline viewing, and keep your entertainment flowing without those pesky buffering woes. Happy downloading, and may your video collection be as endless as your imagination!