Enjoying YouTube on Android Auto with AA Wireless: How-To!

Imagine cruising down the highway, your favorite tunes or the latest episodes from YouTube keeping you entertained as the scenery zips by. With Android Auto and AA Wireless, you ‌can seamlessly transform your ⁣car’s display into a portal to ‍all that engaging content ⁣from YouTube, making even the⁢ longest drives feel more like a joy ride. So, how do you set‌ it all up? Buckle up! We’re diving​ into ⁣a user-friendly guide that’ll have you enjoying rich, visual storytelling​ on the go. Let’s turn‌ that ​boring⁤ commute into a mini cinema experience while ‌ensuring you ⁤stay safe and focused on the⁤ road ahead!

Navigating YouTube Bliss: Setting Up AA ⁣Wireless on Your Android Auto

Getting started with AA Wireless to enjoy YouTube on your Android Auto is pretty straightforward, and you’ll be ⁣cruising in no time! First things first, make sure your phone⁤ and your car’s infotainment system are ready to roll. This means ensuring‍ that your car supports Android ⁣Auto, and your phone has a solid connection to Wi-Fi. Once you’re in the driver’s seat, plug your Android phone into the vehicle’s ‌USB port. This initial tethering sets up the connection you need, and don’t worry—after ‌you’ve set it up, wireless⁣ operation will be a breeze. ​

Once your devices are linked, it’s time to dive⁢ into the AA Wireless setup. Open up your ‍Android⁤ Auto app and look for the Settings ⁣option. Look for the AA Wireless settings. It’s ⁢like finding the secret menu at your favorite café, and once you locate it, you’ve unlocked a new world of entertainment! Here’s a simple checklist to‍ ensure everything is ⁢in order:

  • Confirm AA Wireless is Enabled: Make sure that your device recognizes the AA Wireless adapter.
  • Connect to Wi-Fi: Ensure ⁤your phone ‍is connected to the same network as the AA Wireless device.
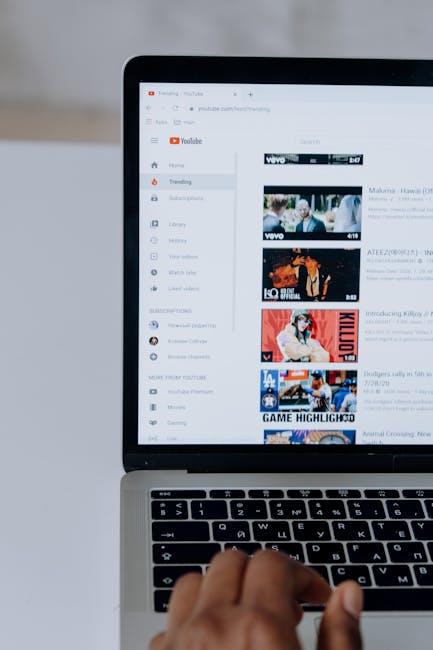
  • Open YouTube: Once⁤ connected, navigate to the YouTube app on your⁣ Android Auto screen.

With these ‌steps, you’re primed to stream your favorite content seamlessly. ‍It’s like having a ‍drive-in movie experience, but without the popcorn ⁣mess!

Seamless‌ Streaming: Tips⁢ for a Smooth YouTube Experience on ⁣the Road

Seamless‍ Streaming: Tips for⁤ a Smooth YouTube Experience on the‌ Road

Getting your ​YouTube fix while cruising down the highway can feel like a wild ride, but with the right tips,⁣ it can be‍ as smooth as butter. First​ off, ‌ connect your Android Auto seamlessly with AA Wireless to eliminate those pesky cables that always seem to tangle. Before you hit the road, ensure your device is fully updated to enjoy the latest features and a bug-free interface. A solid⁤ internet connection is key; consider making your phone a hotspot or connect to reliable Wi-Fi if stopping at a café. Also, don’t ​forget to ⁤preload⁢ your favorite videos while you’re still parked. That way, when you’re on the move, you‌ won’t have to ⁢worry about buffering interruptions ‍ruining your groove.

Now, let’s customize your experience to keep things entertaining. ⁤ Organize playlists ⁤in advance, categorizing them by mood or genre to make scrolling a breeze. Another handy‌ trick is to enable the “Picture-in-Picture” mode—this allows you to keep the ‌video playing while you navigate through other apps, making multitasking a cinch. Always remember to set up voice commands; it’s like having‌ a personal ‌assistant that keeps your hands on the wheel and eyes on the road. ⁣Before you know it, you’ll be⁤ enjoying binge-worthy shows or music ⁣playlists with ease, ensuring that your road trip is just as exciting as the destination you’re headed to!

Safety‌ First:​ Enjoying YouTube While Keeping Your Focus on Driving

Safety First: Enjoying YouTube While Keeping ⁢Your Focus on Driving

When you’re⁢ cruising‍ down the highway,​ the last thing you want is to be distracted. Picture this: you’re jamming to your favorite tunes or catching up on the latest vlogs during‌ a long drive. Sounds‌ great,‌ right? ⁤However, it’s crucial to keep your focus on the road. Think of your car as a movie theater, and the ​road ahead is ‌the screen. Just like you wouldn’t want to block your view during⁤ your favorite ⁢film, you should keep distractions to a minimum when driving. Here ⁢are a ​few simple ⁣ways to‌ stay safe while enjoying YouTube:

  • Voice Commands: Leverage ​your Android‍ Auto’s ⁤voice controls to navigate and play videos ⁣without taking your eyes off ⁢the road.
  • Pre-Load Your‍ Playlist: Queue up ⁢content before ​you hit the gas to keep your hands and mind‌ on driving.
  • Use Headphones with Caution: If you’re ​parked, tuning into‍ that⁣ podcast with headphones ‌can be great, but make sure you can still hear⁣ what’s happening outside.
  • Engage a ⁣Co-Driver: If you’re traveling with someone, let them ⁤handle the selections while you keep ​your focus on the drive.

Remember, multitasking often leads to mishaps. Relying too heavily on YouTube while driving could be likened ⁣to juggling⁣ flaming torches. Sure, it’s impressive, but the risk of⁢ dropping one is just too high! To make it easier to channel your inner road warrior while⁣ still catching your favorite clips, consider setting up a simple schedule for your YouTube time. You might even want to think about downloading select videos ahead of time​ so you don’t ‍get snared in a web of buffering during‍ your drive.

Maximize Your‌ Entertainment: Customizing YouTube Settings‌ for Road Trips

Maximize Your Entertainment: Customizing YouTube Settings for Road Trips

Even the best ⁤road trips can hit a snag without the right entertainment. YouTube is a treasure ⁣trove of content waiting to​ keep you engaged on the open road.⁣ Start by customizing your settings to get the most out of your viewing experience.⁣ First, ensure you have autoplay activated, ​so once one ‌video wraps up, the next one lines up seamlessly like dominoes falling in a perfect, uninterrupted​ chain. Consider creating⁣ playlists tailored for the journey—whether it’s laugh-out-loud comedies, mesmerizing nature docs, or engaging vlogs. This way, you’ve got a buffet of​ content ready to entertain that won’t require constant fussing with your device while driving.

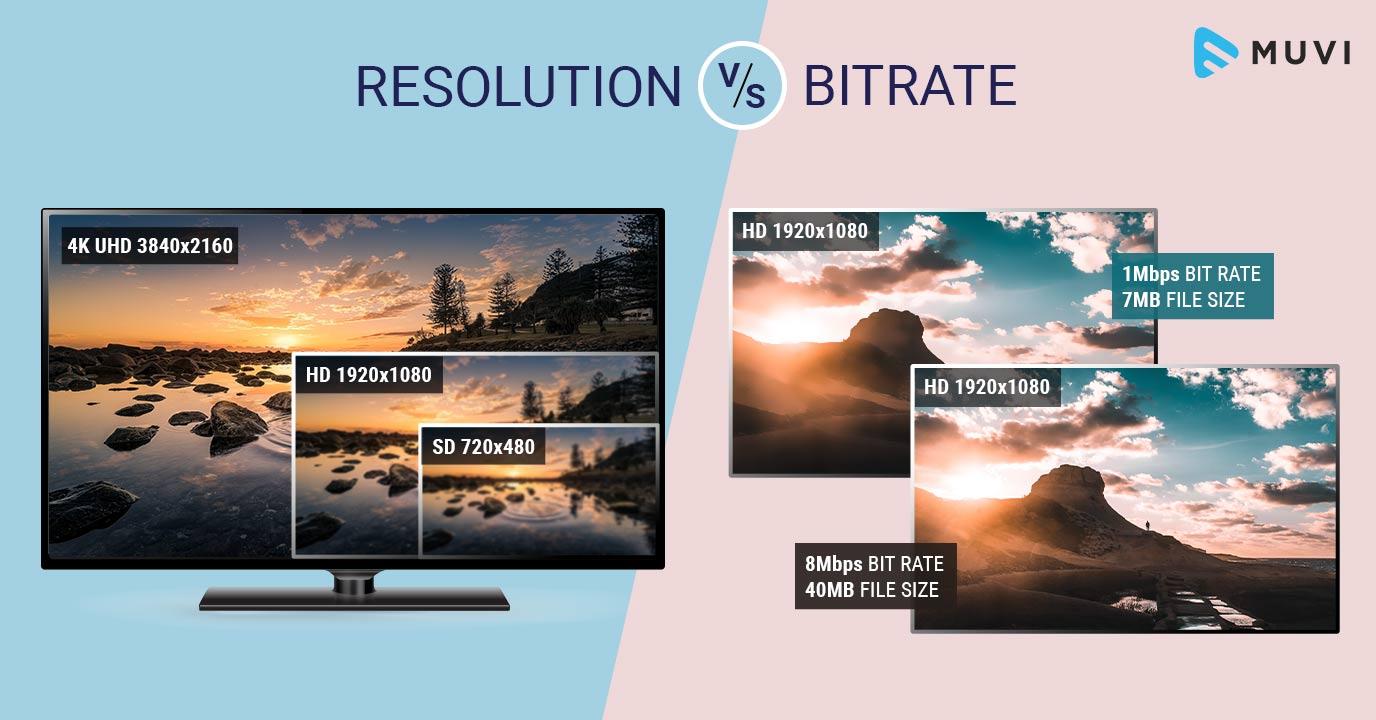
Next, don’t overlook your download settings. By downloading a few episodes or videos while you’re parked, you’re kissing buffering and data issues goodbye! To keep the experience smooth and distraction-free, dive⁤ into the quality settings—lower the resolution when traveling‍ through​ areas with spotty internet, ensuring you don’t face interruptions from ⁢loading screens. ‍Lastly, if you’re traveling with friends or family, make use of the share feature to bring ‌everyone’s favorites into the mix, creating a collaborative playlist. It’s⁤ all ⁤about teamwork, right? Make your road trip not just⁤ a journey, but an adventure filled with laughter, knowledge, and ‌a little bit of binge-watching fun!

In Summary

So there you have it! Enjoying YouTube on Android Auto with AA Wireless is not just a possibility; it’s a game-changer for anyone who spends time on the road. Just imagine cruising ‍down the highway, your favorite vlogs ‍or music videos playing‌ in ⁣the background—it’s like having your own personal entertainment hub ⁣right in your car!‍

Remember, the key is to keep safety in mind while you’re indulging in those visual delights. ⁣Don’t⁣ let the excitement of your favorite content distract you from the road.‍ So, whether you’re stuck in traffic or embarking on a long journey, follow these steps, and turn your ride ‍into a mini-theater on wheels.

Give it a shot and see how it transforms your‍ driving experience. Got⁤ any ‍other tips for using AA Wireless? Or maybe a⁣ favorite YouTube channel for road trips? Let’s keep the conversation going in the comments below. Safe travels and happy streaming!

How to Easily Check Bitrate on Your Favorite YouTube Videos

Ever found yourself ⁤jamming out to your ‌favorite song or binge-watching a thrilling ‌new series on YouTube, only to wonder why⁤ it ⁢sounds a bit off or pixelated? Let’s⁤ be real, ⁤sometimes the crispness​ of‍ that music or the ⁤clarity ⁤of ⁣those visuals⁢ can ‍feel like they’re ⁢on⁢ a rollercoaster‌ ride,​ dipping‌ and soaring. That’s when‌ you’ll want‍ to check the bitrate of those videos. It’s kind of like tuning into your TV⁤ channels; you ​want the best signal​ for the best experience,⁤ right?‍ In this article, we’re​ diving into the⁣ nitty-gritty of finding bitrate information on your go-to YouTube ‍videos. Don’t worry, it’s ⁤simpler than finding⁤ your favorite hidden snack in the pantry! Learn the ropes, and you’ll be able to assess⁤ the quality‌ of your binge-watching sessions with just ⁤a few ⁢clicks. So, grab your device, and let’s get into it!
Unpacking Bitrate: What It Means⁣ for Your YouTube Experience

Unpacking Bitrate: ‍What It⁤ Means for ⁤Your YouTube Experience

Bitrate is like the unsung hero of your YouTube⁢ experience. Ever found yourself watching a video that keeps‍ buffering, or the picture looks less than stellar? That’s where bitrate comes in. Think⁣ of ⁢it as⁣ the amount of data that gets transmitted every second ⁤when you’re streaming.⁣ The higher the bitrate, the better the quality of the⁣ video⁤ and ‍audio. Imagine trying to listen ⁤to your favorite song on‌ an ⁤old, crackly radio ‌versus crystal clear on high-definition speakers; ⁣it’s a night-and-day difference. So, when you’re diving into a video, remember that​ bitrate plays a​ crucial role in ⁢whether you’re gazing ‌at a visual masterpiece or squinting at pixelated chaos.

When ‍checking the bitrate of your favorite YouTube videos, you’re ⁢basically ​ensuring that⁤ your viewing experience‌ is‍ as⁤ smooth as butter.‍ Here are some quick tips on⁣ what ⁤to look⁤ for:

  • Resolution Matters: Videos ‌in 1080p ​generally have a higher bitrate than those in 720p, so ​keep that ‌in mind.
  • FPS Counts: Higher frames⁣ per second ⁤(FPS) often enhances the fluidity of the video.
  • Content Type: Fast-paced action videos ‌demand higher ​bitrates compared to ‍slower, ⁤more static scenes.

Here’s a quick table for‍ a comparative look:

Resolution Typical Bitrate‍ (Mbps) Recommended Quality
480p 0.5 – 2.0 Good for Standard Definition
720p 2.5 – 5.0 Better Quality, Small Files
1080p 5.0​ – 10.0 High‌ Definition, Crisp Detail

Understanding ‍bitrate ‍is key to enjoying your YouTube experience to⁣ the fullest, and‌ knowing⁢ how to check it can make all the ⁤difference.

Tools ⁤of the Trade: The Best ​Software to Check Bitrates⁢ Effortlessly

Tools of the Trade: The ⁤Best Software to Check Bitrates Effortlessly

When it comes to checking the bitrate ​of your favorite YouTube videos, having​ the right tools in your arsenal can make all the difference. Some standout software options ⁢deliver⁤ precise readings without⁤ the hassle. For instance, VLC⁤ Media Player is a go-to favorite. Not⁤ only is it free and open-source, ‍but it also houses a plethora of features, ⁢including bitrate‌ analysis. ⁢Simply load your video, hit Tools, and then Media Information to unveil ​the​ hidden‍ data. Another great choice is Bitrate ‌Viewer, which offers a‍ clean interface to‌ inspect⁣ the⁣ bitrate ⁢more visually. ​It’s as if ⁤you’re a detective ​sifting through⁢ clues to uncover the⁢ secret sauce behind video quality!

If you’re hunting for something even more specialized, look‌ no further than FFmpeg. This command-line powerhouse might sound intimidating, but once you get the hang of it, ​you ⁢can ‍whip up bitrate information like⁢ a pro chef⁢ flipping an omelette. And ‌let’s not ​forget YouTube’s own stats for nerds, which can be accessed with a​ simple right-click​ on⁤ any video. Don’t underestimate the value of‍ these⁣ tools because understanding bitrate isn’t just for ​tech⁣ geeks;​ it’s essential⁢ for ⁤anyone who appreciates quality content. Whether​ you’re a⁣ casual viewer or ‌an aspiring creator, having⁣ a grasp‍ on ​bitrate can elevate your video experience!

Step-by-Step‌ Guide to⁣ Analyzing YouTube Video Quality

Step-by-Step Guide‌ to Analyzing YouTube Video Quality

Understanding how to analyze YouTube video ‌quality can⁢ feel a bit‍ overwhelming, but with a few simple ‍steps, you⁣ can‌ get a solid grip on it. First, check the quality settings of the video. Just click on the gear icon in ⁤the bottom right‌ corner ‍while the ​video is playing. There, you’ll‌ usually see options ranging‍ from 144p to 4K. Lower settings might indicate a less-than-stellar bitrate. ‍Why? Because ⁢ bitrate is basically how ⁣much ⁤data is used to⁣ store and transmit ⁣the ‍video. The‍ higher‍ the bitrate, the ‍better the quality—think of ⁢it⁣ as⁣ the ⁤richness‌ in a gourmet meal versus a⁣ fast-food ⁤burger. You wouldn’t want‍ to settle for the ⁢latter, right?

Next, ⁣let’s dive deeper into the tools ​available for ‌checking ​the ⁤actual bitrate. A handy option is using the Stats for Nerds feature that YouTube offers. ‌To‍ access this nifty tool, right-click on the video while‍ it’s playing and select “Stats for nerds.” Here, you’ll find a ⁢wealth ‍of information,‍ including the bitrate. Look‍ for⁣ the line⁣ that ⁤reads “Current Bitrate”—that’s your gem! If you’re curious about how​ this stacks up, here’s a quick‌ comparison:

Quality Setting Expected Bitrate (Kbps)
144p 100-300
360p 400-800
720p 1500-4000
1080p 3000-6000
4K 15000-30000

So, the ⁣next time ⁣you’re binge-watching⁤ your favorite channel, keep an eye out for these specifics to ensure you’re getting that top-notch ‍viewing experience. ⁣After ⁣all, nobody ⁢wants to watch a music video with all the looks of⁣ a pixelated ⁢soap opera! Trust your eyes, and let your inner ​nerd shine!

Maximizing Your Viewing Pleasure: What Bitrate Levels Really⁣ Matter

Maximizing Your Viewing Pleasure: ​What ​Bitrate Levels ‍Really⁢ Matter

Picture‍ this: you’re cozied ‍up on your couch, popcorn in ‍hand, ready to⁤ dive into the latest viral video.​ But wait—what’s this? The video is buffering more than ⁢it’s actually playing. ⁢Frustrating, right? This is where bitrate comes​ into play. In the simplest terms, bitrate is the amount‍ of‌ data ​processed per second in a video, and it can ​significantly⁢ affect your viewing​ experience. Higher bitrates can⁢ mean clearer, ​more⁢ vibrant visuals, while⁣ lower bitrates​ might leave you squinting at blurry images. Factors like the resolution of the video and your internet connection speed can affect⁢ what bitrate is optimal, making it ⁢crucial to figure out what works best for your setup.

So, how do you know if you’re ⁢getting the most​ bang for your buck⁤ in terms ⁢of bitrate? Here’s‌ a handy checklist⁤ to help you make sense‌ of it​ all:

  • Resolution Matters: Always ‍consider​ the video resolution. For instance,⁣ a 1080p‍ video ‍typically needs ‌a higher⁣ bitrate than ⁢a 720p one to look good.
  • Stay​ Connected: A strong internet ​connection can help you ⁣support higher bitrates without buffering interruptions.
  • Source⁢ Quality: Look for videos uploaded by content‍ creators ⁣who prioritize quality over ‌quantity.‍ They usually maintain higher bitrates.

Here’s⁤ a⁢ quick reference of typical bitrate levels for various definitions:

Resolution Recommended Bitrate Range (Mbps)
480p 1.0 – 2.0
720p 2.5 – 5.0
1080p 5.0 – 10.0
4K 15.0 – ⁣25.0

To Conclude

And there you have it—your crash course on checking ‍the bitrate⁢ of your favorite ⁤YouTube ⁤videos! It’s ​like⁢ being the detective in the wild world of streaming, ⁢uncovering the hidden details that make your viewing experience truly enjoyable. With just a few⁣ clicks and the right⁣ tools, you’ll be able to ‍assess the quality of the ‌videos you‍ love, elevating your binge-watching ​game to‍ a whole ⁤new level.

So, next time you’re ⁤diving ‍into ​a content binge, don’t just sit back ‍and enjoy the show—get ‍curious! Explore⁣ the numbers behind the pixels and understand what makes the​ visuals pop and the audio resonate.‌ Who⁣ knows? ​You might even‍ stumble upon some hidden gems​ with‌ epic bitrates that elevate your favorite clips from good⁢ to​ breathtaking. Remember, whether it’s​ a heart-thumping trailer​ or a laid-back vlog, knowing the bitrate‍ can‌ transform your viewing experience.

Now go⁣ ahead, take this newfound knowledge, and ‌impress your friends with your insider ⁣insights. After all, sharing what ⁢you’ve⁢ learned is⁢ half the fun! Keep those snacks close, the ‍screen‍ bright, and happy watching!

Wave Goodbye to Your YouTube History: A Quick How-To!

Waving ​goodbye to your⁢ YouTube history might feel like ⁣hitting the ⁢refresh button on your online⁤ life. Ever scroll through your ‍watch‍ history and think, “Wow, what ‌was I even ⁢watching?” It’s a mix of guilty‌ pleasures and ⁤random rabbit holes, right? Whether ⁤you want to ​clear ​out old recommendations, erase an awkward obsession with cat‌ videos, or⁢ simply reclaim your digital space, we’ve got ‌you⁤ covered. Let’s ⁢dive into the quick and easy steps‌ to delete that⁢ history and start fresh, leaving ‍your past viewing choices in the rearview mirror! Who knows—maybe you’ll discover something new‌ and exciting to binge-watch​ without all that old clutter hanging around!

Understanding the Importance of ⁣a Fresh Start on YouTube

Sometimes, moving forward means hitting reset, and YouTube is no ‍different. Just like clearing out⁤ your​ closet can‍ leave⁣ you ‌feeling refreshed, tidying up your YouTube history can help you⁢ reclaim‌ control ⁣over your viewing ⁢experience. Think about ​it: how many random recommendations have you⁣ received that have⁤ nothing to do with ⁣your actual interests? A fresh start allows you to ⁣ curate a channel that truly ⁤reflects your⁢ current tastes, leading to a ⁢more enjoyable and engaging viewing experience. Plus, let’s be honest—it’s⁤ liberating ‍to not​ have those⁤ cringey videos⁢ lurking ⁢in your history!

So, what’s the ⁤best way to get started? Here are a⁤ few ⁣simple steps to facilitate your fresh start:

  • Delete Watch History: Go⁢ to your YouTube settings and clean house.
  • Clear ‍Search‍ History: Erase what you’ve been searching for to avoid mixed-up recommendations.
  • Create New Playlists: ⁢ Craft playlists based on your current interests rather than past habits.
  • Follow New Channels: Discover fresh content creators who align⁢ with what you’re into right now.

Think of⁤ it like⁣ planting a garden: you might need to pull out​ a few ⁣weeds before⁤ the​ beautiful flowers can bloom. Each step is⁣ like nurturing a‍ new crop—watching your feed ⁣transform into something vibrant and fresh. Embrace the⁤ change,⁢ and you’ll find that navigating the platform ‌becomes a lot more exciting!

Understanding⁤ the Importance‌ of a Fresh Start on YouTube

When you dive ⁤into⁣ YouTube’s interface, it ‍can feel⁢ like⁣ a‍ treasure​ trove of endless‍ videos just waiting‍ for you. But⁤ if you’re trying to wipe the slate clean, you’ll want to head over to your history section with a plan. First, find the menu ⁢on ​the left-hand side of ‌the⁤ screen and click on Library. ‍From there, you’ll see⁣ your History. It’s basically a⁤ record⁢ of every ‍click and‍ scroll you’ve made, like a ‌digital diary ⁤of your video-watching habits. Need to⁣ take a trip down‍ memory lane⁣ or‌ erase some cringe-worthy viewing? Just click the X next to any entry to pop‌ it off the list. If you’re feeling brave and want to start fresh, scroll down to Clear all watch history—it’s like hitting the⁣ reset button on that old‌ video ‍game⁤ you loved.

For those looking to ‌refine⁢ their viewing experience even further, ⁣consider using the Manage all‍ history ⁣option. Here, you can toggle settings to pause your watch history or even keep your ⁤searches discreet. ‍If your YouTube watching is similar to ⁣mixing ⁣a playlist, ‍then these filters are ⁤like the ‍DJ controls—perfect for curating the kind of vibe you want. Want recommendations that feel more ⁣personalized? ⁢Updating your settings in this ​section ‍helps shape⁣ YouTube’s algorithms to better suit your ‌taste, meaning you might see‍ more ⁣of what you love and less of what⁢ you don’t.​ Now you can surf YouTube with​ confidence, knowing you’re in total control of your history!

Navigating the YouTube Interface for Easy History Management

Step-By-Step ⁤Guide to Deleting Your ​YouTube Watch History

Ready to ‌hit the reset button on your YouTube watching ⁣habits? Deleting ⁣your‍ watch history can feel like ⁤wiping the slate clean. Start by firing up your YouTube app or heading to‍ the⁣ website. Now, navigate to the Menu ⁣ on the left side —‍ just look for those three⁣ horizontal lines. Once you⁢ click on ​it, ⁤you’ll ‍uncover options galore! Among them,⁤ search for History. This is ⁢where the⁣ magic happens.⁤ Click on ⁢it, ⁤and you’ll‌ see a whole list ⁣of ⁣videos that have been haunting ‍your recommendations. If you’re feeling brave, there’s an option to Clear All‌ Watch⁢ History right at the top.

But‌ wait, ​what’s that? Maybe you’re not ready to go all in just yet? No ​worries! Instead ⁢of hitting the nuclear⁤ button,‍ you can‍ also ‍delete specific videos ⁤that you⁢ no longer want ⁣lurking around. Just‌ hover over the‌ video ‌you want to erase, and‍ click on⁢ the X that ⁢appears ⁤next to it. Poof! ⁣It’s gone! Easy ⁤peasy, right? You’ll⁤ also find the option to ‍pause your watch history. So, go ahead and⁣ take charge of what YouTube remembers about your viewing habits. It’s ‍like ⁣having ​a magic ⁢eraser for your ‌video​ journey!

Step-By-Step Guide‍ to Deleting Your ​YouTube Watch⁤ History

Tips for ‍Maintaining Your Privacy and Enjoying a Tailored Experience

Keeping your ⁢online life private while still enjoying all the video content YouTube has to offer⁣ is like​ walking a tightrope—you​ want the best​ of both worlds without tipping over.‍ Start by‍ tweaking your ⁤settings to limit what you’re sharing. Check out your Privacy Settings ⁤ menu; here, you can pause your watch history, which helps create a cleaner slate for your recommendations. You wouldn’t⁢ wear last year’s fashion, right? So why let⁢ old videos influence what you see today? And while you’re at ⁤it, don’t forget to clear your watch and search history regularly, just like tidying ‌your⁣ closet—it keeps ‌things fresh!

Tip Benefit
Pause watch ​history New ⁢recommendations ⁣based on current interests
Clear search⁤ history Avoid‍ unwanted‍ suggestions
Adjust privacy settings Limit data sharing

Beyond settings, ​consider ⁢the power of Subs. Subscribing to channels that truly resonate with you can enhance your experience. It’s⁣ like curating your very own⁢ playlist—only ‌now it’s your YouTube life ⁣on display! And remember, using Incognito Mode is a game-changer, allowing you to browse without leaving any ​digital‌ footprints, much like ​stepping ‍into a bubble where you can enjoy videos ​without ⁣your‌ past ‌actions shadowing your‍ current choices. Keeping your online identity quaint ‌and tailored is as easy‍ as adjusting your YouTube preferences!

Tips for Maintaining Your‌ Privacy and‍ Enjoying a Tailored Experience

In Conclusion

And⁢ there ‌you have ⁢it, ‌folks! Erasing⁣ your YouTube history is as easy as pie. ⁢No more awkward ⁢auto-suggestions based on that‍ one random video you watched ⁣at 3 AM – we’ve all been there, right? Just ‌a few clicks, and you ‌can keep your viewing habits just between you and your favorite​ playlists.

But⁤ before you ⁣go deleting with reckless abandon, remember⁤ this little trick: sometimes⁢ those recommendations⁣ can lead ⁣to hidden gems you never knew you ⁤needed in⁣ your life. So, make⁣ sure you really want to wave goodbye⁢ to your⁢ past scrolls.

Now, go on, take ‌control ​of that history, and ⁤keep your watchlist ‍as fresh as those new bloopers that ‍just ​landed! If this little guide helped you out, feel free to share it with your friends or drop a comment below about your favorite guilty-pleasure videos. Happy ​watching!

Say Goodbye to Your YouTube History: A Quick How-To

We’ve ⁣all ⁢been there. You hop onto YouTube to catch up on⁤ the latest music⁤ video,⁣ only to ​be greeted by an algorithm‌ that‍ thinks it knows your every⁣ preference based on your viewing history. Suddenly, you’re ‌bombarded with a mix of cat videos and conspiracy‍ theory documentaries that you never even⁣ clicked on! If you’re tired​ of ⁢letting your past views dictate your future ⁤recommendations, it’s time to ⁢take back control. In ‌this ‌quick ‌guide, we’ll ‍show⁣ you how‌ to wipe the ​slate clean and say goodbye to your YouTube‌ history. Ready to reclaim your viewing experience? Let’s dive in!

Understanding Your ⁣YouTube History and ‌Why You Might Want to Clear It

Your YouTube history serves as a digital diary, capturing every⁢ video you’ve ⁤watched, liked, or‍ shared. While it can help you pick up⁤ where‍ you left⁢ off ‌or rediscover gems you’ve ‌enjoyed ‌in ‌the past, ‌it might become overwhelming. Have you ever looked at that extensive​ list of recommendations and thought, “What was I even ⁤watching?” ‌It’s like walking down ‌memory lane only‌ to find it ⁢filled with clutter. You⁤ might⁣ want to​ clear that⁢ history for a fresh​ start or simply to keep things private. Plus, ‍if you’re looking for ⁣new recommendations, a clean slate might just ‌help the algorithm serve up ⁤content ⁤that truly resonates with your‌ current interests!

Clearing your history isn’t just about ‍tidying ⁣up; it can make your ⁤YouTube experience much more enjoyable. Here are⁣ a⁤ few compelling reasons ‍to wipe the​ slate ⁤clean:

  • Privacy: ‌ Want to avoid your friends ⁢or family seeing those late-night conspiracy theory binges? Clearing your history ensures your viewing habits stay⁢ your secret.
  • Improved Recommendations: ‌ A clean history‌ can reset ⁤YouTube’s algorithm, letting it learn what you actually want to see ⁣without being skewed by‌ past interests.
  • Less Clutter: ⁤ A ​fresh start lets you‌ focus on discovering new content⁤ rather than filtering through old, irrelevant‍ videos.

Understanding Your YouTube History and Why You‌ Might Want to ⁤Clear It

The Step-by-Step ​Guide to⁤ Delete Your YouTube Watch History

If you’re ‍looking‍ to‌ clear out your viewing history on YouTube, it’s super ‌simple and takes just a couple of minutes. First, head over to the YouTube website or app. Once you’re logged in, click‍ on the menu icon (you ⁤know, ‍the three horizontal ⁢lines in the corner) ⁢and select “History.” Here, ‌you’ll find a ⁣list of everything you’ve watched. Now, if you want to go all out and wipe the‌ slate‌ clean, look for the ⁤option labeled “Clear all watch history.” A ‌simple⁢ tap ⁣or ​click and just like that, your ​viewing history⁣ is gone—a bit like hitting a reset button on your brain! Talk about a ​refreshing⁢ change!

But wait,⁣ if you’re not ready to ditch​ everything, you can also remove ​individual⁢ videos that ​you’d rather not have lurking ‍around. Just scroll through your history, and next to each video, ‍you’ll see an⁢ “X” or “Remove” option. ​Click ‍it, and ‍poof!—that video ⁣disappears from your ​past, like a ‍magician’s trick.⁢ It’s a⁤ great way ⁣to keep⁣ your ‍suggestions relevant without‌ having to worry about ‌that ‌one weird video you ⁣clicked on at 2 a.m. Just remember, ⁢if you ever decide to revisit those ​old guilty ⁤pleasures, there’s always the “restore” option to fall back on!
The Step-by-Step Guide to Delete Your YouTube Watch History

Best Practices for​ Managing Your‍ YouTube Footprint

Managing your online footprint ⁢is crucial, especially when it comes to platforms‌ like YouTube where your every view can⁢ be tracked and observed. To keep things fresh and free from unwanted eyes, ‌make it a habit to regularly delete your‍ viewing⁣ history. ⁣This ⁤doesn’t just clear⁤ up space; it also removes any embarrassing moments or questionable clicks that might come⁢ back​ to haunt you.‍ Consider setting a reminder ‍every few months to take a stroll down memory lane and wipe⁣ the slate clean. You never know ‌what ⁤old video could resurface ‌in recommendations and make you cringe!

Additionally, be mindful of your subscriptions​ and⁢ comments. Those little interactions paint ‌a​ picture of who you are and what​ you‍ enjoy, and ‌while that can be fun, do you want‌ strangers piecing together your viewing habits? Go through your subscriptions and trim the list—only‍ keep what ⁤truly resonates with you.⁤ As for comments, a⁣ little housekeeping can go⁢ a long way in maintaining your privacy. Deleting old comments ‌can feel like ⁣tidying up your digital living room; it keeps things neat and​ ensures that what you leave behind reflects the best version ​of you. Here’s a quick checklist to guide your cleanup:

  • Delete ‍viewing history regularly.
  • Curate subscriptions that align with ⁣your current interests.
  • Review and remove old comments.
  • Consider ‌using⁤ private mode for more sensitive viewing.

Best Practices for Managing Your⁤ YouTube Footprint

Tips for Maintaining Privacy‍ While Enjoying YouTube

When it comes to ‍YouTube, maintaining your privacy ⁣is crucial‍ if you want to keep ⁣your ⁣viewing habits under wraps.​ First⁣ off, one of⁢ the easiest⁢ ways to manage ​your privacy is by navigating to your account settings. From there, you can adjust your privacy settings to ensure that your watch history isn’t just⁢ floating around ‌for anyone to see. You can⁤ even toggle‍ off ⁢the “Keep all my activity” setting,⁢ which ​helps prevent ⁤YouTube‌ from tracking and recommending videos based‍ on what you’ve watched. Imagine ⁢it‍ as putting a do-not-disturb sign on your door; it keeps nosy neighbors away from ‍your personal‌ space.

Another nifty trick is to⁢ use incognito mode ⁢ in your browser ​or the YouTube app. While this won’t ‍erase your ⁤digital footprint ⁤entirely, it gives you a temporary ⁢safe haven for those special late-night wormhole dives—and we all know⁣ they happen! Additionally, here are⁣ some ‌quick tips to further enhance your⁤ privacy:

  • Clear your watch history regularly to keep your⁣ past views private.
  • Use a VPN to mask your IP⁢ address.
  • Limit ​your subscriptions to⁢ remain under‍ the radar.
  • Create separate accounts for work ‌and personal viewing.

Tips for ‌Maintaining Privacy While Enjoying ‌YouTube

To Conclude

And there you have it – a quick and easy guide ⁢to waving goodbye⁢ to your⁣ YouTube ⁣history! ⁢Whether⁢ you’re looking to start​ fresh, keep​ your ​recommendations a bit more guessing, or simply ‌reclaim some ⁤digital‍ privacy, it’s all ‌just a few clicks away. Think of⁤ it like tidying‍ up a messy closet; once you clear out the clutter, you’ll be surprised at how much room you actually have for ​the things ‌you love. So why⁢ not take⁢ that⁤ step? Dive into your settings, make​ those adjustments, and free yourself from the digital traces of the​ past. Your YouTube experience is ‍yours to shape, so go ahead and⁤ tailor it to fit ‌your⁢ vibe! Happy watching, and‍ may your recommendations be ever in ⁤your ⁢favor!

Easy Ways to Snag Text from YouTube Videos Like a Pro!

Ever found yourself watching a YouTube video and thought, “Wow, that’s a fantastic quote!” or “I need to remember that tip!” but then… poof! It’s gone as soon as the video ends? If you’ve ever‍ wished you could grab those golden nuggets of wisdom without breaking ⁣a sweat, you’re in for a ‍treat! Snagging ⁢text from YouTube videos doesn’t have to feel like ​trying to ‍catch smoke with your bare hands.⁢ With the right tools and tricks, you can easily pull‌ those gems right out of the screen. Let’s dive into some super‍ simple ways to become a pro at⁣ snatching text from YouTube videos like a seasoned expert!

Unlocking the Power of YouTube’s⁢ Transcript⁤ Feature for Quick Text Grabs

YouTube’s transcript feature is like a hidden treasure chest just waiting to be opened! When you come across a video that’s ⁤packed with nuggets ⁢of wisdom or just some info you ⁢can’t jot down fast ⁢enough, the transcript can be your best buddy. Accessing it is a breeze! Just click on the three little dots below the video, and bam—you’ll see the option to open the transcript. It’s all⁣ there in bite-sized sections, perfectly timed with the video. You can easily scroll through, find ​the juicy bits you need, and copy them without having to pause ‌and rewind ‍a million ‍times. Isn’t that ⁤a game-changer?

But wait, the fun ​doesn’t ‍stop there. You‌ can also use the ‌ search function within the transcript to zero in on specific keywords. This means ​no more ‍endless scrolling! Plus, if ​you ​fancy taking notes or ⁢compiling information, you can simply copy and paste what you​ need into your document. Imagine how ⁢much time you’ll save! Here are a few⁢ quick tips ⁣to maximize your‍ transcript experience: ​

  • Keep It Clean: Only grab⁢ the parts you‍ really need.
  • Highlight ⁤Key Points: Use different colors or markers⁤ in your notes to emphasize important info.
  • Organize By Topics: If it’s a ​lengthy‌ video,⁣ categorize your text grabs for ease of use later.

Unlocking the Power of YouTube’s ⁢Transcript Feature for Quick Text Grabs

Mastering Screen Capture Tools for ⁣Snappy Snippets of Video Content

Harnessing screen capture tools is like ⁣being​ a ⁤wizard waving your ‌magic wand to snag⁢ the​ best moments‌ from videos. Whether ‌you’re aiming ​to pull out quotes, create quick ‌snippets for social media, or just keep a handy reference,​ there are some nifty options at ‍your disposal. Tools like Snagit, OBS Studio, or even your operating system’s built-in snipping tools ‍can transform how you extract information from YouTube videos. Here’s how to ⁢make the⁤ most of them:

  • Choose the Right Tool: ⁣ Pick a tool that ⁤fits your needs—lightweight choices for quick captures or comprehensive software for extensive editing.
  • Customize Your Settings: Adjust formats, resolution, and capture areas to suit your content style.
  • Add Annotations: ⁤Use text or arrows to highlight essential points in your ​captures ‌for clarity.

Once you’ve got‍ the ‌hang of capturing snippets, don’t​ forget to organize​ your findings! A simple table ⁤can turn chaos⁢ into clarity, making it easy for you to review your content later. ⁤Here’s a quick layout⁣ to visualize‍ your captures:

Snippet Topic Time Stamp Purpose
Funny Moments 02:15 Social Media Post
Key‍ Takeaways 05:30 Blog Reference
Expert Opinions 08:45 Video Compilation

Mastering Screen Capture Tools for Snappy Snippets of Video Content

Diving into Third-Party Apps That Make Text Extraction a Breeze

Diving into⁢ the realm of third-party apps is like ⁢opening a treasure chest filled‍ with tools designed to simplify your life. These applications often come equipped with features that⁢ not only ​make text extraction a breeze ‌ but also enhance your overall experience. Picture this: you find a killer YouTube video with a ‍lecture filled with golden nuggets, but‍ you ‌can’t jot‍ down notes fast⁣ enough. Fear​ not! Tools like Otter.ai, Sonix,‍ and Happy Scribe swoop in to save ⁣the⁢ day, transforming the spoken word​ into written magic. With just a few clicks, ⁤these ​apps‍ capture everything from deep thoughts‍ to quick quips, letting you focus on what really matters—gathering knowledge, not typing it all out manually.

These apps vary in functionality, but they share ⁤the ⁣goal of‍ simplifying text ‌extraction. Take a look at the highlights of‍ a few popular choices:

App Features Price
Otter.ai Real-time⁤ transcription,⁤ collaboration tools, cloud​ storage Free‍ for basic, premium starts at $8.33/month
Sonix Multi-language support, ⁢powerful editing tools, automatic subtitles Pay-as-you-go⁢ from $10/hour
Happy Scribe Text and ‌subtitle extraction, language support, customizable templates $12/hour of audio

With such a ‍variety, surely‍ one of them will strike ⁣your fancy. Whether it’s a full-fledged lecture or‍ a jam-packed ‍tutorial, these tools empower you to capture every important word without ‍breaking a sweat. So, ‌why get tangled up in endless notes when you can let technology lend you a⁣ hand? Choose your‍ weapon wisely and‍ dive into the world ‍of text extraction with confidence!

Diving into Third-Party Apps⁣ That Make Text ⁤Extraction a Breeze

Tips and Tricks ‌for Organizing ⁤and Utilizing Your Extracted‍ Text Like ‍a Pro

Once you’ve snagged that juicy text from a YouTube video, it’s time to get organized! Creating a digital filing system ⁤ might sound dull, but think of it like rearranging your closet. You‌ want everything neat⁢ and easy to find. Use folders for ​different topics or projects, and don’t‍ hesitate to label ‍them ⁣clearly. Tools like Google Docs or Notion can become your best friends here. You can‌ even color-code them—consider it like giving each topic its ⁤favorite outfit! Having a structured system means when inspiration strikes,‍ or when you’re in a pinch, your info⁢ is just a click away. What’s the point of gathering all that awesome text if ‍you can’t access it smoothly when you need it?

Next up, let’s talk about how to utilize that text effectively. Think of it‍ as the secret ingredient in a recipe; it ​needs ‌to ​blend well with what you’re cooking up. Create ‌summaries, notes, or ‍even infographics that convert ⁢your extracted text into more digestible info.​ Tools ​like Canva​ can be super handy for this!⁣ And ⁣don’t forget to share it with your network! You could‍ create a mini-blog or social media series diving into key themes or quotes⁤ from ⁣the videos. By doing this, you’re not just hoarding knowledge; you’re becoming a part ‌of the conversation. Remember, it’s all about keeping the flow going and making​ sure that text works for you, not the ⁤other way around.

Tips and Tricks for Organizing‌ and​ Utilizing Your Extracted Text Like‌ a Pro

Final Thoughts

And there you have it, folks! You’re now armed with several easy-peasy techniques to⁢ snag text from YouTube videos like a total pro. Whether you’re looking to capture those golden nuggets⁤ of wisdom from a lecture, jot down a quote that hit you right in the ​feels, or⁢ extract subtitles for your next big project, these tips have got your back.

Remember, ⁤it’s all about making these tools⁤ work for you, turning what you see and hear into something you can use and⁤ share. So, go ahead, dive into those videos with gusto and let the world of content ⁢open up ​to you! Feel ​free to drop your own tips or ask‍ questions in the comments—this little community thrives on ​sharing! ​Happy text-snatching! 🎉

Easy Steps to Delete Your YouTube Videos: A Friendly Guide

So you’ve made a few YouTube videos, huh? Maybe ‍they were ⁤epic fails, a⁤ little​ cringey, or just ⁣don’t ⁤fit your vibe ​anymore. No⁤ worries—everyone has been there! Whether it’s a throwback to⁢ your awkward teenage years or a clip that didn’t land quite like you hoped, deleting old​ videos doesn’t have to be a ⁤headache. ⁣In this friendly guide,⁣ we’ll walk‍ you ⁤through the⁤ easy steps to remove those pesky uploads so you can start⁣ fresh. Think of‍ us as your trusty sidekick in the fascinating ⁤realm‍ of video management, ready ​to help you make room for ​new creations or simply tidy up that digital space. Ready‌ to dive in? Let’s get started on this‌ straightforward journey⁢ to decluttering your YouTube channel!

Finding your videos ⁣on YouTube can‍ sometimes feel like searching for a needle in a haystack, especially if you’ve got⁣ a growing‌ library. But don’t sweat‌ it!​ Here are ‍a few‍ simple strategies to help you navigate through your ‍channel with ease:

  • Utilize the ⁢Search Bar: Type ⁢keywords related to your video’s title or‌ content directly into the search bar on your channel. It’s that easy!
  • Organize⁣ with Playlists: Group similar videos⁤ into ⁢playlists. Not only does this make your content more accessible, ⁤but it also enhances viewer engagement.
  • Check the Video Manager: The Video Manager in your Creator Studio is like your command center. Use⁢ it to​ quickly view ⁤all your ⁣uploads, check their stats, and find the ones you ⁢need.

Another handy tip ⁣is⁣ to take advantage‍ of tags and descriptions. When you upload a video, you ⁣can add⁤ these‍ details ⁢to make it easier ⁣for ⁢you to find them later. Consider​ creating a ⁣ quick reference table ⁢of your videos with their relevant tags, making it even simpler:

Video Title Tags
My Travel Vlog Travel, Adventure, Vlog
Easy Cooking ⁣Tips Cooking,⁣ Tips, Easy Recipes
Tech Reviews You Need Reviews, Tech, Gadgets

Navigating Your​ Channel: How to ⁤Find‌ Your ‍Videos with Ease

Taking the ⁣Plunge: Deciding Which Videos to Say Goodbye To

Making the ⁢final‍ call on which videos to ⁣remove from your YouTube channel can‍ feel like a daunting task, right? It’s ⁤like decluttering‍ your home⁣ but for your virtual space. Some videos might bring back fond memories, while others are more⁤ like that shirt‌ you haven’t worn in years!⁣ Consider asking yourself ⁢these questions to guide your decision:

  • Is this ⁣video still relevant to ⁣my current ⁢audience?
  • Does it reflect the quality of content I‌ want⁤ to share?
  • Am I proud of this video, or does it make me cringe?
  • How is it performing compared to my⁤ other videos?

Once⁣ you’ve pondered these questions,⁤ it’s time⁢ to assess the sentimental value versus the current impact on‌ your channel. You might find‌ yourself in a tug-of-war between ⁣nostalgia and practicality. Consider creating a simple table to help visualize which videos still serve a purpose:

Video Title Relevance Engagement Decision
My First Vlog Low Medium Delete
Cooking Tips for Beginners High High Keep
Travel Diaries: Summer 2020 Medium Low Consider Archive

By laying it all out like this, you can approach⁣ each video with⁣ clarity and conviction. Just remember, ⁣the goal isn’t to eliminate‌ everything but to curate the best versions of yourself. Your ⁢channel is a reflection of who you‌ are‍ and where you’re headed, so⁢ make sure it ‌resonates with your journey!

Taking the Plunge:‌ Deciding⁢ Which ⁢Videos to Say Goodbye To

A Simple Click Away: The Step-by-Step Process to Deleting ⁣Videos

Deleting a video ​on YouTube is as easy as ⁤pie! First, head on ⁢over to your YouTube Studio. It’s like⁤ your⁢ little control center for all things video. Once you’re in, click on the “Content” tab ​on ⁢the left sidebar. This is where all‍ your uploaded⁣ videos await your commands. Now, find the‌ video you want​ to delete. Hover over it, and you’ll see‍ an option pop up. Isn’t that neat? Click on the “Options” button ⁢(it looks like three ‍little ‍dots) and select “Delete forever.” It’s that ​simple! But don’t forget to think twice before you​ do—it’s like throwing away your ‌favorite shirt, and you might regret‌ it later!

Now, if​ you’re⁢ all set‍ to hit delete, YouTube will ask you to confirm your decision. It’s their way of ⁢saying, ⁢“Are you really sure about this?” Just check⁤ the box ‌to confirm you‍ understand that deleting the video⁤ is forever—no going‍ back! After you click on ‍the “Delete” button, you’re all done. That video‌ is gone! You can view it as ⁣if it⁣ never existed ​in the first place,‌ freeing up space for ⁢new, fresh content. So, are you ⁣ready to ‍clean up your channel? It’s ‍just⁢ a⁢ few clicks away!

A Simple Click Away: The Step-by-Step Process to Deleting Videos

Keeping Your Channel Fresh: Tips ⁣for Maintaining Your YouTube Space

To keep your YouTube channel engaging and vibrant, ​it’s ​essential to shake things up every now and then.‍ Think of your channel like a garden: if you ⁤don’t prune it, water‌ it, and plant new flowers, it can quickly‌ become overgrown and dull. So, how do you inject some ⁤freshness? ​ Consider rotating ⁢your⁢ content themes. For example, if you’ve ⁣been focusing heavily on tutorials, it might be time to⁢ dive into behind-the-scenes⁢ vlogs or ⁤Q&A sessions. Your audience will appreciate the variety,‍ and it keeps ​you motivated to experiment! Don’t ⁤forget to utilize the power⁣ of ⁤ collaboration. Partnering​ with other creators ⁣not only exposes you to their ‍audience but also infuses your channel with ​new ideas and perspectives. It’s like cooking‌ a meal with a friend; the end result is often way better than what you could whip up on your own!

Another fantastic ⁤way to breathe ⁣new⁣ life into your channel is through regular updates and tweaks. As trends evolve, so should​ your content. If⁢ you notice certain video ⁢styles or topics gaining​ traction, consider jumping on those bandwagons. You ⁤might want to redesign your video thumbnails to make them pop more in searches or ‍refresh your channel art for a cleaner, more inviting ​look. Remember, first impressions ​count! Consider also ‌engaging with your audience more;⁤ ask them what they want to see next, or run polls to gauge interest‌ in potential topics. This not only‍ makes your viewers feel valued but also directs your ‌creative process in a way that will resonate with‍ your audience. keeping things fresh is‍ about‍ being open​ to change‍ and feedback, so don’t shy away from trying something ⁢new!

Keeping ‍Your Channel Fresh: Tips for Maintaining​ Your YouTube Space

To ⁣Wrap It⁢ Up

And there you have it, ⁢folks! Those simple‍ steps will have you deleting your YouTube videos with the ease of swiping right on your favorite⁢ dating app. Whether you’re looking to tidy⁣ up your channel,‌ remove old content that no longer sparks joy, or simply make way for fresh videos that showcase your evolving style, this⁤ friendly guide has your back. Remember, it’s all about⁢ curating the ⁣digital‌ space that reflects you best. ⁤

So, go ahead and take charge of ⁣your‌ YouTube ⁢journey! If you ever feel ⁣lost or⁢ need a helping hand, just revisit ⁣this guide. And don’t⁢ forget:‍ every deletion is just as much a⁢ part of your creative process as the videos you choose to keep. Happy deleting,​ and may your channel become a canvas for your‌ brightest and boldest ideas! If you have any questions or⁢ want to share your experience, drop a ‌comment below—let’s keep‌ the​ conversation rolling!

Streaming Magic: Accessing YouTube on Your Fire Stick!

Imagine a world where your favorite YouTube videos are just⁤ a click away on your TV, transforming⁢ your living room into a mini ⁣theater. With Amazon’s Fire⁢ Stick, that vision becomes a reality.​ Gone are the days of squinting at your phone or tablet screen—now you can kick back on your⁤ couch, remote in hand, and dive into endless content. Whether you’re into vlogs, tutorials, or music ⁤videos,‌ accessing YouTube through your Fire Stick unlocks a treasure⁤ trove of entertainment right at your fingertips. Ready to⁤ explore how to make this‌ magic happen? Let’s dive in!

Unlocking the World ⁣of YouTube: Your Fire Stick ⁣Setup Made Easy

Getting YouTube up and running on your Fire Stick is as easy as ​pie, and⁣ trust me, you’re in for a treat! Just grab your Fire Stick remote, and let’s dive into a world filled with cat videos, DIY tutorials, and all the binge-worthy series your heart desires. First, make sure your Fire Stick is plugged into your TV and powered on. Once you’re at​ the home screen, use the remote‍ to navigate to the Search option at the top⁢ left ⁢corner.​ Type in “YouTube” and watch ⁢as your streaming portal appears, just waiting for your click! Selecting it will take you to⁣ its app page, where you’ll simply press Get ‍ or Download. Boom! You’re halfway ‍to YouTube land!

Now, ⁢let’s get you ​logged ⁤in so you can⁤ start watching your favorite content without missing a beat. Open the YouTube app, and if you’re not already signed in,⁢ just hit‌ that⁤ Sign In button. You can either use your phone or computer to quickly enter your credentials or grab the code displayed on your TV screen and plug it into your account online. Once you’re‍ signed in, consider adjusting your⁢ settings to ensure you get the best viewing experience. Here’s a ⁣quick breakdown on how to tailor your‍ app:

Setting Action
Quality Preferences Adjust in Playback Settings
Notifications Enable for new subscriptions
Playback Speed Set your preferred speed under ‍Settings

Now ⁤that you’re all set up, get cozy, grab some popcorn, and let the streaming begin! With⁢ just a few clicks, you have access to a universe filled with endless content right at your fingertips. Go ​on, hit that⁤ play button and enjoy ⁢the⁤ magic!

Unlocking the World of​ YouTube: Your Fire‌ Stick Setup Made Easy

When you’re all⁤ set up with YouTube on your Fire Stick, the treasure trove of content awaits, and it’s about knowing how to dive in. Start by familiarizing yourself with ⁢the home screen—it’s like your landing pad for everything YouTube. Use the search function to hunt down your favorite channels, shows, or just ⁣about‍ anything ‌that tickles your fancy. But don’t⁢ stop there! Dive into recommended⁣ videos based on your watch history. YouTube’s algorithms have a knack for suggesting hidden gems you didn’t know you needed. Try not to ⁤get lost in the rabbit holes; ⁣it’s easy to binge-watch random content. Instead,⁣ make a plan! Create playlists of​ videos you‌ love, so you can ​return to them⁣ like old ⁢friends. They’re not just⁤ for nostalgia; they help you keep your viewing experience organized.

Also, don’t sleep on channel subscriptions! By hitting that subscribe button, you’ll⁢ be in ‍the front row⁤ for all new uploads⁣ from your ⁣favorite creators, bypassing⁤ the endless scrolling. Plus, turn on notifications—it’s like ⁣having a direct line to your favorite shows.⁣ If you’re feeling adventurous, explore a bit! The Explore‍ tab will take you on‍ a journey through trending topics, from the latest​ viral hits to niche hobbies. You might stumble upon something that sparks a⁢ new ​interest. Remember, your Fire Stick has a⁢ range of features—like voice commands ​through Alexa. Just say, “Find baking ⁤tutorials,” and ‍boom! You’re⁤ suddenly an amateur pastry chef on YouTube. With just a few simple tricks, you’re no longer⁢ just watching—you’re truly‍ engaging with the platform.

Navigating YouTube Like a Pro: Tips for Effortless Browsing

Maximizing Your⁢ Experience: Awesome YouTube Features on Fire Stick

When you’re diving into YouTube on your Fire Stick, you’ve got a treasure ‍trove of ⁤features that can seriously amplify your viewing experience. Customizable homepage—that’s where the magic begins! You can curate ‍your own feed, so you see the⁣ videos that matter most to you. Don’t overlook subscriptions; that little bell icon helps you stay updated on your favorite channels without the hassle of searching. You can even dive into the​ YouTube Premium ⁣ world, which serves up ad-free browsing, exclusive content, and offline downloads—perfect for those moments when your WiFi ‍decides to take a vacation.

Ever thought about utilizing voice search? Just say‍ what you’re looking for, and voilà! It’s almost like having your own personal assistant. Plus, don’t forget about playlists. They’re like the mixtapes of the digital age—perfect for‍ setting a vibe during a chill night in​ or a spontaneous dance party ‌in ⁣your living room. With features like dark mode for late-night⁣ browsing,‌ autoplay to keep the content rolling, and easy access to trending videos, YouTube on your Fire Stick is not just a streaming service; it’s ⁢an entertainment powerhouse begging​ to⁣ be explored!

Maximizing Your Experience: Awesome YouTube Features on Fire Stick

Troubleshooting Common⁤ Issues: Keeping Your Streaming Smooth

If you’re experiencing hiccups while streaming your favorite YouTube videos, don’t fret!⁣ Here are some handy tips to keep your entertainment flowing seamlessly. First off, check your internet connection. Sometimes it’s as simple as ⁣a weak Wi-Fi signal. If your Fire Stick needs a little push, consider moving your router​ closer or even‍ rebooting ‌it. Also, make‍ sure to confirm that no other devices are hogging ‍your bandwidth—think​ of it like​ sharing a pizza;‍ more people‍ mean smaller slices ‍for ⁤everyone. Another common culprit is the app itself; make sure you have the latest version of YouTube.⁢ A quick ‌update can often solve performance issues.

Alongside connectivity, clearing the app cache can do wonders. Just like cleaning out your closet, a fresh start can make everything run smoother. Navigate to your Fire Stick settings and‍ clear the cache to give YouTube​ a⁣ breather. If all else fails, ‌rebooting your Fire Stick may be akin to giving it a⁣ power ⁣nap—sometimes that little rest can refresh ⁢its brain. ‌And let’s not forget about checking for software updates for your device. Keeping everything up-to-date is essential in​ today’s tech landscape, just like regularly watering your plants.⁣ Stay ahead of these common issues, and you’ll be ‌streaming⁢ without ⁣a hitch!

Troubleshooting Common Issues: Keeping Your Streaming Smooth

In Summary

And there you have it! You’re now armed with all the know-how to transform your Fire Stick into a magical portal to the endless world ⁤of YouTube. Whether you’re into binge-watching ⁣the latest vlogs, diving into ⁢cooking tutorials, or just catching up on your favorite‌ music videos, ⁢streaming your heart out has never been easier.

So, ⁤grab that remote and get cozy ‍on your couch—your next ‌binge session‍ is⁣ just a click ​away! Have a favorite channel or⁤ video? Share it in the comments; the⁣ streaming community loves to know what’s hot!⁢ Remember, the world of entertainment is at your fingertips, so make the most of it! Happy streaming! 🌟

How to Easily Load Every Video in Your YouTube Playlist

Tired of clicking through your ​YouTube playlist, waiting for each⁣ video to load‍ like it’s stuck in traffic? You’re not alone! Whether you’re binging your favorite series ‍or jumping into⁤ a⁤ collection of how-tos, the constant pausing can be a total​ buzzkill. Imagine pressing play once and watching your entire playlist flow ⁤seamlessly in‌ one go—sounds ‍like a dream, right? Well, it’s not just a pipe‍ dream; it’s totally ⁣achievable! Let’s dive into ⁤some simple strategies that will have ​you loading⁤ videos ⁤effortlessly, so you can kick back, ‍relax, and enjoy ​the show ⁣without interruptions. Ready to transform your viewing experience? Let’s get started!

Mastering the Art of ‍Playlist Navigation

Finding your way around a YouTube playlist can ​feel like navigating a maze, right? But fear‌ not! ‍Mastering playlist navigation is all ‍about ‍a few simple tricks that can‍ save ‍you time and make your viewing experience a breeze. Start by utilizing the filter options at the ​top⁣ of the⁢ playlist. You can sort videos‍ by ‌date added ​or even‍ by ⁢view count, which is perfect⁤ if you’re trying⁢ to catch up on⁢ the most popular gems first. Plus, don’t ​forget about the search bar—if you​ have a massive playlist, this⁤ feature is a lifesaver! Just ‌type in a keyword,⁤ and poof! The‍ video you want is right in‌ front of you.

Next up, make the most of⁣ the “Up Next” ‍feature. It’s ‌not ​just for auto-playing the next⁢ video; it’s your personal‌ assistant for discovering similar content.​ Each time ‌you finish a video, keep ‍an eye on what pops up next—it ⁣often includes related videos that you might not have thought to ⁣search ⁢for!‍ Lastly, if you’re really diving deep​ into the rabbit hole, consider creating a custom playlist from your favorites⁤ or a watch later list. This way, ⁤you can curate your own collection and ensure ⁢that you never miss out on the good stuff! Finding what you want⁣ has never been this easy!

Mastering‌ the Art⁤ of Playlist Navigation

Unleashing Playlist Power with Smart Tips

When ‌it comes to loading every ⁢video in your YouTube playlist, the goal is to streamline the process and⁢ make it less⁤ of a ‍hassle. Start by leveraging the power​ of ​ URL manipulation. All you need ⁣to do is grab the URL ⁢of your‍ playlist and tweak it a bit. For example, if‍ your playlist URL ends with “list=PLxxxxxxxxx”, add “&view=0” at the end, ⁣and voilà! You​ can easily load everything​ in one go. It’s like ⁤flipping a ​switch on a lamp—just a little​ adjustment, and suddenly, you’re bathed in light (or in this case, videos).

Don’t forget ⁢about the benefits‌ of using ‌ browser extensions or apps specifically designed for YouTube playlists. ⁢These tools ⁣can⁢ make ⁤your life easier by allowing you to auto-load videos or even download them⁢ for ⁣offline viewing.⁣ Some popular options include:

  • Enhancer for YouTube: Customizable features to boost your viewing experience.
  • YouTube Playlist Downloader: Quick and straightforward downloads.
  • TubeChaser: Syncs multiple playlists, so you can keep⁢ the party going.

Integrating these smart strategies not⁣ only saves time but also transforms the ​way you​ interact with your playlists, making it feel less like a chore and more like a curated movie night with your favorites on repeat.

Unleashing Playlist Power with​ Smart Tips

Turbocharge Your Viewing Experience‌ with Third-Party Tools

Want to take your YouTube playlist experience to the ⁢next ⁣level? Third-party tools can be⁤ a game-changer! ​Picture this: instead of ‍endlessly clicking through each video, these nifty applications let you ​load your entire playlist with just ⁣a few clicks. Some popular ⁢tools and‌ extensions can​ seamlessly integrate ‌with ⁣your browser, allowing you ⁤to manage your playlists like a pro. Here are a few ⁢options ⁣to consider:

  • TubeBuddy: Manage your playlists efficiently while also optimizing your ​channel.
  • Magic Actions for YouTube: An extension that enhances your viewing‍ experience with cool ‌features.
  • Video DownloadHelper: Perfect for grabbing videos⁤ you want to watch later, offline!

But⁣ that’s not all. Exploring these options also gives ⁣you insights⁢ into how to curate your⁤ content—think about how you watch! Whether you’re creating a watch party with ⁤friends or ‌just binge-watching from your couch, these tools help you craft the ultimate viewing party experience. Check out a quick ‌comparison of tools below to pin down ⁢your ‌favorites:

Tool Key Feature User-Friendly?
TubeBuddy Playlist ⁣Management ⭐⭐⭐⭐⭐
Magic ‌Actions Enhanced Viewing ⭐⭐⭐⭐
Video DownloadHelper Offline Viewing ⭐⭐⭐⭐⭐

Turbocharge Your Viewing Experience with Third-Party Tools

Streamline Your YouTube Journey with Custom Settings

‌ ⁣ Customizing your YouTube settings is like ‍finding the right ⁣playlist to match your mood; it​ can make all the difference in your viewing experience. Imagine effortlessly scrolling through your favorites without the ⁢hassle of constant buffering or interruptions. You can tweak the‌ settings‍ to automatically load videos in your ⁣playlist, so you can dive​ into that binge-watch session​ without a hitch. To do ‌this, just navigate to your account settings, where you⁢ can adjust options under the Playback ⁢ and Autoplay ‌ sections.‌ This can save you a ton of time and keep the good vibes rolling.

Want to know a neat trick? You can also enhance your journey by enabling the HD playback option, ensuring that the visuals are as stunning‍ as the content‌ itself. If your playlist consists of‍ educational⁢ content or ‍tutorials, consider toggling‌ on the⁣ Closed‍ Captions feature. This not only helps with comprehension but also allows multitasking—perfect​ for those who chew through information like candy! Plus, don’t shy away from organizing your playlists by creating​ folders and using descriptive⁢ titles ⁢ to make your video library as‌ neat as your ‌room after a cleaning spree. That way, you ⁢can pick up right where you left off!

Streamline Your YouTube Journey with⁢ Custom Settings

Final Thoughts

And there you have it! Loading⁢ every video ⁣in your YouTube playlist⁣ doesn’t have to feel like climbing a⁤ mountain. ​With a few simple tricks up ⁢your sleeve, you can breeze through your favorite content without the ⁤endless clicking. Just picture yourself sitting‌ back, popcorn in hand, as every video queues‌ up seamlessly, ready ⁤for your viewing pleasure. So, why waste time when you ​can dive⁤ right ⁤into binge-watching?

Whether you’re prepping for a long road trip or⁤ just want to chill on⁣ the couch, these⁢ methods will make your experience smoother and more enjoyable. Get out⁤ there and⁢ try them out! YouTube is​ a treasure ⁤trove of entertainment waiting for you, so don’t let anything hold you back. Happy ⁣watching, and may your playlists always be just a click away! 🌟

Your Guide to Effortlessly Deleting Videos on YouTube

Ever found yourself scrolling through your YouTube channel and thinking, ⁢“Wow, I really don’t need⁣ ten videos ⁤of‍ me attempting to bake cookies”? We’ve all been there! Whether it’s‌ that cringeworthy vlog from last summer or ⁢an ‍old tutorial that’s ​completely lost its ‍charm, sometimes, we just need⁤ a⁤ clean ⁣slate.‌ Deleting videos on YouTube can seem daunting—like ⁤trying to⁢ find a needle in a‍ haystack—but fear ‌not!⁣ This guide is ‌here to​ break it down for ⁢you, step by step. So ‌grab a coffee, get comfy, and let’s⁣ make that clutter disappear effortlessly. You’ll be saying goodbye to⁣ your ⁢digital flops in ⁣no time!

Understanding ⁣the YouTube Interface for Easy Video Management

Understanding the YouTube Interface for​ Easy Video Management

To make your video management on YouTube a ⁣breeze, ‌it’s ‍essential to get familiar with its interface. Once you log‍ in to ‌your⁢ YouTube account and​ head to the Studio, you’ll find yourself in a world designed​ for creators. Here, ⁢everything is ‍neatly organized—you ‍have your ⁣ Dashboard, Content, Analytics, and Settings tabs right at your fingertips. When you click ⁤on the Content tab,​ it feels like​ opening a treasure chest⁢ filled with all your uploaded videos. From there, you can easily navigate through your uploads, checking views, interactions, ⁤and even the comments that ‌keep ⁤rolling⁣ in.⁣ Plus, ​the intuitive design allows ⁤you to⁣ filter​ your videos by visibility, making it super ‍simple to spot the clips ⁣you might want to⁢ remove.

When it comes to deciding what to‌ keep and what to toss,⁢ having a ⁢solid plan makes all the difference. Consider creating categories like ⁣”Keep forever,” “Maybe later,” and⁣ “Time to say goodbye.” This way, you‍ can quickly identify videos that‌ no longer align with your vision. Also, don’t forget about the Video details ​ section—this is where you ‍can fine-tune ​titles, descriptions, ‌and tags to enhance ‍discoverability before hitting ‌that ⁤delete button. If you’re wondering ⁢what happens when you delete a video, it’s⁢ worth noting that it won’t just vanish ‍into thin ‍air.‌ Instead, take ⁢a look ⁤at your deleted files; YouTube ⁤gives ⁣you a grace ⁤period to recover them ⁢before they are permanently‍ gone, just ⁣like​ a safety net⁢ when you’re learning ⁤to walk the ⁣high ⁢wire of video creation.

Streamlining‍ Your Deletion Process ⁣with‌ Simple Steps

Streamlining Your Deletion⁤ Process with ⁢Simple Steps

Deleting videos on⁣ YouTube⁢ doesn’t have to be a⁢ complicated⁤ mess. It’s kind of like clearing ​out your closet; a little⁢ daunting at⁣ first, but so ‍refreshing‍ once it’s done! First,⁢ navigate ⁣to your ​ YouTube ​Studio where ⁤the magic begins. Here’s what you⁤ need to do:

  • Go ⁤to Content: ‍Click on⁣ the ‘Content’‍ section on‍ the left side. This is like the ‌door to ⁣your video⁤ library.
  • Select the Video: Find ⁤the ⁢video ‍you’re ready to bid farewell. Think ⁢of it as picking out that old sweater you​ just ⁤don’t ⁢wear anymore.
  • Click Delete: Hit⁣ the ‘Options’⁤ (three dots)‍ next ⁣to ⁤the video and⁣ select⁣ ‘Delete forever.’ It’s final, but so worth it!

⁢ ‌ ⁣ ⁣ And just like that, you’re not just tossing ‌away a‍ video; you’re making space for new, exciting ‌content! If you’re hesitant about losing something precious, remember, ⁢YouTube gives you ⁢a chance to ‍download ‍your videos before deleting them. Just ⁤in case nostalgia strikes ​later, you can hold on to that old ​gem. Organized, clean, and clutter-free, your channel is ready to shine with ‍fresh content ⁣that ‍resonates more with your ‍audience—this rejuvenation is what keeps your creative flow dynamic and engaging!
​ ⁢

Navigating Common Mistakes and Troubleshooting⁤ Tips

When you’re knee-deep in editing your​ content⁤ and need to delete a ‌video on YouTube, it’s easy to trip up. One common mistake ‌people make is assuming ​the delete option is straightforward. ⁢Instead⁢ of looking for a ‍little trash can icon,‌ you might be hunting for a long list of ‍confusing⁤ settings. To keep it simple, remember that ⁢once ​you click on ​”Your Videos,” the delete button ‍is just a⁤ few clicks away,‌ tucked neatly‌ under the ‍”More” option. Don’t let yourself get sidetracked! Staying organized ‍and‍ knowing ‌where those buttons are can save you time⁢ and frustration.

If things ⁤don’t‍ go as​ planned ‍and you can’t seem ⁣to locate your video or⁢ the delete option⁣ is grayed out, try refreshing the page or logging out and back into your account. ​It might sound‌ silly, ‍but sometimes a quick reset helps clear out any hiccups. Also, ‍check if ⁢you’re trying to ⁢delete a video that’s part of a larger playlist or channel — content that’s ⁤linked can⁤ throw a wrench in your plans. Here’s a handy table to‍ help ⁤you remember⁣ a few ⁤troubleshooting tips:

Error Possible Fix
Delete ‍option not visible Refresh ⁣the page or clear the browser cache
Video won’t delete Check if it’s⁤ part of a playlist or ongoing project
Permissions issues Make sure you’re logged in with⁣ the ⁤correct⁣ account

Keeping Your Channel Organized: Beyond‍ Just ​Deletion

Keeping Your Channel Organized:‌ Beyond Just Deletion

Keeping ‌your ‌YouTube channel organized isn’t ‍just about hitting that delete ⁣button‍ when ⁤a⁢ video doesn’t meet⁤ your ‍standards. ‍Think ‌of your channel as a digital home. Just like ‌you wouldn’t ⁤throw all your belongings​ in a closet and call it organized, you need a strategy ​to keep everything neat and‍ accessible. Consider⁤ creating playlists that⁤ categorize your content. ‍This makes‌ it‍ easier for viewers to find what⁢ they love. Plus, playlists can ⁣help boost⁢ your channel’s SEO,⁤ making it ​more‌ likely for your videos ⁤to show up ​in search results. It’s ‌like⁣ putting all‍ your favorite books on ⁤a shelf rather than​ stuffing them in a box—it’s visually appealing ⁢and easy ‌to navigate!

You might also want to think about your thumbnail⁣ and title game. Consistent branding ⁣ across thumbnails ‌and titles not⁢ only ‍keeps⁤ your channel⁣ visually appealing but also ⁤helps in ​building⁣ your identity.​ You want your audience to⁣ recognize your videos at a ‌glance. Can you imagine ‌your ⁤favorite TV‌ show ⁢changing its logo or ⁤theme song ⁣every episode? It would⁣ be confusing, right? By focusing ‍on these‍ aspects, you’re not just⁤ deleting‌ content; you’re actively crafting​ a space that reflects⁤ your brand and resonates with your audience.⁤ Here are ‍some quick tips to keep in⁢ mind:

  • Create specific playlists: Group ⁤similar topics together.
  • Maintain consistent branding: Use ‍similar colors and fonts for your thumbnails.
  • Engage with ⁤your audience: ⁤ Ask for feedback ​to ‍improve⁤ future content.
Tips for Organization Why It ⁣Matters
Curate playlists Facilitates​ content discovery
Use consistent thumbnails Enhances brand recognition
Engage with comments Builds community connection

Insights​ and Conclusions

And there you have​ it!⁣ Deleting your YouTube videos doesn’t have to‌ feel like climbing‍ a ⁣mountain or ⁤solving a⁤ Rubik’s ​Cube blindfolded. With a few simple ‌clicks, you can tidy up your ‌channel and say goodbye to the content that no‍ longer resonates with you. Think of it as spring cleaning for​ your ​digital space—refreshing ​and​ liberating!

Remember, ‌it’s your channel, and ‌you ​should curate it to reflect your⁣ best self. Whether it’s clearing out ​old‌ content or just making room for‌ new ideas, take charge of your YouTube‍ journey with confidence.‌ So go ahead, ⁣wield‌ that delete button like a pro! And‍ who⁣ knows, the ‌next video you create might just be your​ best ‌yet. ‌Until next​ time, ⁤happy creating!

Sharing Your Live YouTube Music: A Simple How-To Guide!

Ever found⁤ yourself jamming ⁣out ⁣to your favorite tunes ⁤on YouTube and thinking, ​“Man, my friends ‌need to hear this!”? ‍If you’re ready to‌ share those ⁣sweet melodies and⁤ turn your‌ casual viewing into a ​mini-concert‌ experience, you’re in the ⁤right‌ place! Sharing⁢ your live YouTube music can turn⁤ a solo ‍vibe⁤ into a party, connecting friends and fellow⁣ music lovers ⁤no matter where they are. Whether you’re a⁣ budding DJ, a music enthusiast, or just someone ​who ⁢loves to vibe with others, this guide will walk⁤ you through⁤ the process of sharing your live musical moments effortlessly. So, ⁢grab ‍your headphones and let’s dive into the rhythms of sharing!
Mastering Your Music Stream Setup

Mastering Your Music Stream Setup

Getting ‍your live YouTube music stream just‍ right ⁤can feel ⁢like setting ‍up⁣ a‌ concert ⁤in your living room. ‍ Start ⁤with your equipment. You’re gonna want a quality‌ microphone for crisp sound, an audio interface if you’re using ⁢instruments, and a​ decent camera that captures you‍ in all your glory. Background matters too; think ‍about what’s behind you. A clean space ‍or some funky art ⁤can amp up the vibe for‍ your viewers. Don’t forget to check your lighting!⁤ Natural ‌light is great, but ring ⁤lights can really make⁢ you shine like a superstar.

Next up, delve into the ⁤software side of things. Tools like OBS Studio or⁤ Streamlabs can help ⁢you mix ⁢your audio and video seamlessly. Create scenes that highlight your ⁤performance,​ whether it’s switching to a close-up⁣ of your guitar during a solo ‍or displaying lyrics for sing-along moments. Remember, engagement is key – ‌encourage your audience to ⁣comment or ​ask questions during the stream! A great way to keep things‌ interactive‌ is to do shout-outs‌ or even ⁤take song requests, making your viewers feel like they’re right⁢ there with you. Take it up a notch and ​consider ​using overlays to ‌showcase upcoming events or your social media handles, merging professionalism⁣ with personal flair!

Engaging Your ​Audience with Interactive Features

Engaging Your⁢ Audience with Interactive Features

To really draw in your viewers⁢ while sharing your live​ YouTube music, throwing in some interactive⁣ features can turn an ordinary stream ‍into an unforgettable experience. Consider adding live polls where your audience can vote on the next song or type out ⁤their favorites ⁣in‌ the chat. This not only keeps⁢ them engaged but also makes them feel like ⁢they’re part‍ of ‌the show. Encourage⁣ comments during your ​performance and respond to fans⁤ directly; it’s like a little conversation‌ happening right there while ​the music flows.​ Have Q&A ⁢sessions where fans⁢ throw questions at you in ⁣real-time. ⁤Just ​imagine—you’re riffing on a new tune,⁢ and someone ⁣in your chat drops ‍a question asking about your inspiration. It’s a great way to keep the⁤ vibe going and build a deeper ‍connection with your⁢ audience!

Another fun⁢ way to spice things up is through‍ visual​ elements. Why not incorporate a ⁣ live ‌chat‍ overlay ‌ or display real-time⁣ reactions and emojis as you perform? You could even create an interactive‍ animated ⁤poll on your⁣ screen, letting ​fans make choices ⁣that alter the flow of the show. ⁤Here’s a quick rundown of ideas to consider:

  • Live Polls: Let ​the audience​ pick ⁤the next tune!
  • Real-time Comments: Address fans’ ⁣thoughts live.
  • Trivia Questions: Keep things light with some music trivia!
  • Song Requests: Take your audience’s requests on the fly!

Bringing these ⁤elements ‍together creates not just a concert,⁣ but a lively community experience. Plus,‍ a little ⁢fun competitive edge—like⁢ a “Guess That Tune” game—can spark excitement. Don’t be afraid to‌ think ⁤outside the box ⁣and let your ⁣creativity shine.​ Your ⁤audience ⁣isn’t just watching; they want to be part⁤ of your musical journey!

Promoting Your Live Stream Like a Pro

Promoting Your Live Stream Like ​a Pro

Getting eyes and‌ ears on ​your ‍live stream isn’t just ⁣about hitting “go live” and hoping for the best.​ You need a⁤ strategy that ⁤draws your audience in ⁤like a ⁣moth ⁢to a flame. Start by leveraging your social media channels—think Facebook, Instagram, Twitter, and TikTok. Share‍ sneak peeks or behind-the-scenes footage to⁢ crank‌ up the ⁣excitement.‌ Use catchy captions and engaging⁤ hashtags that‌ reel people in. Don’t forget to create a Facebook event or ⁤a dedicated Instagram story ⁢ countdown ⁣to remind your followers when to tune in.⁤ The more you build up the anticipation,‍ the more viewers you’ll‌ snag⁣ on the big day.

Consider collaborating with other creators ⁢or musicians who can⁣ co-host the stream⁤ or share ⁢it with their audience.⁢ It’s like expanding your pool of friends—you ⁢never know ‌who’s ⁣going to‌ bring ​their friends along ‌too! And let’s not overlook the​ power of email‍ newsletters; if you’ve got a list, use it! A quick ​reminder‍ about ⁤your live stream can drive your loyal fans right to your channel. Make it simple for ⁢them: include links, dates, and times ‍in​ your emails. Here’s a quick visual reminder of how⁤ to strategize:

Promotion Method Action Steps
Social Media Share ​teasers, use hashtags, and countdown⁣ stories.
Collaborations Join forces‌ with other creators to expand reach.
Email Newsletters Send‌ reminders with all the juicy details.

Harnessing Feedback for an Unforgettable ‍Experience

Harnessing Feedback for‌ an Unforgettable Experience

Feedback​ is like gold ​in‍ the world of live ‍streaming; it’s your secret weapon to create an⁣ unforgettable experience for⁤ your viewers. Think⁤ of it as a ⁣conversation⁣ with your⁢ audience. They can tell you what‍ hits the right notes and what feels ⁣off-key.​ Don’t⁢ just sit ⁣back and let it pass by;‌ actively encourage feedback during your⁣ live sessions. You ⁤can⁣ do this by using simple tools like⁣ chat‌ polls, comments, or⁢ even dedicated‌ Q&A segments. Talk with your viewers, ask⁢ them ⁣what they want to ‍hear next, ⁣or how they’re enjoying the flow of your set. ​This sense of engagement not only‌ makes ‌your audience⁤ feel valued ⁣but also crafts a unique atmosphere that‍ keeps them coming back for more.

To effectively ⁤harness that feedback, consider creating a‌ feedback loop. Here’s how you can do it:

  • Prompt ⁤Interaction: Regularly ask for ⁤input during your stream.
  • Analyze Responses: After your session, sift through the comments and messages for⁣ common⁤ themes.
  • Incorporate Changes: Use what you’ve learned to tweak ⁤your setup or song selection for next time.
  • Thank‍ Your Audience: Show⁤ appreciation for their insights which makes​ them feel⁤ heard.

By turning feedback into ⁢action, you’ll not only⁣ improve⁤ your content but also build a loyal ⁢community of fans who love being part ⁢of your ‌musical journey.

Wrapping Up

And there you have it! Sharing ‍your live YouTube music isn’t just⁣ a technical chore; it’s an ‌exciting opportunity to connect with ⁤fellow music lovers in real-time. Think of ⁤it like ⁤throwing the biggest block party in your neighborhood, ⁣where everyone can join in, groove to the ⁤beats, and really feel the vibe together. With just a‍ few ​clicks, you’re not only ​broadcasting ⁣your ​tunes but also creating a space for shared experiences, laughter, ⁢and ‍maybe even a⁤ few​ unforgettable memories.

So grab ​your gear, ‌set ‌up your stream, and‌ let ⁣your creativity shine! Whether you’re ‍jamming‌ solo or ‌inviting friends to collaborate, remember⁣ that it’s about ‌the fun and connection, not ⁣just the music ⁢itself. Now go ⁣ahead – hit that “Go ⁤Live” button, and ⁣let the world hear your heartbeat ‌through your music! 🎶 Who knows, you ⁤might⁢ just inspire someone else to⁣ start their own musical‍ journey. Happy streaming!

Effortless Steps to Clip Your Favorite YouTube Videos!

Ever found ​yourself hooked on a YouTube video, just wishing you could save that perfect‌ moment to share with your friends or revisit later? You’re not alone! We’ve all been there—scrolling through our favorite channels, watching a killer recipe ‍tutorial or an epic gaming highlight, and thinking, “I need this on⁢ my⁢ phone.” Luckily, clipping your favorite YouTube videos isn’t as tricky as it ⁢sounds. With ⁣just a few effortless steps, you’ll have those sought-after snippets ready to go, ⁤like catching fireflies in a jar. Let’s dive right into how you can easily snip⁢ out those golden moments and keep the good ​times rolling!
Master the Art of Video Clipping with Simple ⁢Tools

Master the⁣ Art of⁢ Video Clipping with​ Simple Tools

Clip your favorite moments from YouTube without breaking ‍a sweat! With the right tools, you can ⁤create bite-sized clips that are perfect for sharing or replaying. Start ⁤by⁤ choosing a user-friendly online video editor or app. ⁣Look for options that allow ‍you to upload videos directly from YouTube or paste a link to save some time. Once you have your video loaded, the fun begins! You can trim, cut, ⁣and rearrange footage with just a few clicks. Why​ not add a bit of flair by incorporating text overlays ⁣or fun⁤ filters? It’s as easy as pie!

Remember, the key to mastering video⁤ clipping is finding the right balance between simplicity ‍and creativity. Consider these tips:

  • Plan your clips: Jot down timestamps of the moments you love.
  • Stay focused: Keep it short and sweet—30 seconds to a minute is usually ideal.
  • Preview⁣ before saving: Make sure your edits flow smoothly and⁤ capture the essence of the original video.

Once you’re satisfied, export and share your masterpiece! ⁣You’ll impress friends and followers with⁣ your snappy, engaging content that speaks volumes without needing a long watch. Happy clipping!

Unlocking the Secrets ‍of YouTube’s Hidden Features

Unlocking the ⁣Secrets of YouTube’s Hidden Features

Ready to⁤ dive into the world of YouTube’s⁢ hidden gems? The platform’s not just⁣ a place for ‌endless cat videos and music clips;​ it’s packed with features that can make your viewing experience even better. One of the coolest tricks is the​ ability to create clips ⁢from videos, allowing you to share your favorite moments ⁣effortlessly. To⁣ get started, look‌ for ⁢the Clip button underneath the video player. This nifty tool lets you select a portion of‌ a video—usually between 5 and 60 seconds. Once you’ve caught that epic part, you can highlight it, give⁢ your clip a title, and voilà! You’ve created ⁣something shareable that captures the⁢ essence of the moment. Consider ‌it like creating your own highlight reel but for those internet gold moments you can’t help but love.

But wait, there’s ⁢more! You⁤ can also customize how your clips look when ​you share them. Here’s a quick list of ways to make ‍your clips pop:

  • Catchy Titles: Use engaging titles that tease the content—make viewers want to click!
  • Creative Thumbnails: Pick ​a ⁣thumbnail that stands out—first impressions matter!
  • Engage Your Audience: Ask your viewers a question ​about ‍the clip to spark a‌ conversation.

If you want to take it a step further, consider using a simple table to summarize the‌ main points of your clip or to invite viewers to⁤ your ‍other content. For ‍example:

Clip Title Duration Main Moment
Epic Fail ⁢Compilation 30 seconds Slipping on a banana peel!
Best Dance Moves 45 seconds Grooving at the party!

So get out there, start clipping, and share your ​favorite moments! ⁤YouTube is ​waiting for your unique spin on its endless ​sea of content.

Creating Shareable ​Moments: Tips for Social Media Integration

Creating Shareable Moments:​ Tips for Social Media Integration

Sharing⁣ those epic moments from your favorite YouTube videos can feel like a daunting task, but it doesn’t have to be! With simple strategies, you can seamlessly weave‌ those clips into your social media feeds, captivating your audience along the ⁤way. Start by identifying ⁤the specific moments that truly resonate with you—those snippets that​ are packed with⁤ emotion, humor, or⁣ valuable insights. Think about it: wouldn’t you rather share a powerful quote or a hilarious blunder from a​ video than post an entire hour-long‌ clip? Once you’ve pinpointed those gold nuggets, use easy-to-navigate ‌tools or apps that allow you to‍ clip, edit, and customize your selections before sharing them. This keeps your posts fresh and relatable, and who doesn’t love a good, shareable moment?

As you get ready⁤ to⁤ hit ‘post,’ don’t forget ⁣to sprinkle in some engaging⁣ elements that encourage your followers to interact. Add catchy captions, emojis, or even pose questions to spark conversation. It’s like ⁣casting a fishing line—you’re not just throwing out content; you’re inviting your audience to reel in the fun, share⁤ their thoughts, and maybe even create a dialogue. Consider incorporating these tips to boost your shareability:

  • Visual Appeal: Use⁤ eye-catching thumbnails or​ edited previews.
  • Personal Touch: Share your thoughts or reactions alongside the clips.
  • Use Hashtags: Make it‌ easier for others to find your content.
  • Invite Collaboration: Tag others or challenge friends to share their favorite moments.

Polish ‌Your Clips with Editing Tricks That Wow

Polish ​Your Clips with Editing ‌Tricks That Wow

Video editing doesn’t have to be a daunting task. With a few⁢ clever tricks up your sleeve, you can transform your YouTube clips into⁤ engaging and polished⁤ gems. First off, consider cutting out the​ fluff; nobody wants to sit through monotonous content. Snip out those long pauses, awkward ⁤moments, or repetitive information. This not only tightens your edit but‌ keeps your audience hooked. Don’t forget to add transitions—they’re like the cherry on top that can elevate your videos from basic to brilliant. Think about simple fades, wipes, or even an upbeat music cue to signal a change;​ it’s‍ all about maintaining a flow that feels ⁤natural and ‍engaging.

Another essential trick? Incorporating text overlays to highlight key points or add a splash of personality. Use attention-grabbing fonts, but keep them legible. If you’re feeling adventurous, try pairing‌ specific colors with the mood ⁤of⁢ your content; warm hues for exciting ‌moments,​ cool tones for calm sections. And let’s not overlook the power of sound effects!‌ They can punctuate actions and really elevate the overall experience.‌ Whether⁢ it’s a swoosh when you transition or⁢ a soft beep when you make a ⁣point, these sound bites can lift your production quality. Here’s a quick ⁣overview of editing elements that can transform your clips:

Editing Element Purpose
Cuts Eliminate⁣ unnecessary parts
Transitions Smooth change between scenes
Text Overlays Emphasize key points
Sound Effects Enhance viewer engagement

The Conclusion

And there you have⁢ it! Clipping your ⁤favorite YouTube videos doesn’t have to feel like scaling a mountain. With just a few easy steps, you can unlock a treasure trove of‍ moments that make you laugh, cry, or even inspire a little dance in your living room. Imagine having a personal highlight reel at your fingertips—suddenly, every hilarious quip or jaw-dropping reveal is just a click away. ‍So go on, dive into those video treasures‍ and let your creativity flow!

Don’t forget‍ to share your clipped gems with friends or even sprinkle them across your social media. Who knows? You ⁢might just spark someone else’s day with ⁢a perfectly timed laugh or a ‌mind-blowing tutorial snippet. Happy clipping!

Unlocking YouTube: Your Guide to Downloading Videos Easily

YouTube is a ​treasure trove of‍ entertainment, ⁣learning, and inspiration,‍ but​ what happens when you want to take those videos⁢ offline? Whether it’s a captivating documentary, a how-to tutorial, or your favorite ‌music video, there’s nothing quite like having​ your go-to clips saved‍ and ready to‍ go, even without Wi-Fi. But how do you ⁢unlock that ⁣magic? Fear ⁤not! ​We’re diving ⁣into the easy-peasy‌ world‌ of video⁣ downloads, where we’ll⁣ explore the⁣ straightforward methods to snag those​ precious⁣ videos right⁢ onto your device. ‍With a sprinkle of wit and⁣ a dash of practicality, we’ll⁤ help you navigate the sometimes tricky waters of downloading‍ while‍ keeping it all above board and user-friendly. So, get comfy, because by⁣ the ⁤end of⁣ this guide, you’ll be equipped with all the ​tips and‌ tricks to keep your ‌YouTube favorites at ‌your fingertips!
Tips for Choosing the ‍Right YouTube⁤ Video Downloader

Tips for Choosing the⁢ Right⁣ YouTube ⁢Video Downloader

Choosing the right YouTube⁤ video downloader‌ can ⁢feel‍ a bit overwhelming with all the‌ options out ‌there. Start ⁢by assessing​ your needs:‌ Are you looking for a simple ⁤download for ‌personal use, or do you need‌ something more‍ robust⁤ for‌ regular⁢ content⁢ creation? A good downloader should ⁣be user-friendly, ⁢offering⁢ a​ smooth interface‍ that doesn’t‍ make⁣ you​ feel like⁢ you need a‍ PhD ⁤to⁣ operate it. Look ​for features like batch downloading, file format options,⁢ and ‍video quality settings. These can⁣ save you‍ tons‍ of time ⁢and‌ ensure you’re getting the exact ⁣files ⁢you ⁤want.

Also, ‌consider the safety⁤ aspect. You don’t want to end up with malware sneaking‍ into your ‌system ⁤while trying to ​snag⁣ that viral video. Stick to​ reputable programs with ⁢positive ‍reviews ⁤and‍ a history of reliable performance.​ Check ​if the⁣ downloader‌ offers regular updates to keep​ up with‌ YouTube’s changing algorithms. Here’s a quick table to help‍ you visualize some key‍ features you‍ might want⁤ to compare:

Downloader User-Friendly Batch Download Video ⁤Quality Options
Downloader A Yes Yes 720p, ‍1080p
Downloader B No No 480p, 720p
Downloader C Yes Yes All Formats

Understanding YouTubes Terms of Service⁣ for Safe‌ Downloads

Understanding YouTubes‍ Terms of Service ‍for Safe Downloads

When ⁣it comes to snagging videos from YouTube, ⁢it’s​ crucial to stay‌ within the bounds of their Terms of Service. Think of it⁣ like‌ walking‌ through a ⁢park:⁣ you can enjoy the scenery, ​but you don’t want to trample the flowers. YouTube allows users to watch videos‍ freely, ‍but downloading them isn’t a free-for-all. The general rule‌ is pretty straightforward:⁤ downloading content without explicit⁤ permission from the owner ‌is ​a no-go. However, there are⁤ exceptions, especially if the video has a ⁣Download button or if it falls under the Creative Commons⁤ licensing. ⁢Keep these pointers in mind:

  • Respect Copyrights: ⁤Always‌ check if the video’s‍ creator has⁣ allowed ‍downloads.
  • Use Official Apps: Consider using YouTube ⁣Premium, which lets ⁢you ‌download videos legally.
  • Creative ⁣Commons: ‍Videos with this license can often ‍be downloaded and reused, but check specific terms.

Understanding‌ these points not ⁢only keeps you ⁤on​ the right‌ side ⁣of the law⁢ but also supports‌ the creators you love. Imagine supporting ⁢an indie artist;‍ by​ respecting their rights, you help them keep ‍making the ⁢content you ⁣enjoy. So, next time you’re itching⁢ to download ⁤a tutorial⁤ or music ​video, pause and think‌ about‌ how ⁢you can⁣ do it⁣ right. You might ​find it’s easier‌ than‌ you think, and you’ll be showing some love back​ to ​the​ creators!

Step-by-Step Guide to Downloading Videos‌ on Different Devices

Step-by-Step Guide to Downloading Videos on Different Devices

Downloading videos from YouTube​ can feel like ⁢a treasure hunt, but once ⁢you ‌find​ the ⁢right tools, ‌it’s as ​easy⁤ as pie! For most devices, you’ll want a friendly app or website that ​simplifies the ​process. Here are a few user-friendly options you ⁣can try:

  • Smartphones: Use ⁣apps like TubeMate or Snaptube. Just download the app,​ copy the video ​URL, and paste it into ‌the app. Within moments, your ⁣video is safe and sound!
  • Tablets: ⁣ The same apps​ work wonders here,​ but you​ can also use⁤ web-based downloaders like Y2mate. Just follow​ the same copy-and-paste formula, ⁤and you’re⁢ good⁤ to go!
  • Desktops: ​For Mac, ‌4K ⁢Video ‌Downloader is a champ. Windows users can opt for ‌YTD Video Downloader.‍ Install the​ program, throw in ‌your URL, and let it ⁤work its magic!

Keep in mind, different devices might have​ their quirks ⁣when it comes to‌ file formats. Make sure to⁢ choose the right‌ format⁤ that suits your ‍needs, whether ‍that’s​ MP4 for videos or MP3 for just ⁢audio. Here’s a handy little table to help you ⁢understand the common formats:

Device Recommended Format
Smartphone MP4
Tablet MP4
Desktop MP4 / AVI

Best ⁤Practices⁣ for Managing Your⁣ Downloaded⁢ YouTube Content

Best ​Practices ⁣for ​Managing Your Downloaded YouTube Content

Managing your ‌downloaded ⁣YouTube content ‍can⁢ feel‍ overwhelming, but with a few straightforward strategies,⁤ it​ can become‌ a ⁣breeze. First⁢ and‌ foremost, organize ⁤your files right ‍after downloading. Create dedicated⁢ folders for different⁤ categories, like “Music,” “Tutorials,” or “Vlogs.” This not only keeps your ⁣library neat but‍ also saves time ⁤when ⁣you want‍ to revisit a ‌specific video. Additionally, ⁤make it‌ a⁣ habit to regularly back up your downloads to an⁣ external hard drive or cloud storage.⁢ You wouldn’t ‌want⁣ to⁣ lose ⁢those⁤ golden nuggets‌ of content due to a sudden computer ⁢crash, right? Think ‍of it like planting a garden: if you take ​care of‍ your plants ⁢and⁤ remove weeds, they’ll flourish!

Another useful tip is to tag ⁢your videos with relevant phrases in your⁣ file names. For instance, instead ⁣of naming a video “video123.mp4,” ⁢go for something like “GuitarTutorialBasic_Chords.mp4.” This ⁣makes it ⁣easy to⁤ search for and identify your⁢ files later, just like ‌labeling jars in your pantry helps​ you find ⁢that‌ elusive spice ‌without ⁢rummaging around. You might also ⁢want to consider using a media player that supports playlists so ⁣that you can enjoy‌ your videos on repeat or share them with ⁢friends without having to go ​through your‍ downloads ​each time. In essence, ⁣a little ‌organization goes​ a long ‌way in ⁢ensuring your YouTube content‍ is not just⁤ downloaded,⁢ but⁤ truly accessible and enjoyable!

Wrapping Up

So ⁣there‌ you have ‌it! Unlocking​ the secrets of ⁣YouTube video downloads doesn’t have to feel like cracking ⁢a safe ⁢with a hairpin. Whether you’re looking⁤ to save your favorite music videos for offline⁢ listening, snag a tutorial ‍for future reference, ⁢or ‍just want to build up a collection of ‌fun ⁢clips to binge-watch later, you’ve got the tools​ and ⁤know-how right ‍at your fingertips. Just remember ⁢to ⁤respect copyright⁣ and give credit ⁤where it’s ⁣due⁣ – keep the⁣ good vibes going in⁣ the ⁢YouTube community!

Now, it’s your ⁤turn to dive in. Explore,⁣ experiment, and make the most of ⁢your newfound skills.⁣ The world of​ downloadable‌ content⁤ awaits you. Happy downloading!