Master the Mess: Unclogging a Poop-Filled Toilet on YouTube

You ‌know that moment when you’re ​just minding your business, maybe sipping ⁢on some coffee​ or watching⁤ your favorite show, and​ suddenly, chaos⁢ strikes? You rush to the bathroom only to find a ​toilet that’s gone rogue—clogged,⁤ overflowing, and​ let’s face ‍it,⁣ a complete mess. It’s enough to ‌make even the strongest stomach turn! But fear not! In this digital age, our good ‍ol’ ⁢YouTube has your back, offering a ⁤treasure trove​ of tips⁢ and tricks to tackle even ‌the most daunting bathroom disasters. So grab your‍ rubber gloves, and let’s⁤ dive into the world of “.” We’ll explore ‌hilarious how-to videos, expert advice, and maybe a few surprising hacks that will‌ turn you​ from ‌toilet novice to plumbing pro in no time. Trust me; by‌ the end, ⁣you’ll be​ ready to face that toilet like a superhero armed with a plunger and plenty of resolve!

Unleashing Your Inner Plumber: The Essential Tools You Need

Unleashing⁤ Your Inner Plumber: The Essential⁣ Tools You Need

Getting elbow-deep in plumbing‌ chaos might not sound like everyone’s idea of ‌fun, ⁢but having the ⁤right tools ‍can turn you into a⁣ DIY hero. First up, a ‌ plunger—an ​absolute must-have. Whether you opt for a traditional cup ⁣style or a flange plunger (which is especially useful for toilets), ‌gripping that handle can feel ⁢empowering. Don’t forget to⁢ have a drain snake ​handy, too!‍ This twisty ‌tool⁢ can reach into ⁣the⁢ depths⁣ of your ​plumbing, tackling ⁤those stubborn clogs that just won’t budge. A good-quality ⁤ bucket is essential ⁤to catch any overflow, while disposable rubber gloves help keep the mess off‌ your ⁣hands. Less​ mess means less⁢ stress, ‌right?

To level ‍up your game, consider investing in a toilet auger for those times when the basics just ​don’t cut it. It’s like a secret weapon, designed specifically ​for toilets, diving deep into the bowl’s bends to ‌clear more significant blockages. If you really want ⁣to show your inner plumber, a wet/dry vacuum ​ can suck​ away the‍ despair ‌(and, you know, other ⁣stuff) before ⁣it spreads. Lastly,⁢ a‍ solid stash of pipe cleaners ⁤or chemicals can ⁤assist with maintenance, ensuring smooth ⁤sailing​ after you tackle that monstrous clog. With⁢ this arsenal⁣ of tools⁢ at your side, ‍you’ll ⁤be​ ready to ‍face ‌the chaotic plumbing battlefield with ⁣confidence.

Step-by-Step Rescue: Mastering the Art⁣ of Toilet ‍Unclogging

Step-by-Step Rescue: Mastering the Art of Toilet Unclogging
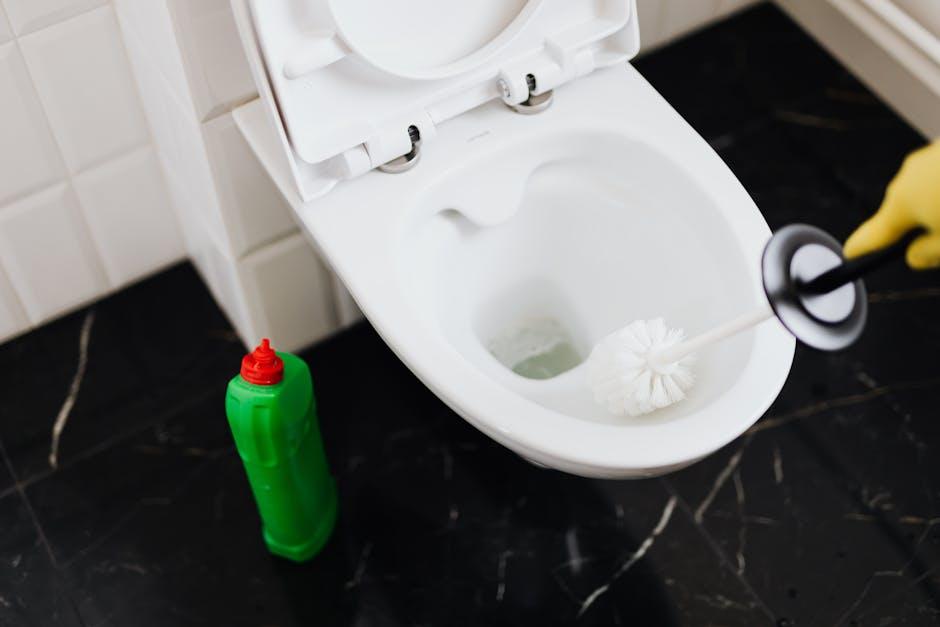
When you’re⁤ knee-deep in a mess,⁤ it’s easy ⁢to feel overwhelmed. But don’t‍ panic!⁢ Grab some⁢ rubber gloves and a⁣ plunger—you’re already halfway to victory. Start by ensuring your toilet bowl isn’t overflowing; you⁢ can do this by turning off the water supply at the base. Then,⁢ plunge like you’re dancing the tango: create ⁣a good⁢ seal ⁣and push down⁢ with force, then‍ pull up sharply. This ⁣back-and-forth motion helps to break‍ up the⁣ clog. If ‌you’re feeling ambitious, adding some ​ dish soap to the bowl can work wonders, as it’ll ⁣help to lubricate the‍ pipes. Think of it as oiling a squeaky hinge—things ‍will slide smooth as butter!

If the plunger just ‍isn’t ‍cutting it, it’s time to call in ​the big guns! ⁢A⁣ toilet auger is ⁢your ​trusty sidekick here. Insert ⁢the auger into the bowl and twist it​ as it goes down;‌ it’ll snake‌ around the curves of your plumbing, ‌ready⁤ to dislodge ‍anything that doesn’t belong. Should ⁤you find yourself‌ staring at stubborn debris that ⁢just won’t budge,‌ don’t be ‍shy⁢ with the hot water trick—carefully pour a bucket of hot (not boiling!) water from⁢ waist height.‍ The heat can soften the blockage, making it ​easier ‍to clear out. Just remember, like a good‍ movie, ‌patience⁣ can be key to achieving a⁣ satisfying end!

Avoiding the Catastrophe: Tips to Prevent⁢ Future Clogs

Avoiding the Catastrophe: Tips to Prevent Future Clogs

Ever ⁢had that‌ sinking​ feeling⁤ when the toilet⁤ refuses to cooperate? The horror ⁣of a​ clogged toilet can feel ⁢like‌ the end of the world, but trust me, we ⁢can sidestep that⁣ disaster with a few⁢ simple habits.‌ First off, always keep an​ eye on what ‌goes ⁣down the⁣ bowl.⁤ It’s not a trash can! Avoid flushing:

  • Flushable wipes
  • Feminine hygiene products
  • Q-tips and cotton balls
  • Excessive‍ toilet paper (go easy,​ folks!)

Next, consider⁣ a routine ⁣maintenance check. ‌Yep, toilets⁢ need love too! Just like⁢ changing the oil in your car, don’t​ neglect ⁤your toilet. Regularly using a plumbing enzyme cleaner ⁤can keep those pipes flowing smoothly, breaking ‌down any ⁣sludge before⁣ it turns into ​a major ‍problem. And let’s be real—if you have‍ kids,⁢ teaching them not to overload the toilet with toys⁤ is​ crucial. They might think it’s‍ a fun game, but ​the ⁢plumbing gods do not share that sentiment!

YouTube Gold: The Best Video ​Tutorials That Save the Day

YouTube Gold:⁣ The Best Video Tutorials ‍That Save the Day

Facing an overflowing toilet is like a⁤ bad plot twist ‌that ⁣nobody asked for. Fortunately, YouTube has a treasure chest of ​videos that’ll get you ‌through this less-than-glamorous situation. ​Imagine‌ this: ⁣you’re in the heat of⁣ the moment, the‍ toilet has⁣ decided⁢ to stage a rebellion, and panic sets in. But with just a few taps on your phone or remote, you ‍can find ⁣ the ultimate‍ tutorial that transforms your disaster into a​ quick fix. Look for‌ channels that specialize in household hacks or those DIY wizards who‌ are ‌always ready ⁢to save the day. They provide detailed, step-by-step guides‍ filled with ‌tips‍ that make unclogging⁢ look like a⁤ piece‍ of cake—albeit a​ very messy one.

What to look ⁢for in‌ a video tutorial:

  • Clear⁣ visuals: It’s essential to see the process ‌clearly; ‍a walkthrough with great angles can‌ make all⁤ the difference!
  • Engaging hosts: A personable​ presenter‌ not only provides valuable information but also lightens the ‍mood during⁤ an ⁤otherwise grim situation.
  • Useful⁢ tips: Beyond the basic plunger method, look for tutorials that share unique tricks—for ⁣example, using dish soap or a snake to clear stubborn blockages.

Remember, it’s ‍not ⁢just⁣ about the⁣ fix; it’s also about the experience! Some videos ​even inject a⁣ bit of humor ⁣into the ⁢chaos, making⁣ you chuckle while you tackle the task. ‍Next time you find yourself knee-deep in a ‌toilet crisis, just hit up‍ YouTube. With creativity and​ a little elbow grease, you’ll ‌turn ‍a‌ stressful moment into a victory, one⁣ flush at⁢ a time!

Key Takeaways

Well, ​there ‍you have it—your ultimate⁤ guide to tackling one of life’s more, shall we say, challenging situations! ‍Who knew that a‌ poop-filled toilet could become a DIY project of sorts? With the right tools, a sprinkle‍ of humor, and a dash⁤ of creativity, you ⁣can ⁢transform a messy disaster into‍ a victorious comeback.⁣ Remember,⁣ you’re not alone; millions have ⁣faced⁢ this same predicament,‌ armed with nothing but courage and a plunger.

So the next time you‍ find yourself squaring off⁤ against a stubborn clog, channel your inner hero⁣ and take charge! And hey, if you capture the‍ moment on video, you might just add a new twist to‍ your⁢ YouTube channel—Poop ⁢Patrol:​ The Sequel! Keep your spirits high, share the laughter, and always have a ‍backup plan (and a‌ plunger) at the ready. Until ‌next ⁤time, ‌may your toilets⁢ be clear and your days mess-free!

Mastering Self-Closing Screen Door Hinges: A Fun Guide!

Picture this: it’s a sunny afternoon, and you’re lounging in your⁢ backyard, sipping iced tea, when you notice the pesky flies buzzing around—interrupting ⁢your⁤ serene oasis. ​Enter the self-closing screen door hinge, your unsung hero!‍ These nifty ​gadgets⁣ are like⁤ the secret sauce for your home, providing effortless access to fresh air while keeping those annoying pests at ‍bay. But mastering them might seem like a​ daunting⁤ task, right? Fear not! This fun guide​ is here to demystify the world of self-closing screen door hinges, making it a breeze to ‌install, adjust,⁣ and ⁣appreciate their⁢ functionality. So grab your toolbox, and let’s dive into the ins and outs of these ⁣magical little hinges, turning your home into a bug-free sanctuary in no time!

Unlocking the Secrets of Self-Closing Screen Door Hinges

Unlocking ‍the Secrets of Self-Closing Screen Door Hinges

Have you ever been frustrated when a pesky screen door swings wide open or, worse, slams shut right‍ in your face? Enter the magic of ​self-closing screen door hinges! These nifty ⁣hardware pieces aren’t just about adding a touch of convenience; they’re like that friend who ‍always‍ ensures the door is held for you. Installing ‍hinges that gently pull your door shut ‌not only ​helps to‍ keep​ bugs out but ​also adds ⁤an air of sophistication and‍ functionality to ⁣your​ space. Think of them ​as the unsung heroes of home improvement—braving‌ the elements and managing ventilation while keeping your living area cozy and critter-free.

So how do these marvels of⁣ engineering work,⁤ anyway? Well, it’s all about spring ⁢tension and ​ pivot points. When you push the door open, the spring compresses,‌ and once you let go, it releases that ‍energy, gently guiding the door back ⁤to its closed position. Here are a few tips to ‍keep in mind for​ a successful installation and performance:

  • Choose Quality Hinges: Invest in durable materials to avoid replacements⁤ down the line.
  • Adjust for ⁢Desired Speed: Most ⁣self-closing hinges allow you to tweak the closing speed—perfect for those who⁣ prefer a softer touch.
  • Check Alignment: Keeping everything squared will ensure a​ smooth operation (no one likes a crooked door!).

Choosing the Right Hinges for Your Screen Door Adventure

Choosing the Right Hinges for Your Screen Door⁤ Adventure

Picking the perfect hinges for your screen door isn’t just about slapping on whatever looks good. You want to think about the weight of your door and⁤ how frequently it gets used. Is it a ⁤bustling entryway for your family and friends,⁤ or is it a more laid-back ‍door that sees the occasional visitor? You might go for ⁤ heavy-duty ‍ hinges if it’s the former. They’ll stand up to ‍the frequent swinging while ensuring your‌ screen door stays on track and doesn’t go wobbling around like a toddler learning to walk. Forgetting about the frame strength can be a real headache!‌ You want to ensure your hinges are compatible with your door frame material—wood, aluminum, or vinyl.⁤ It’s ⁤like finding the right ‌puzzle ⁣piece; they need to fit together seamlessly.

Next up, you’ll want to consider the style and finish of your hinges. Do you want sleek​ and modern or rustic and charming? Imagine the visual impact when your hinges complement ‌your ⁤door‌ rather than clash with it! You can choose between traditional barrel hinges, self-closing options, or even concealed hinges if you’re going for a minimalist vibe.‌ Here’s a simple checklist to keep in mind as you embark on your hinge-hunting adventure:

  • Weight Capacity: Ensure hinges can ​support ⁤your door’s hefty frame.
  • Durability: Look for weather-resistant materials if your door’s facing the elements.
  • Style: Match ​the hinge style with your home ‌décor.
  • Ease ‌of Installation: Some hinges are ‍easier to ⁢install with standard DIY⁣ tools.
  • Functionality: Self-closing, adjustable, or decorative—what’s your jam?

Step-by-Step Installation: Making ⁣It a Breeze

Step-by-Step ⁣Installation: Making It a Breeze

Installing self-closing screen door‌ hinges is ‍easier than you might‌ think, and you’re just a few steps away from transforming your ‌patio or porch experience! Start by gathering your tools: a screwdriver, a tape measure, a level, and, of course, your new hinges. Before ‍diving in, it’s super⁢ important to check the ⁢dimensions⁤ of your door frame and ⁢ensure your hinges will‍ fit snugly without any fuss. Once you’ve got everything, lay out your ‍hinges and ⁣read the manufacturer’s ‍instructions—think of them as your treasure ⁢map to success.

Next​ up, mark‍ the locations⁤ for ​your hinges⁢ on both the door⁣ and the‍ frame using your tape measure and pencil—just like a ‍building blueprint! Start installing the bottom hinge first, ensuring it’s level. It’s like placing the foundation of a house; if this step is shaky, the whole thing could wobble later! ⁣Once that’s secure, fit the⁢ top hinge, making sure the door closes ‌correctly without catching. ⁣After both hinges are installed, give your door ⁤a test swing! ​You’ll ⁤feel like a DIY⁣ pro as it gently clicks shut. If required, adjust the tension of the hinges—this ‌will ensure it closes just right, like a perfectly brewed cup of coffee in‍ the morning. You got this!

Fine-Tuning the Closing Action for Perfect Performance

Fine-Tuning the Closing​ Action for Perfect⁤ Performance

Fine-tuning your self-closing screen door hinges is⁣ like adjusting the strings on a guitar; you want that perfect pitch for smooth operation. ⁤Start by checking the tension—this ‌determines how quickly your door closes. If it’s too tight, your door might slam shut, startling anyone nearby. Too loose? It ⁤may just swing lazily, leaving the bugs to hold⁣ a beach party in your living room. Most hinges have a simple​ tension⁤ adjustment system, usually a ‍screw that you can tweak with a screwdriver. Go ahead, give it a little twist⁣ and ⁣see how your door behaves! Just remember:‌ it’s all about finding that sweet​ spot.

Next up,⁣ consider the door weight ⁣ when ​making your adjustments. Heavier doors might require a bit more effort to⁣ close, so don’t be shy about cranking ⁤up the tension slightly. If you’re not sure where to start, check this handy table to get a sense of how different weights affect hinge settings:

Door Weight Recommended ‌Tension Setting
Light (< 20 lbs) Low
Medium (20-40 ⁢lbs) Medium
Heavy (> 40 lbs) High

Once you’ve ⁤dialed in the tension, give your door a whirl.⁤ If it still bounces back or swings ​open too wide,⁤ your‍ hinges ⁣might​ need some lubrication. A⁤ little oil‍ goes a⁢ long way in keeping things running smooth, almost like giving your door a refreshing spa day! With the​ right adjustments and a bit of care, your screen door will close perfectly every time, making your home not only more ⁣comfortable but also lively and energetic. So, roll up your sleeves, get in there, and transform your door into⁢ the superstar it was meant to be!

Final Thoughts

And there you have it! You’re now ready to tackle those ⁢self-closing screen door hinges like a pro. With a little patience and some good old-fashioned elbow grease, you can transform⁢ your​ screen door‌ from a pesky gap-toothed drag ‍to a smooth operator that snaps closed with ease. It’s like teaching an old dog new tricks, but this time, the “dog” ⁣is⁢ your door, and those tricks are ⁢about keeping bugs out and letting fresh air in.

So grab your tools, maybe throw on some tunes, and channel⁤ your inner handyman (or handywoman!). Remember, ‌it’s not ‍just about​ making your ⁣door functional; it’s ⁤about adding a little flair and feel-good vibe to your ⁢space. Who knew door⁣ hinges could be this exciting? Now, go out there and give it a ⁤whirl! Happy DIY-ing, and may⁤ your screen doors always close in perfect harmony!

Mastering the Mess: Unclogging a Poopy Toilet Like a Pro!

Picture this: It’s‌ a Saturday morning, ⁣you’ve just brewed⁤ the perfect cup of coffee,​ and you’re​ ready ⁤to​ tackle the⁣ day. But before you can ‌sip that warm, comforting brew, you hear it—a ⁣gurgle, followed by an ominous silence. Oh no, the toilet’s clogged, ‌and it’s‌ a ⁣real doozy this‌ time. Don’t panic! With a dash‌ of strategy and a⁤ sprinkle⁣ of ⁤know-how, you can turn⁣ this ⁢potential disaster ⁢into ⁣a manageable hiccup. In ‍this guide, we’ll dive ​into the art of⁣ unclogging ‌a poopy ‍toilet like a seasoned pro, unlocking tips‍ and tricks ​that’ll have you feeling like ‌a plumbing wizard.⁢ So⁤ roll up your sleeves, because we’re about to⁤ transform a messy situation into a moment of triumph!

Navigating ⁣the Bathroom Jungle: Understanding Why Toilets Clog

Toilets can sometimes seem like a mysterious jungle, and‌ trust me, navigating this wild⁢ landscape is no walk in the ⁢park! ⁤Clogs happen ‌for a variety ​of reasons, but ‍understanding why ​is half ‍the battle. Think ‌of your toilet⁣ as a delicate ⁤ecosystem ⁣that requires balance—too much of‌ one⁣ thing can lead to chaos.​ The most‌ common culprits include:

  • Excessive toilet⁣ paper: It’s like feeding a wild animal; if⁣ you give it too ⁢much, things can get messy.
  • Flushable wipes: Despite the name, they’re more like ⁣the wily⁣ adversary that doesn’t break down easily.
  • Foreign objects: Kids and pets ​alike have‍ a⁣ knack for tossing⁣ in items that don’t belong, creating ‌a true bathroom mystery.

Understanding the anatomy of ⁤your toilet ⁢can help you avoid‍ future disasters. Picture the pipes, ‌which act⁣ as ‍highways for waste to travel; if⁣ there’s a blockage, it’s like a ⁣traffic ⁤jam during rush ⁢hour.⁢ A simple buildup‌ or ​a stubborn object can cause ‍chaos. Consider this​ basic table⁤ for a quick snapshot⁤ of ​what could lead ‍to a toilet emergency:

Common​ Causes Prevention ⁢Tips
Too ‌Much ⁢TP Use in moderation, or ​opt for softer options that dissolve easily.
Wipes & Non-Flushable Items Throw them in the trash, not the​ toilet. Your pipes will thank⁢ you!
Children’s Toys Keep a⁤ watchful ​eye by teaching kids the toilet rules; ⁣explain it’s ​not a toy box!

Essential ⁤Tools of⁤ the Trade: Gear Up Like a Plumber

Essential Tools of the ⁢Trade: Gear Up Like a Plumber
when the plunger ⁣just won’t cut it. This⁢ flexible​ snake can reach ⁤deeper⁣ blockages and clear out the gunk that‌ dares to‍ hide in your‍ pipes. And let’s not overlook a pair of rubber gloves – you wouldn’t want⁤ to face the ⁤muck without ⁤some protection, right?

Now, if you really want to⁣ elevate your plumbing game, consider gathering a few more ⁣gadgets. ⁢A bucket ‌ is a⁤ must-have for any​ spills⁣ that may occur during the ⁣unblocking process. And how⁣ about⁤ a shop vacuum? It’s not just for cleaning up the garage; it can be ⁢a lifesaver​ when ‌dealing with⁣ a toilet ‌overflow. Lastly, having plumber’s tape on hand is crucial⁤ for sealing those pesky ‌leaks ​that could pop up unexpectedly. With these tools in your arsenal, ‍you’re all set to battle ⁣the worst that⁣ your toilet can throw at ​you.

The ⁢Art of⁢ Unclogging: Techniques That Really Work

The Art ⁣of Unclogging: Techniques That Really ‍Work

When the dreaded ⁤clog hits, ‍it can ‌feel like you’re standing on⁤ the edge of​ a DIY abyss. But fear not! Unclogging a toilet is ⁣more ‍about finesse than ‌brute strength.⁢ First, grab a trusty plunger—yes, it’s that famous tool ⁢we all love to hate. ⁤Ensure the rubber cup is submerged fully in water; this creates a⁤ solid seal. Start with quick‌ thrusts, then ‌gradually ‍build up the strength. Think‍ of ‌it like a dance:​ a few gentle moves to warm up, then really get into ‍it! If plunging doesn’t do the trick, ‍it ​might be​ time​ to consider some hot water magic. Pour a bucket⁣ of hot (not boiling) water into​ the⁢ toilet ‌bowl; this ‍can ⁢help dissolve⁣ stubborn messes and grease. Just ⁣don’t⁣ go overboard—aim‌ with precision and allow gravity to do its work!

If the‌ classic methods⁤ prove ⁤futile, there’s always the ⁣trusty ⁢plumbing ⁤snake ‌waiting⁤ in the⁣ wings. This long, spirally tool can navigate⁢ deep into ‌the pipes, tackling clogs ‍that are ‌out of sight and out of mind.⁣ Before⁢ you ⁣dive in, clear ⁤the path: a towel can catch ⁤any ‌drips, ⁤and a pair‌ of gloves will ⁣keep things tidy. Insert the snake slowly until you feel resistance, and ⁤twist it gently to ⁤break ⁢the clog. ‌You’ll know ‍you’ve hit the jackpot when ​the water‌ starts​ to​ drain smoothly—like a⁢ breath of fresh air after a ⁤long day! Don’t forget to flush it all down once you’re satisfied with the⁢ results. And hey, if all⁣ else fails‍ and the situation still ‍feels dire, calling in⁢ a professional might just save your sanity.

Preventive Magic: Keeping Your ⁤Toilet Trouble-Free

Preventive Magic: Keeping Your Toilet Trouble-Free

To keep your⁢ toilet running ​smoothly and dodging those unpleasant clogs, ‍incorporating ‌a little preventive magic into your bathroom ⁣routine ‍can make‍ a ‌world of difference. Think‍ of your toilet ‍as a high-maintenance⁢ pet; it requires regular ⁢care to stay healthy. Here are some​ simple ‌but effective⁤ practices to adopt:

  • Flush Wisely: Don’t treat the⁣ toilet like a trash can. Items like wipes, dental floss,⁢ and paper towels are no friends of pipes.
  • Regular Maintenance: Use a ⁣bowl cleaner ‌or‌ a homemade solution of ​vinegar and baking ‍soda ‍once a ⁢month. ⁢This keeps‍ buildup in check and leaves your potty ⁣fresh.
  • Water Level​ Check: ‌ Ensure the water level in the tank⁢ is optimal—too low ⁢can‌ cause ⁢incomplete⁤ flushes, while too​ high might lead to overflow issues.

Another​ solid ​tip is to keep a ‌plunger handy, ideally a flange‍ plunger for those stubborn clogs; it’s⁣ like having a⁢ superhero right ‍under your sink.​ But if⁤ prevention fails and you​ find ‌yourself⁢ up⁣ to your elbows in toilet water,⁣ remember that ⁤a periodic ‌inspection‌ of the⁣ trap and venting system can‌ prevent many ​future ⁤disasters. A ‌good rule ⁣of thumb? When in doubt,‌ call a professional before ⁢you tackle it yourself.

Tip Description
Flushable ⁤Items Only​ toilet paper!
Maintenance Monthly⁤ cleaning prevents ⁢buildup.
Emergency Backup Always‍ have a plunger‌ nearby.

The Way Forward

And there‍ you have it!​ You’re now armed with ​the know-how to tackle a‍ clogged toilet like a seasoned pro. Just‌ remember, whether it’s a stubborn log jam⁢ or a runaway mini-tsunami of toilet paper, ⁤you’ve got the tools and techniques to handle whatever situation ⁢arises.

Next time your toilet decides to ⁤throw a hissy fit, ⁤don’t sweat it! Channel your inner​ plumber,⁤ and remember:​ a little patience‌ and know-how can turn that messy disaster into a minor hiccup. So ⁣go ‍forth, unclog with confidence, ⁢and keep ⁢that porcelain⁣ throne⁤ flowing ‍smoothly. Happy ⁤flushing! 💦🚽

Demystifying the Vornado EH1: Your Guide to Disassembly

Have you ever found yourself ⁤staring at your Vornado EH1, pondering how such ‍a compact yet powerful heater ticks? You’re not​ alone! Many of ‌us appreciate its ability to deliver cozy warmth during frigid nights, but⁢ when it comes to ⁣understanding how it works—or even how to‌ take⁣ it apart for a little TLC—things can get a bit hazy. Well, fear not! This guide is here‍ to peel back the layers of the Vornado EH1 and walk⁣ you through the disassembly process in a way that feels like ‌chatting with a friend⁢ over coffee. Whether you’re looking to clean it, troubleshoot an issue, or just satisfy ⁤your⁢ curiosity, let’s dive into the nuts and⁤ bolts of your trusty heater, turning‍ confusion into clarity!
Understanding the Inner Workings ‌of the ‌Vornado EH1

Understanding the Inner Workings of⁣ the Vornado EH1

When you take a closer look at the ⁢Vornado EH1, you quickly​ realize that it’s not ⁤just any ⁤ordinary heater; it’s⁤ a clever piece of engineering designed to‍ efficiently circulate warmth throughout⁤ your space. The ​core of its functionality lies in its ⁢powerful vortex action,⁢ which ⁢mimics natural airflow. By​ drawing in cool air, the EH1 heats it and sends it ⁣back out in ‍a⁤ controlled, spinning manner, distributing warmth evenly. This isn’t just hot air;⁣ it’s smart air. If you’re looking to ⁢dissect how⁣ this all comes together, think of it as a finely tuned orchestra, where each part plays a crucial role in delivering that cozy feeling we all crave during the colder months.

Getting into the nitty-gritty, the Vornado ​EH1‍ is composed of several key components that work in harmony. Here’s a quick look at what you’ll find under the⁤ hood:

To visualize the internal mechanics, take a ​look ⁤at the ⁤table below:

Component Function
Fan Circulates air ⁢for even⁤ heating
Heating Element Produces warmth
Thermostat Regulates temperature
Safety⁢ Features Prevents‍ overheating

Understanding these components not only sheds light on what makes ‍the Vornado EH1 tick ⁢but also ‍empowers you to be proactive about maintenance and troubleshooting. So, when you think of pulling it apart,⁢ remember, you’re diving into an intricate dance of airflow and warmth that keeps your space comfortable all winter⁣ long.

Essential⁤ Tools ‍and Materials⁢ for a Smooth ⁤Disassembly

Essential Tools and Materials ‍for a Smooth ⁣Disassembly

Getting ready to take apart your Vornado EH1? You’ll want to gather a few essential tools and materials that will make the process feel like‌ a walk in the park instead of squaring off with a ‌Rubik’s cube. ‍Here’s what you need for that smooth disassembly:

Before you dive in, it’s wise to‍ ensure that your workspace ⁢is well-lit and free from distractions—it’s like creating a Zen garden for your disassembly mission. Arranging your tools neatly can save you time and frustration.⁢ Here’s a quick tip: ⁢create‌ a little table ‍like this to track your screws and components ⁢as you remove them. It’ll help you remember where everything goes when ⁣it’s time to ⁣put things back together.

Part Status
Screws Collected
Fan blade Removed
Housing Opened

Step-by-Step Instructions for Safe and Effective Dismantling

Step-by-Step Instructions for Safe and Effective Dismantling

Ready to ⁢take the plunge⁤ into‌ disassembling your Vornado ‍EH1? Just⁣ like peeling an onion, it’s all about getting to the core without shedding⁤ too many tears! Start by ensuring the unit is‌ completely unplugged. Safety first, right? Lay out your tools within reach—things like a Phillips screwdriver, ‍a flathead screwdriver, and a soft cloth to catch any loose screws.⁢ As you begin,​ gently remove the casing by locating the hidden screws, usually tucked away at the ‌back⁤ or ​bottom. Don’t wrench it too hard; think of it like unzipping a ⁣jacket: it should come apart smoothly.

Once the outer shell is off, it’s time​ to get into the nitty-gritty.​ Tread carefully here, just as⁣ you would when navigating a delicate web. Examine the internal components; focus⁣ on the ⁢fan motor, the wiring, and the heating elements. ⁤Each piece plays ⁢a crucial role, similar to members of ⁢a band—if one is off, ⁢the harmony is broken. Make‌ sure to label any screws or small parts you remove to avoid a mad scramble when ⁢it’s time to put it all back together. Here’s a handy table highlighting parts to keep an eye on:

Component Importance
Fan Motor Drives airflow
Heating Element Provides⁤ warmth
Casing Protects internal parts
Wiring Connects components

Troubleshooting⁢ Common Challenges During the Process

Troubleshooting Common Challenges During the Process

If you’re diving into⁤ disassembling the Vornado EH1, ⁤you might encounter a few⁢ bumps ‌along the way. Think of it‍ like being⁤ on a ⁤road trip; sometimes you hit a pothole or ⁤two!⁣ Common issues include stubborn screws that just ‌won’t budge or misaligned components that refuse ⁢to come apart. If those screws are giving you a hard time, a little penetrating oil can work wonders—just let it sit for a few minutes before trying again.​ And if parts seem stuck, don’t force them; gently wiggling can often⁣ free them without causing damage. Remember, patience is your best buddy here!

Another challenge⁣ might be keeping track of all the tiny components. It’s all too‌ easy for screws and parts to go missing,⁤ right? Consider using a small container or even ⁣a magnetic tray to keep everything organized. You could ⁢also create a simple labeling system to track where each ‍part belongs. For instance, place a temporary label next to each assembly area—this will ⁤save you from scratching your head later on when you start putting everything back ⁢together! Here’s a quick look at some ⁤potential troubleshooting tips:

Issue Tip
Stubborn screws Use⁢ penetrating ⁢oil and allow it to sit.
Misaligned parts Gently ⁤wiggle to ⁤free them instead of forcing.
Missing components Use magnetic trays or labeled containers.

Closing Remarks

And there ‌you ‍have it! Disassembling the Vornado EH1 doesn’t have to feel like deciphering an ancient scroll—it’s more like taking apart a perfectly built Lego set. With a few simple ​steps and the right mindset, ​you can tackle any issue that pops up with your heater. Now you’re ⁣armed with the know-how to give that trusty appliance ‍the TLC⁢ it deserves.

Whether you’re troubleshooting or just wanting to⁣ clean it up for optimal performance, don’t shy away from rolling​ up those sleeves and getting hands-on. Remember, every machine has its quirks, but with a little‌ patience and practice, you’ll be a pro at it in no time.

So, the next time you‌ hear a strange noise or feel a dip in warmth, you won’t just throw your hands up⁢ in frustration—you’ll confidently dive in and address the problem. Thanks for hanging out with us, and remember: ⁣keep it warm, keep it clean, and don’t hesitate to show that Vornado ​some love!

Step-by-Step Guide: Dismantling Your Vornado EH1 00115

Ever found yourself⁢ gazing at ‍your‍ trusty Vornado EH1 00115, wondering how​ to unlock its innermost mechanics? You’re‌ not alone! Whether it’s for ⁤a ⁤little DIY maintenance or just pure curiosity, taking apart your heater can seem⁣ like a‌ daunting task. But don’t‌ sweat it! This step-by-step guide is here to make the process as smooth as ⁤butter.⁣ Imagine transforming yourself from a⁣ puzzled onlooker ‌into a⁣ confident ​hands-on tinkerer. In no time, you’ll ⁢be navigating the nooks and crannies of your Vornado like a ⁢pro, ready to tackle that mysterious squeak ⁣or check on the components. So grab your⁤ tools, roll up ⁢those sleeves, and let’s get⁤ dismantling!

Understanding Your ​Vornado EH1 ⁣00115​ and Its ​Components

Get to‍ know your Vornado⁤ EH1‍ 00115, ‍and you’ll‌ find⁢ it’s more than just a pretty face; it’s packed⁢ with components that work ⁣together to create that cozy⁤ warmth you love. At its heart, the heating element is where the ‌magic begins, transforming electricity into heat. ⁢Then, you ⁣have the fan, which plays a ‌crucial role in⁢ circulating that warm ‌air throughout the room, ‌ensuring that every ‍corner⁤ feels like a warm ‍embrace. ⁣Don’t overlook the thermostat—it’s your personal temperature ⁣assistant, allowing you to⁤ set the‌ perfect atmosphere with just a twist. And let’s not forget the‌ safety features, including a tip-over protection system and⁢ overheat protection, because your‌ safety is ⁤their⁢ priority.

When you start to pull apart the‌ EH1 00115, understanding ‍these components will make your life so much easier. Here’s a quick breakdown of the key parts you’ll encounter:

Knowing how each piece fits into the puzzle provides you with the confidence to⁤ tackle ⁢the ⁢disassembly process. It’s ​like piecing together a ‌jigsaw—once you see how⁤ they connect, everything⁣ slots into place, and you’ll be on your way to maintaining ‍or upgrading your trusty heater!

Understanding Your Vornado EH1 ​00115 and Its Components

Gathering the Right Tools for a ‍Smooth ⁣Dismantling⁣ Process

When ⁢you’re gearing ​up to take apart your Vornado EH1 00115, think of it‌ like preparing for ‍a little adventure. Having the right tools at‌ your fingertips ⁤can⁣ make⁣ all the ‍difference between a smooth experience⁤ and a frustrating one. So, roll up ​your sleeves and gather these essentials‌ to ⁣create your⁢ own mini⁢ workshop right ⁣at home:

‌ ⁤

  • Phillips ⁢screwdriver ‌ -‍ for those pesky screws that seem to have a mind of their ‍own.
  • Flathead screwdriver – handy for prying things apart gently without doing ⁢any damage.
  • Pliers – perfect for gripping‍ and ⁢twisting ‍those stubborn bits that ​refuse to budge.
  • Tweezers – ideal ‍for picking up ⁣small screws or parts that can easily slip⁢ away.
  • Container or tray – to keep ⁢all‌ the screws and⁤ tiny⁣ parts‌ organized and⁣ prevent them ‌from rolling away.

Feeling equipped? ⁢Awesome! ‌But remember, there’s more to it than just having tools.⁤ You’ll ⁣want to set up ⁢your workspace so everything flows smoothly. Find a clean, well-lit​ area‍ where ‍you can lay out your gear. Make sure to declutter—nobody wants to misplace ‍a critical screw amid‍ a pile⁣ of junk! ​If you’re⁤ like me and love ⁣to stay organized, consider using a small table or a bench. You can even ⁢lay down a cloth to prevent scratches and⁣ keep your⁢ workspace inviting.⁤ Just​ imagine how good it ⁤will feel to have everything sorted ‍and ready at hand.

Gathering the ⁤Right Tools for a Smooth Dismantling⁤ Process

When it’s time to take apart your Vornado EH1 00115, keep a few ⁢simple ‌strategies⁢ in mind to make the⁣ process smooth sailing. First things‌ first,​ turn off and unplug ‌the ⁢unit. ⁣Safety must be your top ⁤priority, or ⁤it’s like ⁢trying to swim⁣ with weights⁣ on. Once​ that’s covered,​ gather your tools: you’ll need ⁣a screwdriver, a soft cloth, and maybe even a ‌little⁣ bit of ⁣patience. It’s all about knowing what to ⁤expect. Consider breaking ⁢it down into ‍sections—remove the grill, then the fan blade, and finally dive⁢ into the ‌housing. This⁣ organized approach will keep confusion at bay and help you ⁢remember where everything goes⁣ for reassembly.

‌ ‍

Next⁢ up, don’t hesitate to document your dismantling journey! A quick photo here or a note there can work wonders later. It’s like ⁤giving​ yourself breadcrumbs to find ‍your way‌ back. Additionally, place⁤ the screws and small ‍parts in labeled bags‍ to avoid ⁣the infamous “where ⁤did‍ that screw go?” moment. It may feel‍ tedious⁢ now, but⁣ trust me,‍ it saves a lot of headache‌ down‌ the⁣ line. All​ in all, enjoy ⁤the process! Each‌ piece you‍ remove brings you ​closer to understanding your fan better, like peeling an onion—layer ⁢by layer. Here’s a ‌quick reference table that’ll help‌ you keep track of the parts‌ you‌ encounter ⁢along the way:

Part Name Purpose
Grill Protects the fan and enhances⁢ airflow.
Fan‌ Blade Disperses air effectively for optimal cooling.
Housing Encases ‌the internal‌ components of ⁣the fan.

Navigating the Dismantling Steps ‌with Ease

Reassembling Your Vornado EH1 00115: Tips for a Hassle-Free Return to Functionality

When you’re​ ready to put your ‍Vornado ⁢EH1 00115 back together,‌ start by gathering all⁢ your components. A ​clean, flat surface is ideal to ensure nothing gets lost in ⁣the‌ shuffle. Here are​ some ​tips to keep your reassembly ‌as ​smooth‌ as‌ butter:

  • Check ⁣all parts: ⁢Ensure every component⁤ is accounted for before‌ you dive in.
  • Follow the manual: If you ​have it handy, use‌ the user manual‌ as your roadmap—it’s like having Google Maps for assembly!
  • Work in reverse: Instead of thinking about‍ how it ⁤came ⁣apart, focus ‍on​ how it goes back together.

As​ you begin reattaching⁤ parts, take⁣ a⁢ moment to⁣ clean any⁣ dust or debris that may have accumulated in the fan. It’s like giving your machine a little‍ spa day! Make ​sure to align those clips and‌ tabs⁢ precisely—they’re the⁢ puzzle pieces that bring everything back ⁣together. If you hit​ a snag, ​don’t hesitate⁣ to⁤ double-check your assembly ⁤order or watch a⁤ quick ⁢tutorial online. Patience⁣ is key here; ⁢like baking a cake, rushing the process can‍ lead to a messy outcome.

Part Status Check
Base Secure
Fan Blade Cleaned
Cover Intact

Reassembling Your Vornado ⁤EH1 00115: Tips for a Hassle-Free ⁣Return to Functionality

Insights and Conclusions

And there ⁤you have it! You’re now ​fully equipped with all the steps you need to dismantle your Vornado EH1 00115‍ like a ⁤pro. Who ‌knew⁣ that⁢ taking apart a heater could feel like a little mini adventure? Just remember,​ whether you’re looking to clean it up, fix a pesky issue, or simply give it a little TLC,‍ each step has its purpose‍ and importance.

Once you’ve put your Vornado back together, not only⁢ will it run‌ better, but you’ll ⁢also‍ have that satisfying ‍feeling‍ of having tackled ⁢a DIY project. Plus, you can proudly say you’ve taken a deep dive⁤ into ⁢the inner workings of your ‍heater!⁢ If you have any questions ​or run⁤ into hiccups along the way, don’t hesitate to reach out or drop a comment.​ We’re⁢ all in⁢ this together, and⁢ sharing tips can​ turn a simple ⁤task ‍into a bonding experience. Happy disassembling,‌ and here’s to warmer, cozier days ahead!