Ready to give your screen door a little makeover? Let’s dive into the world of butterfly hinges—those nifty little hardware gems that not only serve a practical purpose but can also add a touch of flair to your space. Picture this: a gentle summer breeze flowing through your home, allowing you to enjoy the fresh air while keeping pesky bugs at bay. Sounds perfect, right? Well, mastering butterfly hinges is your first step to achieving that outdoor vibe without compromising your comfort. In this DIY journey, we’ll explore the ins and outs of these hinges, turning a simple installation into a fun and engaging project. So, roll up your sleeves, gather your tools, and let’s get your screen door swinging in style!
Choosing the Right Butterfly Hinges for Your Screen Door Upgrade
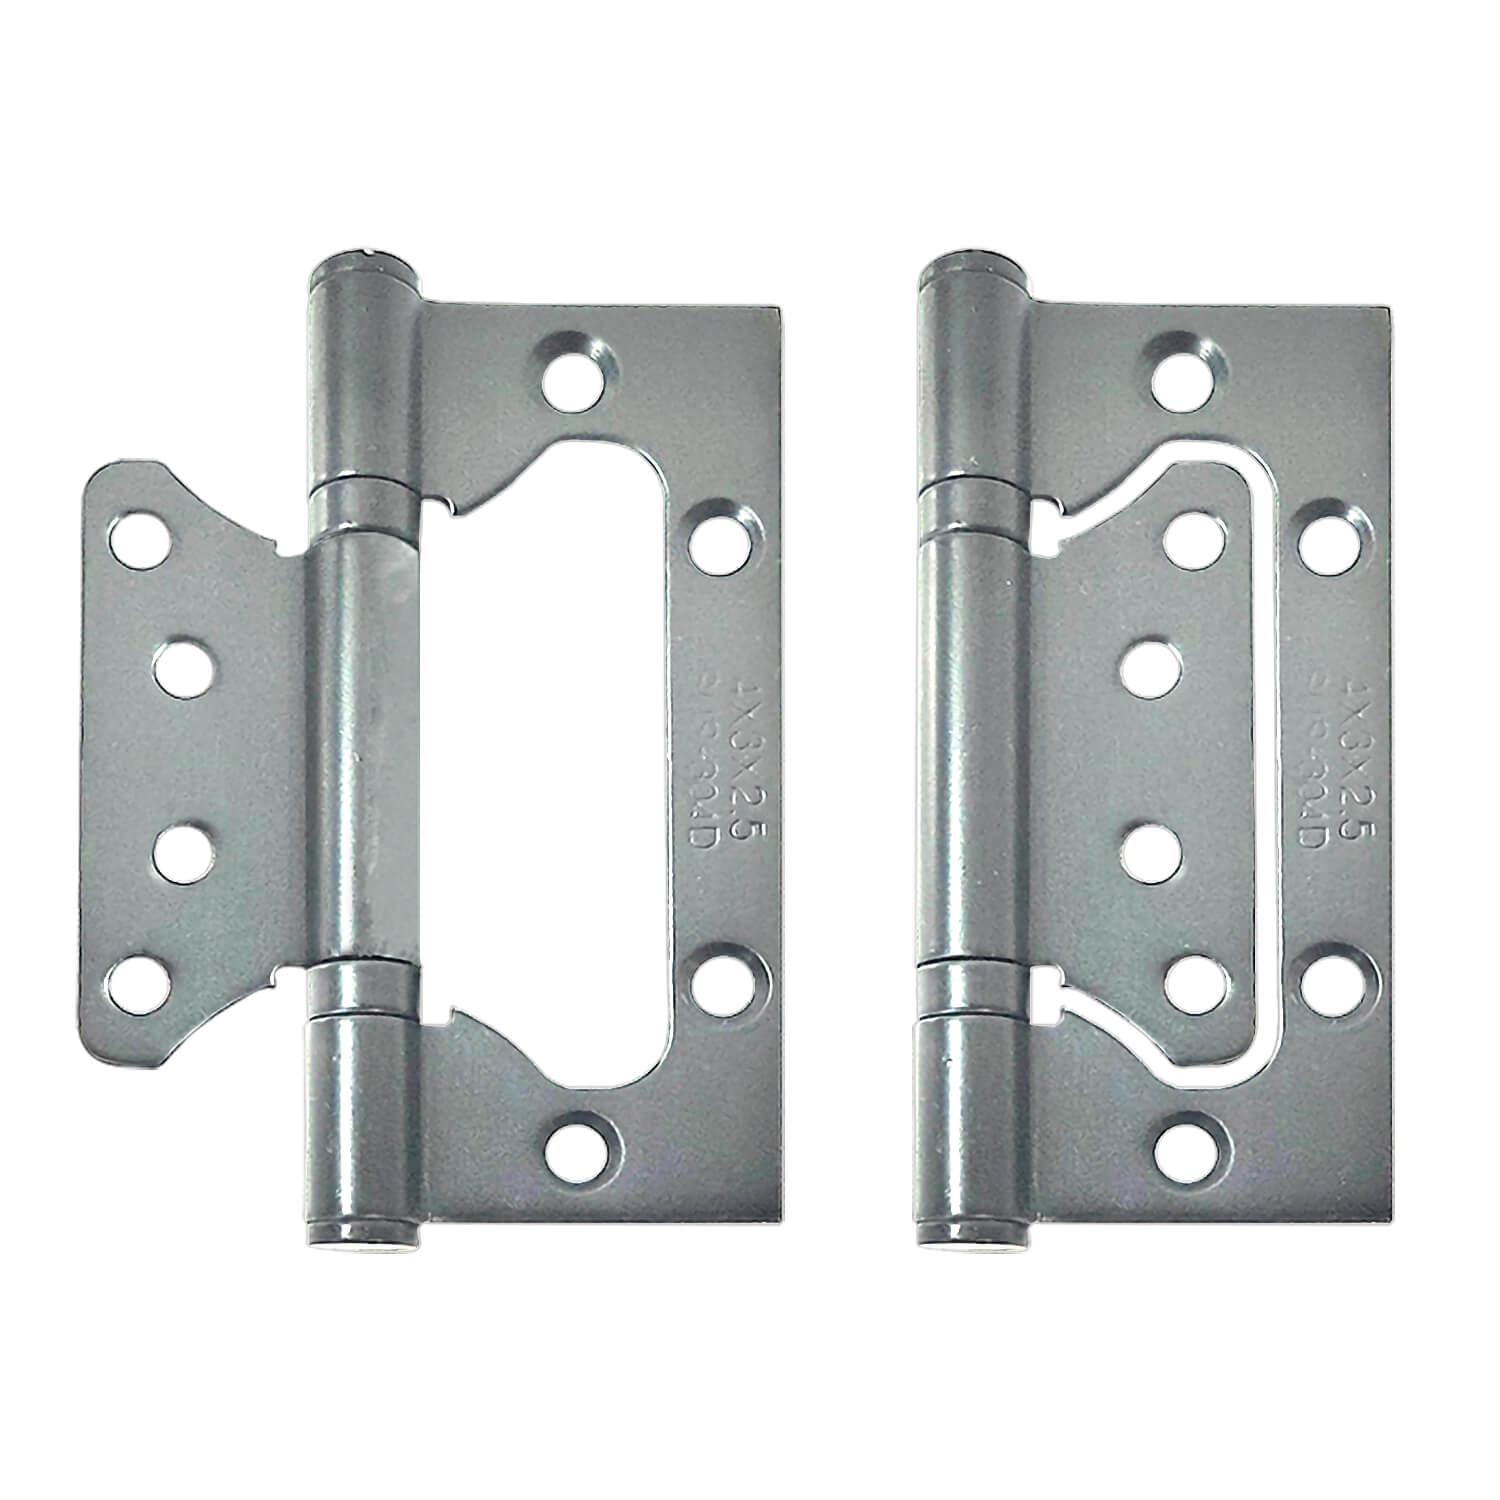
Upgrading your screen door with butterfly hinges can be a game-changer for both functionality and style. When selecting the right hinges, consider material and size as your top priorities. Choose between options like stainless steel for durability or brass for that classic aesthetic. The size of the hinges matters, too—if they’re too small, they won’t support the weight of the door; too big, and they can look clunky. A great tip is to measure the existing hinge locations before making a choice; this ensures you find a perfect match that will swing smoothly and enhance your door’s overall look.
Don’t forget the design aspect! Butterfly hinges come in various styles, making it easy to find the right vibe for your home. Think about these factors:
- Color: Match it with your door’s finish.
- Style: Choose from decorative to minimalist options.
- Weight Capacity: Ensure they can handle your screen door’s weight.
If you’re feeling fancy, there are even some decorative options that can make your door pop. Just remember, a hinge might seem small, but it can be the difference between a door that’s a pain to use and one that glides effortlessly. Happy DIY-ing!

Essential Tools and Materials You Need for a Smooth Installation
To kick off your butterfly hinge installation, you’ll want to gather the right tools that’ll make your project a breeze. Here’s a short list to get you started:
- Screwdriver – Ideally, a bits set for different screw types.
- Drill – A must-have for making precise holes in your door.
- Level - To ensure everything is aligned perfectly.
- Tape Measure – For accurate measurements; you want those hinges just right!
- Pencil - For marking where hinges will go – they say “measure twice, mark once” for a reason!
Next up, let’s talk about the essential materials you’ll need to make your screen door both functional and fabulous. Here’s the scoop:
- Butterfly Hinges – Your star players, so choose sturdy ones that match the vibe of your door.
- Screws – Always use the right size; you don’t want to skimp here!
- Wood Glue – For extra stability, especially if your screen door gets some heavy use.
- Sandpaper – Smooth out any rough edges, giving it that polished finish.
- Paint or Stain – Optional, but a splash of color can turn your screen door into a statement piece!

Step-by-Step Guide to Installing Butterfly Hinges Like a Pro
Installing butterfly hinges is easier than you might think, and it can really elevate the functionality and look of your screen door. Begin by gathering your supplies: butterfly hinges, a tape measure, a screwdriver, a drill, and some wood screws. The goal is to achieve a smooth, unobtrusive swing, so start by marking the height where you want your hinges to sit on the door frame. A good rule of thumb? Place them about 5-6 inches from the top and bottom edges. Once you’ve got your marks, align the hinge on the frame and use your drill to create pilot holes. This will prevent the wood from splitting when you screw in the hinges. Don’t sweat it if things seem a bit off; a little adjustment goes a long way in achieving that perfect swing!
Next, it’s time to attach the other side of the hinge to your screen door. Flip the door over, repeating the same process of measuring and drilling pilot holes for the hinge. Make sure your door is level and properly aligned with the frame before securing the screws. This step is crucial, so take your time! Once everything is in place, give the door a gentle push. It should swing open and closed effortlessly. If you encounter any resistance, don’t hesitate to loosen the screws a bit—it’s all about finding that sweet spot. Want to jazz it up a bit? Consider using decorative butterfly hinges for that extra flair! With just a few simple steps, you’ve turned what could be a chore into a satisfying DIY project—just think of yourself as a hinge-installing superhero!

Tips and Tricks to Ensure Your Screen Door Flies Open and Closed with Ease
Screen doors can be a total game-changer for that indoor-outdoor feel, but let’s be real—getting them to glide smoothly can be a bit of a trick. To ensure your door opens and closes like a breezy summer day, keep a few things in mind. First, make sure your hinges are properly aligned. Misalignment can be a major bummer and cause frustration when trying to slam the door shut in a hurry. You can adjust the hinges by loosening the screws slightly, adjusting the door to sit just right, and then tightening them back up. Simple, but effective!
Next, consider lubrication. Just like your favorite squeaky toy needs a little oil to keep the fun times rolling, your screen door does, too! Grab some silicone spray or white lithium grease and apply it to the hinges. Wipe off any excess, and your screen door will feel so smooth, it’ll be like it’s floating on air. And hey, don’t forget to check for any obstructions in the track. A few little twigs or dirt can create unnecessary drag, so a quick clean-up can make a world of difference. With these adjustments, your screen door will fly open and closed with ease, making your home feel as light and airy as that summer breeze outside!
Future Outlook
And there you have it! You’re now ready to take on the world of butterfly hinges like a seasoned pro. It’s amazing how such a simple little project can add functionality and flair to your screen door, turning it into a delightful entryway that’s both stylish and practical. Remember, just like learning to ride a bike, mastering these hinges takes a little patience and practice, but the satisfaction of a job well done is totally worth it. So grab your tools, invite a friend over, and make a day of it! Whether you’re sipping on iced tea while you work or cranking up your favorite tunes, enjoy the process. And who knows? You might just inspire your neighbors to tackle their own DIY projects. Happy hinging, and don’t forget to show off your handiwork!