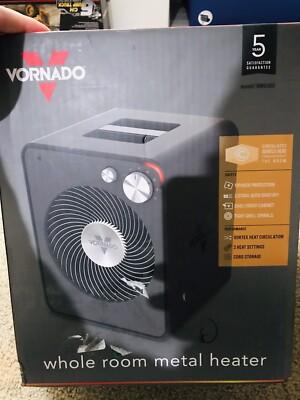
Ever found yourself gazing at your trusty Vornado EH1 00115, wondering how to unlock its innermost mechanics? You’re not alone! Whether it’s for a little DIY maintenance or just pure curiosity, taking apart your heater can seem like a daunting task. But don’t sweat it! This step-by-step guide is here to make the process as smooth as butter. Imagine transforming yourself from a puzzled onlooker into a confident hands-on tinkerer. In no time, you’ll be navigating the nooks and crannies of your Vornado like a pro, ready to tackle that mysterious squeak or check on the components. So grab your tools, roll up those sleeves, and let’s get dismantling!
Understanding Your Vornado EH1 00115 and Its Components
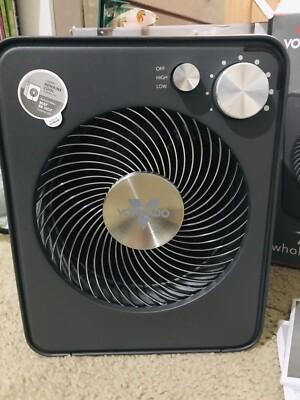
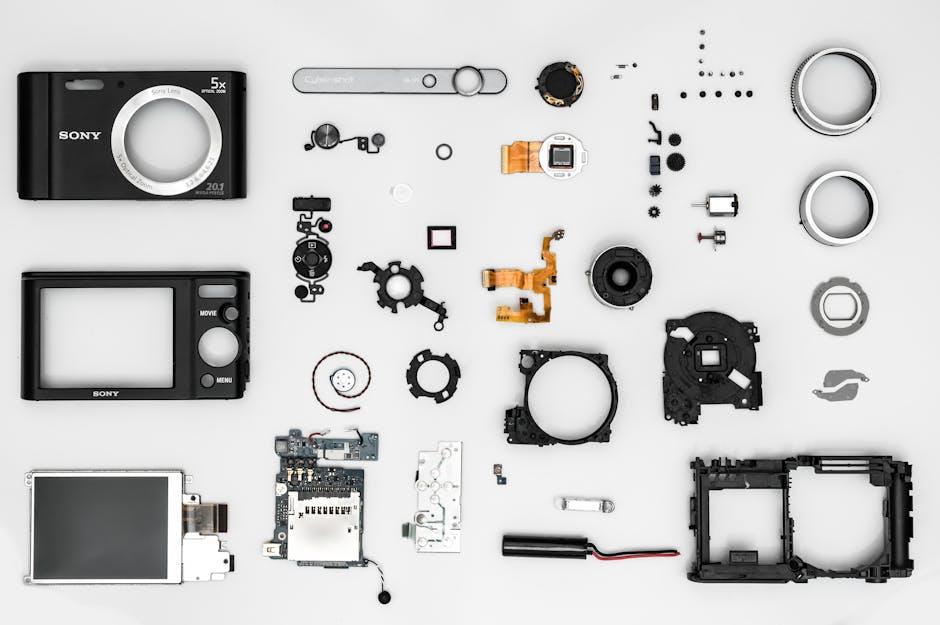
Get to know your Vornado EH1 00115, and you’ll find it’s more than just a pretty face; it’s packed with components that work together to create that cozy warmth you love. At its heart, the heating element is where the magic begins, transforming electricity into heat. Then, you have the fan, which plays a crucial role in circulating that warm air throughout the room, ensuring that every corner feels like a warm embrace. Don’t overlook the thermostat—it’s your personal temperature assistant, allowing you to set the perfect atmosphere with just a twist. And let’s not forget the safety features, including a tip-over protection system and overheat protection, because your safety is their priority.
When you start to pull apart the EH1 00115, understanding these components will make your life so much easier. Here’s a quick breakdown of the key parts you’ll encounter:
- Heating Element: Generates heat using electric resistance.
- Fan: Distributes the warm air effectively.
- Thermostat: Monitors and adjusts the temperature settings.
- Safety Features: Includes tip-over protection and overheat sensors.
Knowing how each piece fits into the puzzle provides you with the confidence to tackle the disassembly process. It’s like piecing together a jigsaw—once you see how they connect, everything slots into place, and you’ll be on your way to maintaining or upgrading your trusty heater!

Gathering the Right Tools for a Smooth Dismantling Process
When you’re gearing up to take apart your Vornado EH1 00115, think of it like preparing for a little adventure. Having the right tools at your fingertips can make all the difference between a smooth experience and a frustrating one. So, roll up your sleeves and gather these essentials to create your own mini workshop right at home:
- Phillips screwdriver - for those pesky screws that seem to have a mind of their own.
- Flathead screwdriver – handy for prying things apart gently without doing any damage.
- Pliers – perfect for gripping and twisting those stubborn bits that refuse to budge.
- Tweezers – ideal for picking up small screws or parts that can easily slip away.
- Container or tray – to keep all the screws and tiny parts organized and prevent them from rolling away.
Feeling equipped? Awesome! But remember, there’s more to it than just having tools. You’ll want to set up your workspace so everything flows smoothly. Find a clean, well-lit area where you can lay out your gear. Make sure to declutter—nobody wants to misplace a critical screw amid a pile of junk! If you’re like me and love to stay organized, consider using a small table or a bench. You can even lay down a cloth to prevent scratches and keep your workspace inviting. Just imagine how good it will feel to have everything sorted and ready at hand.
Navigating the Dismantling Steps with Ease
When it’s time to take apart your Vornado EH1 00115, keep a few simple strategies in mind to make the process smooth sailing. First things first, turn off and unplug the unit. Safety must be your top priority, or it’s like trying to swim with weights on. Once that’s covered, gather your tools: you’ll need a screwdriver, a soft cloth, and maybe even a little bit of patience. It’s all about knowing what to expect. Consider breaking it down into sections—remove the grill, then the fan blade, and finally dive into the housing. This organized approach will keep confusion at bay and help you remember where everything goes for reassembly.
Next up, don’t hesitate to document your dismantling journey! A quick photo here or a note there can work wonders later. It’s like giving yourself breadcrumbs to find your way back. Additionally, place the screws and small parts in labeled bags to avoid the infamous “where did that screw go?” moment. It may feel tedious now, but trust me, it saves a lot of headache down the line. All in all, enjoy the process! Each piece you remove brings you closer to understanding your fan better, like peeling an onion—layer by layer. Here’s a quick reference table that’ll help you keep track of the parts you encounter along the way:
| Part Name | Purpose |
|---|---|
| Grill | Protects the fan and enhances airflow. |
| Fan Blade | Disperses air effectively for optimal cooling. |
| Housing | Encases the internal components of the fan. |

Reassembling Your Vornado EH1 00115: Tips for a Hassle-Free Return to Functionality
When you’re ready to put your Vornado EH1 00115 back together, start by gathering all your components. A clean, flat surface is ideal to ensure nothing gets lost in the shuffle. Here are some tips to keep your reassembly as smooth as butter:
- Check all parts: Ensure every component is accounted for before you dive in.
- Follow the manual: If you have it handy, use the user manual as your roadmap—it’s like having Google Maps for assembly!
- Work in reverse: Instead of thinking about how it came apart, focus on how it goes back together.
As you begin reattaching parts, take a moment to clean any dust or debris that may have accumulated in the fan. It’s like giving your machine a little spa day! Make sure to align those clips and tabs precisely—they’re the puzzle pieces that bring everything back together. If you hit a snag, don’t hesitate to double-check your assembly order or watch a quick tutorial online. Patience is key here; like baking a cake, rushing the process can lead to a messy outcome.
| Part | Status Check |
|---|---|
| Base | Secure |
| Fan Blade | Cleaned |
| Cover | Intact |

Insights and Conclusions
And there you have it! You’re now fully equipped with all the steps you need to dismantle your Vornado EH1 00115 like a pro. Who knew that taking apart a heater could feel like a little mini adventure? Just remember, whether you’re looking to clean it up, fix a pesky issue, or simply give it a little TLC, each step has its purpose and importance.
Once you’ve put your Vornado back together, not only will it run better, but you’ll also have that satisfying feeling of having tackled a DIY project. Plus, you can proudly say you’ve taken a deep dive into the inner workings of your heater! If you have any questions or run into hiccups along the way, don’t hesitate to reach out or drop a comment. We’re all in this together, and sharing tips can turn a simple task into a bonding experience. Happy disassembling, and here’s to warmer, cozier days ahead!