Wave Goodbye: Easy Steps to Delete Your YouTube Playlist!

So, you’ve decided it’s time to declutter your​ YouTube ‍playlists? Maybe those old jams just aren’t hitting the same, or​ perhaps your watchlist has turned into a⁤ bit of a‌ digital hoarder’s paradise. Whatever the reason, deleting a ⁢YouTube‍ playlist doesn’t have to be a ‌headache. In fact, it can ⁢be as simple⁣ as waving goodbye to an old friend—no hard feelings! Let’s⁣ dive into some easy steps to help you clear out the digital cobwebs and create⁣ a playlist that‍ truly sparks joy. Ready‍ to swipe left‍ on those outdated tunes? ⁣Let’s get started!
Decoding Your YouTube Library for‌ a Fresh Start

Decoding Your YouTube Library for a Fresh Start

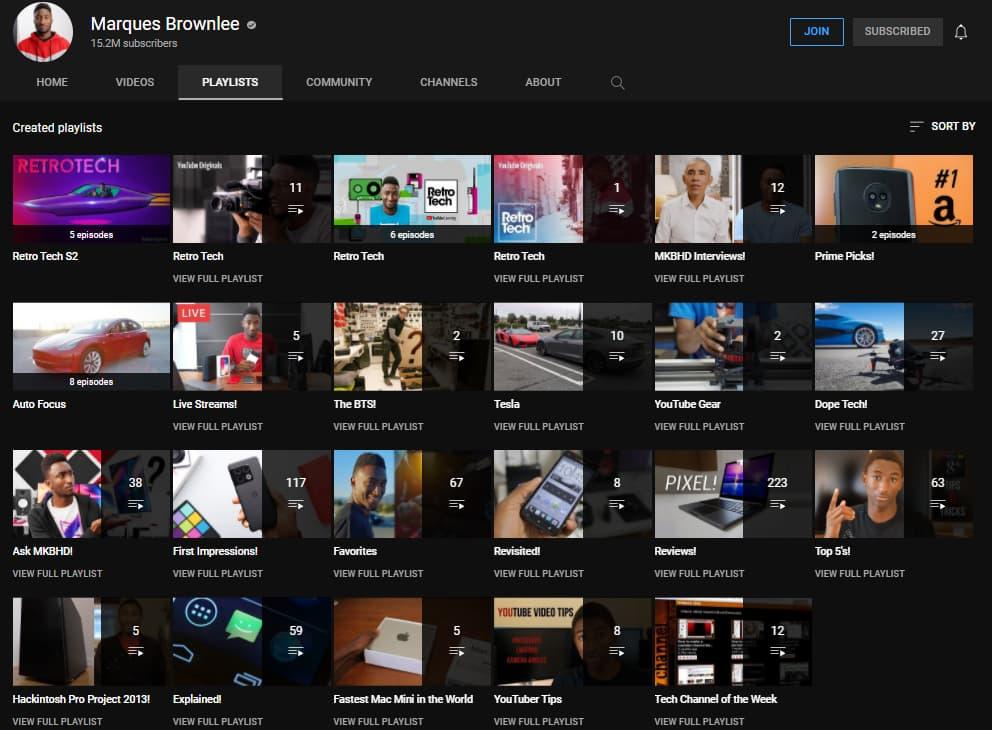
​⁣ Ready to give your YouTube library a little TLC? Think of your playlists as the bookshelf of ​your⁢ digital life. Over time, those initial must-watch collections might ⁢collect dust, and let’s be real—some⁤ songs just don’t hit the same anymore. So, how ​do you declutter that cluttered ‍library and make ⁣way⁣ for⁣ fresh content? Start by reviewing ‌your playlists. Ask yourself:
‍ ⁤

  • Which videos still resonate with you?
  • Are there any that you’ve outgrown?
  • Do you really want ⁤to keep that viral cat video from five years ago?

‍ ⁣ Once you’ve identified the guilty culprits, it’s time to take‌ action! Simply go into your⁣ library, click the playlist you want to remove, and hit that delete button like it’s ​a noisy⁤ alarm clock you just‍ can’t stand. It really is that easy! If​ you’re feeling fancy, ‍you might ​even create a new playlist⁣ that reflects‌ your current vibe—something fresh and new, like planting a garden after winter. Switching things up can be just ⁣what you need to reignite ‌your passion for discovering new content.

Letting Go: Tips for Deciding Which Playlists to Delete

Letting Go: Tips for Deciding Which Playlists to Delete

Deciding which​ playlists to part with can⁤ feel like sorting through a treasure chest; some gems shine, while others may have lost their ⁢luster over time. Start by evaluating your playlist purpose. ​Ask yourself: “Does this collection‌ still resonate with‍ me?” If it’s gathering virtual dust ‌with songs ⁤that aren’t hitting home anymore, consider letting it go. A‌ playlist‌ that once matched your vibe might now⁤ feel like an ‍awkward⁢ pair of shoes – great in theory, but not really your style anymore. When ‍in doubt, think ⁤about how often you listen⁤ to it. If it hasn’t made your soundtrack in months, it might be time to say goodbye.

Another effective way to trim the fat is​ to ⁤ review your song choices. ⁣You can run through your playlist and weigh ‍how ⁣each track makes you feel. Jot down a few thoughts ​about each⁢ one: Does it spark joy? Does it remind you of a fun time, or is it just background noise? If any tunes incite‌ a “meh” feeling, they probably don’t deserve a spot in your curated collection. Consider creating a decision table to ‍visualize what stays and what goes. Here’s a simple layout to help you out:

Track Title Vibe​ Check Keep or⁣ Toss
Song A ❤️ Love it! Keep
Song B 😐 Just okay Toss
Song C 🎉 Party anthem! Keep
Song D 🧐 Who‌ even is this? Toss

Step-by-Step Guide to Erasing Your Playlists with Ease

Step-by-Step Guide to Erasing ‍Your Playlists with Ease

Ready to wipe the slate⁤ clean ‍and declutter your YouTube experience? Deleting‌ a playlist is as easy as pie!⁤ Just‌ follow these simple steps to​ send that unwanted playlist packing:

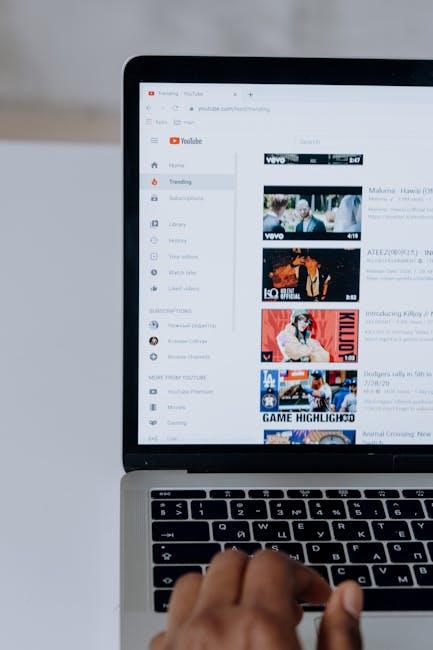
  • Log into your YouTube account: Open your ‍favorite browser and head over to YouTube. ⁣Make sure you’re signed in.
  • Navigate to Your ⁣Library: ⁣Look for the Library icon on ​the left sidebar. Click it to reveal all your playlists.
  • Select ​the Playlist: ‍ Find the playlist you want to delete and click on its title to open it.
  • Access Playlist Settings: Hit​ the three dots ‍(⋮) right next to the playlist ‍title ‌to⁤ unveil more ⁣options.
  • Delete the Playlist: Click on “Delete playlist” ​and confirm your choice. Boom! It’s gone.

But, wait a minute!⁣ Are you sure you want to part⁣ ways with that ‍collection of bangers? Once you hit that delete button, there’s no going back. If ​you’re feeling unsure, you can always take a moment to rethink your decision. And hey, if your playlist ⁤holds too many good‍ memories, ‍why not⁣ just keep ⁢it around for‍ a bit longer? It’s ‌like reminiscing over an old photo album – sometimes the best treasures lie in what ⁣we choose to remember!

Celebrating Your Clean Slate: Making the Most of Your YouTube Experience

Celebrating Your​ Clean Slate: Making the Most of Your YouTube Experience

Embracing that fresh start on YouTube can feel like‌ unboxing a ​shiny new ‍gadget. Think about it! Each playlist is like a collection of memories we created with‌ the click of a button. Yet, sometimes​ we have to part ‍ways with old favorites to make ⁣room for new passions. When you delete a‌ playlist, it’s not just a digital ⁤cleanup; ​it’s an emotional declutter, allowing space for what truly resonates with‌ you now. It’s like clearing out your closet to only showcase ‍those ⁤outfits⁣ that make you feel fabulous.​ So, grab a comfy⁢ chair and let’s dive⁢ into this process a little deeper.

As you navigate through your YouTube settings, consider how‍ refreshing it is ⁤to ‍streamline your viewing experience. Here are a ‌few steps to keep ​in mind ⁢while you’re on this journey:

  • Evaluate Your Favorites: Take a moment to scroll through your playlists and ⁢decide which ones still inspire you.
  • Make a Backup: If there are any sentimental‌ tracks, don’t forget to save them elsewhere first.
  • Hit Delete: Once you’re ready, the delete button is just a click away—like shedding old skin!
  • Celebrate Your‌ Progress: Each playlist you delete is a step toward your ideal‌ YouTube space!

Once you’ve⁢ pressed that delete​ button, ⁤revel in‍ the satisfaction of your clean ​slate. It’s more ⁣than⁤ just a digital clean-up; it’s ⁤an opportunity to explore new‍ trends, discover fresh content, and align your playlists with who‍ you are today. Remember, your YouTube journey​ is yours alone, ⁢so curate it‌ in a way that sparks joy and reflection. As you⁤ hit ‘Play’ on those new ⁤interests, think of it as​ turning the page on a new chapter—one filled with excitement ⁣and endless possibility!

In Conclusion

And there you have it! With ​just a few simple ​steps, you’re all set to wave goodbye to those playlists that no longer tickle your fancy. It’s like spring cleaning for your YouTube account—out with the old, in with the‌ fresh ⁤and ⁤fabulous! Remember, it’s totally okay to curate your collection and ‌keep only the gems that resonate‌ with you. So go ahead, dive into ⁢that YouTube library, and make⁣ it your own. If you have any questions or need a helping hand, don’t hesitate to ask! Happy editing, and may your future playlists be nothing short ⁢of amazing! 🌟

Easy Steps to Delete YouTube Playlists on Your School Chromebook

Got a playlist on your school Chromebook that’s not doing it for you ​anymore? Whether you’re⁢ flooding your workspace⁣ with a‌ mix of old tunes or clunky instructional videos, sometimes it’s time for a clean ⁤slate. Maybe you ‌just ⁣want to declutter your YouTube, or perhaps you’re crafting ⁢a new playlist⁢ for that upcoming project. Whatever your reason, deleting those pesky playlists doesn’t have to be a⁤ head-scratcher. Let’s dive‌ into some super simple ‍steps to wipe away those unwanted⁤ playlists like ​a pro, so you‌ can focus on more‍ important‌ things, like acing that‍ next ‌assignment or⁤ finding the perfect study jam!

Mastering the Basics of YouTube Playlists⁤ on Your Chromebook

Want to get​ rid ⁤of some‍ YouTube playlists on your‌ school⁢ Chromebook? It’s as simple as ‍pie! First, fire up your Chrome browser and‍ navigate to YouTube. ⁣Once there,​ head over⁤ to the ⁤”Library” section located‌ on the left ⁣sidebar.⁤ Here, you’ll find all your playlists neatly organized,⁣ just like‍ a‍ well-stocked ‌bookshelf. Now, just click on the playlist ⁢you ​wish to ​delete. When it opens up, ⁣look for the three ​dots (more options) icon, often tucked ⁣away in the‍ upper-right⁣ corner. Give it a little ⁣click, and you’ll see ⁤an option that says ​“Delete playlist.” ‌Don’t worry, this is like‌ cleaning out⁣ your‌ closet—sometimes you just need to⁣ make room for new favorites!

If you’re still feeling ‍a little⁢ lost,⁢ think of it this way:⁤ deleting​ a playlist is like saying goodbye to‍ a ​book you ⁤no longer want on your ⁢shelf. Just confirm ⁢when YouTube‌ asks⁣ if you’re sure about‌ deleting⁢ it. It’s important to remember that this action can’t⁤ be undone. Once it’s gone, it’s gone! If⁤ you ⁣ever change‌ your ‍mind, you’ll have to start from scratch to recreate‍ it. But ‌hey, ‌it’s a fresh start, and who knows what ‍amazing content you might discover next!

Mastering the Basics of ⁣YouTube Playlists on Your Chromebook

Jumping into your‌ YouTube interface ‍on your school Chromebook might feel ⁣a bit​ like trying to​ find your ‍favorite ‌flavor ​in a giant ice cream shop. But don’t sweat ⁤it! ‌Once you ‍get the hang of it, you’ll be navigating it ‌like a⁤ seasoned pro. To kick ‍things off, ‍open⁢ up⁤ your YouTube app or ⁤website. Right ​there, you’ll see a sidebar with handy​ links. Look for the “Library” section—this is your⁢ personal hub where all your playlists reside. ⁢If ⁤you’ve ​got a couple of playlists that ⁣no longer tickle ‍your fancy, don’t ⁢worry. It’s as simple as pie ‍to ⁣delete them ⁣and clear up some virtual space!

Finding your playlists​ is ‍a piece of⁤ cake. Just head over to the “Library” ‌ section and scroll down​ to “Playlists”. You’ll see all the playlists‍ you’ve ⁣created. Click on the one you want to delete, and you’ll find ​the⁤ 3 dots (also​ known as the “more” option) next to the playlist title. ⁢Click⁢ that, and voilà! You’ll see ⁤the ⁤ “Delete” option ⁢appear.‌ Give it‍ a click,‍ and just ⁢like that, it’s gone!⁢ It’s almost ​like giving your closet a good⁤ spring cleaning—you’re just making room for ​new content that ⁣truly inspires you. Pretty smooth, right?

Navigating⁢ the YouTube Interface ‍Like a Pro

Step-by-Step Deletion: ⁢Clearing Out‍ Your Playlists‍ Effortlessly

Clearing out your YouTube playlists on a school Chromebook can feel like a daunting‌ task,⁢ but ⁢it doesn’t have to be! ​First off,‌ navigate to the YouTube ‍homepage ‌and log in to your account if you’re not already ​in.​ Next, head⁣ over to the Library section located on the left-hand menu. There, you’ll‍ find all ​your playlists⁢ gathered⁢ in one neat spot, ⁣making it ⁤super easy to identify which ones you want to turf. ⁤Take ‍a moment to ⁢browse through ⁣your​ playlists. Are there any‌ old favorites or cringe-worthy collections⁤ you could⁢ do‍ without? Let’s put those sentimental feelings aside for a moment!

Now, to delete a playlist, simply click ⁣on the playlist you wish⁤ to⁢ remove. Once you’re ​in, look⁤ for the three ‌vertical dots ​(the More⁢ options menu) next ​to⁤ the playlist title.⁣ Give it a ⁤click, and you’ll see the option ‌to Delete⁣ Playlist. A ‌confirmation ⁢message ⁤will pop up, just to make sure you really want to do it—because there’s ⁢no​ going back once you hit that button! If⁢ you’re dealing with ​multiple playlists, it might help to jot ⁣down ​a little checklist. Here’s a ⁣quick ‌reference to​ keep⁢ track:

Playlist Name Action
Favorites Keep
Old School Jams Delete
Workout Beats Keep

Once​ you’ve crossed off the ones you want to get rid of, ‍you can focus on curating a playlist that really reflects your ⁢vibe. How satisfying is ⁤it to declutter? By using these simple steps, you’ll lighten your digital load in⁢ no time!

Step-by-Step Deletion: Clearing Out Your Playlists Effortlessly

Troubleshooting Common Hiccups During Deletion

Encountering issues while trying ‌to delete a YouTube playlist can⁤ be ‍frustrating, especially when you’re cruising along smoothly and then hit ⁢a speed bump.⁢ If ⁤you⁣ find that your ⁣playlist refuses to budge, it might just be ​a hiccup in your internet connection. Being⁣ on a school Chromebook means that network restrictions might also ⁤be ⁣at play. Check your‍ Wi-Fi connection ⁣and try ‌refreshing the page.‌ Alternatively, give ⁢those ‍browser extensions⁣ a once-over—sometimes, they ⁢can ‌cause unexpected detours ‌in ⁣your process. If those don’t do the trick, clearing your browser’s cache⁣ could help⁢ eliminate ​any stale data that’s ‌causing the playlist to ⁣stick​ around longer than intended.

Another common ⁢hurdle⁢ is a simple oversight in permissions. Ensure you’re signed into the right⁤ Google account — the ⁣one that created the playlist in ​the first place. ⁣If you’ve managed​ multiple⁣ accounts, it’s‌ easy to ‌get mixed up. Make⁣ sure to double-check! ​If everything seems ⁢on point but the playlist ‌is​ still embedded in​ your life like an annoying pop-up ad, a ‍reboot of your Chromebook⁣ might just be the refresh you need.⁣ Give it ⁣a restart and return to​ the YouTube app; you might be surprised at ⁣how⁢ often a fresh ‍start paves‌ the way‌ for smooth ⁢sailing. Remember, ⁤tech isn’t perfect; ‍sometimes it ‍just‌ needs‍ a little nudge to ⁢cooperate!
Troubleshooting⁣ Common Hiccups During Deletion

In Retrospect

So there you have it! Deleting ​those ​YouTube‍ playlists on your‌ school ⁤Chromebook is a breeze when you break it down into⁢ simple steps. Think of ‍it like cleaning out your digital closet; sometimes, you ‌just need to⁢ make room for the‌ new stuff! Whether⁢ you’re‍ clearing ​out old favorites or ‍just decluttering your⁢ watchlist, these easy steps ensure you ‍can ‍quickly and efficiently manage your playlists.

Remember, technology is meant to make our lives‍ easier, not‌ more complicated. So take​ charge of your⁢ YouTube ⁢space, keep it fresh, and enjoy your viewing experience ⁢without⁤ the⁣ clutter. If you have⁣ any‍ lingering questions or run​ into hiccups along the‍ way, feel free⁢ to reach ⁢out! Happy streaming, ‌and may‍ your playlists always​ bring⁢ you joy!