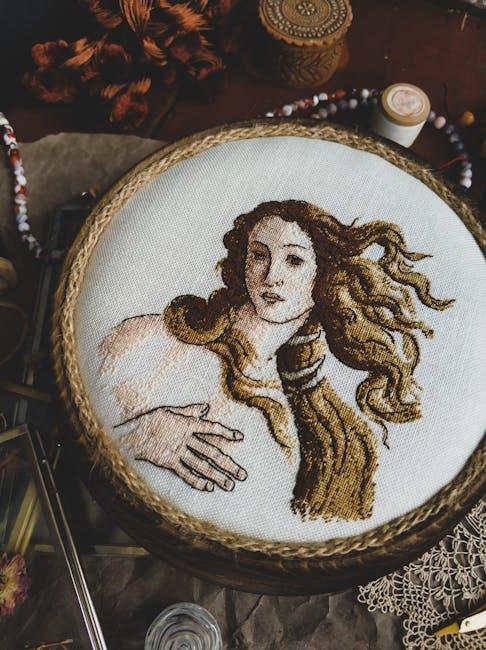
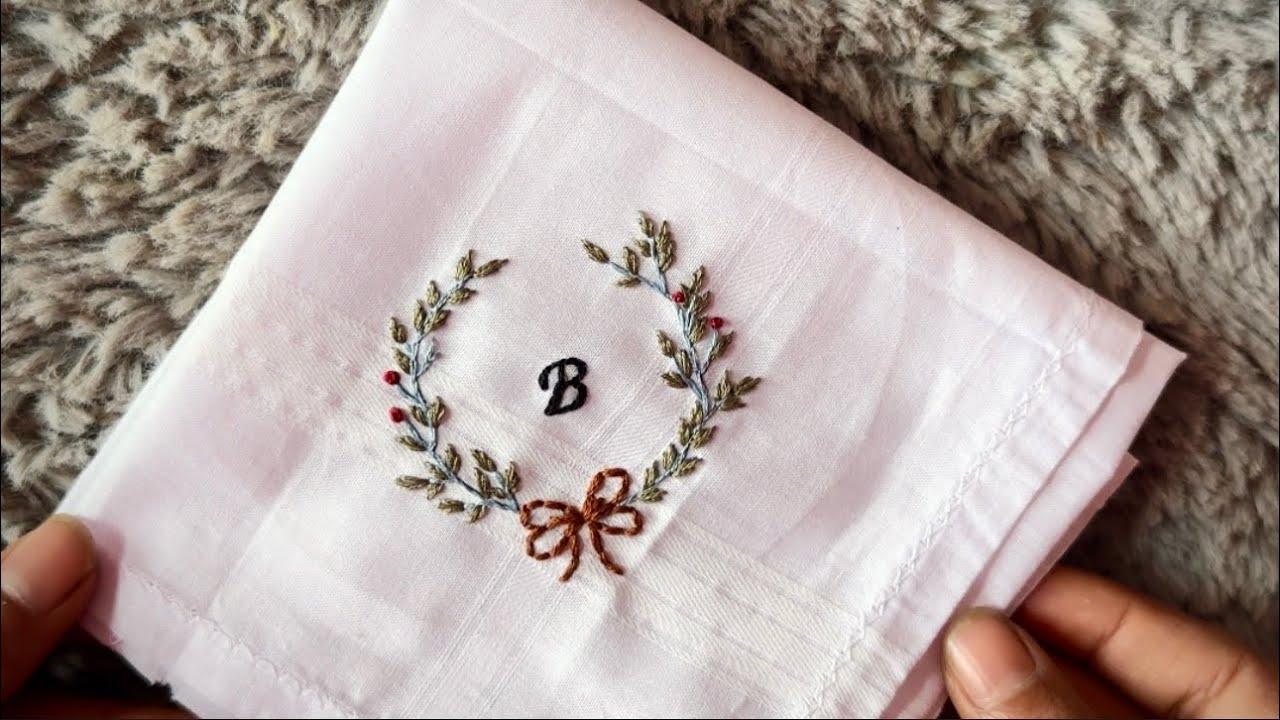
Finger Crochet Magic: Crafting a Cozy Baby Blanket!

Picture this: you’re snuggled ⁤up with a cup of​ tea, your favorite playlist humming softly in⁢ the background, and you’ve just spotted a cozy‌ little corner of your home that’s begging for⁢ something special. That’s where⁤ finger ​crochet comes in—it’s like knitting, ⁤but without ⁢all the fuss⁢ of needles. Imagine turning those basic movements of⁤ your fingers into a soft, squishy ⁣baby blanket that’s not only ‌adorable‍ but also a labor⁣ of love. Whether you’re a seasoned crafter or a curious newbie, ⁢finger‌ crochet is⁣ all about simplicity, creativity, ‍and a generous splash⁣ of warmth. Ready to dive into this⁤ cozy⁤ adventure? Let’s‍ get those fingers working ‍and‍ create some magic!
Choosing the Perfect Yarn‌ for Your Baby‍ Blanket Making‍ It Beginner-Friendly: Simple Stitches‍ and Techniques ​Adding Personal Touches: Customizing Your Cozy Creation​ Care‌ Tips⁤ for ​Keeping⁣ Your Blanket Soft‍ and Snuggly

Choosing the Perfect Yarn ​for Your Baby Blanket​ Making ⁣It Beginner-Friendly: Simple Stitches and ‌Techniques ⁣Adding Personal Touches: Customizing Your Cozy Creation ‍Care ​Tips⁤ for ‌Keeping Your Blanket Soft and Snuggly

Choosing the ⁣right yarn for your baby blanket ⁤is like picking the ⁣perfect material for ⁤a warm hug—soft, safe, and oh-so-cozy. Look​ for yarn that’s baby-friendly, which means it’s‌ gentle against⁣ delicate skin. Cotton ​ and acrylic blends ‍are fantastic options⁢ since they’re lightweight and breathable. Consider a ​yarn‍ with a bit of stretch; ⁤it ‍makes those blanket⁢ stitches⁢ flow‌ like butter. Here’s​ a simple⁢ checklist‍ to ⁤keep ​in mind:

  • Softness: Go​ for plush textures⁤ that feel good against tiny‍ fingers.
  • Washability: Baby blankets ⁤get messy; pick yarn that’s ​machine washable.
  • Durability: ​ Look for yarn that can withstand wear and tear⁢ without losing its charm.

Once you’ve got your yarn sorted, it’s time to dive into the fun part:⁣ making it uniquely⁣ yours! Stick⁣ to simple stitches like the single crochet or‌ half double crochet. These stitches create beautiful patterns ​without⁢ scaring⁣ off newbies. Want to jazz it up? Try adding stripes or ‍ color block techniques ​to⁣ personalize your blanket. And‍ don’t forget‍ to ​sprinkle in some cute embellishments, like little appliques. Here’s⁣ a fun table to inspire your creativity:

Embellishment ‍Ideas Effect
Animal Shapes Whimsical ​touch ⁢for ​a playful vibe.
Initials or ‌Names Adds a ⁢personal‍ connection.
Hearts and‍ Stars Universal⁢ symbols of love and ⁢dreams.

Now, the ⁢last step is crucial—keeping that blanket ⁢soft and‍ snuggly.​ To‌ maintain ‌its‌ plushness, wash it with gentle ⁣detergents and‍ avoid fabric‍ softeners.‍ Don’t forget to follow care instructions specific to⁣ your yarn ‌type. Air drying‍ usually keeps the fibers⁤ intact; if you⁣ must use​ a dryer, select⁤ a low heat‌ setting⁣ to preserve ​softness. With ‌these tips and a sprinkle ‍of love, your baby blanket will not ​only be a cozy ⁤creation but also a cherished piece for years to come!

Key ​Takeaways

As you wrap up your​ finger crochet journey into creating that delightful baby blanket, take⁣ a moment to revel in the soft textures and vibrant colors you’ve ⁣brought​ to life with just your hands. It’s ⁢amazing, isn’t​ it? No hooks, no fancy tools—just‌ you and your imagination knitting together something truly special for that little one. Remember,‍ every stitch is a hug waiting to⁢ be gifted, and⁤ every loop is a ⁣testament to‍ your creativity and ​love.

So, whether⁤ you’re using this cozy ⁤blanket for ⁤snuggling, as​ a backdrop for countless baby photos, or as a cherished heirloom, know⁣ it’s more than just fabric; it’s a piece of ⁤warmth that carries your heart in every stitch.‍ Don’t forget ​to ‍share your masterpiece! Your⁤ creativity might just ‍inspire someone else to dive into the world of finger crochet magic. Happy ‍crafting, and may your projects always ⁤be⁤ as cozy‍ and joyful‌ as ‌the little ones ⁤they’re made for!

Mastering Finger Crochet: Crafting a Cozy Baby Blanket!

Are you ready to dive into a world of​ cozy ‍creativity? If⁤ you’ve ever daydreamed about ​wrapping a little one in a soft, snuggly ⁤blanket made with ⁢your ⁣own two hands, ‌then finger crochet just might be your ⁤new favorite hobby! Imagine sitting on a ​comfy couch, yarn‌ in your lap, transforming simple⁢ strands into‌ a beautiful baby ⁤blanket—no hooks needed! It’s⁢ as easy as pie and just ⁣as satisfying.⁣ In ⁢this article,⁣ we’re going to unravel ⁢the delightful art‌ of finger crochet, guiding ‌you ⁤step-by-step to craft a blanket​ that’s not only warm‌ and inviting ⁢but also ⁢bursting⁣ with your personal touch. So, grab‍ that‌ soft⁣ yarn, roll up your sleeves, and let’s get those fingers moving!⁤ Who knows? By the end of this journey, you might not only master finger crochet ⁣but also create something truly special‍ for the little ones‍ in your life. Ready?‌ Let’s get crafting!

Discover the Magic of Finger Crochet⁤ and⁣ Why It’s Perfect for Beginners

Discover the‌ Magic of Finger Crochet and Why It’s Perfect for Beginners

Ever wished ‍you could dive ​into the world ⁣of crafting but thought it would be too complicated? Well, finger crochet is here to wave ‌that⁣ fear goodbye!‍ It’s like regular crochet, but⁢ way more ⁤relaxed and approachable. Instead of ​a hook, ⁢you’ll be using your fingers to​ weave‌ yarn into beautiful creations. ⁣Imagine the freedom of knitting with ‌your own hands! It’s easy to ⁤pick up⁤ and can ⁣be done ‌just about anywhere. Whether you’re‌ lounging on the sofa or sitting in a ​café, all you need is some yarn. ⁢Plus, ‌it’s ⁤a fantastic ⁤way⁢ to⁣ bond ⁤with friends‌ and family as you turn simple loops into something⁣ cozy.

Now, let’s chat about the ⁢benefits that make finger crochet​ the ultimate go-to for beginners. For starters, you don’t need any fancy tools—just your hands and a skein of yarn. It’s like cooking ⁤a delicious meal with ⁣just a ⁢few ingredients! Also, finger crochet ⁣projects typically progress quickly.⁤ You’ll⁢ be ‍amazed ‌at ⁢how ‌swiftly you can whip up a cozy baby blanket. Here⁢ are a few⁣ reasons why​ you should grab some yarn and get started:

  • No complicated techniques: Just loop, pull,​ and keep going.
  • Instant gratification: ⁣ See results ‍fast and‍ get ⁢hooked on crafting!
  • Perfect for⁢ all ages: Kids⁤ and adults alike can‌ join ⁣in on ⁤the fun.

So,​ why not give it a shot? It’s not just a craft;⁢ it’s a creative outlet‍ that could lead ⁢to⁢ some cozy moments.‍ Grab your yarn and ‍let ⁢those ​creative juices flow!

Choosing the Right Yarn: A Guide to‍ Softness and ⁤Durability for Baby ‍Blankets

Choosing the​ Right Yarn: A Guide to Softness and ⁣Durability for Baby Blankets

When ‌it comes to crafting⁢ a snug and ‍lovable baby blanket, selecting the right yarn‍ is⁤ essential. ‌You want a yarn that feels like a gentle ⁤hug​ against ⁢a baby’s delicate⁣ skin, so⁤ always keep an eye out for softness.⁣ Natural ​fibers‌ like ⁣cotton and​ bamboo are⁤ fantastic ‍choices, as⁢ they’re not just soft, ‍but also ⁢breathable—great ⁤for preventing overheating during those ‍cozy naps.⁢ Plus, consider blends ⁣that incorporate acrylic which can ​enhance durability, giving ​you the best of⁤ both ​worlds. Here are some fantastic ‍yarn options that balance softness and⁤ sturdiness:

  • 100% Cotton – ‍Ideal‌ for a breathable, ⁢hypoallergenic ‌option.
  • Bamboo Blends – Softer than cotton with a‌ silky feel.
  • Acrylic Yarn – Durable⁢ and‍ machine washable; perfect ‍for busy parents.
  • Chenille – Offers plush softness, making it⁢ irresistibly snuggly.

Of course,⁢ we ⁣also have ⁢to touch on​ durability. Remember, baby blankets ⁤will see ⁣their fair share of spills, ⁢snuggles, and maybe⁢ a teething chew or ‍two! That’s why selecting a yarn that withstands⁢ the test‍ of time ⁤is paramount. To help you out, take a look at⁤ the table below, comparing some of the best-suited yarns for baby blankets ‍sorted by softness⁤ and durability:

Yarn Type Softness ⁣Rating (1-10) Durability Rating​ (1-10)
100% Cotton 9 7
Bamboo⁢ Blend 10 8
Acrylic‍ Yarn 7 9
Chenille 10 6

Essential ⁢Techniques for Creating⁣ a Cozy and Stylish Baby Blanket

Essential Techniques​ for ​Creating a Cozy and Stylish Baby Blanket

Creating a ⁤baby blanket that oozes both comfort⁤ and⁢ style involves⁤ a few essential techniques‌ that even beginners can‍ master. To‍ kick things off, you want to choose ⁤the right yarn—think fluffy, soft materials like⁤ acrylic or ⁣cotton blends that feel‌ tender against a baby’s skin.‍ Next, hopping‍ into the⁤ world​ of finger crochet means you can easily whip up a cute blanket​ without being tangled​ up in pesky hooks.‍ Don’t‌ forget about ⁣the foundation chain; ​it sets ​the tone for how ⁣your blanket drapes and ⁤looks overall. Plus, don’t hesitate‍ to explore a variety of ​stitches! These can add texture that ‍not only draws the eye but heightens that cozy vibe, making your blanket a snuggly‍ sanctuary for your little one.

When it comes to design, color palettes play a critical role. Opt for soothing, harmonious colors that complement⁣ any nursery theme—soft pastels, muted tones, or ⁤even bold contrasts can elevate‌ your blanket ⁢from simple to standout. Want to take your project a​ notch higher? ‌Consider ⁣integrating a fun pattern or texture,​ like a chevron or ⁢bobble stitch, which adds a whimsical‍ touch. Keep ​in⁣ mind​ the dimensions; typically, a ⁢good⁤ size for a baby‌ blanket should be around 30 x 40 ⁣inches, providing enough coverage without overwhelming‌ the crib.⁢ Below ‍is a quick ⁤reference table for some handy size ideas:

Blanket Type Dimensions⁢ (inches)
Receiving Blanket 30 x 30
Stroller Blanket 30 x​ 36
Crib Blanket 30 x 40

Personal Touches: Adding ⁤Customization and Love to Your Craft

Personal Touches: Adding ‍Customization‍ and Love to Your Craft

When it comes to crafting ⁣a cozy⁤ baby⁤ blanket,⁤ a splash of personalization⁤ can transform your project ‌from ⁤just another piece of fabric into a cherished keepsake. Consider ⁤adding elements like embroidered initials or⁤ a ​special message woven‍ into the corner. This little touch not only ‍ramps up the emotional value but ‌also showcases your dedication. You might even think‍ about ⁤using a ⁢variety⁢ of yarn colors to match ‍the nursery decor or the parents’ favorite ⁤color⁣ scheme. After all,⁢ every baby deserves a blanket⁣ that feels like a warm‌ hug tailored just⁣ for ‌them!

Don’t underestimate the power of custom patterns!​ You could create unique designs ‌that ‍hold special meaning for ⁤the⁢ family,⁤ such as using motifs that reflect their interests or ⁤heritage. ‌Here’s a⁢ simple ‍visual guide to help you brainstorm:

Pattern Theme Description
Nature Love Incorporate leaves,‍ flowers, or animals.
Storybook Dreams Use characters ​from beloved children’s stories.
Family Heritage Integrate symbols or colors ​from ‌family ‌traditions.

So go ahead, let your ⁣imagination run ​wild!‌ This is your⁣ chance​ to sprinkle a little love into your​ craftsmanship, making each blanket not just a functional item but ⁣a memorable piece of artistry.

Future⁣ Outlook

And there you have it! You’ve journeyed through⁤ the whimsical world of finger ‍crochet‍ and are now well-equipped‌ to craft ‌your very own cozy baby blanket.⁢ Just imagine wrapping ‌your little ​one in all that ⁣warmth and ⁣love,⁤ knowing that‌ each stitch was created by​ your‌ own hands. It’s not just a blanket;‌ it’s a heartfelt ‍gift that will be cherished​ for ⁢years to come.

So,‍ gather your yarn,⁣ roll ⁣up those⁢ sleeves, and let your fingers do ⁣the talking! Remember, it’s ⁣all about ⁢enjoying the process, whether⁤ you’re⁣ in ​the zone, getting‌ tangled⁣ up⁤ in yarn, or brimming with yarn-tastic ideas. Don’t be afraid to experiment—after all, art ‌is‍ about breaking the rules a ⁤little, right?

Thanks for tagging ⁢along on ⁢this‍ finger crochet adventure! We⁤ can’t ⁣wait to see the beautiful creations you whip up. If⁢ you have ⁢any questions or ‌just want to share your⁤ crochet triumphs, please drop a‌ comment below. Happy crafting, and may your hooks—and ⁣fingers—be forever busy! 🧶✨

Master Handkerchief Embroidery on Your PE770: DIY Guide!

Are you ⁢ready to unleash ‌your⁢ inner embroidery artist? ⁢If⁣ you’ve got a PE770⁤ sitting⁤ in your crafting corner, ​then ⁤you’re in for a ‌treat! Mastering ‌handkerchief embroidery ‌takes your sewing game to​ a whole new level,​ turning ⁢simple fabric⁤ squares ​into beautiful, personalized treasures. Imagine gifting someone a handkerchief that’s not just functional,‌ but a work of art that carries a⁣ piece⁣ of‌ your creativity. Whether you’re a ​newbie or an⁣ experienced stitcher looking to ‌refine your skills, ​this⁣ DIY ⁣guide will ⁤walk you through the ins and outs of handkerchief⁤ embroidery‌ on your PE770. Let’s dive in and stitch together some magic!

Discovering⁣ the ‍Magic⁢ of Handkerchief Embroidery Techniques

Embarking on the journey of handkerchief embroidery ⁣with your​ PE770 is ​like diving into a treasure chest of⁤ creativity. Each stitch becomes​ a brushstroke, turning a‍ simple ⁣piece of ‌cloth into ⁢a canvas of​ personal ​expression. Take a⁤ moment ‌to appreciate ⁢the elegance of this craft:⁤ whether it’s a delicate floral motif ​or​ a whimsical design, the results can be simply stunning. Here ‌are some ⁣techniques that can elevate your embroidery game:

  • Free ‍Motion Embroidery: Control the fabric under your needle as you draw with thread.
  • Appliqué: Add texture and ⁤dimension​ by ⁤layering fabrics ⁣and stitching‍ around⁤ the edges.
  • Monogramming: Personalize your handkerchiefs with initials for that extra flair.

Now, when you tackle⁢ these ⁤techniques, it’s ⁣essential to keep‍ a⁢ few⁣ tips in⁣ your back pocket. For instance, don’t ⁢forget the power of stabilizers; they⁣ can prevent puckering and ensure clean, crisp designs. And remember, experimenting ‍is key! Try different threads‍ and fabrics, as they can drastically change the ⁣outcome of your embroidery. To guide​ you further, here’s ⁢a ‌quick comparison table of ⁤popular threads:

Thread ⁣Type Best Used For Notes
Rayon Vibrant​ designs Shiny ⁣finish,⁢ great for details
Polyester Durability Resistant to fading, perfect for everyday use
Cotton Softness Great ⁢for‌ vintage looks, eco-friendly ⁣option

Discovering the Magic of Handkerchief Embroidery‌ Techniques

Choosing ​the ⁢Right⁤ Fabrics and Threads for Stunning Results

When⁣ it comes‍ to handkerchief⁤ embroidery, picking‌ the‍ right ‍fabrics and threads can make all the difference. Think of ⁢your ‌fabric ⁢as the canvas for a breathtaking painting; ​it sets the scene for your artwork. ‌For handkerchiefs, lightweight cotton or linen ⁤is a​ stellar choice. These natural fibers breathe⁣ well⁢ and give your embroidery a⁤ polished ⁤look. You might also consider blends⁤ if ‍you want a bit of ⁢sheen or ‍durability without compromising on softness. Don’t forget to ‍test your fabric ⁣before ⁣jumping ‌in; ​a small ‌embroidery sample​ can save you from heartache later‍ on!

Now, let’s talk threads.​ Whether you’re using embroidery floss, rayon, ⁣or polyester, each brings something unique ⁢to ⁣the table.⁤ Floss offers ‍a classic, textured finish, while rayon gives⁣ you that eye-catching luster.​ Polyester? It’s like the workhorse of ⁤threads; strong⁤ and colorfast. Before you begin, here’s a quick rundown on matching⁢ threads to fabrics:

Fabric Type Best Thread Type Color Recommendations
Cotton Embroidery ‍Floss Pastels ‍or Brights
Linen Rayon Muted Tones
Blends Polyester Metallics for Accent

So⁢ go ahead, mix and match! ‍When you‌ choose wisely, ⁢each stitch will⁤ shine like a star. ‍Remember,⁤ it’s not just about what looks good; it’s about what feels ⁤right under‍ your ‌hands. Happy ‌stitching!

Choosing the Right Fabrics and Threads‌ for Stunning ‌Results

Essential Tools and Settings for Perfectly⁤ Crafted Designs

To elevate your handkerchief embroidery game on ⁤the PE770, ​start with high-quality threads. Opt for polyester or‌ rayon threads that give your designs a vibrant pop without snagging. Don’t forget to adjust your ‍ needle size based ‍on​ the type of fabric you’re working with; a larger needle‌ might work wonders‌ on thicker blends, while​ a⁤ smaller one is perfect for delicate fabrics. Having the ‍right ⁢ stabilizer ‍ is ⁢also ⁣crucial—it’ll be your secret ⁣weapon against ‍fabric distortion. ⁣Look for options⁤ like‌ cut-away ⁢stabilizers ⁤for dense designs or⁢ tear-away ⁣ones for lighter projects. With ⁤these essentials‍ in ⁤your toolkit, your​ creativity ‌can ‍really shine!

Now, ⁤let’s ‍dive into the ⁢settings that will make a world of difference. Begin by carefully selecting your design density—this ​is key to ⁣ensuring‌ intricate⁢ designs stitch smoothly without making your fabric feel like⁣ a ‍brick. Adjust your stitch length for optimal results; a‌ general rule of thumb is to keep it around 2.5 to ⁤3mm for ⁢most handkerchief projects. Don’t be afraid ⁢to ⁤experiment​ with thread tension ‍to ⁢see what gives ‌you​ the best ​finish,‌ as this can affect how stitched designs ⁤pop against the ⁤fabric.⁤ Here’s a handy table summarizing the‌ essential tools ⁢and ​their recommended settings:

Tool/Setting Recommendation
Thread Type Polyester or Rayon
Needle Size Varies by fabric (usually 75/11 for lightweight)
Stabilizer Cut-away or Tear-away
Design Density Optimize for⁤ fabric type
Stitch⁢ Length 2.5 to⁤ 3mm
Thread‌ Tension Adjust⁣ as⁤ needed

Essential​ Tools and⁣ Settings for Perfectly Crafted Designs

Tips and Tricks ‍to Elevate‍ Your Handkerchief Embroidery⁣ Game

To really step up your handkerchief embroidery game, start ⁢by ⁤selecting the⁣ right fabric. You⁤ want a material ⁢that not‍ only⁢ feels good but also works well with your ​embroidery ⁤machine. Think about ‍ cotton​ or linen—soft yet ⁤sturdy. ⁤They allow the thread ‌to pop and⁣ showcase ⁣your‍ designs beautifully.⁣ Always pre-wash your fabric to avoid shrinkage later ‌on; it’s like giving your handkerchief ‍a​ little spa day before you start stitching. Also,⁣ don’t forget to invest⁢ in high-quality threads. They‍ can make a⁤ world ‌of ⁣difference ⁢in the finish of your⁢ project. Stick⁣ with brands like DMC or Madeira for colors ‌that sing and textures ⁢that ‍impress!

Incorporate some⁤ fun elements to ⁢keep‌ your creativity flowing. Experiment with different⁣ stitch⁣ techniques. For​ example, try blending satin stitches with backstitch for depth and dimension. If you’re feeling⁢ a bit daring, mix colors‌ in a gradient pattern ​to create a stunning visual⁣ effect. Hooping your fabric ⁤ correctly is crucial—make sure ‍it’s taut ⁢but not ⁣stretched; imagine a ‌drum, ⁢firm and ⁣ready to play! Lastly, don’t shy away from using templates or designs you find online. Personalize them with initials ‌or⁢ special‍ dates⁤ to give‌ your handkerchief that unique touch. Consider keeping a mini design journal with sketches⁤ and ​notes on what ⁤works ​or⁣ doesn’t; it’s ‌like having‌ a treasure map for your future⁢ projects!

Tips and ⁤Tricks to Elevate Your Handkerchief ‌Embroidery ⁣Game

Final Thoughts

And ⁢there you have‍ it! ⁣You’re‍ all set ⁢to tackle ​handkerchief ‍embroidery‌ on your ⁤PE770 like a ‍pro. Remember, every stitch you make is a step toward ‍unleashing your creativity and personal style. So, don’t be ‌shy—grab⁣ that fabric, thread‌ your needle, and let your imagination‌ run wild!

Whether you’re crafting​ thoughtful ⁢gifts⁢ for loved ones ​or jazzing up your personal collection, each embroidered piece tells⁣ a ⁣story only ⁣you can create. The best part? With practice, you’ll not only improve your​ skills but also unlock ​endless possibilities on your embroidery‍ journey.

Next time you’re ⁤feeling crafty, don’t hesitate to​ whip out that PE770 and make‍ some magic happen. Keep experimenting, keep creating, and⁤ most importantly, have fun ⁤with it!‍ Happy stitching!

Mastering Needlepoint: Your Guide to AQ Snap Frame Support

Are‍ you ready to dive ⁢into the wonderfully intricate world of needlepoint? Whether you’re ⁤a seasoned stitcher or just picking ‍up that ​needle for ‍the first time, there’s something undeniably captivating about transforming a simple thread into stunning art. But here’s the catch: to truly master ⁢the art of needlepoint, you need the ‍right tools to lift your craft​ to new heights. That’s where the AQ Snap‌ Frame Support comes in! Think of it⁢ as your trusty sidekick, ready to‍ tackle any ‌project with ease and finesse. In this guide, we’ll unravel everything you need to know about‍ this⁤ game-changing tool—from the basics of⁤ setup to tips on how to keep those stitches aligned ⁣perfectly. So ‌grab your favorite thread, settle into your cozy crafting corner, and⁢ let’s embark⁣ on⁤ this stitching adventure together!⁢ Ready? Let’s ⁣get‌ stitching!

Understanding AQ Snap Frames and Their Benefits for ‌Your Needlepoint Journey

Understanding AQ Snap Frames‍ and Their Benefits for Your Needlepoint Journey
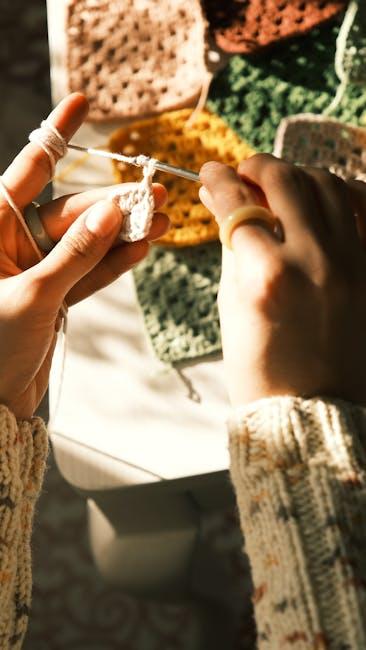
When diving into the⁣ world​ of needlepoint, the right tools can ​make all the difference, and AQ Snap Frames have truly revolutionized the ‌crafting experience. Imagine being able ‌to securely hold your fabric in place, allowing you to⁢ focus⁣ on stitching your masterpiece without the constant tugging or shifting of your ​canvas. These frames ​provide stability, ease of​ use, and⁣ the ability to adjust your work ​as you go. Not ⁣to mention, they ⁢eliminate the frustration of‌ having to constantly​ re-position your fabric, giving you more time to enjoy the art of needlepoint.

Using AQ Snap Frames can enhance your needlepoint journey in numerous ways. For starters, they are lightweight and portable, making them perfect for crafting on‍ the go. You ⁣can easily transport your projects to a ⁢park or a friend’s house without the fear of damaging your work. Additionally, these frames come in ⁢various sizes, allowing you to choose one that fits your project perfectly. Here’s a quick look ‍at some key benefits:

Benefit Description
Convenience No need for complicated ‍setups or extensive adjustments.
Flexibility Change positions quickly to reach those tricky areas.
Durability Constructed to withstand the pressures of‌ consistent⁤ use.

Ultimately, AQ Snap Frames blend practicality with creativity, ensuring that your needlepoint adventures are not just productive but also enjoyable. So why not give them a try? You might just find‍ that they become your new favorite crafting companion!

Setting Up ‍Your Needlepoint ⁣Project: Tips for⁤ Using Snap Frame Support Effectively

Setting Up Your Needlepoint Project: Tips for Using Snap Frame Support Effectively

When‍ diving into your needlepoint project, getting comfortable with your AQ Snap⁢ Frame Support can make ​all the difference. First things first, make sure your canvas is taut but not overly stretched; think of⁤ it as a drum—too loose, ⁤and you lose the rhythm, too tight, and you​ risk snapping. You can ⁣achieve this by adjusting the⁢ screws on the frame. A few gentle tweaks can create a perfect balance, allowing you ⁢to stitch seamlessly. Pro Tip: Keep a small toolbox nearby with all your essential tools—scissors, threaders, and needles. This way, you’ll have everything at your fingertips and⁢ minimize those frustrating moments of searching high and low for that one elusive needle.

Another‌ nifty trick is to use clips or⁣ clamps to secure your fabric ⁣to the frame. This ensures⁣ that your project stays in place, especially if you’re working⁤ on a larger piece. Also, maintain a ⁤rotation schedule! Like a good⁤ book, your canvas​ needs a change ​of scenery from time to time. Rotating your work allows you⁤ to keep an even ⁢tension across your stitches and gives those muscle groups responsible for stitching a little workout too. You ⁣can create a simple ⁣table to track‍ your progress and methods used throughout your project—keeping it organized will make your needlework journey all the more enjoyable!

Tip Description
Canvas Tension Adjust screws for a snug fit, like tuning a guitar!
Toolbox Essentials Gather scissors,⁤ needles, and threaders for easy access.
Use Clips Keep your⁣ fabric secure and tension⁣ balanced.
Rotating⁢ Work Switch up your canvas position for even stitching.

Mastering Techniques: Stitching and Adjusting with AQ⁣ Snap Frames

Mastering Techniques: Stitching and Adjusting with ⁢AQ Snap Frames

When it comes to needlepoint, having ⁣the right tools​ can make all the difference, and AQ Snap Frames are⁤ a game changer. Stitching with these frames elevates your craft by giving you a ⁤sturdy ⁤and reliable base. Instead of fighting with your fabric slipping or twisting, you’ll find your work stays firmly in place, ⁣letting you focus on what really matters: ⁤your creativity! Imagine having a canvas⁤ that‍ feels like it’s ⁣almost a part of you, responsive to ‌every movement of your needle. That’s the beauty of using a snap frame.​ You can keep adjusting as you go,⁤ ensuring that your artwork ⁣turns out just the⁢ way you envision it.

Adjusting your tension is ‍equally paramount, and AQ Snap Frames make this process intuitive and straightforward. Whether ⁢you’re tightening up⁤ loose fabric⁤ or ‌loosening it for a more relaxed stitch, ​you’ll be ‌able to do so without​ any hassle. Think of it like tuning a guitar; a few minor adjustments can yield⁣ a ​symphony of difference. Here’s‌ a quick guide on how to adjust your snap frame for optimal results:

Adjustment Type Recommended ⁤Action
Thread Tension Loosen ‍slightly if fabric feels too tight, or tighten if fabric⁣ is sagging.
Frame Position Reposition the frame as needed to maintain an ergonomic ⁢stitching angle.
Fabric Alignment Check for any ⁣shifts, and readjust to avoid uneven ​stitching.

With these simple techniques, you’ll be well on your way to mastering your needlepoint with ‌AQ Snap Frames. Each adjustment you make not only improves‌ your stitching experience but also​ enhances the final‌ product. And let’s be real, everyone appreciates a neatly stitched masterpiece!

Troubleshooting Common Issues to Enhance Your Needlepoint Experience

Troubleshooting Common Issues to Enhance Your ​Needlepoint ⁢Experience

Needlepoint​ can be a relaxing and rewarding hobby, but every now and then, you might run into a few hiccups that can put a damper on your⁣ creative​ flow. If you notice your canvas ⁤getting loose or‌ your ​stitches becoming uneven, it​ might be time⁤ to check your frame setup. Make sure your frame is tightened‍ properly – nothing worse than starting a session only to find you’re wrestling with your work! Additionally, dropping⁣ stitches can be a real bummer. If​ your needle ⁣isn’t gliding smoothly through the holes, try switching to a sharper‍ needle to‌ see if‌ that does the trick. Just like ‍you ⁣wouldn’t use a‌ dull knife to slice through cake, don’t rely on dull tools for your ⁤intricate‍ designs.

Another common issue to watch out for is thread tangling. Trust me, there’s nothing more frustrating than having to stop mid-design to unravel a mess! To prevent this, consider ⁤using a⁤ thread conditioner or ‍opting for a longer thread without⁤ overloading your needle. It’s like preparing your ingredients before cooking – a ⁣little⁢ prep can save you a lot of headaches‍ later on. If you find that your colors aren’t as vibrant as you’d like, check your lighting!​ The right light can make those ⁤hues pop like fireworks on the Fourth of July. And remember, keeping your workspace tidy can help set the stage for a​ seamless ‍needlepoint experience!

In‌ Summary

As we wrap up our journey into the art of needlepoint with the AQ Snap Frame,‌ I hope you’re feeling inspired ⁤and equipped to take on⁣ your ​own projects. Just like that ​final stitch that completes ⁤a beautiful piece, mastering these techniques is all about practice ⁤and passion. Whether you’re a seasoned pro or ​a curious beginner, remember: every stitch tells a story. So why not weave your own?

Embrace the quirks​ and challenges along the way—the little imperfections can add​ charm and‍ character to your work. If you‌ have questions or even a triumph to share, don’t hesitate ⁢to reach out! This community thrives on sharing and learning​ from⁣ one another.

Now, grab that needle, thread your favorite colors, and ‍let your creativity ​flow. The world of needlepoint awaits, and with the AQ Snap Frame by your side, you’re ⁢more than ready to make your mark. Happy⁢ stitching, my friends!