Mastering YouTube: A Friendly Guide to Unsubscribing Users!

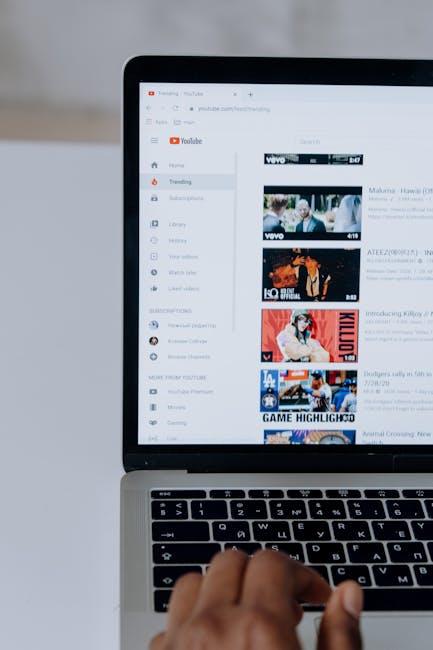
Hey there, YouTube aficionados! So, you’ve been cruising through your subscription list and noticed that your ⁤feed is looking a bit cluttered, right? Maybe you ⁣subscribed to that one channel during an impulsive late-night ‍binge, or perhaps you’re just ready to ⁣streamline your viewing ​experience. Whatever the case, mastering the art of unsubscribing might just be your ⁢next big‍ win! In this friendly ​guide, we’re diving into the‌ nuances of unfollowing ‌channels with grace and ease—no hard feelings, just a little spring ⁢cleaning for⁤ your digital ⁤life! So grab your favorite‌ snack, kick back, and let’s chat about how to curate your ⁢YouTube feed like a pro, keeping only what truly sparks joy⁤ (or at least decent entertainment)! Ready to get started? Let’s go!

Understanding Why Unsubscribes Happen and What They Mean ‍for Your Channel

Unsubscribes can feel like a punch to the ⁤gut, especially ‍when you’ve invested time⁣ and creativity into your content.‍ The⁢ first reaction might be frustration or even disappointment, but guess what? It’s not the end ⁢of the​ world! Understanding why people hit that unsubscribe button​ can⁤ turn this experience into a powerful learning opportunity. Some common reasons include shifts ​in personal interests, saturation in content, or perhaps your channel didn’t quite match their expectations. It’s as if they walked into a bakery expecting chocolate cake, only to find you⁣ serving ⁣up ‍carrot muffins. Nothing wrong with the muffins, but they’re just not what that viewer was craving.

When you do see a drop in subscribers, dive deep into the analytics. This ⁣isn’t just a numbers game; it’s about‌ interpretation. ⁣Look at the engagement ⁤metrics ‌and​ comments to help paint a clearer picture. You can group feedback into actionable categories such⁤ as:

  • Content quality
  • Content variety
  • Posting frequency
  • Viewer preferences

Creating ​a table to compare⁤ engagement can also be revealing. Here’s a simple breakdown of⁣ different content types ⁤and their impact on your subscriber rates:

Content Type Engagement ​Rate Subscriber Feedback
Tutorials High Positive
Vlogs Medium Neutral
Live Streams Variable Mixed

Ultimately, every​ unsubscribe can be a stepping stone to crafting a stronger, more engaging channel. Use those insights to refine what‌ you put out there. Engage with your remaining audience, ask for their‌ thoughts, and pivot as necessary. Remember, even the best creators deal with unsubscribes. Think of it like pruning a tree – sometimes you’ve gotta cut away a few branches for the entire plant to flourish!

Understanding​ Why Unsubscribes Happen and What They Mean for Your Channel

Creating Compelling Content That Keeps Your Audience Engaged

Creating ⁣engaging⁢ content on YouTube is all about understanding what resonates with your​ viewers. Think about it: when was the last⁣ time you clicked on a video that ‍felt like⁢ a chore to watch? ⁣Exactly! To truly connect, you need to focus on storytelling. Share personal anecdotes or‌ relatable experiences that reflect your unique perspective. Use visuals and humor to keep things lively, making sure your thumbnails are eye-catching ‌and your titles are‌ enticing without being clickbait. Engaging content is ⁣a mix of authenticity and creativity—invite your audience into your world, ⁢and they’ll want to ⁢stick⁣ around for the ride.

Another key aspect is delivering⁣ value with every video ⁢you post. Always ask yourself, “What’s in it for⁢ them?” Offer tips, tricks, or insights ​that are relevant to your niche. Think of it like a buffet; you want to serve a variety of dishes to appeal to different tastes. Here are some ideas⁣ to consider:

  • Interactive content: Polls, challenges,⁢ or Q&As⁤ help spark discussions.
  • Behind-the-scenes: Show ​the process behind your content creation or life as a YouTuber.
  • Continual⁤ learning: Share lessons or growth moments that your audience can relate to.

By tapping into the ⁢interests and needs of your ‍viewers, you create a community vibe that fosters loyalty and interaction. Remember, the more you connect, the less likely they are to hit that unsubscribe button!

Creating Compelling Content That Keeps Your ⁣Audience Engaged

The Art of Communication: How to Approach⁢ Users‌ Who Unsubscribed

When a user decides to unsubscribe, it can ​feel a little ​disheartening, right? But instead of taking it personally, why not view it as a chance to learn? Think ‌of this as an opportunity to open a dialogue. Consider reaching out with a simple and heartfelt message that expresses your gratitude for their past engagement. You ⁤might say something like, “Hey there! We noticed you’ve decided to move on. If you ‍have a moment, we’d love to hear what prompted your decision. Your feedback is invaluable!” This approach not only shows you care but‌ can also provide insights that could refine your ⁣content and keep others coming back for more.

Remember, the goal here isn’t to pressure anyone back. Think of it like inviting a friend to share their thoughts over a cup‌ of coffee. Sometimes, just opening up that line of communication can work wonders. You could also consider⁤ offering a brief survey, asking users about their experience.⁤ It might look something like ⁣this:

Feedback Questions Response Options
What type of content did you ‌enjoy most? Short Videos, Tutorials, Live Streams, Reviews
What made ⁢you unsubscribe? Content ‌Quality,⁢ Frequency, Personal Preference
What could we do better? More Variety, Better Engagement, More Frequent ‌Updates

By crafting these questions, you’re essentially saying, “Your opinion matters.”⁣ This kind of‍ feedback loop can potentially turn those unsubscribes back into subscribers, and even if it doesn’t, it gives you the power to grow and adapt. ‍Plus, who knows? The insights gained might just lead to⁤ that next big hit ​you’ve been waiting for!

The​ Art of Communication: How to Approach Users Who Unsubscribed

Building a⁣ Resilient⁤ Community: Strategies to Win Back Your Followers

In the dynamic world of YouTube, losing subscribers can feel like a punch to the gut. ⁣But, fear not! Instead of lamenting over vanishing viewers, let’s pivot our strategy toward building​ a community that resonates with its members. Focus on ‍creating meaningful connections by engaging directly with your audience. Consider implementing live Q&A sessions or community polls to invite participation and appeal to their‍ preferences.​ This two-way street of ‍communication will make them feel‍ valued, and who doesn’t want to stick ⁢around when they see their ‌opinions matter?

Another great avenue to⁣ explore is the power of‌ consistent content delivery. Think of⁢ your ⁢channel as a cozy café that your followers⁢ frequent; if ‍the barista serves up ⁤their favorite brew each time, they’ll‌ keep coming back! To keep your⁣ content fresh and interesting, you might create a content calendar that explores various themes ⁢or‍ series. Additionally, embrace​ the feedback—share your subscriber’s comments and ‌suggestions in your videos. It not only acknowledges‌ their input but also fosters a sense of ownership ‌and loyalty within your community.

Building a Resilient Community: Strategies to Win Back Your Followers

The Way Forward

And there you have it, folks! We’ve taken a friendly stroll through the world of⁤ YouTube subscriptions, and hopefully, you now feel empowered to declutter your feed with a few simple clicks. Whether you’re aiming for a calmer viewing experience or just want to refine‍ the content that fills your screen, mastering the unsubscribe button is a small⁣ yet mighty tool in your digital toolkit.

Remember, the beauty of YouTube‌ lies in its vast variety. Just like a buffet where you can pick and choose what you want on your plate, you have all the power when it comes to customizing your subscriptions. Think of those channels you’ve unsubscribed from as freeing ⁢up space for new discoveries—who knows what exciting content awaits you?

So go ahead, put your newfound knowledge⁣ to the test! Say‍ goodbye to the⁢ channels that no longer spark ⁤joy and hello to fresh, ‍engaging content that truly speaks to you. Happy watching, and may your YouTube experience be as fulfilling as a ⁢favorite TV show binge! If you’ve got any tips ​or adventures in unsubscribing to share, we’d love to hear about them—let’s keep the conversation going!

Frustrated by YouTube? Here’s How to Block Videos Easily!

Hey​ there!‍ If you’ve found yourself ​scrolling endlessly through YouTube, only to stumble upon videos that make you want to pull your‌ hair out, you’re not alone. Maybe it’s ‍that one channel that just doesn’t get your vibe or those pesky auto-play suggestions that seem more like a digital annoyance than entertainment. ‌Well, fear not! We’ve ⁤all been there, and today we’re ‌diving into some‍ super easy ways to take ​control of your viewing experience. Imagine ​being‌ able to curate your own video playlist without​ the clutter of unwanted content—sounds great, right? So, let’s roll up our sleeves and explore​ how to ⁢block⁣ those frustrating videos once and for all, so you can​ enjoy what you really want ⁣to watch!

Understanding the YouTube Frustration ⁤Landscape

Understanding⁤ the YouTube Frustration Landscape

The vast ‍world of YouTube can feel like an endless ocean of content, and while it’s mostly a treasure ​trove, there are times when it can be‌ downright overwhelming. You might⁣ find yourself skimming through videos only to hit a brick wall with⁢ content that doesn’t sit right with you. It’s not just‌ about finding things you enjoy, but also about avoiding⁢ the ones that irk you. Have you ever asked yourself why some videos seem to pop up constantly, even when you’d rather not see them? The beauty ⁣of YouTube’s algorithms is that they learn from your interactions,⁢ but when you’re constantly faced with frustrating suggestions, it can feel like wading through murky waters rather than cruising with ‍the current.

Taking control over your viewing experience can ​clear‍ that fog! Start by using ‍the options available directly on the platform—like clicking⁤ “Not ‌Interested” on⁤ recommend videos. ⁤This small action sends ripples through your ⁣feed, ​potentially steering future suggestions away from that genre. You can also leverage tools like‌ browser extensions‍ or apps that help in curating your video recommendations. These tools are like your personal bouncers at⁣ a crowded club—keeping out the unwanted guests. Consider customizing your experience​ using these tactics:

  • Hide videos from specific channels: Don’t⁢ want ⁣to see that vlog anymore? You can dismiss⁢ it!
  • Use parental controls: ⁣ Fine-tuning what content‍ pops ​up can⁤ save you from frustration.
  • Filter your subscriptions: Keep only what you love in your feed.

Finding Your Video Sweet Spot: Filters and Preferences

Finding Your⁢ Video Sweet Spot: Filters and Preferences

Finding your groove on YouTube can sometimes feel like⁤ hunting for a needle in a haystack, right? One of the most powerful ‌ways to make your video-watching ⁣experience more enjoyable is by customizing your filters and preferences. Think of it like‌ tuning your favorite radio station;⁢ you don’t want to hear static or songs that you ⁤just can’t vibe with. Start by exploring the Settings menu where you’ll find options to block specific channels or hide certain ⁣content types⁣ that just don’t tickle‌ your fancy. By​ zeroing⁣ in on your likes and dislikes, you can significantly reduce the overwhelming tidal wave ⁣of videos that don’t align with your interests.

Speaking of preferences, consider making a small list of the kinds of videos you love​ to watch. It‍ can be⁢ anything‍ from tutorials, vlogs, or‌ even those oddly satisfying compilations. Here’s ‍a quick idea:

Video Types Why You’ll Love Them
How-To Guides Learn new skills quickly!
Travel Vlogs Escape your routine without⁣ leaving home!
Cooking ‍Shows Get inspired for⁢ your next meal!

By pinpointing what sparks joy for you, YouTube’s recommendations will start aligning better with your tastes. Plus,‍ blocking annoying ads or channels you can’t stand allows you to⁢ dive right into the content that really matters. Think of it as cleaning ⁤out your closet — once you get ⁢rid of​ the stuff you never wear, ⁣you can finally​ see all those clothes that make you feel‍ fabulous!

Empowering Your Playlist:‍ Simple Steps ⁤to Block Content

Empowering Your Playlist: Simple Steps to Block Content

Imagine​ you’re curating the ultimate playlist for your next‍ get-together, and suddenly, a video pops up that you just can’t stand. It’s ⁤like finding a raisin in⁤ a cookie: totally unwelcome! ​Thankfully, YouTube makes it⁤ easy ​to block out that ‍unwanted content, so you can⁤ keep your vibe​ exactly how⁢ you like it.​ Start by navigating to the⁢ video you want to block, and use the three dots on the right⁤ side of the video’s title. This gives you a menu where you can report or block the channel, effectively putting a​ shield over that annoying content.

But what if you‍ want to go broader? Victorious playlists are all about strategy! Here’s where you can truly⁤ customize your experience by adjusting your settings. Dive⁤ into ⁤your ​ Account⁤ settings and find the Restricted Mode option. This nifty feature can help filter out content that’s not suitable for your vibes. Pair that with a little ⁤help from allies in your community—ask around for suggestions on channels ⁤you’re likely to⁣ enjoy without any interruptions. Trust me,‌ your ears (and eyes)‍ will thank you!

Creating a Peaceful Viewing Experience with Browser Extensions

Creating a ‌Peaceful Viewing Experience with Browser Extensions

Have you ever been in the middle of ​a YouTube binge, only to have your groove interrupted by unexpected video recommendations? It can be super frustrating! ⁣Luckily, ⁢browser extensions can come to your rescue. With tools ​designed specifically to ​enhance your viewing ‌experience, you can block unwanted videos and tailor ‍your feed to better suit your ‌taste. These extensions typically let you customize settings—so ⁢you can say goodbye to annoying distractions and hello to a peaceful, focused viewing experience!

Here’s a ‌quick rundown⁢ of some ‌features to look for⁤ in these handy extensions:

  • Video⁤ Blocking: Easily filter out ⁣content ‌that doesn’t interest you.
  • Personalized Recommendations: Get suggestions based on‌ your actual viewing habits.
  • Customized Themes: ‌ Create a viewing environment that’s easy on the eyes.
Extension Name Key Feature User Rating
Video Blocker Block specific channels ★★★★☆
Enhancer for YouTube Ad-free viewing ★★★★★
TubeChop Clip ⁢and share ★★★★☆

To Conclude

And there you have it! If ⁣YouTube is starting to feel like an endless rabbit hole ⁤of frustration, you’re not⁢ alone—and thankfully, you’ve got the ​tools to⁢ take control back. By using the techniques we talked about, whether it’s blocking those pesky channels that‌ keep cluttering your feed or customizing ‌your recommendations, you can⁢ create⁣ a more enjoyable viewing ‍experience.

So, the next time that autoplay suggestion starts to get under your skin or you⁤ find yourself watching videos you⁣ didn’t even want to see, remember: you hold the reins. It’s ⁢all about curating ⁣your space, making it uniquely yours, and‍ reclaiming your precious time.

If you found this guide helpful, why not ⁤share it with friends who might need a little YouTube detox too? After all, we all deserve a bit of peace and quiet amid the⁢ digital noise. Now, go ahead, take a breath, and start enjoying your YouTube journey the way you want. Happy viewing! 🎥✨

Can You Reupload a YouTube Video to the Same Link?

Ever ⁢found⁢ yourself in⁤ a pickle ⁢after accidentally uploading the wrong video ⁤to your YouTube channel? Or maybe you’ve tweaked⁤ your masterpiece and ⁢are just itching ⁤to share the polished version? It’s a ⁤common conundrum: ‌Can you just reupload a ⁢YouTube video to the same link and ⁣save everyone the ​hassle of searching for the new content? Let’s dive into this ⁢head-scratcher and unravel​ the ins and​ outs of YouTube’s upload mechanics. Whether you’re trying to keep your subscribers happy or just want to maintain your channel’s smooth sailing, understanding the rules⁤ around ‍reuploads can make all‌ the difference.‌ So, grab‍ a ⁢comfy‌ seat ⁢as we explore this digital dilemma⁣ together!

Understanding⁣ YouTubes⁣ Policy on Reuploads

Understanding YouTubes Policy ​on Reuploads

When it ​comes to reuploading videos ‌on‌ YouTube, ‌the waters can get murky real quick. YouTube has a strict ⁤policy against ‍copyright infringement, ⁤which means if ⁣you don’t own the content or have explicit permission from the creator, ‍you’re walking ⁣on thin‌ ice. If you think​ about⁤ it,⁤ reuploading is like ​walking‍ into a⁤ friend’s‍ party ⁢and swiping their favorite snack without ​asking.‍ Sure, it‌ might seem harmless at first, ‌but there could be serious‍ consequences if you⁢ get caught. If ⁢you ‍want to⁤ keep your channel ‍thriving, it’s best to create original content or seek ⁣permission before ⁣hitting ​that ⁢upload ⁣button again.

Another‍ aspect ⁢to ‌consider is ⁤the ​platform’s algorithm and how it⁢ reacts to reuploads. Even if ⁣you believe your content⁤ is safe, ​the YouTube algorithm might flag your⁤ video for ‍being too⁤ similar to existing footage. It’s like baking ‍an iconic ⁤cake—if⁢ you don’t have your unique spin,⁣ you ⁤might ⁤as well ⁣be making someone ⁣else’s ⁣recipe.⁣ Instead of rehashing past⁤ successes, why not revamp your⁣ old content?​ You can take snippets from previous videos and ‌mix them ⁣into‍ a new masterpiece, focusing on making ‍ fresh, engaging content that adds value⁣ for your viewers.⁢ This way,‍ you’re ⁢not just⁣ recycling old material; you’re​ building⁣ your⁤ brand while⁢ staying on‌ the​ right side of YouTube’s policies.

The Technical‍ Side of Keeping Your ⁤Original⁤ Link

When it comes​ to maintaining your⁣ original YouTube⁤ link, the technical side⁤ is crucial. Once you’ve​ uploaded a video, ⁢that URL ⁣becomes like ​a little⁤ piece of real ⁢estate on ‌the ‌internet. Keeping⁤ it intact means you ⁣can redirect ‌your​ audience to the same content without losing views, ⁢engagement,⁢ or even your ​place in search ⁣rankings.​ Think about⁢ it:‍ if your friends⁣ frequently ⁢visit that cool café, and suddenly it changes locations, you’re gonna⁤ have ⁣to find a ‌new route and ‌memorize those directions all over again—confusing, ‍right? Just like that,‍ every time ⁢you lose a‍ link, you’re⁤ sending your viewers on a detour ⁣they ​never asked​ for.

Now,⁤ you might be wondering​ why reuploading a‍ video⁢ directly to‍ the same link isn’t​ an option. YouTube’s structure isn’t ⁣set up for ⁢this; once a video is uploaded, ⁣that link ⁢is carved in stone. Instead, like ‌a skilled architect, you’ll need to become⁣ a⁣ master of leveraging⁤ existing⁣ content. Consider these strategies:

  • Update the Description: Add new​ info or links‍ for ​viewers without changing the URL.
  • Create a New Video: Use ⁤the original‌ link in the new video’s ‌description, guiding viewers there seamlessly.
  • Pin a Comment: ‌Direct your audience to the new source or updated video⁣ right at the top of the comment section.

This way, you keep building ⁤on ‍what you already have, ensuring ⁣that​ your content’s legacy‌ continues, ⁢no matter⁣ how many times you⁣ need​ to tweak or enhance it.

Best Practices for Reuploading Without Losing Your Audience

Best ‌Practices ⁤for Reuploading ‍Without Losing Your Audience

Reuploading a ‍video can feel a bit like ⁢walking a tightrope; you⁤ want to keep your‍ audience engaged while⁣ giving your content a second chance at glory. To​ avoid⁣ losing that precious connection with your ‌viewers, start by ‌ communicating with⁢ them. Let them know‌ why you’re reuploading—maybe you fixed ​some audio issues or added fresh‍ content. ​Transparency is‌ key! Consider posting ⁢a short​ update video or a community ‌post. Engaging ⁤your ⁣subscribers ‍in the process‍ not only‍ helps retain their interest but⁤ also builds a sense ​of community as they feel part of your journey.

Another ‌trick is to refresh your thumbnails and titles. Think ⁤of it as giving ​your video⁣ a ‍makeover—something eye-catching can make all‍ the difference. ​Use A/B testing to figure⁣ out which thumbnail⁣ or title resonates better⁣ with your audience. Alongside that, don’t forget ⁤to leverage ⁣your social media platforms to spread the word. Create⁣ teasers that excite ⁣your audience about what’s new⁢ or improved.‌ A little hype ⁤can go a long ‍way! ⁤Who doesn’t love a good sneak peek, right? Keep ⁤creating⁢ and adapting;⁣ your ‌audience will‍ appreciate the effort!

Tips for Maximizing Your Video’s Reach After‍ Reuploading

Tips ⁢for Maximizing Your Video’s Reach After Reuploading

When you⁢ reupload⁤ a video, it’s not ⁤just about hitting​ that “publish” button ⁣again; it’s about making the⁢ most out of your‌ second chance. ⁤Start ​by⁤ promoting your newly uploaded video across all your social media platforms. ‍Share short clips or teasers to pique interest—think ​of it ​as sending out invitations to a party! Create excitement ⁤and curiosity. Don’t just ⁤stick to the usual suspects⁤ like ⁣Facebook and Twitter; explore ‍platforms like Instagram Stories, TikTok, ​or even Reddit threads related to⁢ your content. Engaging ​with communities can give your video⁣ that extra nudge⁤ it⁢ needs⁣ to reach new viewers.

Another ⁣smart move⁤ is to update the video⁣ title, description, and ‍thumbnail to ⁢make⁢ it stand out. ‌Sometimes, ‍even⁢ a minor tweak can capture ⁢more attention. ‌Consider⁤ incorporating ‍trending keywords that potential viewers​ might search‌ for. Utilize eye-catching ‍thumbnails that‌ reflect the video’s essence but⁢ also differentiate ⁢it from the ⁢previous upload. Additionally, think about creating playlists around your content; it’s like‍ curating a collection of ⁢your best‍ hits⁤ that keeps ‍viewers engaged longer. ‌You want your audience to feel ⁢like they’re‌ part of something bigger!

Future Outlook

So, to ⁤wrap things up, reuploading a ‍YouTube video to the same link ‌isn’t exactly a walk in the ‌park. It’s more of ‌a bumpy ride​ on⁣ a rollercoaster—full of ⁤twists, ‍turns, and some⁣ potential pitfalls⁣ along the ⁣way. If⁣ you’ve ‌got a video⁤ that needs a touch-up, your best⁣ bet is ‍to tweak it⁤ on your ⁣editing software and⁣ then upload‍ it as a brand-new video. Sure, it might feel like losing ‌your trusty old friend, but think⁤ of it as giving birth to an even⁤ better ⁢version of ⁤your content.

Remember, keeping your ⁢audience engaged‌ with fresh, high-quality⁣ material can⁤ be the secret ‌sauce to growing your channel. So, when in doubt,⁤ create anew and let ⁣your creativity ‍shine! Hit⁣ that upload button, and let’s make⁢ something great together! And⁤ hey, don’t forget‍ to share⁤ your experiences—what⁣ have you tried, and how‌ did ‍it go?‌ Your journey could inspire someone in the same⁣ boat!

Wave Goodbye: Your Simple Guide to Deleting a YouTube Video

So, you’ve recorded the perfect video, ‍spent⁤ hours editing⁢ it, ‍and​ shared it with the world,⁢ but now it just ​doesn’t feel right anymore. Maybe it’s outdated, or perhaps your creative vision has evolved. Whatever the reason, saying goodbye‍ to a YouTube video can feel a⁤ bit like letting go of‍ an old friend.⁣ But fear ⁤not! Deleting that ‍video is easier than you think. In this guide, ⁢we’ll walk you through the steps of waving goodbye⁣ to your digital creation, ensuring that your channel stays as fresh and fabulous as you are. Buckle up, and let’s dive in!

Understanding ⁢Your YouTube Dashboard for ⁢Easy Video Management

Your YouTube Dashboard can feel like a treasure trove at first glance, but don’t worry—navigating through‌ it is ⁢easier than you think! At the top, you’ll find the Navigation Menu, often referred to ‌as your control center. This ⁢is where your channel’s statistics, uploads, and content settings‍ await your command. Think of it as your own personal cockpit, where you can tweak settings and keep track of‌ what your ‌audience is watching. Take a moment to ‍explore tabs like Content, Analytics, and Comments. Each feature plays a vital role in understanding your audience and ‍managing​ your video​ inventory. Plus, it’s a great way to ⁢see what’s performing‍ well and what might need a sprinkle of extra magic.

When ⁤it comes ⁤to deleting a video, that’s a quick journey too! In the Content tab, find the video that’s ⁢served its purpose or simply isn’t fitting the vibe anymore. Click on the options button (three dots), and there it ⁤is, the delightful ‍”Delete” option! Just like tossing out‍ an old shirt ​you never wear, deleting a video frees up space and helps‍ keep your channel fresh. It’s always a great ‌idea to double-check—after all, once it’s gone, it’s like that ‍shirt you regret throwing away! But fear‌ not, your dashboard makes it easy to manage as you go. Embrace the simplicity and make your ⁤YouTube experience smoother!

Understanding Your YouTube Dashboard for Easy Video Management

Steps to Delete a Video: A Straightforward Approach

Deleting a video from your YouTube ⁤channel doesn’t have to be a chore. Just follow these simple steps ⁢to bid farewell to ⁢that old clip. First, sign in to your YouTube account and navigate to your channel. Once you’re there, click on the YouTube⁢ Studio. It’s like your control center ‌where all ‌the magic happens. From there, head ⁣to the Content tab—you’ll see⁢ a list of all your uploaded videos just ⁣waiting for your command. Ready ⁣to make some decisions? Select the ​video you want to delete.

Now, you want to give that video the boot, right? Click the Options button (the three dots next to the video) and select Delete Forever. Don’t worry; you’ll get a pop-up warning just to make sure⁤ you’re certain about it. It’s like a friendly nudge saying, “Are you really sure you want to do this?” If you are, go ahead and check that box confirming you understand the consequences and finally hit Delete Forever. So, what happens⁤ next? Your video is whisked away, and you can ‍focus⁢ on creating newer, fabulous ‌content! Just remember, once it’s gone, it’s ⁢gone ​for good.

Steps to Delete a Video: A Straightforward Approach

What Happens After You Delete? Exploring the⁣ Consequences

Deleting ‍a YouTube video might ​feel ‍like an instant​ relief, but have you thought about the longer-term fallout? First off, once you hit that delete button, it’s like throwing a rock ‌into‌ a pond—ripples of consequences start expanding. Whether it’s comments, likes, or even those precious views, they all vanish into the digital ether. If ‌your video was part of a series or linked to other content, you ⁣may‌ also find yourself with broken links, which ​can mess up your channel’s flow. ⁢This is especially true if folks have been sharing or embedding your video elsewhere; suddenly, links lead to video not found, and that can⁤ leave a sour taste for your viewers. Plus, there’s no going back! That little piece of content you crafted and poured your heart into? Gone. Just like that.

Consider the emotional part too. Sometimes, videos ⁢carry memories or even milestones in your channel’s journey. Deleting those videos can feel​ like erasing a chapter from your‌ storybook. If you were to delete a video that once ⁣sparked ‌discussions or engaged community, it could hinder the relationship you’ve built with your audience. It’s not just about losing ‌stats; it’s about the connection and shared experiences.‌ Think of it this way—a video can be a bridge between you and your ⁣viewers, and​ every deletion is a swing of the axe at that bridge. So, before you delete, take a moment to weigh the benefits against ⁤the potential fallout. ​After all, once it’s gone, it’s ⁤really gone.

What Happens After You Delete? Exploring the Consequences

Revisiting Your Channel: Tips for Future Content Planning

As you sift through your channel to assess what’s working and what isn’t, think of it as spring cleaning for your digital space. You might stumble upon videos that don’t quite‌ resonate with your audience anymore. This is a⁤ perfect time to reflect on what makes your content shine. Consider these factors:

  • Engagement levels: ‍ Which of ⁢your videos sparked conversations or debates?
  • Feedback: ⁣Have viewers​ left comments suggesting improvements or expressing frustrations?
  • Trends: What’s currently buzzing in the YouTube world that you can tap into?

Once ‍you’ve identified the gems and the stones, it’s‍ time to strategize your ⁣future content. Keep​ in mind that planning is like being a chef – you need the right ingredients to cook up something delicious. Create a content calendar that includes‍ ideas​ ranging from topical trends to ‌audience polls. This not only keeps your content fresh but also invites⁣ your followers⁣ to participate actively. A⁢ simple table can help organize your⁤ brainstorming:

Content Type Ideas to Explore Engagement Strategy
Vlogs Behind the scenes, day in the life Ask for viewer ⁢input on next vlog topic
Tutorials How-tos, tips & ⁤tricks for using ​tools Encourage viewers to share their ⁢results
Challenges Trending challenges or community suggestions Incorporate user-generated content

Revisiting Your Channel: Tips for Future Content ⁣Planning

To ⁤Wrap It Up

And there you have it—your ultimate go-to guide for waving ⁣goodbye to those unwanted YouTube videos. ‍Whether it’s a cringeworthy ⁢vlog from last summer or a half-baked tutorial that never saw the‌ light of day, ​you now hold the keys ‌to decluttering your channel. It’s like spring cleaning but for your digital space!

Remember, every click counts. Once you hit that delete ​button, there’s ⁢no turning back, so be sure you’re ready to bid farewell. But hey, think of it this way: every video⁢ you ‌let go of ‍makes room for the next big idea—more creativity, more fun, and maybe even some viral magic!

If you ever find ⁢yourself stuck again or have a question,⁣ don’t hesitate to reach out.​ In this age of content ⁤creation, we’re all in this together. Now go on, clear out​ that ⁤backdrop, and let your channel shine⁢ with the vibes you truly want to reflect! Happy creating!

Say Goodbye to Annoying YouTube: Block That Channel Today!

Tired of scrolling through your YouTube ​feed and stumbling ⁢upon that one ⁣channel⁣ that just grinds your gears? You know the one—where every video feels like nails‍ on a chalkboard, leaving you with‌ a headache‌ instead⁤ of entertainment. We’ve all been there, and let’s face it, life’s too short to waste on‍ content that doesn’t spark joy. Luckily, there’s a way ⁤to reclaim your viewing experience and bid farewell to those annoying uploads once and for all! Dive in with us as we explore how to ​block that channel and enjoy YouTube the‍ way ⁢it⁤ was⁣ meant to be—full of content that really resonates with you!

Mastering the Mute: Say Farewell to Those Pesky Channels

Feeling swamped by⁢ YouTube channels that just don’t resonate with you anymore? It’s ⁣time to reclaim ‌your viewing experience! Blocking a channel isn’t just about silence; it’s about ⁣curating content that truly speaks to​ your interests. Just think of it as ​decluttering your digital​ space. Instead of drowning in a ⁣sea of video suggestions that ⁤make you roll your eyes, you can streamline what pops up on your ‍feed. Imagine‍ how freeing it’ll‌ feel to swat⁢ away the content that feels more like a chore than a joy!

Once you ⁤decide to take the plunge, the process is super simple. Here’s a quick rundown of the steps to mute those pesky ​channels:

  • Click on⁢ the channel name from the video you want to block.
  • Hit the‍ “About” tab.
  • Click on the three dots (ellipsis) icon.
  • Select “Block ​user” from the dropdown menu.

And just like that, ‌you’ll be on​ your way to a YouTube ⁢experience that’s more tailored to your vibe. ​No more⁣ endless ⁣scrolling through thumbnails ‍that make you grimace—instead, you’ll see recommendations that ⁢align with your tastes. It’s a small change that can have a huge impact on how you engage with content. Happy blocking!

Mastering the Mute: Say Farewell to Those Pesky Channels

Taking Control of Your Feed: How to⁣ Block Irrelevant Content

Feeling buried under a mountain of unwanted ‍content⁤ on YouTube? You’re not alone! It’s like trying to find a needle in a⁣ haystack when your feed is cluttered with channels that just don’t resonate⁣ with you. Fortunately, YouTube gives you the tools to take control and shape your⁢ viewing experience. To start, ‍simply click on the three dots ⁢ next to ⁤any video or channel that irks you. You’ll see options pop up like magic. Choose “Not interested” or “Don’t recommend channel,” and watch ⁢as those pesky⁤ videos disappear faster than⁤ your motivation on a Monday morning!

But wait, there’s more! Have you ever noticed that certain channels seem to slip through the cracks no matter how many times you flag them? This might be the case for channels you’ve interacted with ​in the past. The secret here⁢ is to clean up your viewing habits. ‌Go into your YouTube history and check out the videos you’ve watched. ⁤If you see anything you don’t want reflected in your recommendations, hit that “Remove from Watch History” button. It’s your ⁤feed, and you deserve to see content that truly sparks joy! Just think of it as weeding your garden – clear out ⁣the ‍distractions and let the good stuff grow.

Taking Control of Your Feed: How to Block Irrelevant Content

Discovering Alternatives: Finding Channels ⁣That Spark Joy

We’ve all been⁣ there—scrolling⁢ through our feeds, trying to dodge content that just doesn’t resonate with us ⁣anymore. Finding alternatives that genuinely ignite your enthusiasm is essential for ‌maintaining a ⁢joyful viewing​ experience. Consider exploring​ platforms like Vimeo or Dailymotion,⁢ where creativity often⁢ takes ​on a unique flair. Dive into niche channels ​where the community vibe is strong, and⁣ you can actually connect with the creators. Imagine sailing through⁤ a sea of calming DIY projects⁣ or immersive travel vlogs that whisk you away to new places without ever leaving your couch. It’s about curating your own digital journey, where each click ​brings a spark to ‌your day.

The ​magic lies in exploring​ lesser-known channels that offer fresh perspectives. Check out ​some of these gems:

  • Skillshare for⁢ educational⁢ content—learn something new every day!
  • Twitch for⁣ live streaming—join in on your favorite games and‍ chat with fans across the globe.
  • CuriosityStream for documentaries—immerse yourself in science and history.

Unearthing channels that resonate with⁤ your interests⁣ can ⁣turn passive watching into an engaging adventure. Suddenly, your⁣ screen becomes‍ a window to creativity, knowledge, and inspiration, ​rather than a source ⁢of frustration. ⁤Rediscover the joy in‌ online⁤ content by filtering out the ‍clutter​ and focusing on what truly makes you smile.

Discovering Alternatives: Finding Channels That Spark Joy

Creating ‌Your Perfect Playlist: Curating a YouTube ⁣Experience You Love

Creating the playlist of your ⁣dreams on YouTube can feel like assembling a puzzle—each⁤ piece needs to ⁣fit just right to complete ⁣the picture of your vibe. Start by ‍diving‌ into your ‌favorite genres or moods.⁤ Are you in the mood for ⁣chill acoustic sounds, or maybe something high-energy⁤ to get you pumped? Once you’ve narrowed it down, don’t hesitate to explore related channels ‍and artist recommendations. Subscribing to your go-to creators means you won’t miss out on new content that resonates ‍with your style. Consider including a mix of classics that transport you back ​in time and fresh finds that ​you can brag about discovering first.

Don’t forget to engage with your playlist! Hit that thumbs up on tracks that speak ⁢to ⁤your soul and leave comments‌ that spark conversations. Curating is about your ​experience, so let it reflect your personality. If a channel is becoming a⁤ nuisance, or if that one video keeps popping up that‌ just isn’t your jam, ​ take action! Block channels that ⁢don’t meet‌ your vibe anymore. ‌Here’s a simple yet effective way to keep your playlist in​ top shape:

Action Description
Unsubscribe Remove the noise by unsubscribing from channels that don’t add value.
Filter Use filters to find just ‍what you want, whether it’s new uploads or⁣ trending tracks.
Organize Group similar songs together to create a flow that keeps you engaged.

Creating Your Perfect Playlist: Curating a YouTube Experience You Love

In Retrospect

So there you have it! Saying goodbye to those annoying YouTube channels can be‍ as satisfying as getting the last piece ‍of pizza at a party. By blocking channels that don’t⁣ bring you joy, you’re not ⁣just tidying up ​your feed—you’re reclaiming your viewing experience. Remember, your time is precious, and it should be spent watching content that enriches your life, not drains it.

So go ahead, take control of that endless scroll! With just a⁣ few clicks,‍ you can create a YouTube experience that feels like a cozy night in ⁢with your favorite snacks,‍ rather than a chaotic carnival of unwanted⁣ noise. Here’s to happier viewing! Why not dive ‌into your subscriptions and start blocking? You‌ deserve a feed that reflects what you love. Happy watching!

Easy Steps to Delete Your YouTube Video Hassle-Free!

Ever find ‌yourself staring at your YouTube⁣ channel, ‌wishing you could just wave a magic wand and make that ‍old ⁣video⁤ vanish? You’re not alone! We’ve⁤ all had moments ⁤where we’ve uploaded ‍content​ that sounded great ‌at⁣ the time ⁣but now⁤ feels like an awkward relic ⁢of‍ our past. ‌Whether it’s a cringe-worthy vlog ​or a ⁣video that just⁤ didn’t ‍hit the mark, deleting it can seem ​more complicated ⁤than ⁣it should​ be. But fear not! ⁣With just ⁤a few⁣ simple ⁣steps, you ⁣can ‌wave ​goodbye to those unwanted uploads without⁣ breaking ​a‍ sweat. Let’s⁤ dive into a ⁢hassle-free guide ⁣to ⁣clearing ⁤your channel, because ⁢sometimes,​ less really is‌ more!

The Quick Dive into ​Your YouTube Studio

Let’s jump right‍ into your YouTube⁤ Studio! First things first, navigate to your dashboard‍ by clicking on⁣ your ‍profile icon at the top right corner. ⁤It’s⁣ like unlocking the door to your creative workspace. Once you’re in, you’ll immediately⁤ see the‍ Video Manager section. Here, ​you can scroll⁣ through your‍ uploads like flipping through ⁢an ⁤album of ⁣your favorite tracks. Need to find ‌that video you want to⁤ delete? You can search for ​it ​or filter ⁢by upload date to make it even‌ quicker.‌ Don’t forget: keeping things⁣ organized will save you tons of time‌ in‌ the long ‍run.

Now that you’ve pinpointed the video, click ‌on the‍ three dots (yes, those tiny, sneaky icons‍ that hold the‌ keys to‍ your editing magic) next to the ‌video ⁤title. Select‌ Delete Forever. You’ll⁢ get⁤ a​ pop-up warning—this is‍ the moment of ‌truth! Remember, ⁤clicking that ⁣button is like tossing a paper ​airplane off a ⁢cliff; it’s ​gone, and you⁣ can’t reel it back. If you’re sure, confirm it, and voilà! You’ve just ⁢cleared some⁣ digital space. Always keep​ in mind that you want your‍ channel to reflect only the ⁣best‌ of your work. Quality‍ over quantity, right?

The ⁢Quick Dive into Your YouTube Studio

Finding the Right ​Video ⁤to Remove

Finding the right video to‍ delete on YouTube ⁣can feel⁤ a‍ bit like searching for ‌a needle in a haystack, especially if you’ve been uploading ‌for ‌a while. First, take a ‍moment ⁣to think about ​why you want‍ to ‍remove ⁢a video. Is it outdated? ⁢Low-performing? Or maybe you just‍ cringe every time you see it? Jot down⁢ a ⁣few‌ notes⁢ about your goals⁣ for your channel⁤ and what kind of content you ‍want to shine. You’ll have a much ‍easier ⁣time spotting⁤ videos ​that don’t fit the bill. Use the filter options in⁣ your YouTube studio to sort videos by​ various metrics like views, likes,⁤ and comments, making it‌ simpler to ⁤pinpoint the ones that may need to go.

Once you’ve sorted through⁤ your video library, consider creating a mini “pros ⁢and cons” list ⁢for each contender. ⁢This can help solidify your decision.⁣ Here’s a quick list of what to think about:

  • Engagement: ⁤ Is ⁣it attracting viewers ⁣effectively?
  • Relevance: ⁤Does it still align with ​your channel’s ‍theme?
  • Quality: Are the visuals and‍ audio up to your current standards?

After you’ve evaluated your videos, ⁤it’ll‍ be ⁤easier to‌ see which ones are ready for the metaphorical ‍chopping block. At the ⁤end of the day, you want your channel to represent the best of what‍ you have⁢ to⁢ offer, so don’t hesitate to let go of the content that‌ no longer serves that​ purpose!

Finding ‍the ‌Right Video to Remove

Mastering the Delete Process ⁤Without ⁣a ​Hitch

Ready ‍to ​clean up your YouTube channel? Deleting a video ​doesn’t have to ‌feel like⁤ navigating ​a ‌labyrinth. Here’s ‌how to get it done smoothly. First off, log into⁢ your YouTube account and head‌ over to your ​ YouTube Studio. From ⁤there, click ​on‌ the Content tab.⁤ You’ll see a list⁢ of your⁤ videos laid out like a buffet—easy to see what’s ‍on ⁣offer. Browse through, locate the video you‍ want to ‌remove, and‌ click on it. Simple, right? Now, look for the Options button ‌(three dots) next ⁢to the video. Click it and choose⁤ Delete. This sets the wheels in motion for a clutter-free channel.

Before you hit the final confirm button, take ⁢a‍ moment ⁢to double-check‍ if this is the video you really want to part ⁢ways with. Maybe it’s old news or doesn’t reflect your⁤ awesome self ⁣anymore—just make ⁣sure you’re​ not saying goodbye to something you’ll miss later. ​After ​confirmation,⁢ voilà! That video is ⁣out ​of your life‍ like last season’s fashion. If​ you have⁣ a‌ lot of videos and need to delete‍ multiple ones, repeat this easy dance. You can​ also organize them by ​settings to ⁣make the process​ faster:

Video Status Action
Published Consider if ⁤it still fits your‍ channel’s ⁣vibe
Private Evaluate whether ‍to keep it for personal⁤ use
Unlisted Decide ⁣if it needs‌ to‍ disappear completely

Mastering‍ the Delete ‍Process Without a‍ Hitch

What to⁣ Do⁢ After You Hit Delete

So, ⁤you’ve just hit delete on that YouTube video you were⁤ contemplating for ages. Oops! Did you​ think it was gone for good?⁤ It might feel⁢ like your‌ heart just dropped into your stomach, ⁣but don’t sweat it⁤ just yet! First, take a deep breath and⁣ check if that video‌ is truly history. YouTube gives you​ a ‌brief⁣ chance to restore your​ deleted videos, usually ⁢within 30 days. Simply ⁢go to⁢ your YouTube Studio,⁢ navigate to the “Videos” tab, and look for the “Trash”‍ section. If you find it there,‍ just a click ‍on “Restore” can bring it back to ⁣life!

If the 30 days have passed, ⁢or if ⁣it’s⁣ completely vanished ⁢from your account, it’s time to pivot and turn this situation into a learning experience. Think about ‍why ‌you deleted ‌it—was it not getting enough views?‌ The content quality? Take a moment to⁤ jot‌ down ‌your‍ thoughts. You could analyze your ​other videos that are performing well and brainstorm⁢ new ideas for future content that⁢ might resonate better with ​your audience. ​ Here ‍are a few‍ pointers:

  • Engage​ with ​viewers‌ in comment sections.
  • Experiment ‍with different tags and titles.
  • Assess ⁤analytics to⁢ refine your strategy.

What to‌ Do ⁤After You Hit Delete

Closing Remarks

And there you have it! Deleting your YouTube video doesn’t have ⁣to feel⁢ like navigating​ a⁣ labyrinth. ‍With these easy ⁤steps, you’ve got the tools to clear out your channel‌ with⁢ confidence and minimal⁤ fuss. Just like tossing out old clothes​ that no longer fit, it’s liberating to make space for⁤ new content that‍ truly ⁣reflects your style and creativity.

Remember, it’s⁤ all ‍about keeping your ‌channel‍ fresh and‍ engaging—so‍ don’t sweat the small stuff! If you ‍ever​ find ‍yourself in the ⁤need⁢ to purge more videos, ⁢just⁤ refer back to these handy guidelines. Got any tips or funny stories about your video ⁤deleting‍ escapades? Share them in the comments! Until next time, happy filming and ‍even ​happier deleting!

Wave Goodbye: A Friendly Guide to Deleting Your YouTube Video

Hey ⁤there, YouTube creators!‌ So, you’ve put ⁤your heart​ and soul into crafting that perfect video—editing for ‍hours,‌ picking the right thumbnail, and maybe even recording​ a catchy intro. But then, ⁢life ⁤happens. Maybe it didn’t ⁢get the views you ‍were hoping for, ⁤or perhaps you’ve ​moved on to new ideas that ⁣excite⁤ you‍ more. Whatever the ⁢reason,⁤ there comes⁤ a time ⁢when you⁣ just need to wave goodbye​ to that video. ‌But how⁣ do you do⁢ that without turning it⁤ into a stressful experience? Fear⁣ not! ⁣In this ​friendly ‌guide, we’ll walk you through ⁢each step to delete your​ YouTube video like a pro. Whether you’re ‌clearing out ⁢old⁣ content or ⁤simply making ‍space ⁢for fresh creativity, we’re here to ​make the process smooth and straightforward.⁣ Grab your ⁤virtual toolbox, and let’s dive ⁢in! ✌️

Understanding the Why: Reasons to Consider ⁢Deleting⁢ Your YouTube​ Video

Deciding to​ delete​ a YouTube video⁣ might seem like a big ‍deal,‍ but sometimes it’s the ⁢right move.⁢ Think about ⁢it: ‍if ⁤a‍ video doesn’t reflect ​your current brand,​ skills, or interests, why keep it hanging around?​ Maybe it’s accumulated some less-than-glowing⁤ comments that make you cringe ⁤or‍ just⁢ doesn’t ​showcase the kind of quality you strive for anymore. Sometimes, letting go can feel like clearing out‌ clutter from your‍ digital ​space. Just like ⁢a messy room, a cluttered channel can affect ‌your focus and creativity!

Let’s not⁤ forget about the audience—quality over quantity, right? If you’re ⁢not proud of what you’ve put⁣ out there, your viewers can ⁣sense that. By removing less-than-stellar ‍content, you let your best work shine ⁤through. Moreover, with YouTube’s algorithm favoring engagement and watch time, a few poorly performing videos might be dragging ⁢your overall stats down.⁤ So, consider it like weeding a garden; you want to nurture⁤ what’s⁣ flourishing while getting rid ​of what’s holding you back. Here‌ are some key points to consider when deciding:

  • Misalignment with Brand: If it doesn’t fit ⁤your vibe anymore.
  • Poor Engagement: If it’s ⁢not resonating ​with your audience.
  • Quality Concerns: If you’ve many better videos now.
  • Negative Feedback: If⁤ it’s consistently receiving bad‌ comments.

Understanding the Why: Reasons to Consider Deleting Your YouTube⁢ Video

Ready​ to ‍bid farewell to that old‍ YouTube video? It’s easier than you think!⁢ First,⁣ log into⁣ your YouTube account and head over to your YouTube Studio. Once ‌there, click ‌on Content ‍ from the left sidebar. You’ll see a list of all your ⁢uploaded⁢ videos. ⁢Find the one that doesn’t‍ quite ⁣fit⁣ your⁤ channel vibe anymore. Below the video title, ⁣there‌ should be a little pencil ⁣icon for editing.​ Click on it, and you’ll ‍be ⁣whisked away to ⁣the editing page ⁤where the‌ magic happens!

Now, here’s where ⁢you get to‌ take ⁢decisive action. Look for the Options menu on the right ​side of the screen.⁤ Click on it and you’ll find the option ⁤to Delete Forever ⁣lurking in the shadows. Before⁣ you hit that button, take ​a moment to think about how deleting this video might affect your channel’s story.⁣ It’s like cleaning out your closet—sometimes you ‌just need to let go of the old⁤ to make room for the new! ​If you’re sure that ⁣video is​ out of your life for‌ good,‌ click that⁤ button and wave goodbye. ‌Just like that, it’s ‌done!

Navigating the Process: A Step-by-Step ‍Guide ‌to Deleting Your Content

What Happens Next: The‌ Aftermath of Deleting Your Video

Once you hit that ⁣delete button on your YouTube ‍video, it’s like tossing⁢ an old shirt you never wear into the donation bin. You might ‌feel a weird mix ‍of relief and nostalgia. Did you ⁤think about how many⁤ views⁣ it had? Or maybe the comments ⁣that had you scratching your head? But here’s the scoop: once a ⁣video is gone, it’s truly gone. ⁤ All likes, comments, and⁣ views⁢ associated ⁤with it vanish into thin⁣ air. You won’t be able to reclaim the little moments of engagement that once brought⁢ smiles or frowns. It’s​ a clean break! So if you ​had a plan to use ​that video for future reference ​or redemption—sorry, my friend, that ship has sailed!

But not all is ‍lost! Think of this⁤ as⁣ an ‍opportunity for ‌a fresh start. Deleting a video‌ can spark creativity ​and inspire​ new ‍ideas. When one door ‍closes, another one opens, right? Here are some ​things you might want ​to consider ‌moving forward:

  • Review your channel’s direction: What vibe are you going for?⁤ Now’s the perfect time to ‌align ⁣your content with your vision.
  • Engage ‍with your audience: Let them know what’s coming next!‍ They’ll appreciate your transparency⁤ and ⁤be more likely ⁢to stick around.
  • Experiment with ⁤new formats: ‍Maybe it’s ‌time for a new style or theme, like vlogs, tutorials, ⁣or challenges!

So, ‌take a ⁢deep breath. Embrace this change as a stepping‌ stone ⁣towards something ‍greater. Remember, ‍every ‌creator has ⁣moments of‍ doubt⁢ or⁣ regret—it’s totally normal. The important ⁢thing‍ is to keep moving forward ⁣and make each video ‌count!

What Happens Next: ‌The‌ Aftermath of Deleting Your Video

Refreshing Your Channel: Tips for ‍Curating a Stronger YouTube​ Presence

Want to⁤ breathe new life into​ your YouTube channel? Start by diving into your existing video⁢ lineup, like a refreshing‍ summer swim! It’s essential to ⁢identify which videos ⁢resonate with your audience⁤ and which ones may be weighing you⁤ down. Consider checking out your analytics⁣ — ⁢those little ⁣numbers can reveal so much. Look for trends: Are your ‌viewers dropping off? Which ​titles spark⁢ curiosity? This insight not only ‍helps you drop ​any underperformers but also ‌illuminates ‌what content truly clicks with your audience.

As you prune ‍your video ‍library, think about curation as if you’re creating a ‌gallery. You want ​each piece to shine!⁢ Perhaps ‌replace outdated content with newer, more relevant videos. And don’t hesitate to ​give your channel a facelift with some fresh branding or​ a ⁣new thumbnail style—it’s​ like putting‍ on a sharp new outfit that turns heads! ⁢Try experimenting with ideas ‍for series ‍or playlists ​ to keep‍ viewers engaged,⁤ layering your content like⁢ a delicious cake, ensuring every slice is just⁤ as sweet as the last. You’ll create a cohesive experience that ⁢invites viewers to ⁢stick around⁢ for more!

Refreshing Your Channel: Tips for Curating ‍a Stronger YouTube ⁢Presence

Closing Remarks

And there you have‍ it! You’ve navigated the sometimes⁢ choppy waters⁤ of deleting your YouTube videos, and ‍hopefully, it feels less like a⁤ monumental task ‌and more like⁤ a gentle wave​ goodbye. Remember,‍ just like ⁣pruning ⁣a ​garden,⁣ removing those old videos can help your channel grow even stronger. Whether it’s clearing out the clutter or⁤ simply making space for fresh content, every⁢ click of ‌the delete ⁢button is⁣ a ⁢step​ toward your next creative peak.

So,‌ don’t ‌hesitate! If​ you’re⁢ ready ​to ​refresh your channel or ⁣just want to tidy up, you’ve got all the tools ⁣you need right‍ at ⁢your fingertips. Just think about all⁤ the exciting ⁢possibilities‌ ahead—new content, new ⁣ideas,​ and a channel that truly reflects who​ you are​ today.

Thanks ⁤for hanging ​out with us on this journey! If you found this guide‍ helpful or have your own tips to share, drop a ​comment below. And remember, ⁢every great creator has ⁢to start somewhere, so keep pushing those ​creative boundaries. Here’s to new‍ beginnings—happy deleting! 🌊✨

Stop the Streams: How to Block Unwanted YouTube Channels

Hey there, YouTube⁢ enthusiasts! If you’ve⁤ ever found yourself ‍scrolling ‌through your feed and wondering, “Why on ⁤Earth am I ⁣seeing this?” you’re‍ not ⁣alone. We all have‍ those moments where unwelcome channels sneak into⁣ our recommended videos, derailing our viewing experience and shoving our favorite content right out⁤ of ‌the limelight. Whether it’s a bizarre cooking channel‌ that⁣ just doesn’t jive with your culinary aspirations or a vlogger ‌whose antics are more‍ cringeworthy than captivating, it’s ‍time to take⁣ back control.​ In‍ this article, we’ll dive into the⁣ practical steps you can take to​ block those pesky YouTube ⁢channels that just don’t cut⁤ it for you.⁤ Get ready‍ to curate your own perfect playlist because, honestly,⁤ your ‍time is‍ too precious to waste‌ on anything‌ less. Let’s jump right in and reclaim your⁢ YouTube⁣ experience!

Identify Your‌ YouTube Frustrations and​ Take‌ Control

We’ve all been ‌there;⁢ you’re scrolling through ​your ⁣YouTube‍ feed, only to be bombarded by ‌channels that‌ make you cringe. It can⁣ feel⁣ like‍ trying ⁣to find⁢ a needle ‌in a haystack when you just want to enjoy some quality content. Frustration kicks in when you realize ⁣how many ‌unwanted ⁣videos ⁢pop up! But here’s the thing: you don’t have to​ keep taking it.⁣ Take ‌back your viewing experience by acknowledging what ⁢you dislike and ⁣why. Is it irrelevant recommendations?​ Overly repetitive creators? Identifying these pet peeves ​is the ⁢first⁤ step to tailoring your personalized viewing ​experience.

Once ⁣you know your frustrations, you can wield ‌power over⁢ your feed like ⁢a remote control. YouTube offers nifty options for curating what you​ see.​ Here are some easy ⁤ways ‌to⁤ regain‍ control:

  • Block Channels: Simple and straightforward,⁣ just click​ on‌ the ‌three dots next to ⁣a‍ video and⁤ select “Don’t ​recommend channel.” Voilà!
  • Notifications: Turn off notifications for ​channels that annoy you. Don’t fall for their⁣ clickbait anymore!
  • Clear Watch History: ​ If a ⁣channel⁣ keeps ​sneaking into your recommendations, clearing your watch history can help reset‌ the algorithm.

By actively managing what you view, you’ll find that your YouTube⁢ experience transforms from a frustrating⁢ slog to a personalized​ paradise. Just think of it as spring cleaning—getting rid of the ‍clutter allows you to appreciate‍ the treasures that truly matter to ‌you!

Identify ​Your YouTube Frustrations and Take Control

Mastering YouTube’s ​Block Feature for a Tailored​ Experience

Ever felt ‍like⁢ you’re scrolling endlessly‍ through YouTube, only to stumble upon channels​ that just don’t vibe with you? Trust me, you’re ​not alone! ⁤Thankfully,⁤ mastering​ YouTube’s ⁣block feature‌ is like getting the ultimate remote control for ⁤your ‍viewing ⁢experience. It’s super straightforward. Simply head ‌to‍ the channel you want⁢ to block, click‌ on the “About”⁢ section,⁣ and hit that⁣ “Block User” button. Just⁢ like that, poof! Instant ⁤peace. You ​can now curate​ your feed and fill it with content that genuinely interests you. Why waste time on noise⁣ when you can tailor your​ own personalized oasis of entertainment?

Blocking unwanted‌ channels not ‍only cleans up your ​recommendations ‍but also makes your⁤ viewing sessions ⁢so much more‍ enjoyable. Imagine hopping⁤ onto ‍YouTube⁤ and being greeted by content that resonates ‍with ⁢your‌ interests—a ⁣genuine breath of fresh air!​ Besides that, blocking helps ​you avoid those⁤ clickbait traps⁣ that seem to pop‍ up everywhere like ‍unwanted weeds in a‌ garden. ⁤Here’s ⁢a ‍quick reminder of ​what happens when you take control:

  • Clutter-Free Feed: No⁢ more irrelevant ⁤videos⁤ distracting you ​from what matters.
  • Enhanced Recommendations: YouTube’s⁤ algorithm learns ‍from‍ your preferences.
  • Peace⁢ of ​Mind: Enjoy ‍watching without the aggravation⁤ of unwanted content.

Mastering YouTube’s ‌Block Feature⁤ for‌ a ⁣Tailored‍ Experience

Curate ⁣Your Feed: The Power of Subscriptions​ and Notifications

Have you ever scrolled through ‌your YouTube feed and felt like your interests were ‌being drowned in a sea of content you didn’t ⁢sign up for? ⁤It’s‍ like trying to⁢ read⁢ a beautiful book while ⁣someone keeps shoving magazines in your face. ⁢That’s ⁢where subscriptions and notifications come into play! By curating ⁣your⁤ feed, you can⁢ surround yourself with the channels⁣ that spark joy ⁤and​ intrigue. Consider subscribing ‍only ​to those‌ creators whose content resonates with‍ you. This way, your homepage transforms into a personalized hub of ‌creativity,⁢ making it​ easier ‌to find ⁢videos that genuinely interest you. Remember, it’s your space—don’t let⁣ random uploads clutter it up!

And let’s not⁣ forget about ‍those⁢ pesky⁤ notifications! You know, the ones that ⁣pop up when you’re trying to⁢ focus. Instead⁣ of letting‍ every ⁢new video‍ buzz your phone, customize your alerts. ‌Choose ‌ to⁢ be notified⁣ only for new uploads from the channels you adore.⁤ Here’s ⁣a handy table ⁢to help you visualize your subscription management:

Channel Name Notification​ Preference
Cooking with⁣ Sara Always‌ Notify
Tech Guru Only Weekly⁢ Roundups
Travel Vlogs⁢ Galaxy Notify⁢ on Specials
Artistic Expressions No‍ Notifications

With just a little tweak here and there, you can shape your YouTube experience into​ something that truly ‌reflects you. So why continue⁤ getting sidetracked by content⁣ that ‍doesn’t ⁣capture⁢ your interest? Take control and enjoy the journey through your ​curated digital landscape!

Curate Your ⁢Feed: The Power⁢ of Subscriptions and Notifications

Exploring Alternatives: Discovering New Channels ​That⁣ Inspire You

Finding ⁣inspiration‍ in ⁢our daily online interactions can often feel like⁢ navigating a maze. ​While YouTube is⁤ a ‌treasure trove​ of content, it‌ can also be ⁣overwhelming, especially⁤ when unwanted ‍channels sneak into your ‍feed. So, how do ⁣you sift through ​the noise and uncover channels that truly resonate⁣ with your interests? One ‍approach⁣ is to explore alternatives! Dive into niche channels that align​ with ​your passions. For instance:

  • DIY and Crafting: ​Channels that ‌focus ‌on⁣ hands-on ⁣projects and creativity can spark your imagination.
  • Travel Vlogs: Instead of mainstream‌ travel channels, ‍seek out‌ adventurers who share hidden gems and personal stories.
  • Educational Content: ⁤ Look for channels that ⁤present complex topics in relatable ⁢ways, ⁤making⁣ learning fun and engaging.

Discovering these⁤ alternatives⁢ can rejuvenate​ your ‍viewing experience, helping you break free‍ from unwanted​ distractions. But how ​do ‌you find them? A good strategy is to engage with the content you love. Comment, ‍like, ⁢and subscribe to‌ videos that ⁣align with your​ interests;‍ this ‍signals ‍the algorithm ​to deliver ⁢more relevant⁤ options to your feed. You ‌might also want ⁣to⁢ check out​ curated ​playlists created by ​fellow viewers or follow⁣ creators that ⁢highlight underrepresented voices.‍ A simple table can even help⁣ visualize your journey:

Category Suggested‌ Channels
DIY/Crafting Handmade Haven, Crafty ‍Community
Travel Offbeat Adventures, ⁣Hidden⁢ Hideaways
Education Curious Minds,‍ Learn ‌With Me

Exploring Alternatives: Discovering New‍ Channels That Inspire You

Insights and Conclusions

And there you have ⁣it, folks! You’ve now got the knowledge to​ reclaim your YouTube experience‍ from those pesky channels that just‍ don’t do it for ⁣you. Think of ⁢it ‌like‍ spring ⁢cleaning for your ⁢digital space—a⁤ little decluttering goes ‍a long way! By​ blocking those unwanted channels, you’ll create a more enjoyable,‌ tailored viewing ​experience, making it easier to discover content that truly sparks joy.

Remember, YouTube should be your‍ go-to for entertainment, learning, and⁣ inspiration, not a soulless scroll through content you don’t⁢ care ​about.⁤ So, take control ⁢of your feed and curate it to ‌fit your unique tastes. If you ⁤ever feel overwhelmed⁤ by the vast ocean of video content, just dive back into this guide ⁤and remind yourself of ​the tools at your ​disposal. Happy viewing, and may your recommendations be ⁢ever in your favor! 🌟

Keep it Under Wraps: Making Your YouTube Channel Private

Ever‌ found yourself diving into the ‌world of YouTube, ​only ⁣to ⁣realize you⁢ want a bit of privacy with your‌ content? You’re⁤ not alone! Picture your channel⁣ as a cozy ⁢little bubble, a ⁤space where you can share ⁤your creativity without the prying eyes of the‌ internet. Whether you’re gearing up‌ to⁣ perfect‌ your cooking skills,​ showcase your ‍gaming prowess, ⁢or just⁣ rant about your favorite TV shows, ⁣keeping​ certain aspects of your channel under wraps⁤ can feel like having your personal safe haven ‍online. So, ‌how ​do you ‍transform your⁢ vibrant public channel​ into a⁣ more ​private retreat? Let’s explore ⁣the ins and ‌outs of making your ⁢YouTube channel ‍private, so you‍ can enjoy the ⁣best of both ​worlds—creative ⁣expression and a ⁢sprinkle‍ of ⁢privacy!

Understanding the Privacy Settings ‍That​ Suit ​Your Channel

When⁤ diving into the‌ world⁢ of YouTube privacy settings, you’ve got to ⁢think about what you want to reveal and what you’d rather​ keep under wraps. ‍It’s ‌all about‌ creating that ⁢perfect balance! You can choose to make your⁤ videos private,⁣ meaning‍ only ⁢those you invite can see ‌them.‍ Here’s a‌ quick rundown of your options:

  • Public: ​Anyone can ‍find and view your content.‍ Perfect for building an audience.
  • Unlisted: Only people with the link can see your videos—ideal⁢ for sharing with⁤ a⁢ select⁢ group.
  • Private: Only those ‌approved by you can view your videos. ​Great for⁢ sharing intimate content or personal updates.

Moreover, you can adjust your channel’s overall⁤ settings by⁢ toggling features like ⁢comments ⁣and subscriptions. Think ⁣of it as setting the stage for ⁣your ‍own little show! You wouldn’t want just⁤ anyone⁢ walking in during⁢ a rehearsal, right?⁢ With⁤ the right privacy⁢ settings, you⁤ can orchestrate an experience‍ that feels secure and tailored just for‌ your audience. Here’s a simple table to keep track of ‍where your ⁢setting might fit in:

Privacy Setting Who Can View? Best For
Public Everyone Building a⁢ fanbase
Unlisted Those ‍with the⁢ link Selective sharing
Private Approved users only Personal content

Understanding the‌ Privacy Settings That Suit Your Channel

Having a private YouTube channel ⁢can feel like setting up⁣ a ⁣secret clubhouse just for your closest friends. You⁢ get to control who‌ walks through‍ that digital door, sharing ⁣your videos with a select group ⁢rather than broadcasting them to everyone and their⁤ grandma. This kind of⁢ exclusivity⁢ has⁤ its ​perks. You get⁤ better ⁢engagement ⁢from your ⁤audience​ since ⁤the‍ folks tuning in are genuinely interested in what you have⁢ to say. Plus, ‌it shields your⁤ content‍ from trolls or uninvited critiques, allowing for ⁢a more supportive environment. But let’s be ‍honest—seclusion ‌can also feel​ a ⁢bit limiting,‍ right?‍ The smaller audience means slower growth,⁢ and you miss out on the potential for broader visibility and all those shiny new subscribers.

On the ‌flip side, going private can breed creativity. Without the pressure of‍ public scrutiny, you⁢ can experiment and step outside ⁢your comfort zone. Want ‍to ​dive ⁤deep into⁢ a niche ​topic? Go for‍ it! ⁣Your loyal followers ​will​ appreciate ⁣your⁢ authenticity. However, managing a private⁤ channel⁢ isn’t without⁣ its challenges. Think ⁣about the effort required to market your videos​ to a⁢ limited audience; it’s like passing⁤ around flyers for your garage sale in ⁤a quiet neighborhood. You may also⁢ feel frustrated at times—like you’re ‌shouting⁤ into ‌a void when you really want to share your passion with a wider crowd. So, weigh the scales: is ⁢a‌ close-knit community worth giving up on the potential of hitting it big?

Navigating the Pros and Cons of a Private YouTube⁤ Channel

Strategies⁣ for​ Building an ‌Engaged Community in Privacy

Building an engaged community ⁤around a private ‌YouTube​ channel isn’t just about restricting⁤ access;​ it’s about creating a sense of belonging and ​trust. To kick things off, consider using⁤ exclusive content as ⁢bait.⁢ You ⁤can host ⁤special live ⁤streams, ​upload behind-the-scenes​ videos, or share content that only your most ​dedicated viewers can access. This strategy ⁤taps ‍into‌ the human desire to feel special and ‍included. Imagine it like hosting a ​secret club meeting—people love ⁢the⁢ thrill of being in the “in-crowd.” Encourage⁣ your‍ audience to participate by ‍asking for feedback on future⁤ content or ideas for video themes. This kind of interaction makes ⁢your viewers feel valued and‍ fosters a tight-knit community.

Another effective approach is to utilize social⁤ media to create supplementary spaces for⁢ connection.⁢ Platforms like Discord or private Facebook​ groups work ​wonders. Here, you ​can engage with your audience on a more⁤ personal level,⁤ brainstorming, sharing memes, or discussing video ​topics.⁤ Think of this as your own⁢ little ​coffee⁣ shop where fans can ⁢gather, chat,⁣ and build friendships. Rather ‍than just dropping links ⁣to your videos, spark ​conversations that keep your ⁢community buzzing. Lastly, always show ​appreciation—acknowledge​ comments, feature ⁣fan-created content, or ⁣even hold contests for​ your ‌loyal subscribers. ⁢This⁢ sense of reciprocal value can really cement ‌that bond⁤ and keep‍ your engaged community thriving.

Strategies ‌for‌ Building ⁣an Engaged Community ⁣in Privacy

Tips to Smoothly Transition from⁣ Public to ​Private Content

Transitioning your content from a public to a private⁢ setting​ doesn’t have‍ to‍ feel like jumping into ice-cold water. ⁤Start by reviewing ⁣your existing videos to determine what should‌ stay public and what’s‌ better kept behind ⁤closed doors. Ask yourself:⁤ is this⁣ content adding value or just noise? It’s ⁢like​ decluttering your closet; you‍ want to​ keep the pieces that ​truly‌ resonate⁣ with ‍you. Be‍ honest with yourself—if a ⁤video doesn’t‌ reflect the type of⁣ content ⁣you ‍want ‌to‌ be known ‌for, ⁣it might be⁢ time to‌ hide it ‍from ⁣public ⁤view.

Once you’ve figured out what stays and what ⁣goes, it’s time⁣ to ‍ adjust your‍ privacy settings. YouTube ‌gives you a few ‌options ​like private, ⁢unlisted, or scheduled video settings.​ Going unlisted​ is‍ a fantastic middle ground if you⁣ still want the⁤ content accessible ‌to a select group without leaving it​ out in the ‍open. ⁣Think of it like‍ sharing a secret menu with ⁢your close friends—only those who have ​the link can⁤ dig in. ⁢And remember, your audience ⁤might have some​ thoughts ⁣on these⁤ changes, so keep​ an eye on feedback to ensure ⁢you’re not leaving ⁢them ‌in the dark.

Tips to Smoothly Transition from Public to Private Content

In Summary

So, there you have it! Making your YouTube ⁢channel private‍ can feel a ‍bit like putting your‍ favorite book on a high ⁢shelf—keeping it safe from prying eyes while‌ still letting you enjoy the story.‍ Whether it’s to share your journey ⁣with just ⁢a⁣ few close friends ⁣or to ‌protect your creative ideas from the ​vast​ digital world, taking ‌control of your content ‌is empowering. Remember,⁢ privacy‌ doesn’t mean ​you’re⁢ shutting the door ⁢completely; it’s all about ‍creating a cozy, intimate space where you can thrive.

If‌ you decide ‍to go ⁣this ‍route, ​don’t sweat it!​ You’ve got ‍the⁣ keys to your own castle, and you can choose who gets‌ to ⁤peek inside. ⁢Just‌ keep in mind that ‍you can always switch things up later if you‌ feel ⁤like‍ opening the⁤ gates. Happy creating, and keep those ‌videos rolling—just maybe not for the ‌whole world to see… for now!

Frustrated with YouTube Studio? Fix Settings Access Now!

YouTube Studio can feel like a ‍labyrinth‌ sometimes, can’t it? Just when you think you’ve unlocked ‌all the secrets ‌to managing your⁢ channel,‍ you hit a ⁢wall with settings that seem to play hide and seek. If navigating those settings has you⁣ feeling more ‌frustrated⁤ than⁣ a cat in a room​ full of⁤ rocking chairs, you’re not alone! But hang tight—we’re here to ⁣clear up‍ the confusion and help you seize control. In this article, we’re​ diving into‍ the ins and outs of ⁤YouTube ⁢Studio,⁢ making sure you can access those pesky settings with ease. Let’s transform that ‌frustration into smooth sailing, shall we?
Navigating the YouTube Studio Maze with Ease

Getting lost in YouTube ‌Studio can feel like wandering through a maze with no exit. The interface is packed with features ‌and options, ‍making it easy to miss essential settings. One ⁤minute you’re adjusting your thumbnail, and the‌ next, you’re neck-deep in analytics, wondering how you‍ ended up there. To​ navigate more smoothly, focus on key areas like ​the Dashboard, ⁢where you can keep⁣ an eye on your channel’s performance, and the Content tab, which acts like your video library. Here’s a quick rundown of must-know tips:

  • Use the Search Bar: Quickly find‌ settings without ​scrolling.
  • Customize‌ Your Dashboard: Pin the features⁤ you use ‍the most.
  • Familiarize ‍Yourself with the Menu: Each tab has specific⁤ tools that simplify your workflow.

Want to ensure you have access to everything ⁢you⁢ need? Think of your YouTube Studio ⁢settings as a toolbox – make sure you have your essentials handy! Check out ​a ⁢simple comparison below, ‌highlighting some common ⁢settings to adjust:

Setting Purpose
Channel Settings Customize your profile ​and branding.
Video⁢ Settings Control uploads, monetization, and audience restrictions.
Community Settings Manage⁢ comments, moderators, ⁢and blocked users.

Unlocking ​Hidden Settings for Seamless Uploads

Unlocking Hidden Settings for Seamless Uploads

Many of us⁢ have experienced the frustration of uploading videos on YouTube Studio,‌ only to find that certain features just⁤ seem out of reach. ‌It’s like trying to ‌access​ a secret door in a video game—you know it’s there, but how do you get in? By diving into the settings, you can uncover a treasure trove of options that can streamline your upload process. Start by checking out the Upload Defaults section under Settings, where you can set preferences for ⁣titles, descriptions, and tags. This can save⁣ you tons of time ⁢on future uploads!

Another gem hidden within the YouTube Studio is the Advanced Settings tab. Here, you can ⁣tweak the visibility of your uploads‌ and‍ adjust monetization options. Have you ever wished⁢ you could limit who sees your content while you’re​ still perfecting those edits? With the right settings, you can make it private or unlisted—it’s like having a backstage pass for your audience! Plus, don’t forget to explore the Customization section, where⁤ you can​ refine your channel layout to make it feel ‍more ⁤personal ‍and engaging. By unlocking these settings, you’ll turn an uphill battle into a smooth ride.

Mastering Your Channel’s Customization Options

Mastering Your Channel’s Customization Options

Customizing your YouTube channel is like setting the stage for a performance; it’s all ⁣about creating the right vibe and making your content shine. Dive into your⁤ channel’s settings and explore options that let you showcase your personality.‌ From eye-catching banners to unique thumbnails, these‌ elements are your first impression, and there’s no second chance at that! Don’t forget to play around with the branding section. This‍ is where you upload your profile picture, channel art, and even your video⁣ watermark. You want to⁣ ensure that your channel reflects who you are and grabs the attention of new ​viewers! 🔍

Moreover, the layout settings‌ are⁤ a treasure trove waiting for you to unlock. Here,⁤ you can rearrange ⁤your featured sections, highlight your best videos, and even showcase your playlists like a pro ⁣curator. Think of it like organizing a beautiful gallery where each piece ⁢tells a story. Utilize the‍ trailer features for newcomers; it’s your chance to offer a sneak peek ​of what they can expect⁢ from your channel.⁣ Remember, the goal is to keep‌ people engaged. Here’s a quick table to help you keep⁤ track of customization ⁣points:

Customization Option Description
Channel Art Visually defines ⁤your channel’s identity
Thumbnails Boosts click-through rates ‌with eye-popping visuals
Playlists Organizes content and keeps viewers on your channel longer

Tips and Tricks to Streamline Your Workflow

Tips and Tricks to Streamline Your Workflow

To truly make the ⁣most of YouTube Studio, you’ve got to ensure that your settings are⁣ not just turned on but fine-tuned ​to fit your workflow like a glove. First things first, head to the Settings menu, where you can tailor everything from your⁤ channel details to upload defaults. Adjust the upload settings ⁢ to automatically set your videos as ‘Private’ or ‘Unlisted’ before they go live. This way, you can ​make edits without the stress of anyone seeing those rough edges. Additionally, make the most of the branding​ options—having eye-catching thumbnails and watermarks can make your videos pop and keep viewers‌ engaged⁢ longer. It’s ⁤like adding sprinkles on top ‌of a cake; they might not change the flavor but boy, do they make it look good!

Let’s not forget about ⁢analytics because knowing your audience ‍is half the battle. With proper settings, you can‍ receive ⁣tailored insights ‌that help you strategize your content‍ better. Create a checklist using YouTube’s built-in features to track metrics like watch⁢ time, viewer demographics, and engagement rates. It’s like having a GPS for your channel’s growth, guiding⁤ you on what content resonates well and what might need a little tweaking. Also, consider using keyboard shortcuts to navigate through the interface more efficiently—it’s a game changer! Just like mastering the art of riding a bike, once you get the hang of it, your workflow will ​feel smoother, and​ you’ll be able to focus⁤ more on what‍ truly matters—creating awesome content!

Future Outlook

So, ​there you have it! Navigating YouTube Studio can feel like⁤ trying ​to untangle a set of earphones — frustrating and‌ sometimes downright maddening. But with a few tweaks here and there, you can⁣ turn that confusion into clarity. ‌Whether you’re adjusting your settings, revamping your ​layout, or simply figuring ⁢out where the heck everything is, don’t let the ⁢quirks of the platform get you down. Remember, every pro was once a rookie. So take a deep breath, dive back in,​ and take control of your channel like the superstar you are. And if you ever hit a snag, just revisit this guide—you’re not alone in this digital jungle! Happy creating!

Can You Reupload a YouTube Video to the Same Link? Let’s Explore!

Hey there, fellow ‌YouTube enthusiasts! Have you ever ⁤found ⁣yourself in a bit of a pickle after uploading a⁤ video, only‍ to realize you made a mistake or want to tweak it a bit? It’s a common scenario—trust me, you’re not alone in this! So, here’s the⁣ burning question: can you re-upload a‍ YouTube video to the same link? If you’ve been pondering this little conundrum, you’ve‍ clicked on the right article. ​Grab a cozy spot and let’s⁤ dive into​ the‌ ins and‌ outs of this ⁣digital dilemma.‍ We’ll explore‍ the technicalities and the why’s behind​ YouTube’s‍ policies, all while keeping it light and breezy. By ⁤the end, you’ll be armed with all the knowledge you ⁣need to navigate your video uploading adventures like a pro. Ready? Let’s roll!
Understanding the YouTube Link ‍Ownership Game

When diving into the⁣ intricacies of link ‌ownership⁢ on YouTube, it’s important to understand that video links are tied to ​the‌ original content creator.‍ Unlike a Facebook post, where you might share and ⁣reshuffle content at ⁣will, a ⁢YouTube video link​ holds a sense ⁢of permanence with the creator. This means if you⁣ upload a video, the link remains the same,⁣ but you ⁢can’t just swap out ​the video like changing ⁢a shirt. The link reflects the original video’s‍ metadata,‌ existing‌ views,⁤ comments, and everything associated with it. So, if you’re contemplating re-uploading the same video at‍ the​ same URL, think twice—YouTube has specific ‍policies that make⁣ that more of a dream than⁢ a reality.

To‌ navigate this⁢ link ownership game, keep these key points in ​mind:

  • Original Content Reigns Supreme: The​ first upload⁢ of a⁤ video holds​ the link and privileges, making ownership clear-cut.
  • Revisions ⁣Instead of Reuploads: Instead⁤ of deleting and re-uploading, consider using YouTube’s ‍editing tools⁢ to change titles, descriptions, and even the thumbnail.
  • Copyright ⁤Concerns: Ensure that‍ any‌ new content respects copyright ‌laws—you don’t ​want ⁢to find yourself⁣ in a⁢ creative pickle!

Here’s a quick comparison ‌table on what ‌happens with links depending on⁣ your actions:

Action Link Behavior
Upload New Video New link generated
Edit Existing Video Same link,⁣ updated content
Delete ⁤Video Link becomes inactive

What Happens When​ You Reupload: Pros and Cons

What Happens When You⁤ Reupload: Pros and Cons

Reuploading ‍a YouTube video might​ seem like a⁢ quick fix or an‌ easy way to‍ garner new views, but there’s a double-edged sword at​ play. On the plus side, you could breathe new life‌ into an old video that didn’t get‍ the attention it deserved the first time around. If your video ​is⁢ outdated or⁤ needs a ‍sprinkle ⁣of modern magic—like‌ fresh​ editing, better​ thumbnails, or updated⁤ descriptions—this could be a​ creative avenue⁣ to explore. ​Also,⁢ if​ done right, ⁣it can ⁣reinvigorate your channel’s engagement, making it feel like a brand-new offering. But ⁢remember, as tempting as it‌ might be to⁢ recycle content, it might draw the ire⁤ of​ loyal viewers ⁢who are ‌looking⁤ for genuine new​ experiences—after all, ⁢who wants to feel‌ like⁣ they’re stuck in a rerun?

On‍ the flip side, there are​ some ‍notable drawbacks that could trip ⁤you up. ⁤ Uploading⁤ the same ​content ‍again may confuse your audience​ or lead them ‌to question⁢ your originality. You might ​be stepping on ⁤the toes of YouTube’s algorithm, which​ prefers⁣ fresh and unique content—this could ⁤negatively affect your‌ channel’s visibility. Another point to consider is the potential ‌loss of engagement metrics; views and likes stored on the original‍ post won’t carry over, meaning you’re hitting the reset⁢ button on your hard-earned stats. If⁤ the goal is to flourish on YouTube, weigh these factors carefully before diving down the ⁢reupload ​rabbit hole.

Mastering the Art ⁢of Video Management on YouTube

Mastering the Art⁣ of Video⁣ Management on YouTube

When it comes to managing your videos on YouTube, ⁣understanding ‌the ins and outs of reuploading⁤ can save you a lot ​of headaches. Imagine this: you’ve⁤ published a video that initially didn’t get the views you expected, or maybe it has outdated‍ content. ​You might‌ be thinking, “If I ⁣just reupload it, I can ⁢fix those issues!” ⁤Unfortunately,⁤ reuploading ⁣a video to⁢ the same link is like trying to fit a square peg in⁤ a round hole. YouTube doesn’t ‍allow this, but there’s a silver lining! You can always delete⁣ the old ‍video and ⁣upload the newer version, although you’ll lose the views and comments tied to⁢ that original link. That’s a bummer, ⁤right? But, you⁣ can attempt to redirect your⁤ audience to the⁣ new video through your channel,​ social media, ⁣or even a pinned comment on the original upload!

So, ‌what’s​ the best way to go about managing your content? Here are ⁤a few tips that can⁤ help ‍streamline your video strategy:

  • Optimize your titles and descriptions: This can make a world of difference in visibility.
  • Create engaging thumbnails: A great⁤ visual can catch the eye of potential viewers⁣ scrolling through⁤ their feeds.
  • Use playlists: ‍Group ⁢related videos ‌together to keep viewers on your channel longer.
  • Engage with your audience: ⁢Respond to comments ⁤to ⁣build a community around your​ content.

As⁣ you navigate your⁤ journey on YouTube, ‍keep​ in⁣ mind that management is key. With each video, think about the long-term impact it has on your ‍channel’s growth.⁢ Instead of just counting views, focus on building a loyal audience who finds genuine value⁤ in what you share. Remember, it’s not just about the video itself, but the entire experience around it!

Tips‌ for Successfully Handling Your​ Content on YouTube

Tips for Successfully Handling Your ⁤Content on YouTube

‌ Navigating ‌the world of YouTube can ⁢feel​ like‍ wandering through a vast jungle, especially ⁣when it comes to reuploading your videos. You might⁤ be tempted to just hit that upload button again, but hold up! You ⁣can’t reupload a video ‌to the same link, and understanding the nuances of this can save⁤ you from a heap of frustration. Instead, ⁣consider these‍ handy tips to⁣ streamline your⁢ content management:

  • Keep a Backup: Always save a‌ copy of your original video in case you⁢ want to‌ tweak and re-upload ⁣it later.
  • Engage with Your​ Audience: Use the comments section ​for feedback and suggestions rather than duplicating content.
  • Make Use​ of⁢ Playlists: Group your videos ⁣by themes or topics ⁤to⁤ keep your ‍content‍ organized⁣ and engaging.

‍ If​ you need to ⁤refresh your content, consider ​editing​ the original ⁢video instead of starting from scratch. This keeps all your views​ and‍ interactions intact, which is crucial ⁢for ​maintaining momentum on your channel. Plus, when you edit,‌ you ‌can take the opportunity⁢ to ⁤spice things up with​ new graphics ⁣or information. The table below outlines⁣ the benefits of modifying existing content versus reuploading.

Action Benefits
Edit Existing Video Retain views, enhance content, build rapport with audience.
Reupload Video Loss ⁢of views, potential⁢ confusion, disrupted ⁣algorithm signals.

The Way​ Forward

And there you have it, folks! So, can you reupload a YouTube​ video to​ the same link? The short answer ⁣is: no,⁤ you ⁤can’t. But don’t let that bring⁤ you down! Each⁤ video you upload is like a⁢ chapter⁢ in your creative story, and while it might be disappointing to lose ⁢that‍ initial link, it opens up endless opportunities to ⁣refine your content⁤ and​ connect with your audience in fresh ‍ways. Think of‌ it as hitting ‍the refresh button on your creative journey!

Remember, the⁤ YouTube platform‌ is⁣ all⁢ about ‌growth,⁣ engagement,⁤ and‍ evolution. Every upload is a chance‌ to learn something ‍new, ​experiment with your style, and maybe even share a giggle or two with your viewers. So, if you ever find yourself ⁤in a⁢ position to re-upload, consider it an opportunity to redefine and⁢ enhance your ‍work.

Thanks for joining me⁢ on this little exploration! If ⁣you’ve got more questions or need tips about ⁤navigating the‌ YouTube ‍universe,⁢ don’t hesitate ‌to⁢ reach ⁣out. Keep creating, keep sharing,⁢ and who knows? Your next video might just be your ⁣best yet!‍ Happy filming! 🎥✨

Your Easy Guide to Deleting YouTube Videos—Bye-Bye, Clips!

Ever ⁢found yourself⁣ scrolling through your YouTube channel, wondering what⁣ on ​earth that video‌ from three ⁤years ago ‍was all about? Maybe it’s time for ⁢a little digital spring cleaning! Deleting old clips can ⁣feel ⁢daunting, but it doesn’t ‍have ‌to​ be. Whether ‍you’re clearing out ancient ⁣content⁢ that no longer reflects⁣ your ​vibe or ​just making room⁣ for new creations,‍ this ⁢easy guide⁢ will have you ⁢saying “bye-bye” to those outdated videos ⁣in no⁣ time. Let’s dive in, and I’ll walk ‍you ⁣through every step, making it as effortless ⁢as flipping ⁣a switch! ‌Ready to tidy⁣ up‌ your channel? Let’s go!

Mastering Your YouTube Studio​ for Quick Video Management

Mastering Your YouTube ​Studio for Quick Video ⁣Management

‍ Managing⁣ your YouTube videos can feel like a juggling act, especially ‍when your channel‌ begins to grow. Fear⁤ not! With a few tips⁢ tucked under your belt,‍ you’ll navigate the YouTube Studio like a pro. The first step? Familiarize ⁢yourself with⁢ the​ layout.‍ When⁤ you dive into the Videos section, you’ll see ⁢all your uploads ⁤organized neatly. This is where you ‌can⁣ quickly sift through⁣ your‍ clips. Engagement⁣ stats, view counts, ⁣and even comments hang out ‍here, ready for your review. Just click on the ⁢ three dots next to any video to access a smorgasbord of options, including the⁤ ramp-up to the eventual video⁢ deletion.⁤ It’s almost like ‍having‍ a personal assistant at⁣ your fingertips!

⁢ Embracing your channel’s cleanliness is key! If you​ find a video⁣ that no longer vibes ​with your brand or maybe ⁤just doesn’t ​meet⁤ your standards anymore, go ahead and hit ⁣that delete‌ button with confidence.‍ Before you‍ take ‍the plunge, ​remember⁤ to check ‌for ⁤any ⁢lingering⁣ collaborations, links, or‌ just content that might still hold some ⁤value. This ⁢is also the perfect ⁤time‌ to⁢ reconsider what videos resonate with your audience. Here’s a quick table of ​things to ‍keep⁤ in mind ‍while managing your clips:

Action Purpose Considerations
Delete Remove ⁤outdated ​or⁢ low-performing videos Check analytics before deletion
Update Refresh content that still ‍has⁢ potential Consider ⁢audience feedback
Archive Keep videos but make them​ private Useful for⁤ future reference or⁢ rebranding

Navigating Deletion: Step-by-Step to Bye-Bye, Clips

Ready ​to bid farewell to those YouTube videos​ that no longer spark joy? Let’s dive in!⁢ First, make ⁢sure‍ you’re logged‍ into your YouTube account and navigate‍ over to the YouTube ​Studio. This⁣ is basically your control room, where ‌you can manage your channel’s content. Once inside, ⁣look for the “Content” ‍option on the left⁢ sidebar—this is where all your uploaded videos hang out. Find the ⁢clip you want to remove⁤ and⁣ hover⁤ over it; you’ll notice ‍a little pencil icon pop​ up. ‌Click on that to enter ‍the editing realm!

Now that you’re‍ in edit mode, it’s time to unleash the delete⁣ magic. Scroll down ‍and find the “More options” section. Underneath, ⁣there’s the⁣ ominous “Delete⁢ forever” ⁢option waiting for ⁢your brave click.⁣ Don’t fret; you won’t accidentally delete⁣ it without a confirmation. ​Think of ‌it as a safety ‌net for your brave​ decisions!‌ If you‌ want a⁤ quick refresher​ on ‍the crucial steps, take a gander at the handy ‌table below:

Step Action
1 Log into your YouTube account.
2 Access YouTube Studio.
3 Click on ​ “Content” to view⁤ your videos.
4 Select the video and click the‌ pencil⁢ icon.
5 Hit “Delete forever” ‌ in “More options.”

What ⁤Happens After Deletion? Understanding ⁢the Impact

What Happens After Deletion? Understanding the Impact

Once you hit that delete⁢ button on your‍ YouTube video, it’s like‌ flipping​ the final page in a book—you can’t​ go⁤ back and change a ⁢chapter you’ve already read. The⁣ video​ vanishes from your channel, ‍which might feel like a ‍relief if it was⁤ cringeworthy,‌ but ⁢remember, all the ‍views, comments, and likes‌ associated⁣ with it disappear too. Imagine working hard on‍ a project, getting feedback, and then deciding to⁣ erase it completely. It’s not just the video that’s gone; it’s the engagement and‍ the community interaction⁢ you’ve built around it. Depending on how significant that video was to your ​channel, ⁢this could ⁤leave a noticeable ‍gap​ in your content history‍ and ​audience ⁣connection. ⁣

Beyond the immediate loss, consider the long-term effects on your channel’s⁢ analytics‌ and reach.⁢ Every view lessens your overall watch‍ time, affecting⁢ your standing in YouTube’s algorithm, which lives for those metrics. Deleting multiple⁢ videos can even ‌change your subscriber count and alter how your audience perceives your content. ‌Here’s a ​handy table to illustrate the possible impacts:

Impact Description
Lost Engagement All likes, comments, and shares vanish, potentially dampening⁤ your ⁤channel’s vibrancy.
Analytics Shift Your overall views and watch‌ time‌ decrease, which‍ might hurt future content ⁢visibility.
Subscriber Confusion Regular viewers may​ wonder why certain videos are gone, ⁣leading to questions about consistency.

So, before you delete, ask yourself:‍ Is it worth the trade-off? Sometimes,⁢ letting ⁢a ‍video remain—even an awkward ‍one—might be better for ⁣your channel’s growth and community connection.

Tips‍ for Organizing​ Your‌ Channel to Avoid Future Clutter

Tips for⁢ Organizing Your Channel to Avoid Future Clutter

Keeping your⁣ channel​ organized⁣ can​ feel like a ⁢game of Tetris—if you‌ don’t keep ⁢up, ‌everything just piles up and creates ⁤chaos! Start by‌ categorizing your videos⁣ into clear playlists. ‍This ⁤helps viewers ⁤find what they want without endless scrolling. You can ⁢use‌ descriptive⁤ titles to grab attention ⁢and thumbnails that ⁢visually represent the content. It’s like putting‍ your best foot forward; you want people to‌ see ⁤the best of⁣ what you offer ‍right away! ‌Also, don’t hesitate to‍ revisit old videos. Updates or rebranding can shift ⁣how they fit into your channel’s vision, ⁣so take⁢ a moment⁢ to shuffle things around as needed.

Another nifty​ trick is to create a content​ calendar.‌ It’s like having‌ a roadmap that keeps everything on track.‍ Plan your uploads and​ stick to a‌ consistent schedule; not⁢ only does this​ benefit your viewers, ⁤but it also saves you​ from last-minute ⁢scrambles. ⁤Remember to regularly⁢ review ‍your analytics to ⁢figure out‍ which​ videos shine⁤ and which ‍ones could be trimmed. If a ‍clip isn’t ⁤pulling its weight, consider ​making‍ space for‌ new creative ideas! This proactive approach ⁣can make⁢ your channel feel fresh and lively, generating excitement among your viewers. Just think of it as spring‌ cleaning for your digital space, and watch⁤ your‍ channel’s engagement blossom! ⁢

The Conclusion

So there you have it—your easy guide to saying “bye-bye” to those YouTube ‌clips you’ve decided to part ways with.⁣ Whether it’s a ⁣video that didn’t‌ quite ‌hit the ⁣mark or one that’s just taking up digital space, ‌deleting ​old content can feel like ⁤a breath of fresh air. It’s like clearing out your closet and making room for new outfits,⁢ right? Just follow those steps, ⁣and you’ll⁤ be a pro‌ at decluttering your channel in ‍no time.

Remember, it’s⁣ perfectly okay ‌to let go of what no longer serves you. ⁢Think ⁣of it as a way to ‍refine your ⁢digital presence and focus on what⁣ truly ‍resonates with your audience. If⁣ you’ve still got ‍questions or need a hand, don’t‍ hesitate to ‌dive back ‍in—this community is all about​ sharing ⁢wisdom and ‌supporting one another.

So, go ahead! Hit ‌that delete⁢ button ‌with confidence, ​and welcome ⁣a cleaner slate for your creative journey ahead. Happy editing, and may your future content ⁢shine ​even brighter!