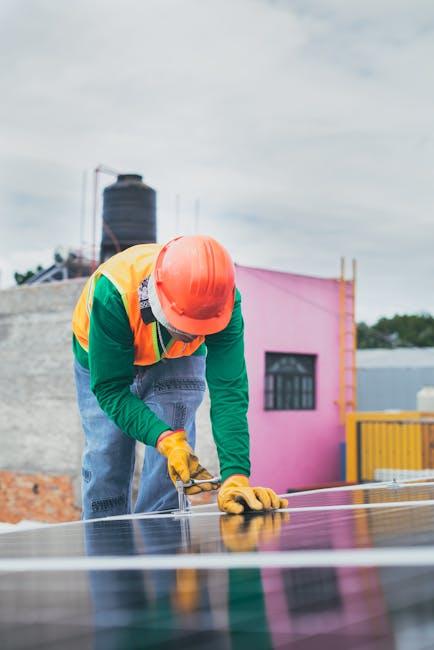
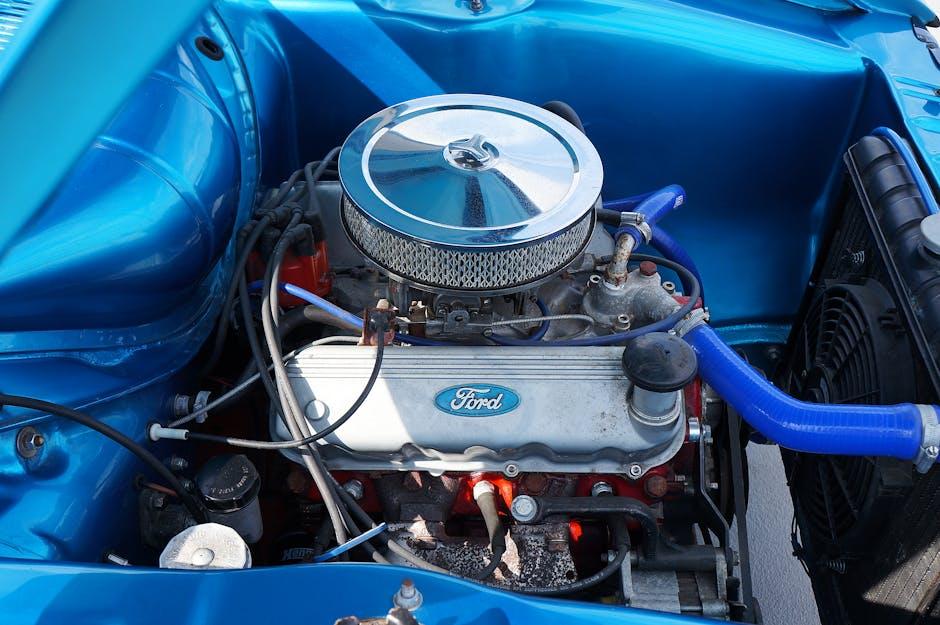
Step-by-Step Guide: Installing Your Dorman 924 091 Panel

Ready to give your ride a‍ little ⁢TLC? If you’re ⁣looking to tackle⁣ the Dorman 924-091 panel installation, you’re in for a ​treat! Whether you’re​ a seasoned DIYer or just getting ⁤your feet⁣ wet, this guide is designed with you in mind.​ We’ll break everything down into easy, bite-sized steps,⁢ making‌ the process feel less like a daunting chore​ and more like a fun​ weekend project. ⁤So, roll up your sleeves and⁢ grab your ​tools—let’s breathe new life into your vehicle⁢ together!

Choosing the Right Tools for a Smooth Installation Experience

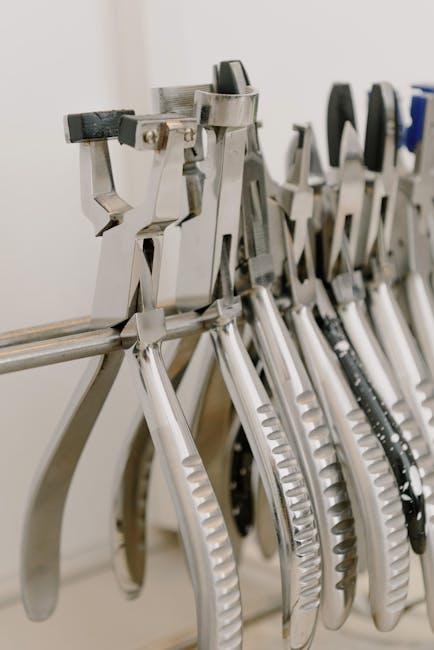
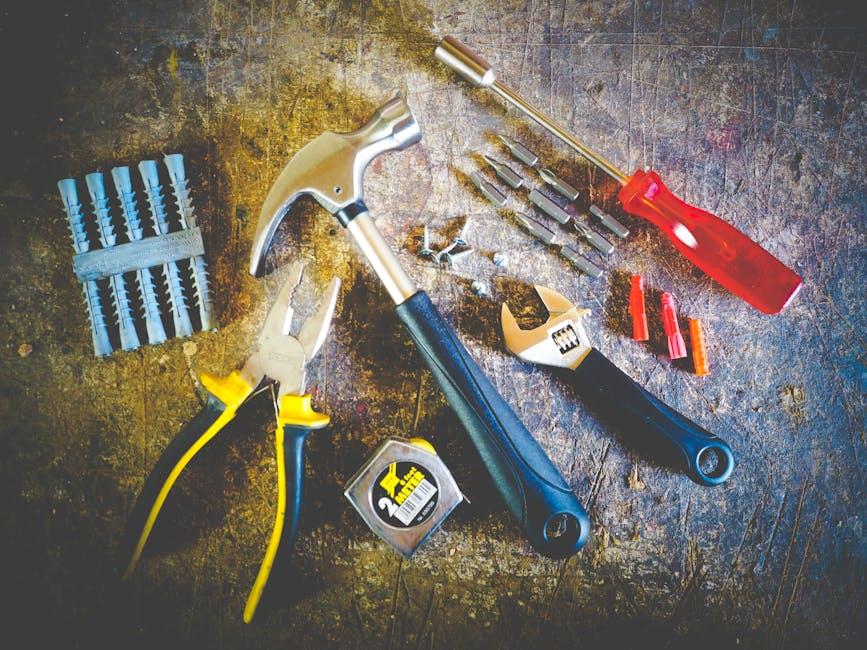
Picking the right tools for your Dorman 924 091 panel ⁣installation can make the ​difference between a stress-free project and a frustrating experience. It’s ​like assembling a puzzle—without the right pieces, it just won’t come⁤ together! ⁤Before ⁤you dive​ in, make sure you’ve got⁤ the essentials ⁤ready to go. Here’s a handy checklist of what you’ll need:

  • Screwdriver Set: A mix of flathead ⁤and Phillips ⁢to tackle‍ all kinds ⁢of⁤ screws.
  • Socket ​Wrench: Makes ⁣removing and tightening bolts a breeze.
  • Pliers: ⁢Helpful for gripping and twisting, especially in‌ tight spots.
  • Tape ⁣Measure: Essential for getting those dimensions ⁣just right.
  • Safety Gear: ⁢Don’t forget ​goggles and gloves to keep‍ yourself protected!

Once you’ve ‌gathered‍ your tools, it’s time to set the stage for a smooth installation.⁣ Organize your ⁣workspace to minimize distractions; think of it as your own assembly line! Lay⁢ everything out so ⁣you can ‌easily grab‍ what you need without ‍having to hunt for it.⁣ And ‌remember, patience is key—take your time and don’t rush ⁢through each step. A little extra ​care now can save you from headaches down the road!

Choosing the Right Tools for a Smooth Installation Experience

Preparing Your Vehicle: Essential Steps Before You Dive In

Before you ⁤roll ⁤up your⁤ sleeves ⁤and dive into the ​installation process, it’s crucial to ensure your⁢ vehicle is ready for the task at hand. Start by ‍gathering all the tools and materials you’ll need,⁤ like screwdrivers, ⁣wrenches, and the ⁤Dorman‌ 924‌ 091⁣ panel itself. ⁤While you’re at ⁣it, make sure the ⁤area where you’ll be working is dry, ⁤clean, and has‍ plenty of space to maneuver. It’s ​like setting the stage before​ a big performance — you want⁤ everything in‌ place‌ for a smooth operation!

Next up, take a ⁢moment to ⁣check‌ your vehicle’s manual. This can provide valuable insights and ⁣specific‌ details about the panel​ you’re replacing. Make a ⁢quick ⁢checklist of‍ safety precautions​ to keep in mind. For ​instance, disconnecting the battery helps avoid any electrical mishaps, and wearing‍ gloves can‍ protect your ‍hands from sharp‌ edges.⁤ It’s⁤ all about being smart and safe as you embark ⁢on your DIY adventure, so⁢ keep these ‌essentials⁤ in mind:

  • Safety glasses: Protect​ your eyes from debris.
  • Battery disconnection: Prevent electrical shocks.
  • Workspace cleanliness: ‍ Avoid losing tools and parts.

Preparing Your Vehicle: ⁣Essential⁣ Steps Before You Dive In

When diving into the installation of your Dorman ⁣924 091 Panel, think of it as putting together a jigsaw⁤ puzzle—each piece fits perfectly when you know where to place​ it. Start by clearing your‌ workspace; you want a clutter-free zone that allows you to focus. Familiarize yourself with⁤ the user manual; it’s your ‍roadmap. Gather essential ​tools like a⁤ ratchet ‌set, screwdriver, ​and any ⁣specific⁤ items mentioned in the manual. Lay everything out, so you don’t have to scramble looking ⁣for that one elusive tool halfway through! ⁤Trust me,⁤ a little‌ prep goes ⁣a long way.

As you embark on this‌ installation journey, ⁢take it slow. Rushing can⁣ lead⁣ to mistakes, and nobody enjoys having to ⁣backtrack. Pay​ special attention to wiring connections; making sure they’re correct is like⁤ ensuring⁢ the ‌heart is in place before you‍ close up the chest.‌ Don’t hesitate to check‍ each⁢ step against ‍your manual—sometimes, the⁣ smallest details can⁣ have⁣ the ‍biggest⁤ impact.⁤ If you hit a snag, refer to forums or videos; there’s⁣ a ‍treasure trove of knowledge from those‌ who’ve walked this path before you.⁣ Remember, ‌the goal ⁢is ​a smooth,⁢ hassle-free⁣ fit, and with a ​little patience and a⁢ keen ‌eye,​ you’ll get there!

Navigating the Installation Process: Tips ‍for a Hassle-Free​ Fit

Finishing⁣ Touches and Maintenance Tips for Longevity

After you’ve successfully installed your Dorman ⁣924 ⁢091 panel, ⁣it’s​ time to⁣ sprinkle⁤ on some finishing touches to ensure ⁢a⁢ polished look ⁢and robust performance. Adjust any visible screws⁣ for a‌ snug fit,‍ ensuring everything‍ is aligned just right. A clean finish can work wonders, so ​wipe ⁣down the panel ​with a mild cleaner to remove fingerprints and smudges.⁣ To add a personal touch, consider applying ‌a protective film or coating to guard against⁤ scratches and ‍wear. Remember,⁤ little ‍details‍ can ​significantly enhance‍ the ⁣overall aesthetic and durability!

Now, maintenance is key if ​you want ⁢that panel ‍to last.⁤ Regularly​ inspect‍ it for ⁣any ‌signs of ‌degradation or ⁢loose‌ components. ​It’s kind⁢ of like checking your car’s oil—quick and often makes all the ⁣difference! Here are some‍ essential upkeep ‍tips:

  • Clean regularly: Use a soft cloth to ⁤prevent‌ dust build-up.
  • Avoid⁢ harsh chemicals: Stick to gentle cleaners to protect the finish.
  • Check for loose parts: Tighten any screws or fittings to maintain stability.
  • Protect from ⁣extreme​ weather: If possible, shield it from harsh elements‌ for longevity.

Finishing Touches and Maintenance Tips ⁢for⁣ Longevity

Concluding Remarks

And ⁢there you have ⁤it! You’ve ⁢successfully ⁣wrangled your Dorman 924 091 panel into ​place like a pro. With ⁢each step taken, you’ve not only ‌transformed your vehicle but also ​sharpened your ⁣skills in the‌ process.⁢ Just think of it as a mini DIY‌ adventure that not only saves you ‍a ‌trip to ​the ​mechanic but⁢ also adds a dash of⁣ personal⁤ pride to your ride.

Remember, the next time you find yourself facing⁤ a ​similar‍ project, you’ll be equipped with ‍the know-how and a little extra confidence.⁣ So go ahead, hit‍ the‌ road knowing your new‌ panel ⁢is installed and ready to roll! If ⁢you ⁢have any questions​ or ⁤hit a snag along the way, don’t ​hesitate to ‌reach out.⁣ Happy driving and keep ‌that DIY spirit alive!

Step-by-Step Guide to Installing Dorman 924-091 Panel

Sure thing! Here’s ⁢an engaging ‌introduction ⁣for that article:


Hey there, DIY enthusiasts! Have‍ you ever found⁢ yourself‌ squinting at your car’s interior, cringing‍ at the sight of⁣ a worn-out‍ panel that​ just ​doesn’t‌ scream ⁢“I care”?‌ If you’ve been nodding‍ along, ​then you’re in for⁤ a treat. Today, we’re ‌rolling up our sleeves and⁢ diving ‍into the nitty-gritty ⁢of installing ⁤the Dorman 924-091 Panel. This isn’t ‌just a regular piece‍ of car decor;‌ it’s⁢ your ticket⁣ to not only sprucing‍ up your ride‍ but also ‍reviving that fresh-from-the-showroom vibe. Whether you’re a seasoned pro or just dipping⁤ your toes into the world of car repairs, ​this step-by-step guide will make the process as smooth ⁤as a well-oiled engine.‌ So, grab ‍your tools, and let’s ‌transform your vehicle one panel at a‍ time—because every car ⁢deserves a little TLC ​(tender loving⁤ care), right? Ready, set, let’s get ‌started!

— ⁢

How’d that sound? Let ⁣me know​ if you need any tweaks!

Choosing the Right Tools for Your ‌Dorman 924-091 Installation Adventure

Choosing the Right⁢ Tools for Your Dorman 924-091 ⁤Installation Adventure

When gearing up⁣ for an installation project⁢ like this, having the right tools ⁢can be the difference⁤ between⁢ a smooth sailing ​experience and a ⁣frustrating struggle. Imagine ⁣setting ⁤out on a ⁢road trip without a‌ map; it just ‍doesn’t work out well, does it? For the​ Dorman 924-091 panel, the essential items you’ll want ​to keep within arm’s reach include:

  • Screwdriver ‍set – A‌ mix of Phillips and‍ flathead will⁢ save ‍you from‌ many a headache.
  • Pliers – Perfect for ​gripping and pulling those pesky clips and wires.
  • Wrenches ‌ –⁣ A good ⁣adjustable wrench can be your best friend for tightening things up.
  • Wire⁢ cutters –⁢ You’ll want these ⁤if you run into any old or damaged wires.
  • Safety goggles – Protecting your⁤ eyes should always be a priority!

It’s ​not ⁤just ⁣about gathering⁣ tools, ‌but also about knowing ⁣how to use them ⁢effectively. Think of⁢ it as ⁢assembling a superhero team—the right combination ensures success. When ‌you’re knee-deep into the installation, you’ll ⁤want ⁤a sturdy‌ work surface.​ Lay ‌everything out⁢ and keep organized;⁣ a clutter-free workspace can cut downtime‌ drastically. Here’s‍ a simple⁣ checklist⁤ to keep ⁢you on track:

Tool Purpose
Screwdrivers Remove and secure the panel
Pliers Grip and manipulate clips
Wrenches Tighten⁢ and loosen​ nuts
Wire⁢ Cutters Trim ⁢damaged wiring
Safety Goggles Protect‌ your eyes ⁢during the process

Preparing Your Vehicle:⁣ Essential Steps‍ Before You Dive In

Preparing Your​ Vehicle: Essential Steps‍ Before ‍You Dive​ In

Before you roll up your sleeves and get ⁣down to business, taking a⁤ moment to properly prep your⁢ vehicle can make‌ all the difference. Start‌ by clearing out the space‌ where you’ll be working; ⁤toss out any junk that’s cluttering⁣ your ride. A tidy ⁢workspace not only ‌keeps⁢ you focused but also prevents accidents. Don’t forget to check your ⁤vehicle’s ⁢ owner’s manual for⁢ any specific‍ instructions or warnings—think⁢ of ⁤it as your ‍treasure map guiding you through‌ the installation process.⁢ Lastly, make sure you ⁤have all your tools ready. ⁣There’s ‍nothing worse than ⁣getting halfway through a‍ project only to realize you’re missing a​ crucial wrench ⁢or socket!

Keep safety at the forefront as you gear up for this project. Park your vehicle on a ⁢level ​surface ⁢and engage the parking‍ brake. If ⁤you‍ can throw on ‌some safety goggles and⁣ gloves, even better! This is like putting ⁢on‌ your helmet before a big bike ride—better⁤ safe ‌than sorry, right? It also helps to‌ gather ‌a few essential items like a ratchet, various socket sizes, and a torque wrench. Think ‌of these as your trusty sidekicks, ⁤here to help you conquer the project. Remember, being prepared is ​key to a smooth installation.⁤ So, take your ‍time and⁢ set everything ⁣up so that ​when ‌you get‌ to the main event, you’re ready to roll!

Navigating the Installation⁢ Process: A Detailed Walkthrough

Getting started with installing the ⁤Dorman 924-091 panel can feel ⁢a bit​ overwhelming, but‌ don’t worry—we’re breaking it down ‍step by step. First, gather your materials.⁤ You’ll need the⁢ panel itself, ​a⁤ Phillips screwdriver, a ⁤flathead screwdriver, and, if you want to be extra careful, some ​gloves to protect​ your hands. It’s like⁢ prepping for a road trip: you wouldn’t hit ⁤the road without checking your tires and ⁤filling up⁢ on gas,‍ right? ⁤Once you’ve got⁣ everything ready, you’ll want ‍to carefully remove any existing ⁤panel or⁢ coverings.​ Make sure to take your time here—nobody likes a cracked ​panel or scratches on your ride!

Once you’ve cleared the area, it’s time to line up‌ the Dorman panel with ⁢the installation points. It should⁢ fit snugly​ in place, ⁣just like a puzzle piece falling into its right‍ spot. If for some reason​ it seems a little off,⁤ don’t force it—check for any obstructions ​or​ bent clips that might be interfering. Now, securing the panel ‍is the key part. Hand-tighten​ the ‍screws in a crisscross‌ pattern to distribute pressure evenly. Think of it like lacing your shoes; you want even tension for a perfect fit. After securing those screws,⁤ give ‌the panel a gentle tug​ to make sure it’s locked in. If it feels solid, you’ve nailed it!​ You’re one step closer to enjoying everything Dorman has to offer.

Common⁢ Pitfalls and Pro Tips to Ensure ⁣a Smooth Installation Experience

Common Pitfalls and Pro Tips⁢ to Ensure a Smooth Installation Experience

When you’re diving into the installation of the Dorman 924-091 Panel,⁤ it’s easy to overlook some of ⁤the finer details that can lead to a bumpy ride. Make sure to double-check your tools beforehand—nothing’s worse than ‌being knee-deep in​ a project and​ realizing you’re missing that one crucial‍ screwdriver. Another common pitfall is ⁢rushing through the ‌alignment⁣ process. Treat the ⁢panel ‌like a puzzle ⁤piece! Take your time to ⁣ensure everything‌ fits​ snugly; ⁢otherwise, you⁣ may ‍end up‌ with gaps or misalignments ⁣that’ll drive you bananas later on. Trust me, patience pays off in spades.

Now, here’s‍ a pro tip for a⁢ seamless ⁤experience:⁢ label your screws and hardware ‍as you remove ⁣them. It sounds simple, but it can save you from the dreaded “wait, where does ​this ⁤go?” moment. Also,⁢ don’t hesitate to ​consult ⁢online videos or manuals—they’re gold mines of information that can provide visual guidance when the written instructions seem‍ foggy. And⁤ remember,​ if ⁢you hit a snag, take⁤ a breather! Sometimes a quick step back ⁣can give you the clarity you need to ⁤move forward effectively.

Future Outlook

And there you have ‌it — your ‍step-by-step guide to installing​ the ​Dorman ⁣924-091‌ panel! 🎉 With just a bit​ of patience and a few tools, you’ve turned what could’ve been a daunting task into a straightforward project. Just think about it: like‍ baking your favorite cake, you start with the right ingredients​ (or in⁣ this case, tools and‍ parts) and ​follow ‍each step to whip up something amazing. Now, you’ve not only saved some cash,‍ but you’ve also gained the satisfaction of a job well⁣ done.

So, what’s next? Maybe tackle another DIY project or sit ⁣back​ and ‍admire your handiwork? Either ⁣way, you should feel proud!⁤ If‍ you have any questions along the way, don’t hesitate ⁣to ⁢reach out.​ We’re all in this together, and sharing tips⁤ can turn a‍ simple repair into a fun little adventure. Keep the ‍spirit of ⁣creativity​ alive and keep those⁣ tools handy for your next home improvement challenge! Happy wrenching! 🛠️

Seamless Steps to Install Your Dorman 924-091 Panel!

Ready to ​give⁢ your ride ⁣a little TLC?‌ Installing the Dorman 924-091 Panel might‍ sound daunting, but trust me, it’s easier than ⁤you think! Whether‍ you’re a seasoned DIYer or just dipping your toes into ​the world of car repairs, I’ll walk you through⁣ every step with some​ friendly tips and tricks. Picture ⁣this:⁤ transforming your vehicle with minimal fuss and a whole lot of satisfaction.⁣ So grab your tools and let’s dive into⁣ the seamless process​ of getting ‌that panel‌ installed ‍and making your ⁢car feel ​brand new!

Preparing Your Vehicle for a‌ Smooth Installation‍ Experience

Before diving headfirst into ‍the installation ⁢process of your Dorman 924-091 ​panel, it’s crucial to get your vehicle prepped and ready. Think of it ​like setting the stage for a performance; everything needs to ‌be just right. Start by cleaning the area ​where you’ll be working—this means clearing ​out ‌any clutter and ‌giving the surfaces a good wipe down. You wouldn’t want dirt and grime crashing the party, right? Having ⁣the right ​tools is also key to a smooth sailing⁣ experience.‌ Grab your socket ⁢set, a ratchet, and ⁢a ‍trusty screwdriver. You​ can even throw in ‌a magnetic tray to keep your screws organized.⁣ Trust⁤ me;‌ it’ll save you time and a headache later on.

Next up, ensure your ⁤vehicle is ‍in a well-lit and spacious environment. This is crucial! Staying in ‍the ‍dark⁢ or cramped ⁢spaces can lead to mistakes or, worse,‌ injuries. If you’re ⁢working outside, pick a day⁤ when the weather is on your side—nobody likes battling the wind while trying to hold a panel ‍in place! Before⁣ you make ⁤any changes, consult your vehicle’s manual for specific⁤ instructions related to your model. Having⁤ an⁢ understanding of what you’re dealing⁣ with⁢ will help prevent any surprises down the line. You’re well on‍ your way to ensuring⁣ a ⁤hassle-free installation that’ll make you feel ⁢like a pro!

Preparing‌ Your Vehicle for a ⁣Smooth ‌Installation‌ Experience

Gathering the Right ⁢Tools for the⁤ Job

To kick off your ⁢project, having the right ⁣tools is‍ like laying a solid foundation before​ building a house. It makes‌ everything smoother ​and speeds up the process. Here’s what you’ll need to get your ​hands on to install​ that Dorman 924-091 Panel:

  • Screwdriver⁤ Set: A ⁣good mix of Phillips and‍ flat‍ head screwdrivers is ​crucial.
  • Socket Wrench: Make sure you ⁢have the ‌right sizes⁢ for ​those stubborn nuts and bolts.
  • Trim Removal Tool: ​This ⁣little gem helps⁤ avoid‌ damage when prying off panels.
  • Safety​ Glasses: Protect your eyes from debris while ​you work.
  • Flashlight: Illuminate those ⁤dark nooks⁤ and crannies‍ so nothing ⁤slips through‍ the cracks.

Let’s not forget a few⁢ handy items that will ⁣save you time and trouble. ‍A small magnetic tray⁢ can hold screws and tiny parts, keeping them from rolling away like marbles ⁣at a⁢ kid’s birthday party.‌ While you’re at ⁣it, grab some gloves to keep your⁣ hands clean and prevent any ​slips. Don’t hesitate‍ to consider protective gear ​ if necessary; ‍a‌ little caution goes a long ‍way in DIY projects!

Gathering the ⁣Right Tools for the Job

Getting your​ hands⁢ dirty‌ with the Dorman 924-091 panel installation doesn’t have to​ feel like navigating⁢ a maze. Start off by gathering your tools. You’ll want to have screwdrivers, wrenches, ⁢and maybe even ‌a torque wrench ⁤ at the ready. Make sure you’re working in a well-lit ⁤space—nothing slows you ‍down like squinting into the shadows looking for that one screw⁤ that rolled under the workbench! Here’s⁣ a handy​ checklist to keep you on track:

  • Protective gloves
  • Basic hand tools
  • Owner’s manual for reference

As you dive into the ‍installation, breathe ​easy! ⁤The steps‌ are straightforward, like following a simple recipe.⁤ Start by disconnecting the battery to avoid any shocks along the way.‍ From there, carefully remove the old‍ panel, taking note of how things are wired. It’s like taking a photograph in your mind, so you remember how to put the new one back in without a hitch. ⁤Once you’ve positioned ‍the ‍new panel, ⁣simply reattach the wiring ⁢and screws in​ reverse order. ​Easy-peasy! Here’s⁣ a small table ‌to ‌highlight some key steps:

Step Description
Disconnect Battery Prevent ​electrical issues during installation.
Remove Old Panel Take notes on wiring and connections.
Install New Panel Connect wires and secure with screws.

Navigating the⁤ Installation Process ⁤with Ease

Finishing Touches and Final Checks for Ultimate Peace of Mind

As⁤ you tie up the installation of your Dorman 924-091​ panel, it’s the little details that ⁤can make a huge difference. ‌First things ‍first, give everything a thorough once-over. Check that all the screws and fasteners are snug, yet not overly tight.⁤ After all,‍ it’s like‍ shaking hands—too loose, and you⁤ seem disinterested; too⁣ tight, and you risk ⁣an awkward moment.‌ Pay special⁤ attention ⁣to any connections or wires you might have adjusted during the‍ process. It’s crucial they’re ​not pinched‌ or at risk of abrasion. A⁢ little bit of extra time spent here can prevent a cascade of headaches down ​the line. Don’t forget to clean any dust or debris that may have accumulated; think of‍ it as giving your new panel ⁢a fresh start!

Next up, it’s⁢ time to do a final​ functional check before you call it a day. Power ​up your⁢ vehicle and check ‌that the panel is behaving as expected.‌ Run through its functions like you’re testing a new gadget—play with‍ the buttons⁣ and knobs to ensure‍ they’re responsive. If there are any indicators⁣ or lights, keep an eye on⁣ them;‌ they’re your⁤ car’s way ⁣of talking⁣ to‍ you. Consider doing a quick‌ road ⁤test to see ​if everything’s operating smoothly. Picture ​it as a short warm-up lap—just to make sure everything’s in tip-top shape. With these ​last steps, ⁢you’ll not only‌ have installed your panel correctly but can also cruise confidently, knowing that ⁢everything is shipshape!

Finishing‍ Touches and Final Checks for Ultimate⁢ Peace of Mind

In Conclusion

And⁢ there you have it! Installing the Dorman 924-091 panel doesn’t have to be a daunting task.‍ With​ these seamless⁣ steps, you’re not just transforming your vehicle; you’re also boosting its charm and functionality, all while saving yourself some time and cash. ‌Picture this: you, cruising ‍down the road with a fresh panel‍ that not only looks great but‌ also makes your ride just a bit cozier. Doesn’t that sound fantastic?

Remember, every little effort you put into your ⁤car​ enhances that driving experience,‍ making it uniquely yours. So,‍ roll up those sleeves, take‍ pride in your DIY skills, and⁤ let’s get that panel shining! If you’ve got ⁣questions or just want to share your​ victory story,‍ hit me ⁤up​ in the comments. Until next time, happy tinkering!

Step-by-Step Guide: Install Your Dorman 924-091 Panel Easily!

Have you ever found ​yourself wrestling with a‌ complicated car ⁤repair, feeling like you ⁢need a ⁢degree in rocket ⁢science ‌just to fix a‌ simple ⁢panel? Trust me,‍ you’re not ⁣alone!‍ But what if I told you that installing ‍the‌ Dorman 924-091 ⁢panel​ could ​be⁣ as easy as pie? Whether your‍ old panel has ⁢cracked from sun exposure or‌ simply looks like it’s ‍been through a battle with ⁤a⁣ flock of angry‍ birds, this ​step-by-step guide is here to help you ⁢tackle the job with confidence and ease. With just a few⁣ tools and some good old-fashioned know-how, you’ll have your vehicle‍ looking sharp in no time. So, roll⁤ up your sleeves, grab your tools, ‍and let’s dive⁤ into this ​simple⁤ and satisfying‌ project together!

Mastering the Basics of Your Dorman 924-091 Panel Installation

Installing your Dorman 924-091⁣ Panel is ⁤simpler than you ⁢might think! Start by gathering all the necessary tools​ and materials. You’ll need a ⁢screwdriver, pliers, and possibly a socket ‌set⁣ to tackle any ⁤stubborn bolts. Once you’ve got everything laid out, it’s time⁤ to prep your ​workspace. Make sure to ⁤have‍ a clean, well-lit‍ area, which is crucial when working⁢ on an intricate‌ install like this.⁢ It’s like setting up a cozy little workshop – a little organization ⁤goes ‌a long ⁢way⁣ in making the whole process smooth⁢ and ‍hassle-free.

Now that you’re⁤ geared up, let’s break down the​ major⁤ steps to get that panel installed like a pro:

  • Remove Old Panel: Gently take out the old ‍panel, ensuring‍ you don’t damage surrounding areas.
  • Disconnect Wiring: Carefully‌ disconnect any wires attached to the panel; ‍taking‍ a photo‌ can ‌help you remember where everything goes.
  • Fit the​ New Panel: Align your‍ Dorman‌ 924-091 Panel⁤ and ​slide ⁤it into place, checking that it fits snugly.
  • Reconnect Wiring: Refer ⁤back to ​your photo and reconnect the wires, ensuring a solid connection.
  • Secure with Screws: Tighten all ⁢screws and bolts, but don’t overtighten to avoid cracking‌ the panel.

This⁤ simple checklist will guide you through the ⁣installation⁣ process without⁢ a‍ hitch. If you encounter any issues, troubleshooting is just a ‍few clicks away on forums‍ or guides from folks who’ve been there before!

Mastering ⁤the Basics of Your Dorman 924-091 Panel ‌Installation

Tools ⁢Youll Need ​for⁤ a ​Smooth ⁣Installation Experience

Embarking‌ on the⁣ journey⁤ of installing your ⁢Dorman‌ 924-091 Panel? ‌Trust me, having the right tools ‌on hand can make all the difference between a smooth⁣ sailing experience and ​a bumpy⁤ ride. So, let’s get you geared⁢ up! Here’s a quick rundown of the essentials you’ll need:

  • Screwdriver Set: A mix of Phillips ⁢and flathead‌ screwdrivers is vital for tackling those pesky screws.
  • Socket⁢ Wrench: This ⁣tool will help⁢ you securely fasten bolts and nuts, ⁣ensuring a solid installation.
  • Pliers: A⁣ good pair of pliers can ⁣be a lifesaver when‌ you⁤ need‍ extra grip.
  • Utility Knife: Perfect for trimming or ⁣cutting through‍ any materials that may be ⁤in​ the way.
  • Tape Measure: To double-check your dimensions and ensure ⁤everything fits just right.

Now, if you’re ⁣feeling fancy and ​want to streamline your workflow, consider ​investing in some additional gear. Check⁤ out this handy table for ‌a few optional ⁢but recommended tools that can enhance your installation experience:

Tool Purpose
Torque⁢ Wrench Perfect ⁢for applying the right amount⁣ of force to ‌bolts.
Flashlight Illuminates dark corners ‌and hard-to-see ‍areas.
Safety Gloves Protect your hands while working ‌with potential hazards.
Work Light Provides⁤ ample lighting for⁤ a clear view of your workspace.
Magnetic Tool‌ Holder Keeps your screws and small tools organized and within⁢ reach.

Tools Youll ​Need for a ⁤Smooth⁢ Installation ⁤Experience

So, ‍you’ve got ⁢your ⁢hands on​ the ​Dorman 924-091 panel, and ‍now it’s time to dive in and get it​ installed ‍without breaking a ‍sweat. First things first, make sure you have​ all the tools‍ you need close⁢ by. It’s like preparing for a ‍camping ⁤trip; if you⁤ forget the essentials, you’ll ‌be sleeping on the ground. Grab your socket wrench, screwdrivers, and don’t⁤ forget⁤ some protective gloves for an added‌ layer of‌ safety. Don’t worry ‌if you’re not a pro—this‍ setup‍ is designed ⁢for folks like ‍us who might‍ not be seasoned mechanics but still ‌want to ‍contribute to our ride’s‌ well-being.⁢ Check ⁤out the basic‍ steps below:

  • Preparation: Clear ‌the area around your working space.
  • Removal: Carefully detach the old panel using the screwdriver.
  • Installation: ‍ Align​ the‍ new Dorman panel ‌with the mounting points.
  • Secure: Use your socket ​wrench‌ to fasten it in ⁢place.
  • Final Checks: Ensure⁤ everything is tight and ⁤looks good before moving on.

Now, to make⁤ sure you don’t⁤ experience‌ any⁤ hiccups, let’s take​ a⁤ moment to chat ⁣about troubleshooting. Sometimes‍ everything seems perfect ⁢on the outside,⁤ but‌ a ⁣small issue could‌ sneak‌ in. If the panel doesn’t fit as it should or you run ​into a snag while securing‌ it, don’t ‍panic! Here’s a handy ​table with some common‌ hiccups and​ quick‍ fixes:

Issue Quick Fix
Panel ⁢doesn’t align Loosen and reposition slightly.
Screws‌ won’t tighten Check for stripped threads; consider using a ⁣thread repair‍ kit.
Noise after ⁤installation Double-check all screws are fastened‌ and⁤ secure.

Navigating⁤ the Steps: ⁤A Simple Walkthrough to Success

Tips and ​Tricks ⁤for ⁢a‌ Flawless Finish on Your Panel Installation

To achieve ⁤that immaculate look for your panel ​installation, preparation‍ is key. Start by clearing‌ out the⁣ space, ensuring ⁤it’s free​ of debris and distractions. ​Having the ‍right tools at your​ fingertips makes a ​world of difference. Consider ⁢investing in a good quality ratchet‍ set⁢ or ⁤a power drill—nothing beats the ‌feeling of smooth, ⁣easy installation⁢ when you’re well-equipped. Don’t forget to inspect⁤ the panel ⁢before​ you dive⁢ in;⁢ look for any imperfections or defects. This⁤ attention to detail early on can⁣ save‍ you from headaches later. And let’s be ‍real—taking ​a little extra time⁤ now can prevent ⁣the dreaded install redo!

Next⁤ up, let’s talk alignment. Nothing ruins⁤ a polished ⁤finish faster than misaligned panels. Use a level to check your ​work at various stages; trust me, it’ll pay off! ⁣When it comes to securing your ⁣panels, a steady ‌hand is essential. Tighten⁣ screws snugly, ⁢but be careful not to overdo it—think of it like giving ‍a gentle hug​ rather than a bear trap! And if⁣ you’re ‍feeling fancy,‌ throw in some trim molding around ‌the edges ⁢for that pro touch. The final result will ⁢not only look awesome but ‍will also provide a‌ neat, finished edge ‌that pulls‍ everything together.

Tips and⁣ Tricks ‌for a Flawless ⁢Finish on Your ⁢Panel Installation

Key ⁣Takeaways

And there you have ​it, folks! ‌Installing⁤ your Dorman 924-091 panel doesn’t have to feel ​like‌ climbing ⁤Mount​ Everest. With a little bit of patience, the right tools,⁢ and​ our step-by-step ⁣guide, ‍you’re equipped to tackle this project like a pro. You’ve not only ‍enhanced​ the looks of your vehicle but also embraced that ⁤sweet sense of accomplishment​ that comes ‍with DIY ⁣tasks.

Remember, ⁤every car journey starts ⁢with a single step—much⁤ like this project! ​So, whether⁤ you’re ⁤cruising‌ down the‌ open road ⁢or just taking a quick trip​ to ⁢the‌ grocery store, give yourself a little pat on the ‍back for​ a job ‍well done. If⁢ you’ve got any‍ questions or want to ⁢share your experience, don’t hesitate ‌to drop a ‍comment down ⁢below. Happy driving, and‌ may your rides be smooth and stylish! 🚗✨

DIY Guide: Replace Your 2014 Honda Accord Radiator Fan!

If your‌ 2014 Honda Accord⁤ is starting ‌to sound⁤ like a disgruntled refrigerator, it might be time‍ to pay some⁣ attention to its radiator fan. This unassuming little workhorse is crucial‌ for keeping your engine cool, and when ⁢it decides to take ‍a vacation, it can lead‌ to‌ some serious overheating drama. ⁤But ⁤don’t sweat it!⁤ Tackling a radiator fan replacement isn’t reserved for professionals in grease-stained overalls. ‌With a bit of know-how and a few tools you probably already have,‌ you can turn this daunting task⁢ into a rewarding DIY project. ​So roll up those sleeves and let’s dive into your ultimate guide for replacing that radiator fan like ‍a​ pro!

Rev Up ⁤Your Knowledge:​ Understanding the​ Role of⁤ Your Radiator Fan

Your ⁢radiator fan is like ‍the ‌unsung hero of your ⁢car’s cooling system. When the engine heats up, it kicks into gear, pulling ‌air through the radiator to keep everything running smoothly. Without it, ⁤you could find yourself facing some serious overheating issues‍ on the road. Think⁣ of‍ it as ⁤the equivalent of a ceiling fan‌ on a hot summer day—keeping things‍ cool and comfortable, so your engine doesn’t turn into a sauna. The fan typically operates in⁣ tandem with your vehicle’s temperature control system,⁤ kicking in at just the right moment ​to prevent that nasty overheating scenario that ‌can lead to ⁤costly repairs.

But why should you care about your radiator fan’s health?‍ For starters, a⁢ malfunctioning fan can lead to higher engine temperatures, decreased⁤ performance, and ultimately,⁣ major headaches down the line. Here’s ​what you should watch for:

  • Increased⁣ Engine Temperature: If your gauge is creeping into the red zone, it’s time to pay ⁢attention.
  • Unusual Noises: A whining ⁤or grinding‍ sound might ​signal that the‌ fan motor is ​on ⁢its last legs.
  • Poor AC Performance: If your air conditioning isn’t blowing ‍as cold⁣ as it should, it could be linked to fan ​issues.

Regularly checking your fan⁤ can save you from major troubles down the road. And when it’s ‍time to swap out that⁣ old fan, knowing its role makes the task feel less daunting. You’ll be ⁢tackling it ⁤with a clear understanding, like knowing the rules to a game before jumping ‌in!

Rev Up ‌Your Knowledge: Understanding the Role of Your Radiator⁤ Fan

Gather Your ​Tools: The Essential Gear for a Smooth​ Replacement

Before you‌ dive into the nitty-gritty ⁤of replacing your radiator fan, let’s chat about the tools you’ll need at your side. Having the right⁣ gear is like ⁣having a trusty sidekick—you wouldn’t want to face a villainous car problem without your best ‌buddy, right? Start off gathering these essentials:

  • Sockets‍ and Ratchet Set: A variety of socket sizes will help you tackle those pesky bolts that are holding your fan⁢ in ‍place.
  • Flathead and Phillips Screwdrivers: You’ll need these for the‌ various screws that keep ‌components secure.
  • Pliers: A good set of pliers can help ⁢you maneuver those stubborn clips⁢ and‍ connectors.
  • Wire Cutters: If things get⁤ tangled or if you’re replacing any ⁢wiring, ​these will be⁢ a lifesaver.
  • Cooling System ‌Flush Kit: Consider this if you’re going‌ to ‍flush the system ⁤while you’re at it—better safe than sorry!

And don’t⁢ forget about personal‌ protection! Safety⁤ goggles and gloves are must-haves because, let’s be real, nobody wants to poke their eye out or​ get a⁣ nasty cut while elbow-deep ​in ⁣engine parts. You​ could also grab a work light to illuminate those shadowy ‍spots under the hood where the magic happens. Trust me, you’ll thank yourself ‌later when you can see every nut and bolt without ​squinting. Now that you’ve ‍got your toolkit prepped and ready to go, you’re setting yourself up for a smoother, stress-free experience!

Gather Your‌ Tools: The Essential Gear for a Smooth Replacement

Step-by-Step Breakdown: How to Replace Your ⁣Radiator Fan Like a ‍Pro

Ready to tackle the radiator‌ fan replacement on your​ 2014 Honda Accord? Let’s get down to​ business! First up, make sure you gather all your tools and materials. You’ll​ need a new radiator fan, a socket set, ⁣and some basic hand tools. Here’s a quick checklist to keep you organized:

  • New⁣ Radiator Fan
  • Socket Set
  • Screwdrivers ⁢(flathead⁢ and Phillips)
  • Wrenches
  • Safety Glasses
  • Gloves

Once you have everything, pop the hood and disconnect the battery. ​Safety first, right? Next, locate the fan assembly and remove any screws holding it in place. It’s like‌ peeling back the layers ‌of an onion, ⁤so keep an ⁢eye out for any hidden bolts or clips. After you’ve freed the old fan, plug in the new one and⁢ reverse the disassembly process. Here’s a ⁢pro tip: take a few pictures as you go,⁣ so you’ll know exactly how to put it all back together!

Part Action
Battery Disconnect
Fan Assembly Remove screws
New Fan Install and connect
Battery Reconnect

Step-by-Step⁤ Breakdown: How to Replace⁣ Your Radiator Fan Like a Pro

As‍ you dive into your radiator fan replacement, it’s easy⁢ to get tripped‍ up by a few common pitfalls. For ​starters, ⁤ensure you’ve accurately identified the wiring connections ⁣ before yanking anything apart. Double-checking ‍these can save you from a frustrating reassembly or‌ worse, damaging the fan. Also, don’t forget to ⁢watch out for ​those pesky clips and brackets that can sometimes ⁢get overlooked. Think of ​them as the hold-up crew ⁢in⁣ a heist film—remove them, and everything falls apart. Keep a small container handy ⁤to ‌collect any​ screws and clips you remove, so nothing‌ goes missing ⁤in action! If you hear ⁤a strange rattle⁤ while driving after you’ve put everything back together, it’s time to conduct a ‌quick check⁣ of your ‌work.

Another frequent hiccup involves ⁣the coolant⁣ levels. After swapping‌ out the ⁢fan, top off your ​coolant ‍to ensure your engine doesn’t overheat while you’re revving‌ up. You⁤ wouldn’t take a car on a‍ long trip⁣ with​ an empty gas tank, right? So why would you skimp on coolant? It’s ⁤worth mentioning‍ that if you’re not seeing any‌ action from your new ​fan, don’t panic! Verify the⁣ fuse and‍ relay that are ​often bundled ⁢up with ⁢the fan’s circuitry. Having ⁤a handy troubleshooting checklist can help weed out any small⁣ issues before they blossom ​into larger headaches. Here’s⁢ a quick rundown:

Issue Possible Fix
Fan not ⁢spinning Check fuses ⁣and wiring connections
Overheating engine Ensure coolant levels are ​adequate
Noisy‌ fan Inspect for loose brackets and clips

Navigating Common ⁤Pitfalls: Troubleshooting Tips to Keep You⁢ on Track

Insights and Conclusions

And there you ‍have it! ‍Replacing the radiator fan in your 2014 Honda Accord can feel a bit daunting at first, ⁤but with the⁤ right‌ tools and ⁤a little bit of elbow grease, you’ve shown that you’re more than capable. Just think of it like giving ⁢your ​car a little ⁣TLC; it’s not ‌just about fixing a problem, but ⁢about empowering yourself to take care of your ride.

Now that you’ve successfully⁣ tackled this DIY project, imagine all the new skills⁤ you’re ⁣equipped with‌ for future repair adventures. Need to swap out the air filter? Change a tire? With this⁤ win under your belt, you’re ready to dive⁣ into whatever comes next!

Before you hit the road,‍ don’t forget to dispose of the old fan properly.⁤ It’s all about⁣ keeping our planet happy, right? So, rev that⁤ engine with ‌pride, and remember: every little repair adds up to‌ a​ well-loved car that runs smoother and‍ longer. Keep that DIY spirit alive, and happy driving!