Hey there, DIY enthusiasts and car aficionados! If you’re itching to give your ride a little love or perhaps tackle that pesky interior issue that’s been bugging you, you’ve landed in just the right spot. Today, we’re diving into a step-by-step guide on installing the Dorman 924-091 panel—a must-have upgrade that can breathe new life into your vehicle’s cabin. Whether you’re a seasoned gearhead or a curious newbie with a wrench in hand, this straightforward tutorial will take you from start to finish, transforming a somewhat daunting task into an enjoyable experience. So, grab your toolkit and let’s roll up those sleeves! Your car’s makeover is just a few simple steps away. Ready to rev up? Let’s get started!
Choosing the Right Tools for Your Dorman Panel Installation Journey
When diving into the world of Dorman panel installation, selecting the right tools is like choosing the perfect playlist for a road trip—essential for a smooth journey! You want to gather tools that not only make the process easier but also ensure a polished finish. Start by getting your hands on these essentials: screwdrivers (both Phillips and flathead), a ratchet set, and pliers. Don’t forget a trim removal tool; it’s your best friend for prying off those pesky clips! If you’re like most DIYers, you’ll also want a torque wrench to guarantee everything is snug and secure. Each item plays a significant role, making your task feel less like a chore and more like an enjoyable project.
Always remember, having the right workspace can make a world of difference. Think about setting up a clean area with plenty of light, as it’ll help you see the small details that matter. A simple table will do, but laying down a drop cloth can protect your surfaces from scratches or spills. Here’s a quick checklist to keep your station organized and efficient:
- Drop Cloth
- Lighting
- Tool Organizer
- Safety Goggles
- Trash Bin
This setup not only minimizes confusion but also maximizes your productivity, so you can focus on getting that Dorman panel installed! Trust me, it’s all about making your journey to a successful installation hassle-free and enjoyable.
Preparing Your Vehicle for a Smooth Installation Experience
Getting your vehicle ready for a smooth installation of your Dorman 924-091 panel is like prepping for a big game—every little detail counts! First things first, you’ll want to gather your tools. Having everything on hand not only saves time but also keeps you from getting frustrated halfway through the job. Here’s a quick list to help you out:
- Socket set
- Ratchet wrench
- Screwdrivers (flathead and Phillips)
- Pliers
- Safety gloves
- Cleaning wipes or cloth
Next, make sure your vehicle is in a safe and comfortable spot. Ideally, park it on a level surface and turn off the engine. Take a moment to clean the area where you’ll be working, as a clean workspace can make a world of difference. Remove any debris or old parts that might get in the way. If you’re working outdoors, check the weather too—nobody wants rain ruining their plans! Lastly, read through the installation manual a couple of times. This little step can save you from potential headaches during the actual installation.
Step-by-Step Instructions to Master Your Dorman Panel Replacement
First things first, you want to gather all your tools and materials before diving in. Trust me; you don’t want to be scrambling for a screwdriver halfway through the job. For this installation, make sure you have the following on hand:
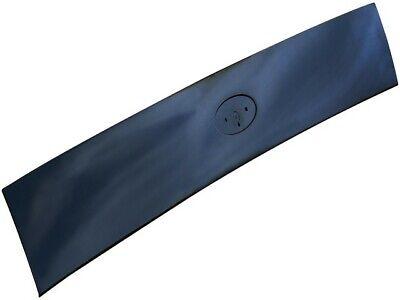
- Dorman 924-091 panel
- Flathead screwdriver
- Phillips screwdriver
- Ratchet and socket set
- Protective gloves
Once you have everything ready, it’s time to get down to business! Start by removing the old panel. Use the flathead screwdriver to gently pry off any clips or fasteners holding it in place. Next, disconnect any electrical connections—don’t worry; it’s easier than it sounds! Simply squeeze the tabs and pull apart. With the old panel out, align your shiny new Dorman panel with the mounting holes. Push it into position and secure it with your Phillips screwdriver. If you run into any stubborn clips, a little finesse goes a long way; just take it slow!

Finishing Touches and Maintenance Tips for Longevity
Once you have installed the Dorman 924-091 panel, it’s time to give it those final touches that make all the difference. Think of it like decorating a cake; the icing and sprinkles turn a simple dessert into a showstopper! Start by ensuring that all screws and fasteners are tightened adequately, preventing any future rattling. Next, grab a soft cloth and a gentle cleaner to wipe down the panel, removing any fingerprints or smudges that may have accumulated during installation. Don’t overlook the edges and corners—those tiny details can often make the most significant impact!
Now, let’s talk maintenance because nobody wants to deal with wear and tear too soon! Regularly inspect the panel for any signs of damage or loosening, just like you’d check your tire pressure. Keep it clean by using non-abrasive materials to avoid scratches. If applicable, consider applying a protective coating to enhance durability. And remember, parking in the shade can be a game-changer in preserving those vibrant colors. Here are a few easy tips to remember:
- Regular Cleaning: Wipe down with a soft cloth.
- Inspect Often: Look for loose screws or cracks.
- Protect From the Sun: Park in shaded areas when possible.
- Use Proper Products: Stick with non-abrasive cleaners.

The Conclusion
And there you have it—the ultimate step-by-step guide to installing your Dorman 924-091 panel! 🎉 We’ve peeled back the layers, tackled each step, and I hope you’re feeling a bit like a car guru yourself now. Remember, diving into a DIY project can seem daunting at first glance, but with a little patience and the right tools, you can totally make it happen.
If you hit a snag or have questions along the way, don’t hesitate to reach out to fellow DIYers or consult a pro. Sharing tips and experiences can make the journey smoother—and who doesn’t love a good success story? So, roll up those sleeves, take pride in your handy work, and enjoy the satisfaction that comes from tackling a project all on your own! Happy wrenching, and may your ride be as smooth as your installation skills! 🚗💨