Are you ready to unleash your inner embroidery artist? If you’ve got a PE770 sitting in your crafting corner, then you’re in for a treat! Mastering handkerchief embroidery takes your sewing game to a whole new level, turning simple fabric squares into beautiful, personalized treasures. Imagine gifting someone a handkerchief that’s not just functional, but a work of art that carries a piece of your creativity. Whether you’re a newbie or an experienced stitcher looking to refine your skills, this DIY guide will walk you through the ins and outs of handkerchief embroidery on your PE770. Let’s dive in and stitch together some magic!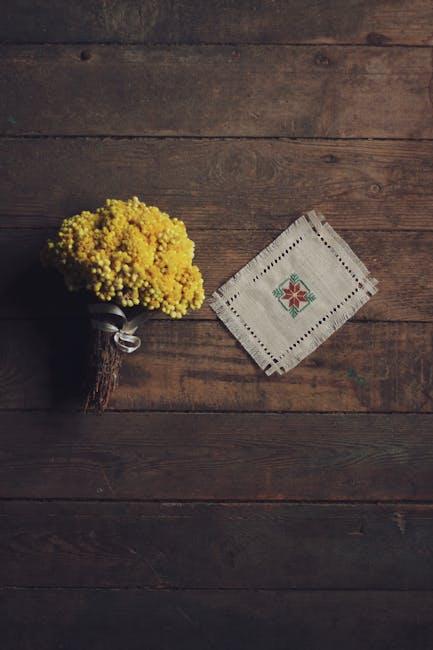
Discovering the Magic of Handkerchief Embroidery Techniques
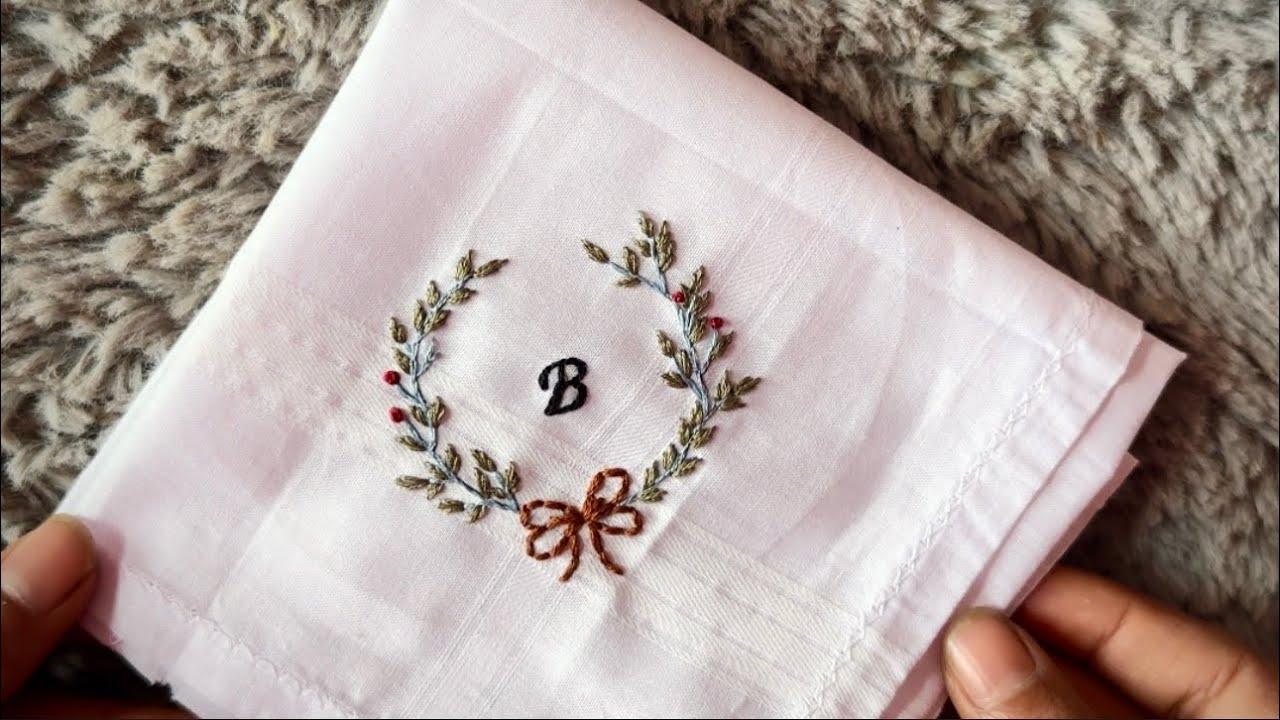
Embarking on the journey of handkerchief embroidery with your PE770 is like diving into a treasure chest of creativity. Each stitch becomes a brushstroke, turning a simple piece of cloth into a canvas of personal expression. Take a moment to appreciate the elegance of this craft: whether it’s a delicate floral motif or a whimsical design, the results can be simply stunning. Here are some techniques that can elevate your embroidery game:
- Free Motion Embroidery: Control the fabric under your needle as you draw with thread.
- Appliqué: Add texture and dimension by layering fabrics and stitching around the edges.
- Monogramming: Personalize your handkerchiefs with initials for that extra flair.
Now, when you tackle these techniques, it’s essential to keep a few tips in your back pocket. For instance, don’t forget the power of stabilizers; they can prevent puckering and ensure clean, crisp designs. And remember, experimenting is key! Try different threads and fabrics, as they can drastically change the outcome of your embroidery. To guide you further, here’s a quick comparison table of popular threads:
| Thread Type | Best Used For | Notes |
|---|---|---|
| Rayon | Vibrant designs | Shiny finish, great for details |
| Polyester | Durability | Resistant to fading, perfect for everyday use |
| Cotton | Softness | Great for vintage looks, eco-friendly option |
Choosing the Right Fabrics and Threads for Stunning Results
When it comes to handkerchief embroidery, picking the right fabrics and threads can make all the difference. Think of your fabric as the canvas for a breathtaking painting; it sets the scene for your artwork. For handkerchiefs, lightweight cotton or linen is a stellar choice. These natural fibers breathe well and give your embroidery a polished look. You might also consider blends if you want a bit of sheen or durability without compromising on softness. Don’t forget to test your fabric before jumping in; a small embroidery sample can save you from heartache later on!
Now, let’s talk threads. Whether you’re using embroidery floss, rayon, or polyester, each brings something unique to the table. Floss offers a classic, textured finish, while rayon gives you that eye-catching luster. Polyester? It’s like the workhorse of threads; strong and colorfast. Before you begin, here’s a quick rundown on matching threads to fabrics:
| Fabric Type | Best Thread Type | Color Recommendations |
|---|---|---|
| Cotton | Embroidery Floss | Pastels or Brights |
| Linen | Rayon | Muted Tones |
| Blends | Polyester | Metallics for Accent |
So go ahead, mix and match! When you choose wisely, each stitch will shine like a star. Remember, it’s not just about what looks good; it’s about what feels right under your hands. Happy stitching!

Essential Tools and Settings for Perfectly Crafted Designs
To elevate your handkerchief embroidery game on the PE770, start with high-quality threads. Opt for polyester or rayon threads that give your designs a vibrant pop without snagging. Don’t forget to adjust your needle size based on the type of fabric you’re working with; a larger needle might work wonders on thicker blends, while a smaller one is perfect for delicate fabrics. Having the right stabilizer is also crucial—it’ll be your secret weapon against fabric distortion. Look for options like cut-away stabilizers for dense designs or tear-away ones for lighter projects. With these essentials in your toolkit, your creativity can really shine!
Now, let’s dive into the settings that will make a world of difference. Begin by carefully selecting your design density—this is key to ensuring intricate designs stitch smoothly without making your fabric feel like a brick. Adjust your stitch length for optimal results; a general rule of thumb is to keep it around 2.5 to 3mm for most handkerchief projects. Don’t be afraid to experiment with thread tension to see what gives you the best finish, as this can affect how stitched designs pop against the fabric. Here’s a handy table summarizing the essential tools and their recommended settings:
| Tool/Setting | Recommendation |
|---|---|
| Thread Type | Polyester or Rayon |
| Needle Size | Varies by fabric (usually 75/11 for lightweight) |
| Stabilizer | Cut-away or Tear-away |
| Design Density | Optimize for fabric type |
| Stitch Length | 2.5 to 3mm |
| Thread Tension | Adjust as needed |
Tips and Tricks to Elevate Your Handkerchief Embroidery Game
To really step up your handkerchief embroidery game, start by selecting the right fabric. You want a material that not only feels good but also works well with your embroidery machine. Think about cotton or linen—soft yet sturdy. They allow the thread to pop and showcase your designs beautifully. Always pre-wash your fabric to avoid shrinkage later on; it’s like giving your handkerchief a little spa day before you start stitching. Also, don’t forget to invest in high-quality threads. They can make a world of difference in the finish of your project. Stick with brands like DMC or Madeira for colors that sing and textures that impress!
Incorporate some fun elements to keep your creativity flowing. Experiment with different stitch techniques. For example, try blending satin stitches with backstitch for depth and dimension. If you’re feeling a bit daring, mix colors in a gradient pattern to create a stunning visual effect. Hooping your fabric correctly is crucial—make sure it’s taut but not stretched; imagine a drum, firm and ready to play! Lastly, don’t shy away from using templates or designs you find online. Personalize them with initials or special dates to give your handkerchief that unique touch. Consider keeping a mini design journal with sketches and notes on what works or doesn’t; it’s like having a treasure map for your future projects!
Final Thoughts
And there you have it! You’re all set to tackle handkerchief embroidery on your PE770 like a pro. Remember, every stitch you make is a step toward unleashing your creativity and personal style. So, don’t be shy—grab that fabric, thread your needle, and let your imagination run wild!
Whether you’re crafting thoughtful gifts for loved ones or jazzing up your personal collection, each embroidered piece tells a story only you can create. The best part? With practice, you’ll not only improve your skills but also unlock endless possibilities on your embroidery journey.
Next time you’re feeling crafty, don’t hesitate to whip out that PE770 and make some magic happen. Keep experimenting, keep creating, and most importantly, have fun with it! Happy stitching!