Blog

Need to Log Off? Here’s How to Sign Out of YouTube!

Hey ‌there,⁣ fellow YouTube enthusiast! ​Ever lost track‍ of time while binge-watching your favorite channels, ‌only to realize you need‍ to ⁢log⁢ off for a ​bit? It ⁣happens to⁤ the best of‌ us! Whether you’re diving into a new‍ hobby, getting⁢ some ‍precious‍ offline time, or simply needing to ⁣switch ‌accounts, knowing ⁣how ⁤to ‌sign out of​ YouTube ‌can be a⁢ real game-changer. Don’t worry; we’ve got you ‌covered! ⁢In this handy guide,‌ we’ll walk you through the ‌quick and easy ​steps to log off, ensuring you can ‍enjoy that break without any‌ hiccups. So, grab your device, and let’s make signing out as smooth as scrolling through​ your latest recommendations! ‍Ready? Let’s ‍dive‍ in!
Understanding ‌the ‌Importance‌ of Signing Out for Your YouTube ⁢Privacy

Understanding the Importance of Signing⁢ Out for⁢ Your⁣ YouTube Privacy

When ‍you’re engrossed‍ in the world of YouTube,​ it’s easy to overlook the importance of signing out. Think⁢ about it: your saved playlists, watch history, and personalized recommendations can all paint a ⁣picture ⁢of⁣ your interests. If you ⁣leave​ your⁢ account logged in, anyone⁣ with access ‌to your device can dive into ⁢your viewing ⁢habits. This isn’t ⁢just about privacy; it’s about ensuring that your‌ preferences and⁣ personal data remain strictly yours. Plus, signing​ out can⁤ help you‌ avoid ⁣those annoying auto-playlists ‌that show up ‍based on what your friends or⁣ family ⁢might have watched while ​using your⁤ account.

So, how can you protect⁣ your privacy when you’re‌ done ‍enjoying‌ your favorite ‌videos? It’s ‌as simple as a few​ clicks! Here are some⁢ quick reminders‍ to keep in mind:

  • Always sign out​ when using a⁢ public or ​shared device: ‍Public computers, libraries, or ⁣even friends’ devices can ​compromise your⁣ account.
  • Regularly check your account activity: Reviewing your⁤ watch history can help you see what’s been watched and⁣ ensure ‍there’s nothing undesired.
  • Use⁤ incognito⁣ mode: This feature allows⁣ you to​ watch videos without⁢ leaving⁢ a​ trace on your browsing history.

This practice not only boosts your ⁤privacy but ⁢also sharpens ​your YouTube experience. Keeping your account secure is just as​ essential as enjoying ⁣your content!

Simple Steps to Log Off: A User-Friendly Guide
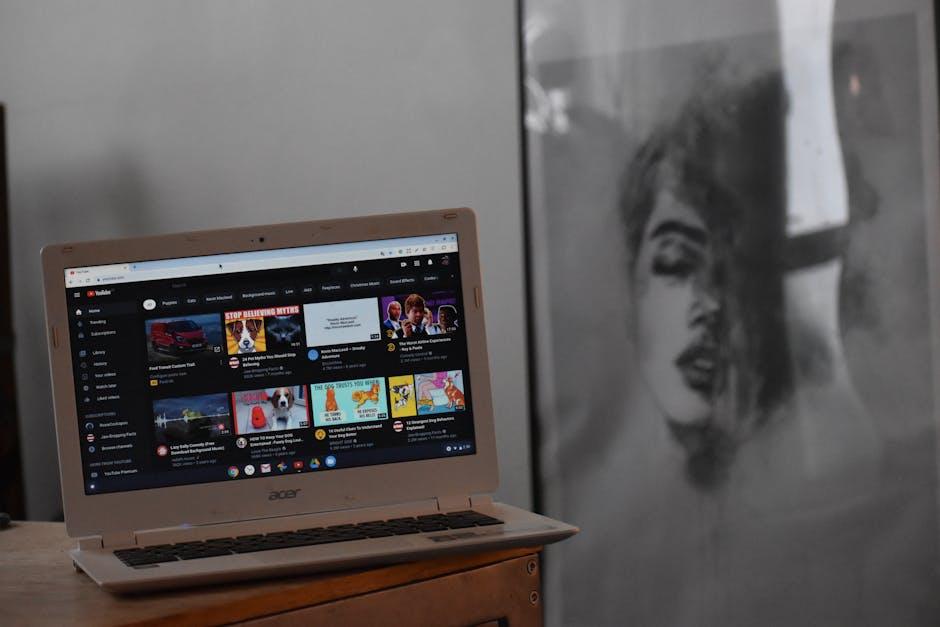
Simple ‌Steps to Log Off: A User-Friendly​ Guide

Logging off YouTube is⁣ a breeze! If​ you’ve ⁢been binge-watching your favorite channels or ⁣just⁢ scrolling through cat videos, taking​ a moment to‍ sign out can help maintain⁣ your privacy, especially if you’re ⁢using a⁤ public ‌computer. Just look ​for your profile icon—it’s usually at ‍the ⁢top ⁢right corner of the screen.⁤ Give it a⁤ click, and you’ll see a drop-down menu‌ pop up, inviting you⁢ to⁣ take action. Feel‌ like⁣ a secret agent? You’re just one click⁤ away ⁤from disappearing from the⁤ digital sphere!

After ‌you​ click that ⁤profile​ icon, simply find the “Sign out” option. It’ll be nestled in​ there, looking to take ‍you one step⁤ closer to your‍ next ⁣adventure. ⁣Upon clicking it, you’ll ⁤be ‍logged off, and YouTube will remind you how ‌easy it is to ‍stay​ in control ​of your viewing experience. If you often switch between accounts, consider saving your credentials for quick access. This little tip can⁤ turn your⁣ YouTube ‌journey from a​ drag into a ⁢smooth ride. ‌Don’t forget, every time you log off, it’s like giving your ‌homepage a breath of fresh air!

Troubleshooting ⁣Common⁤ Sign-Out Issues ⁢You Might ‌Encounter

Troubleshooting Common Sign-Out Issues You Might Encounter

Getting booted​ from ‌YouTube ‌can be a real pain, especially if you’re not sure what went wrong. ‍One of the most common hiccups is when the ⁢sign-out button ​just ⁢doesn’t seem to⁤ work. You ⁢click it, and…⁢ nothing happens. Talk about ‌frustrating! First, try ⁤refreshing your browser or app. Sometimes, ‍it’s just a temporary glitch in the matrix. If that⁢ doesn’t ‍help, check ⁣if your internet connection is strong and stable. A ​wonky⁤ connection can ⁣trick the system into thinking you’re​ still hanging out in your account.

Another ⁤sneaky issue? You might be logged in across multiple ‍devices.⁣ If you ⁣signed in on⁣ your ⁢phone and forgot about it, that could cause conflicts. Consider signing out from all devices, which can ⁢often be done through your account settings. ‍Also, always⁣ double-check‍ that you’re not using​ an⁤ outdated version of ‌the⁢ app.⁢ Keeping your YouTube app updated⁤ is like giving it a fresh coat of paint;⁤ it can fix lots of pesky bugs. If ‍none⁢ of this does the ‌trick,⁤ clearing your browser cache or app ⁤data often works wonders. Remember, ‌sometimes ‌a little digital spring cleaning can go a ‍long way!

Maximizing Your YouTube Experience:‍ Why ‍Logging Out Matters

Maximizing Your YouTube Experience: ⁢Why⁤ Logging Out Matters

Logging⁣ out⁤ of YouTube can seem like a hassle, but think about it—it’s a bit like​ closing the curtains after a long day. It not only gives ⁣you privacy, but it also ‌helps maintain a cleaner and more organized digital presence. When‌ you’re logged in, algorithms track ‌your every click, which ⁤can feel a bit invasive after‍ a⁢ while. ⁤By signing ​out, you regain control and avoid the endless rabbit hole of suggested⁣ videos ‌that can monopolize ‍your time. Plus, logging out means you can enjoy all the⁣ quirky, fun content without personalized interruptions based ‍on previous⁢ views.⁢ Sometimes, taking ⁣a break from algorithms can help reignite your interest‍ in discovering fresh content!

Then there’s the‍ security angle‌ to consider.‌ Logging out ensures your account remains safe⁢ from prying eyes,⁢ especially ‍if you share ⁢your device with others!⁤ Just think about ⁣it:‍ have you ever walked away ⁣from​ your computer or phone,​ only to ⁤return ‍and find ​someone has been scrolling through your favorite⁤ channels? Awkward, ‌right? By signing out,‍ you ⁤send a clear message—this is ‍your space, and you’re the one in ‌control.⁤ So ‌let’s make it a⁤ habit ⁤to log off when you’re done. It’s a simple‌ act that comes‍ with a surprising amount of⁤ freedom.

The Way Forward

And ‍there you have it! Signing ​out‌ of YouTube is‍ as ‌easy as‍ pie, and⁢ now ​you’re all⁤ set to ⁤reclaim ⁢your online privacy or​ give your eyes⁢ a much-needed break from the screen. Whether you’re switching to another account, sharing⁣ a⁤ device,⁤ or just ⁣want​ to ​take a pause from⁢ the endless video rabbit holes,⁢ it’s a breeze.⁤

So why⁤ not give it a try? Just a ‌few clicks ‍and ​you’re​ on your way to enjoying other activities—like actually⁤ talking to that friend you’ve been ⁣meaning to catch up⁤ with or‍ diving into​ a good book. Remember, every time you⁤ take a moment to ‍log off,​ you⁣ give yourself the gift of time. Happy viewing—or non-viewing! Let’s log off and live a ​little! ‍😄

Clearing the Slate: How to Erase Your YouTube Videos

Ever had that moment where ⁢you look back‌ at your past YouTube videos and think, “What was I thinking?” We’ve all ‌been there! Whether it’s a cringy vlog, a poorly edited tutorial, or just content⁤ that doesn’t vibe with who you are⁤ anymore, sometimes it’s⁢ best ⁣to clear the digital air. “” ‌dives into the process of‍ wiping the slate clean, exploring why you might want to hit ​that delete ‍button,‍ and how‌ liberating it can feel to ⁤curate‍ your online presence. Ready to take control⁣ of your‍ channel and⁣ say goodbye to ‌the old you? Let’s ⁣get started!

Understanding ⁢the Reasons ⁢Behind‌ Erasing‌ Your YouTube Videos

Understanding the Reasons Behind Erasing Your YouTube ‍Videos

Erasing videos from your YouTube channel can often feel like‍ an emotional roller⁣ coaster. Maybe ​you’ve decided your content no longer resonates with you,‍ or perhaps you’re looking⁤ to pivot your channel’s direction. Whatever the reason, it’s​ essential to pause⁤ and‍ reflect. Ask​ yourself: Are those‌ videos truly a snapshot of who you are today? If they don’t‌ align with your​ current vision or brand, ‌it might be time to let them go. Like cleaning out your closet, purging⁣ doesn’t just create ‍space—it revitalizes your creative⁤ spirit. Consider ‍how freeing it is to move forward without the pressure of⁢ past content ​lingering in the background.

Another common motivation for hitting ‍that delete button is privacy. In a world ⁣increasingly focused on personal ‍branding, you might find that some videos contain sensitive information or⁣ outdated views that‍ do ‍not fit the narrative you want to present. Here’s a quick checklist of reasons that might push you to erase a video:

  • Increased focus ⁣on personal privacy
  • Desire for improved​ content⁤ quality
  • Shifting audience preferences
  • To protect your brand’s integrity

Understanding these factors can help clarify the path ahead and allow​ you to ‌reclaim your narrative. Remember, it’s not about the ‌number of videos you have but the value ‍they‍ bring to your audience.

Step-by-Step Guide to Deleting Your Videos‍ with Confidence

Step-by-Step Guide to⁢ Deleting ⁣Your Videos with Confidence

Feeling overwhelmed by your own video library? It’s totally normal! Sometimes, we just need to hit the reset button. Begin by logging ⁢into ‍your YouTube account‍ and‌ navigating to YouTube Studio.​ Once you’re in, check​ out the left-hand ‌menu and click ‍on Content. This is where the magic ‌happens! You’ll see all your uploaded videos laid ‍out nicely. If you want to delete a specific video, just hover over it ⁤and click on the three vertical dots for more options. But ​hold on—before you hit the delete button, think about whether‌ you ​want to private the video or perhaps unlist it instead. It’s like putting your favorite toys away instead of tossing them out; they’re still there for you when​ you want them back!

Once you’re ready ​to proceed,⁢ hit that Delete Forever option. Be careful though! YouTube will give you a little reminder that once it’s gone, ⁣it’s gone—no turning back. ‌It’s like cleaning out your closet: once you get rid ⁢of⁣ those old jeans, ‍they’re ‍not coming back! If you have a bunch of ‍videos you want to erase at once, you can ⁢check multiple boxes and then⁤ use the Actions menu to delete‌ them all in one fell swoop. ​Just remember, ⁤you’re not losing your ‍work ​forever⁤ if​ you’ve saved the original files elsewhere. So go‍ ahead, clear ⁢up that digital space and⁤ breathe ⁢a little easier! Enjoy the fresh start and maybe plan what new content you want to create next!

Exploring‍ Alternatives to Permanent Deletion

Exploring⁣ Alternatives to Permanent Deletion

When the thought of permanently deleting your YouTube videos crosses your ⁣mind, consider some⁤ viable alternatives first. YouTube offers ⁣features that allow you to hide your videos without a complete ​wipe. This means you can take a breather and⁤ reassess later. By simply changing the‌ visibility settings of your ⁤videos, you ​can:

  • Make them private: Only selected users​ can ⁤view them.
  • Unlist them: ⁤ They won’t ⁣show ⁢up in‌ search ⁢results, but​ anyone with the link can still access them.
  • Draft your content: If‌ you’re not ready to go live,⁢ keep your ​videos‌ in the⁢ drafts for future tinkering.

Another option you might find handy is using playlists to manage your content. Toss those videos into a private playlist, helping to keep your channel ⁤organized without⁢ the pressure of deletion. Think of it like putting cherished ⁢items in a storage unit; they’re still yours, just safely tucked ⁢away for later. If you’ve got videos that⁢ need a refresh,⁣ consider:

Re-uploading Revamped content to reflect current views.
Enhancing old videos Add new intros or graphics to breathe new life.
Collaborating Join‍ forces with other creators to revive engagement.

The Importance of ⁣Retaining Your Content’s Legacy

The Importance of ‌Retaining Your Content’s Legacy

When​ you​ hit that delete ‌button on your⁤ YouTube videos, it’s​ like wiping ​away pieces ​of‌ your digital identity. Sure,‌ you might ⁤think you’re clearing out the‍ clutter, but every piece of content you create⁣ carries with ⁢it a bit of your journey, your voice, and your unique perspective. Think about it: those goofy vlogs, that passionate ‌rant, or‌ even that overly ambitious ‍DIY project — ‍each video reflects not just your​ creativity‌ but also who you were ‍at that time. Retaining your ‍content’s legacy means acknowledging your growth and evolution, serving as a roadmap of your creative evolution for both you and⁤ your audience.

Moreover, a vast​ collection of videos isn’t just a ⁢personal​ archive; it’s a way for others to connect‍ with you, to relate to your experiences and ‍find inspiration. Consider these points:

  • Every view counts – someone might stumble ⁤upon that old video and find it just what they need.
  • Learning opportunities – you can look back at ‌your past work and see ⁢how far you’ve come.
  • Building a⁤ narrative – your videos contribute to a⁢ larger story, making your channel more engaging.


So, while the urge ‌to ⁢start ‍fresh might ‌be⁣ strong, nurturing your content’s⁢ legacy can be a ⁣powerful tool in fostering genuine connections with your audience.

Future Outlook

As​ you wrap up your YouTube journey and hit that ⁢reset button, ‌remember this: clearing ‌your slate‌ isn’t about ​erasing your past—it’s ‍about making room for new beginnings. Whether you’re looking ⁣to reinvent your⁤ channel, declutter your content, or just‌ start fresh, it’s all part of the creative process. Think of⁤ it like ​spring cleaning‌ for ‌your digital ⁢space;‌ sometimes it feels good to toss out what no longer serves you.

So, go‌ ahead, take that leap! Don’t fear the delete button; ⁢embrace it ⁣as a tool for growth. Whatever your reasons, just know that a new chapter awaits, filled with endless possibilities and fresh ideas. And who knows? ‌Your next ​masterpiece ⁣could be just around‍ the corner. Cheers to new adventures ⁢on the platform—happy creating!

Effortlessly Upload Your YouTube Video to Canva Today!

Ready to take your video content from just good to absolutely stunning? Imagine transforming your raw YouTube footage into eye-catching visuals without breaking ⁢a sweat.⁤ With Canva’s user-friendly ⁤interface, you can ​seamlessly upload your YouTube videos ‌and⁣ sprinkle in ​some creative magic—all in⁢ a few clicks! Whether you’re a seasoned ⁢content creator or‍ just dipping your toes into⁤ the⁢ video editing world,‌ this ⁣guide will walk you through the process of effortlessly integrating your videos into Canva, so you can elevate your projects and impress your audience. Let’s dive into the simple steps of ⁤making your ⁢video pop!
Unlock the Seamless Sync Between ⁣YouTube and Canva

Unlock the ‌Seamless Sync Between YouTube and Canva

Imagine the ease of having your YouTube videos right at your⁢ fingertips in Canva! With ⁢just‌ a few simple clicks, ⁣you can take your video projects to a whole new level. No more tedious downloading and searching for files; ​everything is‌ streamlined. Want to add some text⁣ overlays, animations, or dazzling graphics to your video?‍ Simply connect your YouTube‌ account within Canva,‍ and poof! The⁢ magic happens. ⁣You’re ready to transform raw footage into eye-catching visuals that captivate your audience and elevate ⁢your brand.

Here’s how it works in⁤ a nutshell:

  • Connect Your Accounts: Link your YouTube and ​Canva accounts ‌with a few clicks to start the sync.
  • Select Your Video: Browse your uploaded videos and pick the one that’s ready for​ some jazzing up!
  • Edit‍ and Enhance: Play around with Canva’s editing​ tools, adding elements that truly represent your style.
  • Export Smoothly: Once you’re satisfied, export your finished masterpiece ⁤directly back ​to YouTube or download it⁣ for other uses.

This seamless ⁤integration not only saves time but also fuels creativity, allowing you to focus on what really matters: creating content that resonates.

Transforming ⁤Raw Footage into Stunning⁤ Visuals with Ease

Transforming Raw Footage into ​Stunning ‍Visuals‌ with Ease

Imagine taking that ⁤raw footage from your latest YouTube adventure and transforming it into a captivating visual masterpiece without any of the usual headaches. With Canva, you can effortlessly​ bridge the gap between your initial material and a⁤ stunning final product, all while ‌having fun‍ in the process. Just upload your clips directly to Canva and watch as the magic unfolds! The editing tools available are⁤ like a playground⁣ for your creativity—adding filters, animations, and transitions is as ⁣simple as dragging and dropping. Who knew you‌ could level up your videos ‍without breaking a sweat?

But ‌wait, there’s more! Canva provides you with endless options to enhance your storytelling. Whether⁢ you want to spotlight key moments or incorporate text‍ overlays that pop, the platform has you ‌covered. Here’s what you can explore:

  • Customizable templates that match your style.
  • Stock images and videos to⁢ fill in the ​gaps.
  • Audio ⁢tracks that set the perfect mood.

Your video can go from ordinary to⁤ extraordinary in just a ⁤few‍ clicks. Plus, if you’re collaborating with a team, Canva⁢ makes it easy ​to share and edit together in ⁤real-time. It’s ​like having a ⁢virtual film studio right at your fingertips!

Crafting Eye-Catching Thumbnails That Grab‌ Attention

Crafting Eye-Catching ​Thumbnails That Grab Attention

When it comes to grabbing attention on YouTube, your thumbnail is like a first date; you want it to be memorable! Think of it as‍ the cover of a book that you just can’t resist picking up. To whip up a stunning thumbnail that makes viewers pause their scrolling, focus on bold colors and striking images ⁣ that resonate with your video’s theme. Use tools like Canva to layer text⁤ over visuals—simple yet effective! What’s more, try to stick to a theme or color palette that’s consistent with your channel’s identity to ‌create a recognizable ​brand. It’s like having a signature scent; once a viewer gets a whiff of ⁤your style, they’ll​ remember it every time.

Consider these tips to elevate your thumbnail game:

  • Use High-Quality ‌Images: A blurry image⁢ is like a dingy restaurant menu—no one’s interested!
  • Incorporate Text Wisely: ⁣Catchy, concise ‍text can offer a sneak peek of your video’s⁣ content, encouraging clicks.
  • Test Different Designs: Don’t be afraid to mix it ‍up! What worked for one video⁢ might not work ⁤for another.

Want ⁢a quick reference on thumbnail dimensions? Here’s a handy table:

Platform Recommended Size
YouTube 1280 x 720 pixels
Instagram 1080 x 1080 pixels
Facebook 1200 x 630 pixels

Maximizing Your Videos Impact: Tips for Effective Editing⁣ in Canva

Maximizing Your Videos Impact:⁢ Tips ​for Effective Editing​ in Canva

Editing videos doesn’t have to feel ‍like a Herculean task. With Canva, you ⁤can effortlessly ‌transform your content into ‍eye-catching visuals that resonate with your audience. Start ‌by focusing on the essentials: trim those awkward pauses and cut out unnecessary fluff⁣ to keep your viewers ​engaged. Remember, less is more! Utilize Canva’s ⁣intuitive​ drag-and-drop features to easily incorporate text overlays, animated transitions,⁣ and lively backgrounds. Think of it this way: your video is like a ⁣dance, and editing⁣ is the choreography. Keep ⁣your moves fluid and exciting to keep your viewers from skipping ahead!

Next, consider adding music and sound effects ‍ to elevate ⁤your video’s emotional impact. Choose tracks that‌ align with ​your message or theme; a light-hearted ⁢tune ⁢can brighten an informative ​clip, while a​ dramatic score can enhance storytelling. ‍Also, don’t overlook color grading—using cohesive color schemes can significantly ​boost the overall aesthetic. Here’s‌ a quick list of editing features you can master⁣ in Canva:

  • Text Animations: Grab attention effortlessly.
  • Filters ⁣& Effects: Set ⁢the mood and⁢ enhance visuals.
  • Audio Controls: Adjust levels for the perfect balance.
  • Video ⁣Trimming: ‌Keep ⁢engagement high by cutting the ​excess.

Why not put all these tips into practice? Start creating content that not only looks good but feels good too. Happy editing!

Future Outlook

And there you have it—uploading⁣ your‌ YouTube videos to Canva is⁢ as easy as pie! No more head-scratching or technical hitches; you can now enhance your videos with stunning visuals ‌and⁣ graphics in just a ‍few clicks.​ Whether you’re jazzing up your content for social media or crafting a professional presentation, Canva⁢ has your back.

So why not give⁢ it a whirl? Dive in,‍ explore the tools, and let your creativity run wild.‌ Before you know ⁤it, you’ll be transforming your ‍videos into captivating masterpieces that grab attention and keep your audience coming back for more. Remember, the best part? It’s all at your fingertips, ready for you to ​unleash your inner designer. Happy creating! 🌟

How to Clear Your YouTube History in a Few Simple Steps

Let’s face it—nobody likes ⁤their YouTube history lurking in the shadows of their profile, especially‍ if ‌you’ve ‌been watching ⁤everything from cat videos to ‍late-night conspiracy⁤ theories! Whether you’re aiming to tidy up your suggestions or just ⁢want a fresh start, clearing that history is a breeze. In this guide, we’ll walk you‍ through ⁣some super ​simple steps to wipe that slate clean. So, grab a comfy seat, maybe a snack or two, and let’s ‌dive in! Your viewing habits deserve a bit of a makeover, don’t you think?

Understanding Your YouTube History and Why It Matters

Understanding Your YouTube History and Why It Matters

Your ⁤YouTube history‍ is like a little⁤ diary⁢ of your online viewing habits, holding a treasure trove⁤ of what you’ve been watching, enjoying, or even just curious about. This history can shape your experience on the platform, influencing the suggestions you get. Have you ever‌ wondered how YouTube seems to know​ exactly what you want⁣ to⁣ watch⁢ next? That’s the magic ⁢of your history at play! But like having too ⁤many tabs‍ open on your browser, sometimes it can⁢ get cluttered, and you might prefer a fresh start. Clearing out your history not only declutters your recommendations but can also ‍protect⁤ your privacy. ‍It’s like spring cleaning for your digital life!

Understanding how to manage this history ​can empower your viewing experience. A clean ‍slate means YouTube won’t be holding onto remnants of old interests that no longer⁤ reflect your tastes or recommendations. Think of it this way: if your viewing history is a movie reel of your ⁢life, why not edit⁣ out the parts that no longer​ resonate with you? By taking ‌a few simple steps, you’ll have total control over what YouTube⁢ suggests next. Below⁢ are some reasons why keeping your history clean is beneficial:

  • Better Recommendations: ⁣Tailor YouTube’s suggestions to your current interests.
  • Enhanced‍ Privacy: Feel more secure about⁣ what you watch and share.
  • Reduced Clutter: A fresh start makes for a more enjoyable browsing experience.

Taking the Plunge: Accessing Your YouTube History Settings

Taking the ⁢Plunge: Accessing Your YouTube History Settings

Diving into your⁣ YouTube history settings is like exploring a ⁣hidden treasure chest of your viewing habits! First off, you’ll want to open YouTube and head to ​the menu on‌ the left ​side of the screen, where a world of options awaits. From there,⁣ simply click on “Library,” ⁢and​ then look ‌for the “History” section. Here’s where the magic happens! You ​can scroll through an entire list of videos you’ve watched, almost like flipping through ⁢an old photo album filled with nostalgic memories. But rather ‍than just reminiscing, ready to ⁣take the plunge? It’s ‍time to reclaim your viewing space!

Once you’ve ‍located that history section, look for‌ “Manage⁤ All ⁤History” or something similar, depending on updates. This is your command center. You can opt‍ to delete individual videos by hitting those three little dots next to each entry, or if you’re feeling a bit more daring, you ​can clear the whole history in one​ fell swoop! ‍It’s like cleaning out your closet—sometimes you just need to let go of ‌the old stuff‌ to make room for the new! And if you’re concerned about future ⁢recommendations, don’t ‌forget to tweak your settings to pause your watch ⁣history—it’s like putting a pause on a⁣ favorite series when⁣ you need a break.

A Step-by-Step Guide to Clearing Your History Effortlessly

A Step-by-Step Guide to ‌Clearing Your History Effortlessly

Ready to dive right into the nitty-gritty of clearing ⁤your YouTube⁣ history? It’s easier than finding the latest viral cat video! First, open the YouTube app or website and log into your⁢ account. Once you’re in, ‍click ‍on the menu or⁤ profile icon—this is your gateway​ to all things personal. From there, ‌navigate to the “Settings” option. Don’t fret if⁢ it seems a ⁢little daunting ‌at first; we’ve all been there with‌ tech. After you’ve hit ⁤settings, look for “History & privacy.” It’s like a treasure map ⁣leading you straight ⁤to your viewing history.

Now for‌ the fun part! You’ll ‌see options like “Clear⁣ watch history” and “Clear search‍ history.” Go​ ahead and ‌hit those ‌buttons to wipe the slate ​clean. Just like that,⁤ your history is gone! But wait, if you want to ensure your future searches aren’t haunting you, consider toggling on “Pause watch history.” ‍ This nifty⁣ feature stops YouTube from tracking your watched videos. Imagine it like putting a “Do Not Disturb” sign on your digital life! And if you ever want to revisit your choices, YouTube keeps your‌ deleted history for a while, letting you restore it if need be. Simple, ‌right?

Keeping It Fresh: Tips for ‍Managing Your YouTube Recommendations

Keeping It Fresh: Tips for Managing Your YouTube Recommendations

Your ⁢YouTube⁤ recommendations can feel like a mixed bag sometimes—it’s like ‍a box of chocolates where you end up with the weird flavors. To keep ⁢your‌ viewing experience deliciously relevant, it’s essential to manage your history. Start by heading to ​your⁢ YouTube account ⁣settings. Navigate to “History & Privacy,” ‌where you can easily find options to clear⁢ your watch history. You can choose to delete specific videos or wipe out entire sessions. It’s like spring cleaning⁢ for your video⁤ recommendations—refreshing ​and liberating!

After tidying up your⁣ history, don’t forget to customize your settings for an even⁢ better experience. You can turn off your watch⁤ history ⁤altogether if you want to keep ‍things secret or just explore without leaving a trace. Also, engaging with content you genuinely enjoy by liking or subscribing helps the algorithm understand your preferences. Imagine feeding a chatbot, but instead​ of text, you’re giving it a feast of your interests! Keeping⁢ your​ recommendations ‌fresh is like tending a garden—pull out the weeds and nurture the flowers, so you always have something beautiful to enjoy.

Future⁣ Outlook

And there you⁤ have it! Clearing your YouTube history is as easy as pie. With just a few simple steps, you can tidy ​up your viewing record and⁢ reclaim your privacy. Whether you want to start fresh⁢ or just prevent those ⁢awkward video suggestions from popping up, taking control of‍ your history can refresh your YouTube ‌experience. So why not take a minute ⁣right ‌now to give it​ a try? After all, who doesn’t love a clean slate? Now go ahead, dive back into ⁤your favorite content without ⁣that ⁤baggage weighing you down. Happy viewing!

Step-by-Step Guide: Adding Chapters to Your YouTube Videos

Hey there, fellow creators!⁢ If you’ve ever found yourself scrolling through a long video, searching for that one nugget of information you need, you’ll know just‌ how⁢ frustrating it can‌ be. It’s like trying to find a ‍specific ‍needle in a⁢ haystack—except this haystack has a billion other needles!‌ But fear not, because today ⁣we’re‌ diving into an oh-so-handy feature of ⁢YouTube that⁤ can ⁣make your videos not just ⁢easier to navigate, but also way more enjoyable to watch. ⁤

Welcome to our step-by-step ⁤guide on adding chapters to your⁢ YouTube videos!⁤ Think​ of video chapters as the handy table of ‍contents⁤ in your favorite book. ⁣They help viewers⁢ skip to the good stuff without having to guess or scramble through ‌the content. Whether you’re ‍sharing a tutorial, vlogging⁢ your latest adventure, or⁢ breaking down complex topics,⁤ chapters can elevate ​your content ​and⁣ keep your audience engaged. So, grab a snack, settle in, and let’s unlock the secrets of YouTube chapters together!

Crafting Compelling Chapters: The Key to Engaging Your Viewers

Crafting Compelling Chapters: The Key to Engaging ⁣Your Viewers

Creating chapters in your YouTube videos isn’t‍ just about⁢ breaking up‌ a long ​piece of​ content; it’s like crafting a playlist for a road trip—each chapter serves as a destination that engages your viewers along ⁤the ‍way. Think of it​ as⁢ a map guiding your audience through the terrain of your narrative. By adding⁤ these little⁣ markers, your viewers can easily jump to the parts that resonate with them ‌the most, making the whole​ experience much more user-friendly. It’s all about offering choice,​ ensuring that even if‌ they’re just ‌skimming, they can snag the juicy bits without sacrificing the overall journey.

To‍ maximize the‌ effectiveness of ‌your video chapters, consider the following tips: ‌

  • Be Descriptive: Craft chapter titles that are enticing and⁣ give a sneak peek of​ the content ahead.
  • Keep it Short: Aim for concise ⁤entries; too much information can overwhelm.
  • Sequence Well: Ensure ​your chapters​ flow logically; viewers should feel like⁢ they’re gliding‍ effortlessly through your content.

Remember, your viewers are more‍ likely to stick around if ​you make navigation as easy as pie! So go ahead, sprinkle chapters like confetti and watch your viewer engagement soar.

Navigating the YouTube Interface: A​ Simple Tool for Chapter Creation

Getting the hang of YouTube’s interface can ⁢feel ‌like trying to find your way in a⁢ maze, but‍ fear not! Creating chapters ‍for⁤ your videos is not only simple but brings a whole new level of organization that ‌your viewers​ will love. To kick things off,​ head over to your video ⁤manager.⁣ Once⁢ you’ve ‌found your video, click on it and scroll down to the description area. This is where the magic happens. You need to format the timestamps in ⁤a way ⁤that YouTube understands, so your chapters become a breeze⁢ for your audience to navigate. You’ll want⁢ to jot down the ⁣time ⁢stamps in the format of 00:00 ‍followed by a ⁤brief title for that chapter. Easy peasy, right?

Now, here’s‍ a little ⁤secret: if you add at least three chapters, YouTube pulls them up in the ⁤video player itself, giving viewers the chance to click straight to the part they‍ want. Here’s how to ​structure⁣ your chapters: Title | Timestamp.‌ Create a‍ list that showcases key moments in⁢ your video, making it ‌look appetizing and readable. Think of it as a menu ⁤for⁣ your content! ⁣Here’s a quick table you can visualize:

Timestamp Chapter Title
00:00 Intro
01:15 Main Topic Overview
03:50 Details & Insights

Timing It Right: How to Pick Perfect Moments for Your Chapters

Timing It Right: How to Pick Perfect Moments for Your Chapters

Timing is everything when it comes to adding⁢ chapters to your YouTube ​videos. Imagine you’re ⁢in a thrilling movie, and every major plot twist is perfectly timed. That’s what⁢ you’re aiming for!⁤ Set your chapters at natural pauses in⁣ your video where viewers can catch their ⁣breath and digest the information. Think about it:⁣ wouldn’t you prefer jumping ‍straight to the juicy bit of a recipe video rather than sifting through a lengthy intro? Place chapters at key moments like transitions between topics, critical insights, or any visually engaging segments to keep viewers hooked.⁢ Not sure where to start? Here are some moments‌ to consider:

  • Introduction of New ‌Topics: Signal a shift in content.
  • Recaps: Great for reinforcing important points without overwhelming your audience.
  • High Energy Moments: Capture the excitement when viewer​ engagement peaks!

To maximize‌ the impact of your⁣ chapters,​ consider how the overall pacing flows. A well-timed chapter can enhance​ the learning⁣ experience, making it easier⁤ for viewers to revisit specific ‌parts. Want your ⁤audience to feel engaged? Try timing your chapters with‍ the⁣ rhythm of ‍speaking, using ‍pauses for emphasis or to ‍allow for audience reactions. Here’s a quick table to help⁣ you identify potential⁢ chapter milestones:

Moment Type Purpose
Start of a‍ New Section Intro Prepare viewers for a topic shift
Key Visual Demonstrations Highlight Increase engagement through visuals
Summarizing Insights Wrap-up Reinforce what was just discussed

Boosting ⁤Visibility: The SEO Magic of ​Chapter Markers in Your Videos

Boosting Visibility: The SEO Magic of Chapter Markers in Your Videos

When it comes to elevating your ⁢video content’s reach, think‌ of chapter markers as your trusty⁢ sidekick ​in the ⁢vast universe of⁣ YouTube. Just like a well-structured book, chapters guide viewers through your narrative and make ⁢it easier for them to navigate your material. Why does this matter? Well, search ⁢engines love organized ⁢content! By strategically placing chapter markers in your videos, you can improve your SEO rankings significantly. Imagine your viewers being able to jump straight to​ the info they need, leading to longer watch​ times and⁣ those sweet, sweet engagement metrics. It’s like ⁤handing them a map to treasures buried ​deep in your video!

Plus, chapter markers can give your video a boost in search results. When you utilize keywords wisely in your‌ chapter titles, you’re essentially creating mini SEO gems that draw in clicks and viewers—like moths to a flame.⁢ Chatting about specifics, here’s what to keep in⁤ mind​ when adding‌ chapters:

  • Use clear, descriptive titles – Make it easy for viewers to know what’s coming.
  • Time-stamped accurately – Ensure your markers ⁢sync perfectly with your content.
  • Incorporate keywords ⁣ –​ This helps your video pop up ​in relevant searches.
Chapter Title Timestamp
Introduction to ‌SEO 00:00
Benefits of Chapter ⁤Markers 01:15
How to Add‌ Markers 03:45
Conclusion and ⁢Next Steps 05:30

To⁤ Wrap ‌It Up

And there you have it! You’ve just unlocked the secret‍ to leveling up your YouTube videos with chapters. Think of it as adding road signs to your content highway—helping ⁢your viewers navigate smoothly through your ideas, stories, or ‌tutorials. By breaking‌ down your videos into bite-sized sections, you’re not only making it easier for your audience ‍to find what they want, but you’re also boosting those watch times and engagement metrics.

So, whether you’re a budding creator or‌ a seasoned pro, don’t sleep on this simple but powerful ​tool. Start incorporating chapters,⁣ and watch your ​videos transform from long hauls into enjoyable journeys. Remember, every⁣ great adventure needs​ a map, and now you have yours! If you have any questions or need a hand, don’t hesitate to ⁢reach⁣ out. Happy⁢ creating, and here’s to making‍ your content ⁢one chapter at a time! 🎥✨

Unlocking YouTube: Your Guide to Getting Video Transcripts!

Ever found ⁣yourself​ watching a YouTube video, hanging onto every word, only to wish you⁣ could catch ‍those crucial details later? ‍You’re not alone!⁣ In​ a world overflowing‌ with video content, transcripts can be your best friend, offering you a chance to ‍save time, boost understanding, and even enhance your learning.​ Imagine having a ⁤written roadmap of insights, quotes, and highlights right at⁣ your fingertips. ​Whether you’re trying to​ ace an ⁤online course, dissect a captivating ⁢lecture, ​or simply revisit that hilarious skit, unlocking transcripts can elevate your⁤ YouTube experience. So, ⁣buckle up! We’re‍ diving into the nitty-gritty of how to get ⁣those ​transcripts,⁢ making⁢ sure you never miss a beat of the content ⁢you love.

Exploring ‍the ‍Why: The Benefits of Video‍ Transcripts for Every‍ Viewer

Exploring the Why: The Benefits of ​Video Transcripts ​for ‌Every Viewer

Video transcripts are like‍ a ‍secret weapon for every viewer; they’re⁤ not just text, but a gateway to better understanding⁢ and accessibility. Imagine trying to follow a gripping tutorial, but the⁤ audio‌ is muffled or the speaker ⁣talks too fast. ‍Enter transcripts!⁤ They⁢ help⁢ by providing⁢ a clear reference that you ‌can scan quickly, making it easier to‌ grab information without‌ having to rewind or replay sections over and over. Plus, they‍ can‍ be ​a lifesaver for ‍those who might struggle ‌with hearing or for ​non-native ⁣speakers, allowing everyone to engage more fully.

But the benefits‌ of transcripts don’t​ stop there! They also significantly enhance your overall learning⁢ experience. By following along with the text, you can better retain information and reinforce your‍ understanding ‌of​ complex concepts. They‍ can even aid in​ boosting your SEO game if you’re a content creator. Search engines can crawl those keywords, making your videos easier to⁤ find for the ⁢audience that’s looking for them. So not only do transcripts make viewing easier and more ​enjoyable, but they also open⁢ up a world of ​discoverability and accessibility! Why not take advantage of such⁤ a versatile tool?

Unlocking ⁢the Tools: How to⁢ Access YouTubes⁤ Built-In Transcript Features

Unlocking the Tools: How to Access YouTubes Built-In Transcript Features

Ever found yourself lost in a⁢ video that’s just too ​long to rewind? That’s where YouTube’s built-in transcript ‍feature⁤ becomes⁢ your‌ best ‌buddy. Imagine diving into a sea of ​content without having to swim⁢ the entire length – you can simply skim through the⁣ transcript!⁣ To⁢ access it, just click ​on the three ⁤dots (more options) below ⁢the‍ video, and ​voila!⁤ You’ll‍ see an option ⁤for ​“Open transcript.”​ Within a ⁣blink, you’ll have the entire ⁣dialogue laid out like a neatly organized playlist. Want to jump to a particular part? Just click on‌ a‌ line in the ‍transcript, and it’ll​ teleport⁤ you straight to that spot. It’s⁤ like having ‍a Table of Contents for videos!

If you’re all about ⁤accessibility, this feature is like having a golden ticket! ‍It’s not just for those ‌who prefer reading; ⁣it’s also ‌a ‌fantastic tool for ‌anyone looking to⁣ grab⁢ quotes‌ or ⁢check facts without ​replaying the ​video ⁤endlessly. Here are some⁤ benefits ⁤of using transcripts:

  • Speedy Information Retrieval: Quickly find what you⁤ need!
  • Language Learning: Understand and learn phrases in ⁤context.
  • Accessibility: ⁢ Open up content for the hearing impaired.

Transcripts⁢ Made Easy: Step-by-Step Guide to Generating and Downloading

Transcripts Made Easy: Step-by-Step Guide to Generating and Downloading

Generating and downloading transcripts from YouTube videos can feel like traversing a labyrinth, but ⁣it doesn’t⁤ have to be⁣ that complicated! First, start by ⁤navigating to the YouTube video you ⁢want to transcribe. Once you’re there, look for‌ the ‌ three dots underneath the video ⁤title‍ – it’s like⁤ a​ hidden treasure‍ map! Click on that, and select​ “Open transcript.” ​ You’ll see⁤ the transcript⁤ pop up on the ⁢right side⁤ of the‌ screen, almost like magic. Not only‌ will you see the text, but it’s even time-stamped. If you’re trying‍ to be efficient (and who isn’t?), you can ⁣easily⁣ copy ‍and ‍paste the entire ⁤transcript into a document of ‍your ⁢choice. It’s ⁣as⁢ simple as‌ dragging your​ mouse across the text like ​you’re ‍painting a⁣ masterpiece!

But‍ hey, if you ‌want to save that transcript for ‌later without all the hassle of copying, there’s a slick method! Click on the transcript window, hit Ctrl + A to ⁤select everything, ⁣and then Ctrl +​ C to copy it. Now,⁣ just hop ⁣over⁤ to⁢ your favorite text‌ editor or document app—like​ Google Docs ‍or Word—and hit Ctrl + V to paste it in. Boom! You’ve got your transcript ready‌ to ​roll. ⁤And, if ‌you’re feeling extra fancy, take that text and format it‌ just how you want it. Maybe you want to highlight⁢ key points or ‍add bullet​ points for⁣ clarity? Go for it! Just remember, with a⁢ few clicks ​and keystrokes, you’re on your way to unlocking a wealth of ‍information from your‍ favorite videos.

Enhancing⁤ Accessibility:‍ The Power of ⁣Transcripts ⁢for Content⁤ Creators and Audiences

Enhancing Accessibility: The Power of Transcripts ‍for Content Creators ​and ‌Audiences

Transcripts ⁣are absolute ⁤game-changers when it comes to making content more accessible ⁣for‌ everyone. ⁤Think​ about ⁣it—when you ⁣drop a video that’s packed with valuable info, ⁢you want your message to​ reach as many people⁣ as possible, right? By providing a transcript, you’re not just helping those‍ who are ⁢deaf ​or hard of hearing; you’re also catering to non-native speakers, folks in noisy environments, and even ⁤the ones who prefer to ‍skim ‌through ⁣content instead of watching an entire video.⁤ It’s like giving every viewer ‍a VIP pass, allowing them to ‌consume‍ your⁢ content in their ​own ⁢way, at their own pace. Plus, having a written version means your ‌content can pop up in search results, ​boosting visibility ⁣and engagement!

Creating a transcript‍ doesn’t have to be​ a Herculean task. With so many ‍tools⁢ available​ today, ⁣you ⁣can automate a significant ‍portion of the ⁤process. But ⁣don’t think your job ends there! ⁣To truly elevate⁢ the experience, consider ⁤these key elements that‌ can go‍ a long way:

  • Timestamping: Helps audiences navigate‍ to specific ‍sections quickly.
  • Speaker Labels: Makes ​it clear⁢ who’s talking,⁢ especially⁣ in interviews.
  • Accessibility ​Features: Integrate alt-text ‌for images discussed in the video.

By paying attention to these details, you’re not just creating⁢ a piece of text; you’re crafting‌ a‌ comprehensive guide to‍ your ⁢video content. ⁤It’s a win-win—your ⁤audience gets a richer experience, and you‌ get to showcase your commitment‍ to ​inclusivity, making your channel⁤ a welcoming space for all!

In Retrospect

And there you​ have it! You’re now ‍equipped with⁢ all‌ the tools⁢ you need to unlock the hidden gems of YouTube video transcripts. It’s like⁤ having a backstage pass to the ⁣concert of ‍knowledge, right? No ⁢more squinting at‍ the ‍screen or ⁣hitting ​rewind⁢ just‌ to catch that one point. ​Whether you’re diving‌ into tutorials, ⁤lectures, or just your favorite vlogs, transcripts ​make everything more accessible.

So,‍ get ‍out there and put⁣ this newfound‌ skill ‍to work! ​Explore ⁤content⁢ like a pro,⁣ whether it’s for ⁤studying, content creation,⁤ or just satisfying your‍ curiosity. ⁣Remember,​ every video​ is⁤ a treasure trove of information ‌just ⁢waiting to be unpacked. And ⁢who knows?​ You might find ‌that clarity‍ opens up completely new ​avenues of understanding, turning casual viewers‍ into avid⁣ learners. So go ​ahead, hit that play button again – but ⁣this time, enjoy the magic ⁢of transcripts!⁤ Happy‌ viewing!

Unlocking YouTube Riches: What a Million Views Pays!

Hey there, YouTube enthusiasts! Have you ever‍ found ‍yourself daydreaming about hitting that‍ magical‍ million​ views mark on your videos? Picture​ it: your content is resonating with viewers, your subscriber count ​is soaring, ⁢and those ⁢endless notifications of likes and‌ shares light⁤ up ‌your phone. But let’s get real⁤ for a minute—what does hitting that million views ⁤actually ​mean ​for ‌your wallet? Spoiler alert: it’s a game changer!⁢ In this ⁣article, we’re diving into the nitty-gritty of how much those coveted million⁣ views can ⁢really ‍pay off.⁤ We’ll explore everything from ad⁤ revenue to brand sponsorships,‌ and we’ll break⁤ it down in ‍a⁢ way that even your grandma​ could​ understand (seriously!). So⁢ grab​ a ‌snack, settle in, and let’s unlock ⁤the riches ‌that‍ YouTube ⁣has to offer!
Exploring the Money-Making Mechanics⁢ Behind a Million​ Views

Exploring ​the Money-Making Mechanics ‍Behind a Million Views

Ever‌ wondered how ‍those massive​ view counts ‌translate​ into ⁢real dollars?‌ Getting a ⁢million⁤ views on a YouTube video is like hitting the jackpot in the‌ digital‍ world, but the⁤ payout isn’t as straightforward ​as⁣ it ⁤seems. The first thing​ to keep in mind is that ⁢earnings primarily come‍ via ad⁣ revenue,⁣ but ⁤not every view holds the ‌same value. Factors like audience engagement,​ video type,⁤ and the geographical location of your viewers can all play a ⁣significant‍ role‍ in how much you earn.⁤ For instance, one of‌ your viewers in the US⁢ might⁤ generate way more revenue than someone‍ watching from a⁣ different country. It’s⁣ all ⁤about ⁣attracting⁤ the ​right audience!

So, how is this⁢ sweet‌ income calculated, you ask? It often boils down to the concept​ of‍ CPM​ (cost per thousand impressions) and‌ CPC (cost ​per click). ⁤On‌ average, ⁣CPM can range from $1 to $20, varying‍ with content ⁢niches, seasonality, and advertiser competition. To give ⁣you⁤ a clearer picture, here’s a ⁢breakdown:

CPM Range Typical Earnings⁢ from 1M Views Content Type
$1 ⁣- $5 $1,000 – $5,000 General Vlogs
$5 – $12 $5,000 – $12,000 Tech Reviews
$12 – $20 $12,000 – $20,000 Finance​ & Business

Additionally, revenue ‍can spike‍ based on external partnerships or‍ sponsorship deals. Collaborating ‌with brands can significantly boost your​ earnings ⁣as they ⁣often offer flat fees for‍ promoting their product within your ⁣content. In ⁢essence, while⁣ a million views is a great achievement, the​ true magic happens when you ‍combine strong content with savvy ‌monetization strategies.

The Hidden Costs and​ Rewards of Creating Viral Content

The Hidden ⁣Costs and Rewards of Creating Viral Content

Creating⁤ viral content can⁢ feel like a goldmine, but hidden‍ costs often lurk ⁣beneath the glittering surface. Sure, a​ million ⁣views look ⁣fantastic⁢ on paper, but there’s ​more to⁣ the story. You‍ might find yourself trapped in a whirlwind of trends that can be‌ exhausting to keep up with. Time and effort poured into crafting ‌the perfect video⁤ can drain⁢ your​ creativity. Moreover, the pressure ⁣to replicate success can lead to burnout faster than ⁣you can say “subscribe.” Navigating viewer expectations ​also comes ⁤with its​ own price⁤ tag; one moment of misalignment can⁤ send your engagement ⁤metrics plummeting. It’s a bit like ​performing‌ a tightrope⁢ act, where ​one misstep can turn adoration‍ into ‍apathy.

On⁣ the flip side, ⁢there are undeniable rewards that accompany the rush of virality. ‍The ⁢thrill of reaching a massive audience ‍can enhance your brand visibility and open ⁤doors to lucrative‌ partnerships and sponsorships. Imagine the networking⁤ opportunities ⁣ that a viral hit brings! Not to mention, your ⁤subscriber​ count could⁢ skyrocket, transforming your channel into‌ a​ flourishing ‌revenue stream. Below ⁣are‍ some key benefits and potential pitfalls that‌ you⁣ might want to⁢ keep in mind:

Benefits Potential‍ Pitfalls
Increased ⁢visibility High ⁣viewer expectations
New partnerships Burnout⁣ from content ⁢pressure
Ad ⁤revenue ​surge Short-lived trends

Maximizing Your⁤ Revenue: Tips for Monetizing⁢ Your Channel

Maximizing Your Revenue: Tips ⁣for ‌Monetizing Your Channel

To truly tap into the potential of your channel, you‌ gotta think beyond just ads. Sure, running ads is a straightforward way to earn, but why​ stop there?⁣ Consider diversifying⁤ your income ⁣streams. Think about‌ branching ⁢into ⁢merchandise—who wouldn’t want ​a⁢ cool t-shirt or mug with their favorite catchphrase? Plus,‍ partnering with⁤ brands that align with your content can significantly‌ ramp up your⁤ earnings. Don’t⁢ shy ⁢away from affiliate ‍marketing either! By promoting products you⁣ genuinely ‍believe‌ in, you earn a ⁤commission while also‌ delivering value to ​your audience.​ It’s a win-win!

An‌ essential part⁤ of the strategy is understanding your audience.⁣ For instance, if you ‍know your viewers love⁤ gaming, create content ​that highlights the latest gear or offers tutorials on popular games. Check out your analytics and see what grabs ‌the​ most interest. Crafting ‍ exclusive content for platforms like Patreon can also be rewarding; subscribers are often​ willing ​to pay for behind-the-scenes access or ⁤special live streams. ​Remember, engaging your community is key—discussions, Q&As, and responding to comments can build loyalty that translates‌ into higher revenue.

Building a ⁣Sustainable Strategy for‌ Long-Term YouTube Success

Building a ‌Sustainable Strategy for Long-Term ⁤YouTube Success

When it’s time⁢ to kick‍ your ⁢YouTube ‌game into high gear, creating‍ a sustainable strategy ‌is key. Think of it⁢ like planting ‍a⁢ garden: you ‍need to nurture your content, cultivate your audience, and ​stay consistent to see the fruits of your labor. Start by⁢ identifying your target audience—who are they, what do they love, and how can you‌ serve them? Create a content calendar that aligns with trends and ​timely⁣ topics ⁣while still sticking to ⁤your niche. This helps you stay ​organized and ​allows ⁢your viewers to anticipate your uploads. ⁢And remember, variety is ⁣the spice of life! Mix ​up your content types—vlogs, tutorials, and even live Q&A sessions can keep things fresh and engaging.

As you build your YouTube empire, keep an​ eye on your analytics; they’re your secret⁢ weapon! Tracking viewer engagement,‌ watch‌ time, ⁢and demographics can reveal insights into what works and what falls flat. Here’s a simple breakdown of ⁢handy metrics you should monitor:

Metric Description
Watch Time Indicates⁢ how long people are⁣ sticking around ⁤for your content.
Engagement Rate Measures likes, shares, and comments—this tells ‌you how much your content resonates.
Click-Through Rate Shows how ​enticing your thumbnails and titles ⁢are to potential viewers.

By staying attuned to these elements and adapting your strategy accordingly, you ‍can‍ create a path toward ‍sustained success. Getting that million views isn’t‍ just about‍ luck—it’s about⁤ deliberate steps ‍that ⁤build​ your channel into a thriving community! Who‍ wouldn’t want ⁢that?

The Conclusion

And there you⁣ have‌ it,⁣ folks! We’ve peeled back the curtain ⁤on the captivating world of ⁣YouTube‍ riches. Who⁤ knew that a⁣ million views could equate⁣ to such ​a whirlwind of opportunities? It’s not just about ⁤the money; it’s about ‍the potential‌ for growth, community, and creativity that comes with it.‌

Whether you’re a ⁣budding‍ content ⁢creator or a⁤ curious viewer,⁢ remember ⁤that ‌every click,⁣ every comment, ‍and every share⁤ builds this vibrant ecosystem of ⁤digital storytelling. So, what are‍ you waiting for?⁤ Grab your camera, brainstorm that killer ‍concept,​ and dive into the ⁤realm ⁤of ⁣video ‍creation! Your million⁢ views—and all the rewards that come with it—might just be a ‍video away.

Stay​ curious,​ keep creating, ⁤and ​who knows? Maybe the next big success story we’ll⁣ be talking about will⁣ be yours! Until⁤ next time, keep​ those‌ cameras ​rolling and those ideas flowing!

Kickstart Your Journey: A Simple Guide to YouTube Accounts!

Ready to dive into‍ the world of YouTube? You’re not alone! Think of starting a ⁢YouTube‌ account like planting a tree; it takes time, care, and a sprinkle of creativity to grow something truly amazing. Whether you’re looking to share your gaming skills, showcase ‌your culinary prowess, or just chat about life, setting up‌ your channel ‍can ⁤be an exciting adventure. With the right guidance, you can transform ‍your ideas into captivating content that draws in viewers and keeps​ them ⁣coming back for more. So, let’s roll up our sleeves⁤ and‌ kickstart your journey—because your unique voice ⁤deserves to be heard!

Discovering Your Niche and Crafting ⁣Engaging Content

Finding your niche is like discovering a hidden gem in a vast landscape; it’s all⁤ about identifying what makes your heart sing. Think⁣ about your passions, hobbies, or even ‌the quirks that make you unique. What topics do you light up about when​ you talk ⁤to your friends? Dive deep into those interests and‌ see where they ‌intersect with what people are searching for ⁣on YouTube. Conducting a little research is essential; check out popular channels, see what’s⁣ trending, and consider the gaps in content. Believe it or not, there’s room for ⁤everyone, but your voice and‍ perspective can make all the difference!

Once you’ve narrowed down your niche, it’s time to ​let ‌your creativity flow. Start brainstorming⁤ content ideas that not only⁣ resonate with you but are also engaging for⁢ viewers. ​Consider creating a content calendar to keep⁢ track of your ideas and ensure a consistent upload schedule.⁢ You could include different styles, such as tutorials, vlogs,⁢ or even reaction videos. Here’s a quick look at⁣ some engaging content formats:

Content⁤ Idea Description
How-To Guides Step-by-step content that teaches viewers ‌a ‌specific skill.
Behind-the-Scenes A sneak peek into⁣ your content creation process.
Challenges Fun, interactive challenges that engage your audience.
Q&A Sessions Answer questions from your viewers to build a community.

These engaging formats can help you captivate your audience and keep them coming⁢ back for more. So, get ready to unleash your​ creativity and⁤ connect with viewers who vibe with your unique flair!

Discovering Your Niche and Crafting Engaging Content

Setting Up Your YouTube Account Like a Pro

Getting ⁤your YouTube account off the ground is like setting the ⁢foundation of a house. ​You want it​ solid and ready for all the creativity you’re about ⁢to unleash. First ⁣things first, head to YouTube and hit that “Sign Up” button. You’ll need a Google ‌account, so if you don’t have one yet, just create it. Once you’re in, personalize your channel by clicking on your profile picture and choosing “Your Channel.” From here, don’t skip the chance to jazz ⁢it up! Add a catchy channel ‍name that ⁤reflects your vibe, choose a fun profile picture that captures your ⁣essence, and create a banner that ⁢grabs attention. Remember, this is your online home, ​so​ make sure it feels welcoming!

Next, let’s talk about your channel‌ description. This is your chance to shine! Think of it as your ‌elevator ⁢pitch, and keep it succinct yet inviting. List out⁣ what ​kind of content you’ll be​ delivering with bullet points, like so:

  • Weekly vlogs ⁤about my daily adventures
  • Tutorials on all things tech
  • Fun‌ reviews of cool ⁢gadgets

Once your‌ description is⁤ ready, don’t forget to⁢ create ‍a ⁣trailer⁣ video. It’s your chance to outline what⁤ your subscribers can⁤ expect. An engaging trailer can hook viewers faster than a catchy pop song! And customize your channel layout to make it user-friendly. Consider adding featured playlists or sections to highlight your ⁤best content. Keeping ⁣it neat and organized will help viewers navigate your channel like ‍pros themselves!

Setting Up Your YouTube Account Like a Pro

Growing Your Audience with ⁣Authentic Engagement

Building ​an audience on​ YouTube isn’t‌ just ‌about posting videos; it’s about creating a ‍connection.‌ Think of your channel as a virtual coffee shop where viewers come⁢ not just for the brew, but the conversation. Start by⁣ interacting with your audience through the⁢ comments section. A simple reply to a viewer’s‌ comment can turn a ​casual viewer into a⁣ loyal subscriber. Consider hosting live Q&A sessions or community polls. By keeping the dialogue open, you ⁣make your audience feel like they’re part of your journey. Don’t shy away from sharing behind-the-scenes moments or ⁤personal stories; it humanizes your brand and fosters ‌a sense of trust.

Another vital aspect is recognizing your ⁣audience’s interests and⁣ preferences. Use analytics to​ dive deep into who your viewers are, their likes, and what keeps⁣ them clicking.⁤ Create content that resonates⁤ with their passions ‍while maintaining your authentic voice. You might even think⁢ of⁤ it as curating a playlist for a friend—only, this playlist is all about the topics that get your audience excited! To better understand ⁤and engage with what ‍your‌ viewers crave, make use of:

  • Surveys: Ask them directly what ‌they want ‌to see!
  • Trendy topics: Keep ‌an eye on what’s ‌hot in your niche.
  • Feedback loops: Encourage constructive criticism to improve.

Maintaining ​authenticity ‌while adapting to audience⁣ feedback is key. It’s all about balancing your​ passion ​and ⁤their preferences. Like a dance, it requires practice and attention to make it flow beautifully!

Growing Your Audience with Authentic Engagement

Monetization‍ Strategies to Turn Passion into Profit

Turning ​your passion into⁢ profit on⁤ YouTube is like crafting⁣ your ⁢own secret recipe; you’ve got to mix ‌the right ingredients just right! Here are some creative monetization strategies to explore:

  • Ad Revenue: ⁣ Let YouTube do ‍the heavy lifting! Once you meet⁤ the‍ monetization criteria, ads can roll in, giving you passive income while you focus on creating awesome content.
  • Sponsored Content: Team up with brands that align with your niche. ⁤Just like picking the perfect toppings for your pizza, ⁣choose carefully to ensure it fits your ‌style.
  • Merchandise: If⁣ you have a loyal following, why not offer them something tangible? Think of it as creating your own line of fan gear.
  • Memberships: Offer exclusive perks to your biggest fans. It’s like a VIP club, rewarding those who support you the most.

Don’t forget to ​analyze your audience! Understanding what ‍makes them tick can lead to streamlined content creation that resonates well. Here’s a handy table to help visualize that:

Content Type Potential Gains Audience Engagement
How-to Guides High Interactive
Vlogs Medium Personal Connection
Product Reviews High Trust-Building
Challenges/Trends Variable Fun

By ‍blending creativity with​ these monetization tactics, you’ll ⁤not only fuel ⁤your passion but also build a sustainable income stream! It’s all about ⁣engaging your audience and knowing where to place your bets, much ‍like strategizing your moves in a game ‌of chess.

Monetization Strategies to Turn Passion into Profit

In Summary

And there you‍ have it—your roadmap to diving ⁣headfirst into the vibrant world of YouTube! Honestly, starting your own channel can feel like unfurling ‍a treasure⁢ map. One moment, ‍you’re at the drawing board, and the next, ⁣you’re creating content that can reach thousands or even millions. So, whether you’re showcasing your cooking ‍skills, ‌sharing your fitness routine, or just vlogging about your daily life, remember that every big adventure starts ⁢with one small step. ‍

Don’t be discouraged by the uphill climb; every great YouTuber started with a single video. Keep experimenting, stay true to yourself, and most importantly, have fun! The beauty ‌of YouTube is in ​the connections ‍you make and the stories you share. Now, grab that camera and let your unique voice be heard—your audience is waiting! Happy vlogging!

Mastering the MLA: Citing YouTube Videos with Ease!

In today’s digital age, you’ve probably​ noticed that ⁤YouTube has become​ a ​treasure trove of information, entertainment, and inspiration. Whether you’re diving⁤ into a DIY project, researching for your school paper, or just ‌looking‍ to unwind with some gameplay commentary, it’s hard to‍ ignore the⁣ vast ocean of content available at⁤ your fingertips. But⁤ wait, how do ‌you properly⁢ credit these video gems in your⁤ academic work without pulling your hair out? Fear not! Mastering ​the MLA format for citing YouTube videos is easier ⁢than you think. Imagine walking ⁤into a ⁤library, confident and ready to⁣ tackle your assignment, ​knowing you’ve got the citation game ​on lock. In ‌this article, we’ll break down the process‌ step ‍by step, making sure you can⁤ wave goodbye to any citation ⁢anxiety ⁤and hello to polished,⁢ professional​ references. Let’s dive in‌ and make those videos work for you!
Understanding⁤ the Basics of MLA⁣ Format for YouTube Videos

Understanding the​ Basics of MLA Format for⁢ YouTube Videos

When ⁢you’re ⁢diving into the⁣ world ⁤of academics⁣ or content creation, citing sources ‌is non-negotiable. Think ⁤of⁢ citing ⁢like giving⁢ credit where it’s due; just as you’d thank a friend for a fantastic recommendation, acknowledging the creators behind those awesome ‍YouTube videos is a‍ must. MLA format makes this process ⁣a⁣ breeze. ​To ‍cite‌ a YouTube ‍video,⁤ you’ll ‍want to include the following key pieces of information: the creator’s name, the title ‍of the ​video (italicized), the name of the ‍platform ​ (YouTube), the URL, and ⁤ the date of‌ upload. ⁤For‍ example:

  • Smith, John. How‌ to⁤ Bake a⁣ Cake. ‍ YouTube, 1‌ Jan. 2020, www.youtube.com/watch?v=xxxx.

It’s also‌ handy to⁣ create a clean⁢ and organized reference list at the⁢ end of your ⁢paper ⁣or project. This becomes⁣ your treasure ‌trove of resources, and keeping it neat not‍ only ⁣shows your diligence but ‌makes it ‌easier for your readers⁣ to find ⁤the original ⁣content. ⁣Use‍ hanging ​indentations‌ for your references, so they’re easy ‍to scan. Here’s a quick⁤ look at ​what⁤ that might look like:

Creator Title Date
Smith, John How to Bake a Cake 1 Jan. 2020
Doe, Jane Learning to Dance 15 Aug. 2021

Navigating the Essential ​Components of a YouTube Citation

Citing YouTube videos ⁤in MLA format may seem daunting at first, but breaking it down‍ into pieces can make it ‌a breeze. Start with⁤ the creator’s name—this could be an‌ individual or⁣ a corporate entity. Next up, you⁣ need the title of the video,⁤ which should be in italics. Then, don’t ⁣forget​ to include the platform—YouTube,‌ of course.⁣ After that, ​follow it‌ up with the date‌ of publication and the URL. Here’s a quick⁢ glimpse of what you’re working with:

Component Examples
Creator’s Name John ⁣Doe
Title ⁢of Video How‌ to Navigate Citing
Platform YouTube
Date of Publication 1 Jan 2023
URL www.youtube.com/example

Now, to wrap​ up your citation, you’ll stitch these ⁤pieces together in⁢ a​ flowing ⁣sentence. Stick to​ the​ formula: Creator’s Last‌ Name, First⁣ Name. Title of Video. YouTube, Date of Publication, www.youtube.com/yourvideo. It’s like piecing together a ‌puzzle, ‌and once you find the right pieces,⁣ your ‌citation will fit perfectly!⁢ Remember, achieving ⁤that polished look isn’t about having perfect skills but ‍practicing until you get it right. Whether ‍you’re a seasoned ​pro or just‌ starting ​out, this straightforward‌ technique‌ will have⁣ you citing like a champ ⁣in no time!

Tips and Tricks for Efficiently Creating Your References

Tips and Tricks for Efficiently Creating Your References

Creating references ⁣can feel like solving‌ a Rubik’s ‌Cube blindfolded, right? ‌But fear not! Once you get the⁢ hang of it,⁢ you’ll ⁤breeze through. Start by paying attention⁣ to the basic formula⁣ for citing​ YouTube videos ⁤in MLA style.​ The crucial elements include the ​creator’s name, the video title in italics, the platform ​(YouTube), the upload date, and the URL.‍ To make it​ easy, keep this in mind:

  • Creator’s Name: The‍ person or organization behind the video.
  • Video ‍Title: Use italics for titles – it’s like dressing up your ⁤references!
  • Platform: Always mention ⁤YouTube, it’s your breadcrumb trail.
  • Upload Date: ⁣ Knowing⁢ when it went‍ live​ is essential – it provides context.
  • URL: Don’t forget the link; it’s your gateway back to ⁣the‌ source!

Next, make reference ‍compilation a⁤ breeze ​by organizing your sources! ‍Use a spreadsheet or a​ document to collect your video details as you go. It’s like ‌building a⁣ playlist for your references, where ⁢each ‍entry is lined up ​and ready ‍for action. You might set⁢ up ⁣your table ⁤with clearly labeled columns⁤ for‌ easy navigation, such as:

Creator Title Date URL
John Doe How​ to Cite ⁢in MLA March 1,‌ 2023 Watch Here
Jane Smith MLA Made Easy January 15, ⁣2023 Watch ⁤Here

Common ⁣Pitfalls to Avoid When⁤ Citing YouTube in MLA

Common Pitfalls⁢ to Avoid When ‌Citing YouTube ​in MLA

When it comes to citing YouTube videos, many folks trip ⁤up on a‍ few common mistakes that can easily be avoided. One pitfall is failing ‌to include all ‌necessary details.‌ Always remember to​ include the creator’s ⁣name,​ the title of ⁤the video in​ italics, the name of ⁤the website ​(YouTube), ​the‌ upload date, and‌ the URL. If you⁢ leave ​out any ​piece ‍of this puzzle, your ⁤citation isn’t‌ complete.⁣ Additionally, watch out for formatting! ⁤MLA has⁣ specific rules on how to present ‍your‍ citations. For instance,‍ the title ⁣should be in‌ italics, and remember to use proper punctuation⁤ throughout. ​Don’t let simple oversights ruin your⁤ work and​ keep your credibility ‌intact!

Another major error is​ not paying ​attention to the context of your source. Just because a‌ video looks⁢ good does not mean⁤ it’s ‍reliable. Check the creator’s credentials and the information they provide. Are they an ⁤expert in the topic?‌ Also, don’t forget about the publication date;⁢ an outdated ⁤video may mislead your ​audience with stale ⁢info. Therefore, always ensure‍ you’re ‌using sources that ⁢are both relevant and trustworthy. Keep these tips‍ in‌ mind, and​ you’ll navigate the wild‍ waters of YouTube citations like ‍a pro!

Key ⁢Takeaways

As we wrap up our deep dive into the ins ⁣and outs of ​citing YouTube videos in ‌MLA ‌format, it’s clear ‌that mastering this skill⁢ is like finding the perfect recipe for your‌ favorite‌ dish—it ‌takes a ⁤little practice,⁢ but⁤ the results are oh-so-satisfying! Imagine confidently quoting that viral video ​in your⁤ next paper‍ and ⁢dazzling your professors with your newfound expertise. You’re ‍not just following the rules; you’re adding flavor‌ to your​ academic work!

So, whether you’re a seasoned writer or just starting​ out, remember that every citation is your chance to build‍ credibility and show off⁤ your research chops. With the tips we’ve covered, you’re well-equipped to⁤ tackle those YouTube references like a ‌pro. Don’t let formatting overwhelm ⁤you—instead, embrace it as part⁢ of the⁤ creative process.

Now, ‌go forth ⁣and ⁢make those citations shine! And who knows? You might even inspire your classmates ​to⁤ step up their game. Happy writing!

Step-by-Step: Dismantling Your Vornado EH1 00115 Guide

Ever​ found yourself staring ⁢at your Vornado​ EH1 ‌00115 and realizing it’s time for a little TLC? Maybe it’s not ⁢heating quite right, or perhaps it’s just ⁢showing signs of wear and‍ tear. Don’t sweat it!‌ Dismantling your trusty Vornado heater could be⁢ a breeze with the right guidance. Think of it ⁤as​ a mini adventure:‍ just ‍you, your tools, ‍and ‍a ‌heater waiting to be revived. In this step-by-step guide,⁤ we’ll walk ⁢you through each phase of the dismantling process, making it as easy as pie. So grab⁤ your toolbox and let’s ⁢get to work on ‍giving your Vornado the care it deserves!

Unplugging ‌the Mystery: Safety Precautions Before You Begin

Before you​ dive‌ into taking⁢ apart your Vornado EH1 00115, let’s chat about some essential safety precautions to keep in mind. First ⁢off, unplug ​your ‌device.⁢ This might sound like a no-brainer, but‌ you’d be surprised how many people forget this crucial step. Imagine‍ reaching​ in‌ to unscrew a part while the fan’s⁣ still plugged in—that’s an unnecessary recipe for disaster.‍ Also, grab some protective⁣ gear‍ like gloves and goggles; they’re not just for show. Think ⁣of ⁢them as ⁤your superhero⁣ outfit against any unexpected debris⁤ flying your way.‌

Next on the list, ensure you have a clean and well-lit workspace. A clutter-free zone can make a⁤ world of difference, turning what could be ⁢a chaotic project into a‌ smooth operation. Keep your tools handy but ‌organized. A simple tool checklist can help you avoid⁣ any frantic searches ⁤in the middle of‌ your task. Here’s a quick table to help you gather everything you ⁢need:

Tool Purpose
Phillips screwdriver Removing screws
Flat-head screwdriver Prying parts apart
Utility‍ knife Cutting through tape
Cleaning cloth Wiping dust and debris

Unplugging the ⁣Mystery: Safety Precautions Before You Begin

Breaking Down the Pieces:⁣ A Detailed⁤ Walkthrough of‌ Dismantling

Dismantling your ⁢Vornado EH1 00115 is like peeling an onion; you have ‌to work ⁢carefully to ​avoid shedding any tears. First,‌ make⁢ sure⁣ to power down the heater and unplug it from the wall. Safety first, right? Once that’s ⁢out of the way, gather your tools—think screwdriver, flashlight, and maybe⁢ even‌ a small dish for loose screws. Start by removing the front grille, which⁢ often involves a bit of gentle prying. A plastic spudger can be a lifesaver here if you’re‌ worried ⁢about scratching the surface. After you’ve got the grille​ off, take ‍a moment to​ admire the intricate fan assembly inside. It’s a mini work of art‍ that ⁣shows just how much engineering goes into keeping ‍you​ warm during those chilly nights.

Next up, it’s time ⁢to ‌tackle ⁢removing the heating‌ element. Take your time here. Look ‌for​ the ‌connections and carefully unscrew ‍them ‍so you don’t damage ​any wiring. Once the heating element is out, inspect ‍it for any signs ⁣of wear or ‌buildup—this is a ⁤great ⁤opportunity to⁢ clean ‌it if needed! You⁣ can lay out the screws and parts on a table, organizing them ‍for​ easy‍ reassembly later; trust me, future-you will ‍thank present-you! As you dismantle, ⁤feel free⁣ to document ⁤each step with your phone.​ That way, when you’re piecing everything back‍ together,⁣ you’ll ⁣have a handy reference to ⁣jog your memory. you’ll feel like a true DIY master!

Breaking ⁢Down the Pieces: A Detailed ⁣Walkthrough of ‌Dismantling

Tools of the Trade: Essential Gear for a Smooth Disassembly

When it comes time to tackle the disassembly of your Vornado EH1⁤ 00115, having the right ​tools is key ‍to a ⁤smooth experience.‍ Think of ⁢it like preparing ‍for a ‍camping ⁣trip; if you don’t have your gear‍ ready, you’ll be left fumbling⁤ in⁣ the dark. For this project, ‌make sure ‍you gather the ⁢following essentials to‍ ensure the process goes off‌ without a hitch:

  • Screwdriver ‌Set: A mix​ of Phillips ⁣and flathead screwdrivers ‍is a must-have; they’re the unsung heroes when it comes to unscrewing those stubborn bolts.
  • Pliers: Needle-nose ​pliers⁣ can help you grip ⁣and pull out any tough parts that might be stuck.
  • Flashlight: Nothing’s ⁤worse than squinting in ⁢the shadows—shine a light on the task and keep your workspace clear.
  • Magnetic Tray: ​Keep those screws ⁤and tiny parts organized; you don’t want to ⁣lose anything vital in the chaos.
  • Soft Cloth: ⁣ Protect your surfaces and your device; a soft place to rest parts can prevent⁤ scratches ⁣and damage.

Now that you’ve got⁤ your‍ toolkit ⁢ready, it’s time to​ prepare your workspace. Just like cooking in a tidy ⁤kitchen, a clear area helps you focus solely on disassembly.​ Lay out a clean blanket or mat‌ to catch any ‍bits⁤ that may​ fall and keep your tools within arm’s reach. Check out this simple table ⁢for a quick reference on setting up your workspace:

Workspace Item Purpose
Blanket or ‌Mat Protects your surfaces and catches any ⁢loose parts
Small Containers Sorts screws ‌and tiny parts for easy access
Work Lamp Illuminates dark spots for better visibility

Tools of‌ the Trade: Essential Gear for a Smooth Disassembly

Putting It ⁣Back​ Together: Tips ⁢for Reassembly and ‍Maintenance

Once you’ve⁤ successfully‍ dismantled ​your Vornado EH1 00115, it’s⁢ time⁣ to reassemble everything like a pro.⁢ To make the process smoother, ​ organize your parts on a⁢ clean, flat surface. This way, you can easily locate screws and components‍ as you go. Remember the ‌old saying, “measure twice, cut ​once”? Well, it holds true here ​too. Double-check ⁣that each piece matches its corresponding ⁣spot before securing anything. Take‌ your ⁢time, and don’t‌ rush. No one wants to be that person who ends up with leftover screws!

When you’re piecing it‍ back ⁤together, consider ‌ systematic‌ steps that might help keep your ⁤assembly ⁢process orderly:

  • Start from the base and work your ‌way up to the fan unit.
  • Ensure any wiring is neatly tucked‍ away to prevent⁣ snagging.
  • Use a magnet to catch any dropped screws; they’re slippery little critters!

Regular maintenance is just as vital as ​reassembly. A quick dusting and wipedown every so often⁤ will keep your Vornado at⁢ peak performance. Think of it ​as‌ a spa day‍ for your⁤ fan!‍ By following these tips, your device will run smoothly and last longer. It’s all about ⁢giving your trusty appliance the love it deserves!

Putting It Back Together: Tips for Reassembly and Maintenance

Insights and Conclusions

And ‌there you have it!⁣ You’ve successfully navigated the ins and outs of dismantling your Vornado EH1 00115. Just like taking apart a puzzle, it might seem⁣ daunting at first, but⁤ with a little patience and these ⁤handy steps,⁢ you’ve turned what could⁢ be a headache into⁢ a ‍satisfying afternoon project. Now, you’re equipped to⁣ clean, repair, or simply understand your heater a bit ⁣better.

Feel ‍empowered? You should be! Just remember, every tool you used and every part you removed is a step toward keeping your space cozy and warm. If you run into any hiccups or have lingering questions, don’t hesitate to ‌reach out​ and ⁤share your⁤ experiences. Happy ⁤heating, and may ​your Vornado serve you well for many seasons to come!

Mastering the Art: Citing YouTube Videos Made Easy!

Hey​ there, ​fellow⁤ content creators ⁤and savvy students!‌ Have you ever⁢ found yourself lost in​ the ⁢vast sea of videos on YouTube, trying to ⁢figure⁤ out how on earth ⁣to ⁣cite that one golden ‍nugget​ you stumbled upon? ‌You’re not alone!⁢ Whether you’re crafting a research paper, ​launching a blog, or just⁣ trying to make your point shine in a presentation, citing⁢ YouTube videos can feel ⁢like attempting to solve a Rubik’s cube blindfolded. ⁣But don’t worry; mastering ‌this art doesn’t ⁤have to ⁢be ⁢a chore. In this ⁤guide, we’re ⁤going to break ⁢it down into ⁣simple, bite-sized pieces, making ‌it as easy as pie (or should we‌ say, as⁣ easy as clicking ‘play’?). So grab a comfy seat, and let’s dive into the world‍ of YouTube citations—trust us, it’s ⁣more fun than binge-watching ‍your favorite series!

Understanding the Importance⁣ of Proper Citations in ‍the Digital Age

Understanding the ​Importance of‌ Proper Citations in the⁢ Digital Age

In our fast-paced ‌digital‌ landscape, proper citations⁤ have become more⁢ crucial than ever. Think about ⁣it: every time you dive into a video on YouTube or share that jaw-dropping tutorial, you’re participating in a massive web​ of information. But who owns that idea? If⁢ we don’t ⁢give⁢ credit where it’s due, we risk losing not just our ‍credibility but also the​ integrity of the⁤ wider community. Furthermore, proper ‍citations can ​shield‍ us⁤ from potential legal ramifications, ensuring we’re ​showcasing our understanding⁣ while respecting the hard work of‌ content creators. It’s like building a library; without⁣ a proper catalog, how⁣ can‌ anyone find ‍or trust ⁢the ⁤sources?

Additionally, ⁢citing⁤ sources helps strengthen your ⁣arguments and enhances the quality of⁣ your work. When you reference a ⁣YouTube ⁤video, you’re not ⁣just plucking‍ random‌ snippets from the digital ether; you’re ⁤providing‌ context‌ and enriching ⁣the conversation. Here’s‍ why it matters:

  • Enhances Credibility: Citing provides evidence that ‍backs up your claims.
  • Encourages Ethical Sharing: ​It’s ​about respecting original ⁢creators.
  • Facilitates Research: Proper citations allow readers⁣ to dig deeper‍ into‌ the subject.

And while it might seem like‌ a ⁣chore to⁣ find ⁢the right ⁣format,⁣ once you grasp the basics, it becomes ​second nature—like riding a bike! Remember, proper citations aren’t⁣ just‍ a formality; they’re a testament⁣ to your ⁣professionalism and commitment to the digital community.

Navigating‌ the Unique ​Format ⁢of⁣ YouTube Citations

When‍ it ​comes⁣ to​ citing YouTube videos, ⁣it’s a bit different from the standard citation formats you ⁢might⁣ be⁣ used to, ⁤like MLA or APA. First off, you want to make sure you’re capturing the essentials. Include the name of ​the​ creator, often found in the video title or ⁣description, ‌followed by the ‌ video ​title in italics, ​the date it ‌was published, and the URL where ‍viewers ⁣can find the video.‍ This gives your readers ​a clear path to the⁣ source, much ⁤like​ offering a ⁣breadcrumb trail through the‍ forest ​of the ‌internet.

Here’s a snazzy breakdown for you ⁢to ‌keep in ⁤mind:

Element Details
Creator’s Name How it’s shown‌ on YouTube, might be a user name⁣ or a channel name.
Video Title Always italicize it! ⁣This makes​ it⁢ pop.
Publish⁢ Date Include ⁢the⁢ full date for precision.
URL Make sure it’s⁢ clickable, so your audience can directly ⁤access it!

Remember, clarity ​is the name of the game! Just like‍ a map guides you ⁣to a treasure,‌ clear ‍citations​ guide your readers⁤ to credible sources. Don’t overthink it; keep ⁣it straightforward! Using this format not only​ respects the creators’ works⁣ but also enhances your⁢ own credibility.

Crafting Perfect Citations with⁣ Style and Clarity

Crafting Perfect Citations with Style and Clarity

When⁣ it comes ‌to ‍citing YouTube videos, ⁤clarity and style are your ​best friends. Think of it like giving a shout-out to a friend who just aced‌ a ⁤test; you want to make sure everyone knows who ⁢they are! To ‍keep it straightforward, always start with the YouTube creator’s name ⁤ followed by the⁢ video⁤ title in italics. Then, ​don’t ‍forget​ to ​include⁢ the publication date ⁣and ​a direct link​ to the‍ video. It’s like giving your readers ⁤a⁣ treasure ⁢map; they love⁣ knowing where to find that shiny gem of content you’ve⁣ referenced. Here’s a quick look at what you need to include:

  • Creator’s Name
  • Video Title
  • Publication Date
  • URL

Now, let’s ‌make sure it all fits‍ together seamlessly. ‍Consider this simple format when crafting your⁣ citation: (Year, Month Day). ⁢ Video‍ Title. YouTube. . Keep ​your lists of references both consistent and concise. It’s all ​about delivering​ that ⁤perfect ‍mix of style and⁢ clarity. ⁢Want to see it in ⁢action?⁣ Check ⁢out‌ this ‍handy table that ⁤breaks down the essential elements:

Element Example
Creator’s Name Smith, J.
Publication Date 2023, September 15
Video‌ Title How to ‍Master Your Garden
URL https://www.youtube.com/watch?v=example

Common Mistakes to Avoid and Tips for Effortless Referencing

Common Mistakes to Avoid and Tips for Effortless Referencing

When⁣ it comes to referencing YouTube videos, some common mistakes can trip you up.⁤ First ‌off, a ​frequent misstep is ⁣not including ⁣crucial details‍ like the uploader’s name and ​the date of publication. ‌Imagine trying‍ to find a needle in a haystack without the right tools—your ​sources​ will be just⁤ as lost if they don’t have all the info they need! Another pitfall is neglecting the formatting rules of the citation ⁣style you’re ⁣using. Each style⁤ from APA to MLA has its ⁢quirks, and ignoring them ⁢can make‌ your references look ⁢haphazard. So, double-check ​and follow the guidelines ‍closely to keep it polished.

To make⁢ referencing easier, consider creating a simple cheat sheet! Here are some ⁢tips:

  • Gather the key ​details as⁤ you watch—note the uploader, title, and publication date.
  • Create a template for the citation style ⁤you need,​ so ⁢it’s handy‌ when you’re ready to reference.
  • Use citation tools or ⁣generators;⁣ they ​can⁣ save you a ton of time and hassle!

Just⁣ think of it⁢ like ⁤cooking; having all⁢ your ingredients ⁣prepped and organized before you start can turn a complicated recipe into a breeze. And⁤ with the right approach, your references will be effortless, clean, and professional ‌every time!

Future Outlook

And there you have⁣ it—your⁤ roadmap to‍ mastering the art of citing YouTube videos in a way‍ that even⁤ your high ⁣school English teacher would ​be proud‌ of! It’s like learning to dance; at first, those steps might feel awkward, but before you⁢ know it, you’ll ‌be gliding smoothly across ‍the citation ⁢floor, leaving confusion in the dust.

Remember, citing isn’t just about ​following ⁤rules; it’s about giving credit where credit’s ‍due and making your work‍ shine brighter. So, don’t shy away from including those ‌video gems⁤ in your research. Whether it’s a captivating lecture or a quirky tutorial that’s tickled your fancy, ​adding a YouTube source adds⁣ flavor to your writing.

Now, go‍ ahead—grab those video links, sprinkle in​ some‌ citations, and watch​ as your projects transform! If you⁤ have any ‌questions⁣ or need a friendly nudge⁢ in the right direction, feel free to ‌reach out.⁤ Happy citing,​ and may your​ references ​always be as⁢ solid as your prized playlists!